Creating painted paper crafts is a joyful and creative way to make art at home. Whether you are a parent looking for an easy activity for your child, a teacher planning a classroom project, or an adult searching for a relaxing hobby, painted paper crafts offer endless possibilities.
You do not need to be an artist to enjoy this craft. Simple materials and a little imagination are enough. With painted paper, you can make cards, decorations, gifts, and even wall art. This guide will show you step-by-step how to make painted paper crafts, explain the best materials to use, give techniques for painting, and share ideas for finished projects.
Along the way, you will find tables and examples to help you choose, compare, and create more easily.
Why Painted Paper Crafts Are Special
Painted paper crafts are unique because they allow you to mix painting and crafting. You can use any paintable paper, from plain printer sheets to textured watercolor paper. Unlike store-bought colored paper, painted paper lets you make your own colors, patterns, and effects.
This is a great way to use up leftover paints and paper, and it is also budget-friendly. Many people find painting paper relaxing and satisfying. Children can learn about color mixing and fine motor skills, while adults can enjoy personalizing every piece.
One thing beginners often miss is that painted paper crafts are not just for kids. Many professional artists use painted papers for collage, card making, and scrapbooking. Another hidden benefit: painted paper projects are easy to adapt for different ages and skill levels, making them perfect for family or group activities.
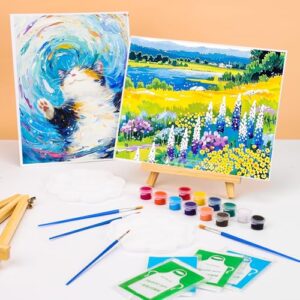
Choosing Your Materials
Before you start, you need the right materials. Not all paper and paint work well together. The table below compares common types of paper and paint for crafting.
| Paper Type | Best For | Pros | Cons |
|---|---|---|---|
| Printer Paper | Kids’ crafts, simple designs | Cheap, easy to find | Can warp with wet paint |
| Cardstock | Cards, decorations | Sturdy, holds paint well | More expensive |
| Watercolor Paper | Detailed painting, effects | Textured, absorbs paint evenly | Can be costly |
| Recycled Paper | Eco-friendly crafts | Sustainable, unique look | May have uneven surface |
For paint, you have several choices:
- Tempera paint: Washable and safe for children.
- Acrylic paint: Bright, dries fast, good for all ages.
- Watercolor paint: Soft colors, perfect for blending and backgrounds.
Other useful materials include:
- Brushes (various sizes)
- Sponges or foam rollers
- Palette or plate for mixing
- Water cup for cleaning brushes
- Paper towels
- Protective covering for your table
A non-obvious tip: test your paint and paper together before starting your main project. Some paints can bleed through thin paper or take too long to dry.
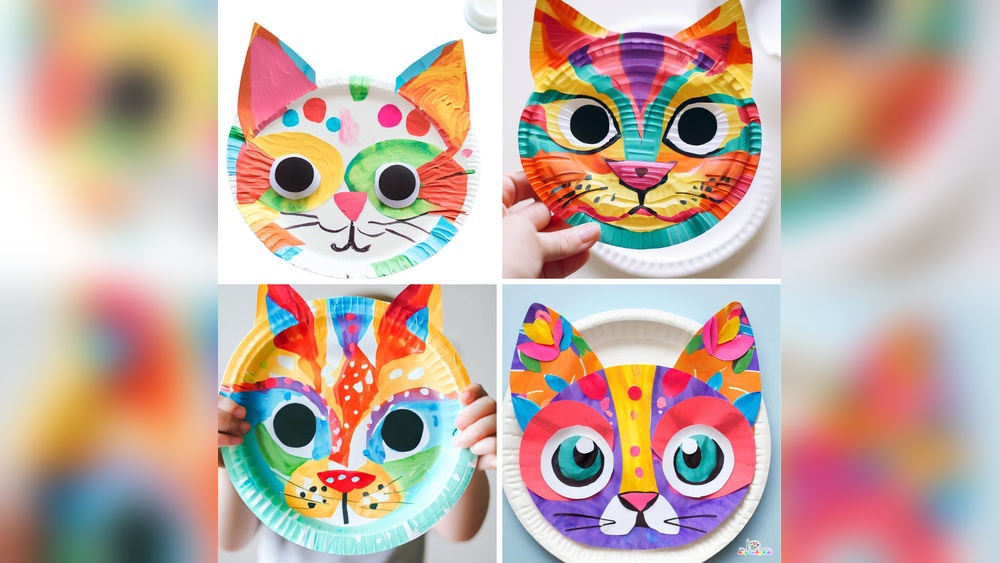
Credit: www.artycraftykids.com
Basic Painting Techniques For Craft Paper
Painting paper for crafts is different from painting a picture. The goal is to create interesting backgrounds, colors, and textures. Here are some simple but effective techniques:
1. Solid Color Wash
Brush one color evenly across your paper. This is perfect for cutting shapes later.
2. Blended Colors
While the paint is still wet, brush a second color next to the first and blend where they meet. This creates soft transitions and gradients.
3. Splatter Effect
Dip your brush in paint and flick it over the paper for a random dot pattern. This adds energy and texture.
4. Stamping And Printing
Use sponges, bubble wrap, or even leaves dipped in paint to press patterns onto your paper.
5. Dry Brush
With a mostly dry brush and little paint, drag across the paper for a scratchy, textured look.
6. Layering
Let one layer of paint dry, then paint over it with another color. This builds depth and can create interesting effects.
Beginners often forget to let paint dry fully between layers. Rushing can cause colors to mix in unwanted ways or the paper to tear.
Step-by-step Guide: Making Painted Paper
Follow these steps for best results:
- Prepare your area: Cover your table, set out materials, and wear old clothes.
- Choose your paper: Decide what works best for your project.
- Select your paint: Pick colors that match your idea.
- Test your paint: Try a small area to see how the paper reacts.
- Paint your paper: Use your chosen technique. Make several sheets in different colors and patterns for variety.
- Let dry completely: This can take 30 minutes to a few hours, depending on paint and paper.
- Flatten if needed: If your paper curls or wrinkles, place it under heavy books once dry.
Many people paint only one or two sheets, but making several at once saves time and gives more creative options later.
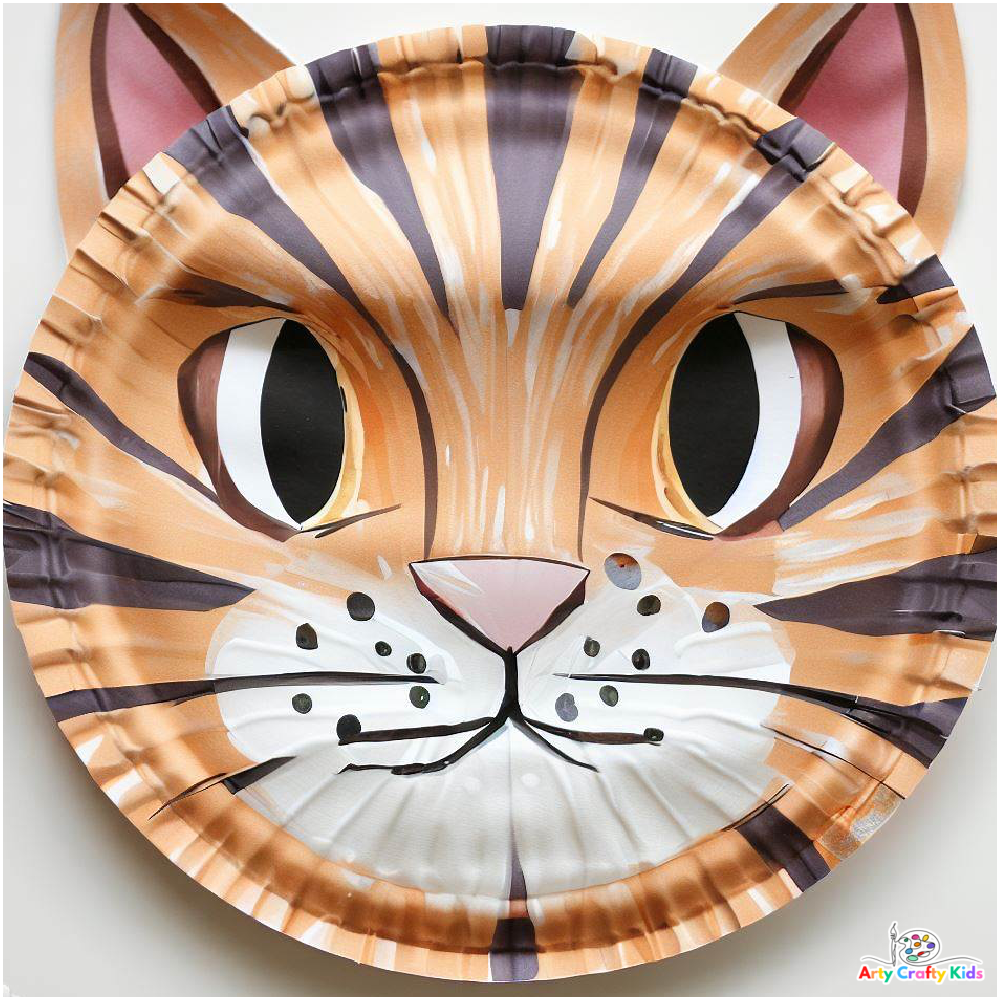
Credit: dewintonpaperco.com
Creative Ideas For Painted Paper Crafts
Painted paper is just the beginning. What you do with it matters most. Here are some popular and fun projects:
Handmade Cards
Cut your painted paper into shapes (hearts, stars, flowers) and glue onto blank cards. Add words with pens or stamps. Painted cards are personal and great for any occasion.
Paper Collage Art
Tear or cut your painted paper into pieces and arrange them on a canvas or thick paper. Overlap, mix colors, and create scenes, animals, or abstract art. Collage is forgiving—there are no mistakes, just creative choices.
Gift Tags And Bookmarks
Cut small rectangles or shapes, punch a hole, and add string. You can write on the painted side or the back. These are simple and always useful.
Paper Garland
Cut painted paper into flags, circles, or other shapes and string them together. Hang across windows, walls, or party tables for instant decor.
Origami And Paper Folding
Painted paper works for simple origami, like boats, cranes, or boxes. The colors and patterns make each piece unique.
Wall Art
Glue painted paper pieces onto a canvas or frame for custom wall art. Try geometric patterns or layered abstracts.
Journal Covers
Cover plain notebooks with your painted paper. Use glue and trim the edges. Add a clear contact sheet for protection if you want it to last.
3d Paper Sculptures
Fold, roll, or layer painted paper to make flowers, animals, or decorative objects.
Scrapbooking
Use painted paper as backgrounds or accents in your scrapbooks. It adds a personal touch that pre-made papers can’t match.
Party Decorations
Make confetti, banners, or table decor from your painted sheets. You can match any party color scheme perfectly.
A beginner’s tip: save your small painted scraps. These are perfect for tiny accents, mosaic effects, or patchwork designs.
Comparing Painted Paper Craft Ideas
Some projects are better for kids, some for adults, and some can be enjoyed by everyone. See the table below for a quick comparison:
| Project | Skill Level | Time Needed | Best For |
|---|---|---|---|
| Handmade Cards | Beginner | 30 min – 1 hr | All ages |
| Paper Collage Art | Beginner–Advanced | 1–3 hrs | Kids, adults |
| Paper Garland | Beginner | 1 hr | Parties, kids |
| 3D Paper Sculptures | Advanced | 2–4 hrs | Teens, adults |
| Scrapbooking | Beginner–Intermediate | 1–2 hrs | All ages |
Tips For Success
Even simple painted paper crafts can look impressive with the right approach. Here are some tips to help you succeed:
- Use good light: It is easier to see colors and details.
- Mix enough paint: Running out of a custom color can be frustrating.
- Keep your brushes clean: Wash between colors to avoid muddy results.
- Experiment: Try different tools—old toothbrushes, stamps, or fingers.
- Store your painted paper flat: This prevents creasing and curling.
A non-obvious insight: painted paper often looks better after it dries than when it is wet. Colors may brighten or soften, and textures become more interesting.
Common Mistakes And How To Avoid Them
Painted paper crafts are forgiving, but some mistakes are easy to make. Here’s how to avoid them:
- Using too much water: This can make paper tear or wrinkle. Use a little water with thicker paper.
- Not waiting for paint to dry: Working too soon can cause smudges and holes.
- Not protecting your workspace: Paint can stain tables and clothes quickly.
- Forgetting to test materials: Some paints bleed through or do not stick well to certain papers.
- Throwing away scraps: Small pieces can be useful for details and mini projects.
Storing And Using Painted Paper
After creating your painted papers, store them flat in a folder or box. Keep them away from moisture and sunlight, which can fade colors. When inspiration strikes, you’ll have a supply ready to use.
Painted paper is also a great gift. Make a pack of painted sheets, tie with ribbon, and give to a crafty friend. Sharing your painted paper is like sharing your creativity.
Where To Find Inspiration
If you feel stuck, look at nature, art books, or online galleries. Try searching for “painted paper crafts” on platforms like Pinterest or YouTube. Museums and modern artists often use painted paper in their work. For more ideas and painting techniques, Tate Kids offers fun art activities and inspiration for all ages.

Credit: www.amazon.com
Frequently Asked Questions
How Do I Stop My Painted Paper From Curling Or Wrinkling?
To prevent curling, use heavier paper like cardstock or watercolor paper. Let your painted sheets dry flat. If they still curl, place them under heavy books once dry.
Can I Use House Paint Or Wall Paint For Paper Crafts?
Most house paints are too thick and may crack when dry. Stick to acrylic, tempera, or watercolor paints designed for art projects.
What Glue Works Best With Painted Paper?
White PVA glue or glue sticks work well for most projects. For heavy or layered crafts, a tacky glue or double-sided tape may be better.
Can I Use Painted Paper For Origami?
Yes, but use thin paper and minimal paint. Too much paint can make the paper stiff and hard to fold.
What Is The Best Way To Share Or Display Painted Paper Crafts?
You can frame your art, hang garlands, or give handmade cards as gifts. For online sharing, take photos in good light and post on social media or craft forums.
Painted paper crafts are a simple way to bring color and creativity into your life. With a few materials and a little time, you can make art that is both fun and beautiful. Try different techniques, experiment with colors, and most importantly, enjoy the process.