
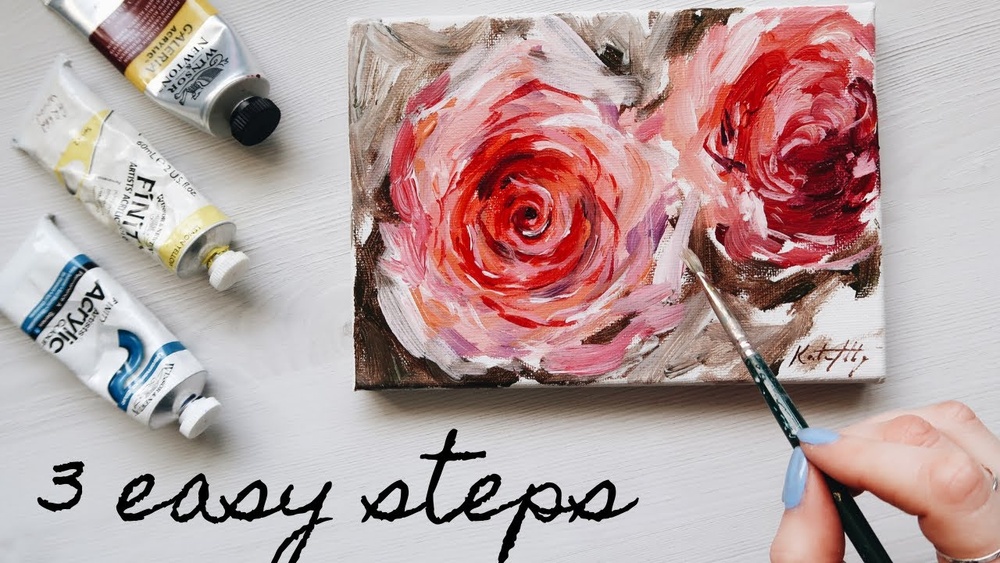
Quick answer: To paint a rose with acrylic paint, start with a spiral or a small cup shape for the bud at the center, then add petals outward in widening, overlapping C-shaped strokes. Paint the darkest value deep in the center and under each petal edge, use a mid-tone for the petal bodies, and finish with light tints along the curled outer rims. A double-loaded flat brush (dark on one corner, light on the other) can create a convincing petal in a single stroke.
Roses look complicated because they’re dense. Dozens of petals wrap around each other, and it’s hard to tell where one ends and the next begins. Painters who make roses look easy aren’t painting every petal. They’re painting a simple structure, a cup inside a bowl, and then describing the edges that matter.
Below you’ll find two complete methods for how to paint a rose with acrylic paint. The first is a quick one-stroke rose built with a double-loaded brush, which is great for cards, borders and decorative work. The second is a layered, realistic rose painted from dark to light. Read the structure section first; both methods rely on it.
The Structure of a Rose
Look at an open garden rose from the side and you’ll see three zones.
- The bud (center): a tight spiral of petals, often darker, with deep shadows between them.
- The cup: petals that wrap around the bud like a bowl. Their top edges curl outward, catching light.
- The skirt: outer petals that open and drop down, flattening as they go.
Every rose painting, no matter how detailed, comes back to these three. If a painted rose looks like a cabbage, it’s usually because there’s no clear bud, or because every petal is the same size and value.
Two more observations help:
- Petal edges curl back on themselves. That rolled edge is where the lightest highlight sits.
- Each petal casts a shadow onto the petal behind or below it. That cast shadow, more than the petal outline, is what separates them visually.
Materials
- Canvas panel or heavy paper, 8×10 to 11×14 inches for a single bloom.
- A 1/2-inch flat (for one-stroke petals), a size 6 and size 2 round, a small filbert, and a liner for stems and thorns.
- Acrylic paints: a cool red (quinacridone crimson or alizarin crimson hue), a warm red (cadmium red medium or pyrrole red), titanium white, a dark (burnt umber or Payne’s gray), sap green or a mix of phthalo green and yellow ochre, and yellow ochre.
- Flow improver or a slow-dry medium.
- Paper towels and a misting bottle.
Choosing rose colors
| Rose color | Shadow mix | Mid-tone | Highlight |
|---|---|---|---|
| Classic red | Crimson + burnt umber | Pyrrole or cadmium red | Red + a little white and yellow |
| Pink | Crimson + a touch of ultramarine | Crimson + white | White + a hint of crimson |
| Yellow | Yellow ochre + a touch of violet | Cadmium yellow medium | Lemon yellow + white |
| White | Light gray-violet (white, ultramarine, burnt umber) | Warm off-white | Pure titanium white |
| Coral or peach | Cadmium red + burnt sienna | Cadmium orange + white | White + a little orange |
Red roses are the trickiest because many reds become pink or chalky when lightened with white. Lighten red with a touch of yellow or orange first, and only then a little white. A strong, transparent crimson for shadows makes a huge difference; weak reds tend to go brown when darkened. If you’re unsure which paints have the saturation for this, see our guide to the best acrylic paint brands for vivid reds and pinks.
Method 1: One-Stroke Rose With a Double-Loaded Brush
This technique comes from decorative painting. The brush carries two colors at once, so each stroke creates a petal with its own shadow and highlight built in.
How to double-load a flat brush
- Wet the brush and blot it so it’s damp, not dripping. A small amount of flow improver in the water helps.
- Dip one corner into the dark color (crimson) and the other corner into the light color (white or a light pink).
- Blend on the palette by stroking back and forth in the same spot, about 10 to 15 times, flipping the brush. You want a smooth gradient across the bristles, dark to light, with no hard line in the middle.
Painting the one-stroke rose
- Bud: with the dark side of the brush toward the center, paint a small “C” shape, then a reverse “C” facing it, so they form an oval. Fill the inside with a dab of dark color.
- Back petals: above the bud, paint two or three arched strokes, wiggling the brush slightly to create a ruffled edge. Keep the light side of the brush on the outside.
- Front cup petal: paint a “U” stroke in front of the bud, with the light side on the bottom edge. This closes the cup.
- Side petals: add petals on each side, angled outward, overlapping the cup.
- Skirt petals: paint three to five larger, flatter strokes underneath, spreading outward and slightly down. Wiggle the brush for ruffled edges.
- Leaves: double-load the brush with dark green and a light yellow-green. Start at the stem end, press down, wiggle slightly to the tip, then lift. Do the same for the other half of the leaf.
A one-stroke rose can be finished in five to ten minutes once you’ve practiced the double load. Fill a sheet of scrap paper with 20 or so before moving to a final piece.
Method 2: Layered Realistic Rose
This approach builds the rose in values from dark to light. It takes longer, typically one to three hours, but produces depth and form that the one-stroke method can’t match.
Step 1: Sketch the big shapes
Draw a circle for the overall bloom. Inside it, draw an oval or spiral slightly above center for the bud, a bowl shape around it for the cup, and a few broad shapes for the skirt petals. Don’t draw every petal edge. You’ll find them with paint.
Step 2: Paint the background first
A dark or muted background (deep green, gray-blue or a warm brown) makes the rose glow. Paint it first, overlapping the bloom outline slightly. You’ll paint the rose over the edges for a clean, soft silhouette.
Step 3: Block in the darkest values
Mix your shadow color and paint the center of the bud, the gaps between petals, and the areas underneath curling edges. Be generous; it will look like an abstract dark shape. Those darks give you something to paint light petals against.
Step 4: Lay in the mid-tones
Fill the body of each petal with the mid-tone, leaving the shadow shapes visible. Use the filbert and follow the curve of each petal with your strokes. Petals in the skirt usually have strokes that radiate outward from the center; petals in the cup curve around it.
Step 5: Add light along the petal edges
Here’s where the rose comes alive. With a size 2 round, paint the curled rim of each petal in your highlight color, just a thin band along the top edge. Then soften the inside of that band into the mid-tone so it looks rolled rather than outlined.
The petals facing the light source get the brightest highlights. Petals on the shadow side get a subtle, darker version.
Step 6: Paint cast shadows
Where a petal overlaps another, glaze a thin shadow on the lower petal right below the edge. Mix the shadow color with glazing medium so it’s transparent. This step separates petals more effectively than adding detail.
Step 7: Refine the bud
Go back to the center. Add two or three small, bright edges inside the spiral to suggest tightly wrapped petals, and deepen the darkest point. The bud should be the area of strongest contrast in the whole painting, because that’s where the eye goes first.
Step 8: Stem, leaves and thorns
Rose leaves grow in groups of three, five or seven along a central stem, with serrated edges and a visible central vein. Paint the leaf shape in mid-green, darken one half for form, and pull a lighter vein down the middle with a liner. Thorns are small, hooked, reddish-brown triangles pointing slightly downward along the stem.
Painting Rose Petals: Strokes That Work
| Stroke | Brush | Use |
|---|---|---|
| C-stroke | Flat, double-loaded | Bud and cup petals |
| Wiggle stroke | Flat, double-loaded | Ruffled outer petals |
| Comma stroke | Round | Small petals in loose, impressionistic roses |
| Rolled-edge highlight | Small round | Light catching on curled rims |
| Glaze | Soft flat or filbert | Cast shadows and color shifts |
Loose and Impressionistic Roses
Not every rose needs to be botanical. A loose rose can be painted with a palette knife or a large round brush in a few minutes:
- Load a palette knife with mid-tone pink and press a small spiral for the center.
- Drag curved knife strokes around it, letting the paint stay thick and ridged.
- Pull a lighter color along a few edges with the side of the knife.
- Add a couple of dark, quick strokes in the center and under the bloom.
Heavy body paint holds knife marks best. This approach suits bouquets where several roses overlap and fine detail would look fussy.
Arranging Several Roses in One Painting
Once a single bloom feels comfortable, a small group is the natural next step. Odd numbers (three or five blooms) usually look more natural than pairs or fours. Vary the angles: one rose facing the viewer, one in profile so you see the cup from the side, and one half-open bud.
Decide which rose is the star. Give it the sharpest edges, the strongest contrast in the bud and the brightest highlights. Paint the supporting blooms slightly smaller, with softer edges and less contrast, so they recede. Let leaves overlap the blooms in a few places; overlaps create depth and tie the group together instead of leaving three separate flowers floating side by side.
Common Mistakes When Painting Roses
- Same-sized petals everywhere. Petals grow larger as they move away from the bud. Keep the center small and tight.
- Outlining each petal. Dark outlines flatten the rose. Use cast shadows and rolled-edge highlights instead.
- Using white to lighten red. Adding only white makes a red rose look pink. Warm it with yellow or orange first.
- Losing the darks. As you paint petals, it’s easy to cover the deep center. Re-establish the darkest darks at the end.
- Overblending. Acrylic dries quickly, and repeated brushing creates a muddy, matte patch. Place a stroke and leave it.
- Stiff leaves. Rose leaves tilt and twist. Show some from the side or partially folded.
Tips by Skill Level
Beginners should start with the one-stroke method on scrap paper, then paint a single rose with two leaves on a small panel. Focus on the double load and on keeping the bud small.
Intermediate painters can try the layered method from a reference photo, paying attention to cast shadows and to warm and cool shifts: petals facing the sky often look cooler and slightly bluer, while petals reflecting light from other petals look warmer.
Advanced painters might paint a bouquet where some roses are in sharp focus and others are softly lost into the background. Controlling edges across several blooms is the real challenge.
FAQs
What is the easiest way to paint a rose with acrylic paint?
The one-stroke method. Double-load a flat brush with a dark and a light color, paint a small oval bud from two C-shaped strokes, then add arched petals around it. The brush creates shading automatically.
What colors do I mix for a red rose?
Use a crimson darkened with burnt umber for shadows, a pyrrole or cadmium red for mid-tones, and red warmed with yellow plus a little white for highlights. Avoid relying only on white to lighten red.
How do you paint rose petals with depth?
Block in dark values first, then mid-tones, then thin highlights along the curled petal edges. Add transparent cast shadows where petals overlap. The contrast between edges and shadows creates the depth.
What brush is best for painting roses?
A 1/2-inch flat brush is the most versatile for petals, especially for one-stroke work. Add a small round for highlights and a liner for stems and thorns.
How long does it take to paint a rose?
A one-stroke rose takes five to ten minutes after some practice. A layered, realistic rose usually takes one to three hours, including drying time between layers.
Can I paint a rose with acrylic on paper?
Yes. Use heavy paper (around 300 gsm) so it doesn’t buckle under wet paint, and tape it down on all four edges before you start.
Next Step
Whether you paint one-stroke roses for cards or layered blooms for a frame, the result depends on reds and pinks that stay clean when mixed. Once you’ve practiced the strokes above, pick a palette that supports them: our comparison of acrylic paint brands ranked by color strength and blending will help you choose colors that keep your roses bright instead of muddy. For thin, flowing double-load strokes, our Daler-Rowney fluid acrylic review explains how a fluid paint behaves differently from heavy body.




