
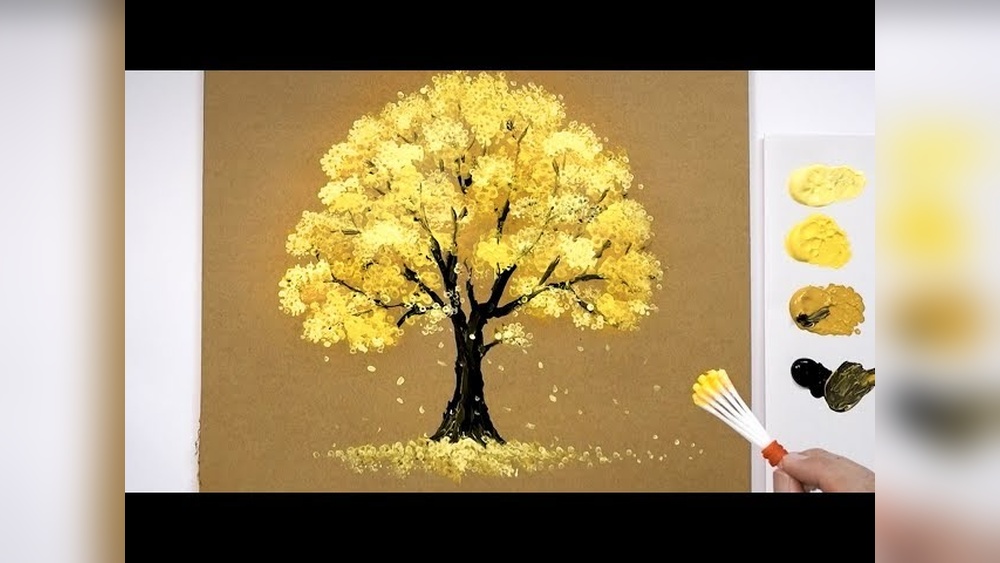
Cardboard is free, sturdy and sitting in your recycling bin right now, which makes it one of the most practical surfaces for practice studies, kids’ projects and experimental pieces. The catch is that it soaks up paint, warps when wet and can show through as a dull brown. Learning how to do acrylic painting on cardboard is mostly about preparation: a few minutes of sealing and priming solve nearly all of those problems.
Quick answer: To paint on cardboard with acrylics, choose a flat, clean piece, remove any glossy coating by sanding lightly, then seal both sides with gesso or a coat of acrylic medium to reduce warping and absorption. Once dry (about 20–30 minutes), paint in thin layers, letting each dry before the next. Weigh the cardboard down or brace it while drying, and finish with a varnish if you want to protect it.
Is Cardboard a Good Surface for Acrylic Paint?
Acrylic sticks well to cardboard because the surface is porous and slightly fibrous, giving the paint plenty to grip. It is a strong choice for practice, sketches, crafts, signs, school projects and mixed-media work. It is less suited to paintings you want to last for decades, because most cardboard contains acidic wood pulp that can yellow and weaken over time.
| Pros | Cons |
|---|---|
| Free or very cheap | Warps when wet unless sealed |
| Easy to cut to any size | Absorbs paint, dulling colors |
| Rigid enough for heavy paint when thick | Usually acidic, not archival |
| Grips acrylic well | Glossy printed areas resist paint |
| Low pressure for experimenting | Corrugation can show through thin paint |
Types of Cardboard and How They Paint
Not all cardboard behaves the same way. Choose based on your project.
| Type | Description | Painting notes |
|---|---|---|
| Corrugated (shipping boxes) | Wavy inner layer between two flat sheets | Sturdy; ridges may show; prime well |
| Chipboard / paperboard | Dense, flat, single layer (cereal boxes, backing boards) | Smooth surface; thin pieces warp easily |
| Mat board | Framing board, often acid-free | Excellent surface; more archival |
| Illustration / artist board | Paper mounted on board | Designed for paint; most durable choice |
| Coated / printed boxes | Glossy printed exterior | Sand or prime heavily, or use the plain inside |
What You Need
- Cardboard, flat and free of creases, grease or tape.
- Craft knife and ruler for clean edges.
- Fine sandpaper (around 220 grit) for glossy surfaces.
- Acrylic gesso or a clear acrylic medium to seal.
- Acrylic paints in a basic palette.
- Brushes: a wide flat for priming, plus rounds and flats for painting.
- Heavy books or clips to keep the board flat while drying.
- Optional: painter’s tape, matte or gloss varnish.
Because cardboard absorbs paint, the first coat uses more than you expect. Paint with a strong pigment load stays bright even when the board drinks some of it in; our guide to acrylic paint brands that cover well on absorbent surfaces compares coverage across popular ranges.
How to Do Acrylic Painting on Cardboard: Step by Step
Step 1: Choose and cut your cardboard
Pick a flat area without folds or water damage. Cut it with a sharp craft knife against a ruler, using several light passes instead of one hard one to avoid crushing the corrugation. Thicker, double-wall cardboard resists warping better for larger paintings.
Step 2: Clean and sand
Wipe off dust with a dry cloth. Peel away tape and labels. If the surface is glossy or printed, sand it lightly until the shine is gone so primer can grip. Alternatively, flip the piece and paint on the plain interior side.
Step 3: Seal both sides
This is the most important step. Paint a thin coat of gesso or acrylic medium on the back first, let it dry, then do the front. Sealing both sides equalizes moisture so the board pulls evenly and warps less. Use thin coats; a thick, wet coat soaks into the fibers and causes buckling.
Step 4: Prime the painting side
Add one or two thin coats of gesso to the front, letting each dry for 20–30 minutes. Brush the second coat at a right angle to the first for even coverage. If corrugation lines show through, add another coat or sand lightly between coats.
Step 5: Flatten while drying
If the board curls, place it under heavy books with wax paper between the board and books once the surface is dry to the touch. Leave it for an hour or more. Clips around the edges onto a flat board also help.
Step 6: Sketch your design
Use a light pencil or thinned paint to sketch. Avoid pressing hard, since the primed surface can dent.
Step 7: Paint in thin layers
Start with background colors and large shapes. Thin layers dry fast and are less likely to warp the board than thick, wet ones. Build up color gradually, allowing each layer to dry before the next.
Step 8: Add details
Switch to smaller brushes for details, highlights and edges. Acrylic paint markers work nicely on primed cardboard for crisp lines.
Step 9: Seal the finished painting
Once the paint has dried for at least a day, apply a thin coat of acrylic varnish or medium to protect the surface. This also gives a consistent sheen and some protection from moisture and dust.
How Long Does Acrylic Paint Take to Dry on Cardboard?
Cardboard is one of the faster-drying surfaces for acrylic because it absorbs water from the paint.
| Situation | Touch dry (typical) | Notes |
|---|---|---|
| Unprimed cardboard, thin coat | 5–15 minutes | Fast but colors look dull |
| Primed cardboard, thin coat | 15–30 minutes | Better color, slightly slower |
| Thick or textured paint | 1 hour or more | Thicker layers dry more slowly |
| Full cure before varnishing | About 24 hours or more | Longer for heavy layers or humid rooms |
Humidity, temperature and airflow all affect these times. In a humid room, thin coats may take twice as long. A fan set on low and aimed across the surface can speed things up without warping the board.
How to Stop Cardboard From Warping
- Seal both sides before painting.
- Use thin coats of primer and paint.
- Avoid soaking the surface with watery paint or washes.
- Choose thicker cardboard or glue two pieces together with grain running in opposite directions.
- Weigh it down under books once the surface is dry to the touch.
- Brace the back with strips of cardboard or a thin wood frame for larger pieces.
- Mount it onto a rigid board or a canvas panel once finished if it must stay perfectly flat.
Priming Options Compared
| Primer | Effect | Best for |
|---|---|---|
| White acrylic gesso | Bright, opaque base with tooth | Most paintings; true colors |
| Black gesso | Dark base | Night scenes, neon or metallic colors |
| Clear gesso or acrylic medium | Seals while letting cardboard color show | Rustic or kraft-paper look |
| White acrylic paint | Basic seal and base | Quick craft projects; less tooth than gesso |
| PVA glue diluted with water | Seals fibers | Budget crafts; not archival and can be prone to yellowing |
Painting Ideas for Cardboard
- Quick landscape studies: sunsets, mountains and seascapes in under an hour.
- Kraft-paper-style art: seal with clear medium, then paint with white and one or two colors, letting the brown show as a midtone.
- Signs and lettering: bold colors and paint markers on primed board.
- Abstract experiments: try new techniques without worrying about wasting canvas.
- Color charts and swatches: test mixes and pigments.
- Dioramas and props: painted cardboard cutouts for school or craft projects.
- Textured pieces: peel away the top layer to expose corrugation and paint over it for a ribbed texture.
Techniques That Work Well on Cardboard
Dry brushing
The slightly rough surface of primed cardboard catches dry-brushed paint nicely, which is useful for grass, wood and weathered effects.
Palette knife work
Thick cardboard handles knife-applied paint well. Avoid very heavy impasto on thin board, which can bend under the weight.
Layering and glazing
Once the board is primed, layering works just as it does on canvas. For guidance on how a mid-priced artist acrylic covers and layers, the Daler-Rowney acrylic paint review looks at opacity and drying in detail.
Exposed corrugation
Peel the top paper layer away to reveal the wavy interior, seal it with medium, and dry brush color across the ridges for striking texture.
A 45-Minute Cardboard Practice Session
Cardboard is ideal for short, focused practice because you are not worried about wasting an expensive surface. Here is a simple routine once you have a batch of primed panels.
- Five minutes: Choose a simple subject, such as a cup, a piece of fruit or a view from a window, and squeeze out three colors plus white.
- Ten minutes: Block in the large shapes with a flat brush. Ignore details completely.
- Five minutes: Let the panel dry while you look at the subject and note where the lightest and darkest areas are.
- Fifteen minutes: Add shadows and lights with a smaller brush, focusing on getting values right rather than exact color.
- Ten minutes: Add a few details and highlights, then stop and write the date on the back.
Doing this several times a week builds observation skills quickly, and the pile of dated panels shows progress clearly.
Painting on Cardboard With Kids
Cardboard is a natural choice for children’s art because it is free and sturdy. A few adjustments make it easier and tidier.
- Pre-prime panels yourself the day before so kids can start painting right away.
- Use washable craft acrylics or tempera for younger children, since artist acrylic can stain clothes once dry.
- Cut smaller pieces, around 6×8 inches, which dry faster and are less likely to warp.
- Cover the table and keep a damp cloth nearby; acrylic is much easier to clean before it dries.
- Try cutout shapes, such as animals or houses, which can be painted on both sides and stood up as decorations.
Common Mistakes When Painting on Cardboard
- Skipping primer. Colors sink in and look dull, and the board warps more.
- Priming only one side. Uneven moisture causes curling.
- Using watery paint. It soaks into the fibers and buckles the surface.
- Painting over gloss. Paint may bead or peel off printed, glossy areas.
- Using damaged or greasy cardboard. Stains can bleed through the paint.
- Expecting archival results. Standard cardboard is acidic; use mat board or artist board for keeper pieces.
How to Make a Cardboard Painting Last Longer
- Use acid-free mat board or artist board rather than shipping boxes.
- Seal all surfaces, including the edges, with gesso or medium.
- Varnish the front once the paint has cured.
- Frame behind glass or display away from direct sun and humidity.
- Mount it onto a rigid backing for support.
FAQs
Do I need to prime cardboard before acrylic painting?
It is not strictly required, since acrylic sticks to raw cardboard. However, priming with gesso gives brighter colors, reduces warping and uses less paint in the long run.
Can I use acrylic paint on cardboard without gesso?
Yes. A coat of white acrylic paint or clear medium can seal the surface for craft projects. Gesso provides better tooth and coverage for more serious work.
How do I keep cardboard from bending when I paint it?
Seal both sides, use thin layers, and weigh the board down while it dries. Thicker cardboard or a braced back helps for larger pieces.
Is acrylic paint on cardboard waterproof?
Dried acrylic resists water, but cardboard itself does not. Moisture can still soak in from unsealed edges or the back. Seal all sides and varnish for better protection, and keep cardboard pieces indoors.
Will acrylic paintings on cardboard last?
Ordinary cardboard is acidic and may yellow or become brittle over years. For lasting work, choose acid-free mat board or artist board and seal and varnish it.
What kind of cardboard is best for painting?
Mat board and illustration board are the best surfaces. For free options, thick corrugated board or dense chipboard works well once sealed and primed.
Next Step
Cut a few small cardboard panels, seal and prime them in one batch, and keep them ready for quick studies. Painting on low-cost surfaces takes the pressure off and makes it easier to practice often.
Because cardboard drinks in pigment, your paint choice shows more here than on canvas. If you want colors that stay rich after the board absorbs the first coat, take a look at our picks for the best acrylic paint for vibrant coverage on any surface.




One Comment