
PaintingProGuide is reader-supported. When you buy through links on this page we may earn an affiliate commission at no extra cost to you.
The best way to hold a paint brush correctly is not one grip but a small set of grips you switch between. For detail work, hold the brush like a pencil, close to the ferrule, and steady your hand on the table or a bridge. For loose, expressive strokes, slide your hand back toward the end of the handle and hold it lightly between thumb and fingers, moving from the elbow and shoulder instead of the wrist.
Most painters who feel “clumsy” with a brush are using the pencil grip for everything. It is the grip we learned for writing, so it feels natural, but it locks the stroke into small finger movements. Learning when to change grips does more for control and confidence than any new brush.
Quick answer: Use a tripod (pencil) grip near the ferrule for fine lines and edges; an overhand grip further back for broad strokes, washes and blocking in; and an underhand or baton grip for long, flowing marks at an easel. Keep pressure light, let the bristles do the work, and move from the shoulder for anything longer than a few inches. For kids learning grip, triangle-grip brushes help; for miniature painters, a painting handle with a finger rest adds stability.
The Core Grips at a Glance
- Tripod or pencil grip, near the ferrule — best for detail, lettering, edges and small work.
- Tripod grip, mid-handle — best for general shaping and medium strokes.
- Overhand grip, back of the handle — best for loose strokes, washes and blocking in.
- Underhand or baton grip — best for long sweeping lines at an easel.
- Fist or palm grip — best for stippling, dry brushing and texture.
- Rolling liner grip — best for branches, grasses and tapered lines with a rigger or liner.
| Grip | Hand Position | Movement From | Best For | Typical Brushes |
|---|---|---|---|---|
| Tripod near ferrule | 1 to 2 cm above the ferrule | Fingers and wrist | Details, edges, lettering | Round, liner, small flat |
| Tripod mid-handle | Middle of the handle | Wrist and elbow | General painting, shaping | Filbert, round, flat |
| Overhand | Back third, palm over handle | Elbow and shoulder | Washes, blocking in, loose work | Large flat, mop, filbert |
| Underhand / baton | End of handle, palm up | Shoulder | Long strokes at the easel | Long-handled oil and acrylic brushes |
| Fist / palm | Whole hand around handle | Arm, short taps | Stippling, dry brush, texture | Stencil, fan, old bristle brushes |
How We Approached This Guide
This guide is based on long-established painting instruction about brush grip and handling, not on a test of products. The handful of supplies at the end were chosen from Amazon listing details and specifications checked in October 2026, on how directly each item supports grip, stability or brush care, and how widely each product is reviewed by Amazon buyers.
We focused on what actually changes your marks:
- Distance from the ferrule: closer means more control, further back means looser marks.
- Which joint moves: fingers for millimeters, wrist for short strokes, elbow and shoulder for long ones.
- Pressure: how firmly bristles meet the surface changes line width more than grip does.
- Brush angle: near vertical for points and dots, low angle for broad side strokes.
- Support: resting the hand, using a bridge or mahl stick, or stabilizing the object.
Best Way to Hold a Paint Brush Correctly, Grip by Grip
1. The tripod grip near the ferrule (detail grip)
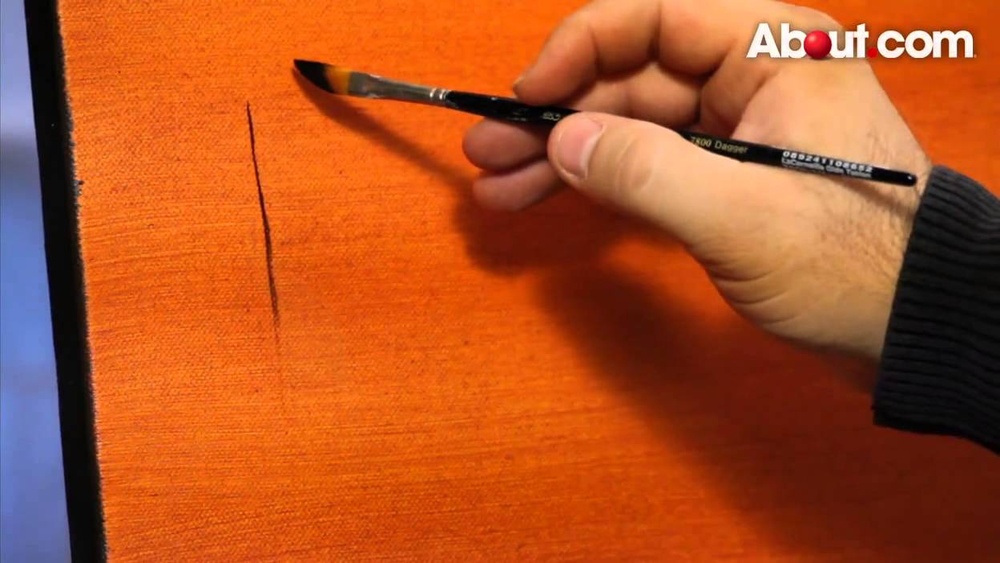
Hold the brush as you would a pencil: the handle rests against the side of your middle finger, with thumb and index finger pinching it lightly from either side. Place your fingers about 1 to 2 cm above the metal ferrule. This position gives the most precise control, because small finger movements translate directly to the tip.
Use it for eyes and highlights in a portrait, crisp edges, lettering, botanical veins and any line that must land exactly. Anchor the heel of your hand or your little finger on the table or a clean area of the painting to stop tremor. If your hand cramps, you are squeezing too hard; the brush should be secure but able to wiggle slightly.
2. The tripod grip mid-handle (working grip)
Slide the same pencil grip back to the middle of the handle. You lose a little precision but gain freedom, and the wrist begins to take over from the fingers. This is the grip most painters use for the bulk of a painting: shaping forms, laying in mid-size areas and adjusting edges.
A useful habit is to start every session here and only move forward to the ferrule when a stroke truly needs it. Painters who start at the ferrule tend to paint tight, over-blended work.
3. The overhand grip (loose grip)
Turn your hand so the palm faces down over the handle, holding the brush between your thumb and the first two or three fingers, toward the back third of the handle. The handle runs under your palm rather than resting on your middle finger. It feels odd at first, which is the point: it stops you from fiddling.
This grip is ideal for blocking in large shapes, laying watercolor washes, scumbling and loose impressionist strokes. Movement comes from the elbow and shoulder, which produces longer, more confident marks. Many oil painters keep long-handled brushes precisely so they can use this grip from a step back.
4. The underhand or baton grip (sweeping grip)
Hold the end of the handle with your palm facing up or sideways, the brush resting across your fingers and steadied by your thumb, like a conductor’s baton. Standing at an easel, this grip lets you pull long curves and lines with your whole arm.
Use it for horizons, long grasses, drapery folds and calligraphic marks in abstract work. Because it puts distance between your eye and the brush tip, it also encourages you to see the whole painting rather than one corner.
5. The fist or palm grip (texture grip)
Wrap your whole hand around the handle, bristles pointing down. It looks crude, but it is the right grip for stippling, stencil work and dry brushing, where you tap or drag the bristles rather than draw with the tip. The brush stays perpendicular to the surface, and the pressure is even across the bristles.
Use stiff, inexpensive or older brushes for this, since repeated tapping splays bristles. A stencil brush is designed for exactly this motion.
6. The rolling liner grip
Liner and rigger brushes have long, thin bristles that hold a lot of fluid paint. Hold them with a light tripod grip mid-handle and roll the handle slowly between thumb and fingers as you pull the stroke. Rolling keeps the bristles together and lets the line taper naturally.
Thin your paint to an ink-like consistency, start with pressure and lift as you go. This is how painters get convincing tree branches, rigging lines and fine grasses.
How to Hold a Brush for Each Medium
Watercolor
Watercolor rewards a light touch. Hold large rounds and mops further back in an overhand grip for washes, letting the brush belly lay down water and pigment in one pass. For details, move to the ferrule, but keep pressure light so you do not scrub the paper surface.
Acrylic
Acrylic dries fast, so confident strokes beat repeated dabbing. Use the mid-handle tripod grip for most work and the overhand grip for blocking in. Keep the brush moist and clean the ferrule regularly; paint drying near the ferrule makes any grip feel stiff.
Oil
Oil brushes have long handles because oil painters traditionally work standing at an easel, an arm’s length from the canvas. Holding the end of the handle with an overhand or baton grip keeps strokes loose. Move to a tripod grip for final details, often with a mahl stick to rest your hand above wet paint.
Miniatures and models
Miniature painters hold the brush near the ferrule and stabilize both hands: brace the wrists together or against the table, and hold the model on a handle rather than in the fingers. Steady contact points matter more than grip style at this scale.
Pressure, Angle and Movement
Grip decides where your hand is, but pressure and angle decide the mark. A round brush held upright with light pressure makes a fine point; pressed down at a low angle, the same brush makes a broad, leaf-shaped stroke. Practice drawing a single line that starts thin, swells and tapers, using only pressure.
Think in terms of joints. Fingers handle a few millimeters, the wrist a few centimeters, the elbow up to a hand-width, and the shoulder anything longer. A long line drawn from the wrist arcs and wobbles; drawn from the shoulder it stays smooth. Stand when you can, and keep your arm free.
Teaching Kids to Hold a Paint Brush
Toddlers naturally start with a fist grip, and that is fine for early painting. As fine motor skills develop, encourage a tripod grip with chunky or triangular handles that are easier to hold and do not roll off the table. Short-handled brushes help small hands feel in control.
Avoid correcting every stroke. Demonstrate, praise effort, and let the shape of the brush do some of the teaching. Painting at an upright surface such as an easel also strengthens the wrist position used later for writing.
Supplies That Help
You do not need special gear to hold a brush well. These few items earn their place because they support grip, stability or bristle shape.
| Product | Best For | Key Spec | Key Strength | Price Tier |
|---|---|---|---|---|
| READY 2 LEARN Triangle Grip Brushes | Kids learning grip | 6 brushes, triangular rubber handles | Encourages tripod grip, no rolling | $ |
| Golden Maple Miniature Handle | Miniature painters | Metal finger rest, 5 rotating bases | Steadies hand for detail | $$ |
| DUGATO 3-in-1 Brush Basin | Brush care at the desk | 16-slot holder, 18-well palette | Keeps bristles upright to dry | $ |
| Paint Puck Ultimate Rinse Cup | Gentle cleaning | Silicone bristle cleaner, brush rests | Protects soft bristles | $$ |
1. READY 2 LEARN Triangle Grip Paint Brushes — Best for Kids Learning Grip

This set of six brushes has triangular rubber handles that the brand says encourage a proper writing grip, and the shape means brushes stay put rather than rolling off the table. Thick bristles and flexible rubber suit toddlers and preschoolers, and the listing calls out suitability for kids with special needs who benefit from greater control.
Each brush is about 6.25 inches long with a 1 inch width. They clean up with warm soap and water and are tested to comply with CPSIA and ASTM standards for ages 18 months and up.
Best suited for: Toddlers, preschoolers and kids who need extra support forming a tripod grip.
Key features:
- 6 brushes with triangular rubber handles
- Anti-roll design
- Thick bristles
- CPSIA and ASTM compliant, ages 18m+
Pros:
- Shape guides a correct grip
- Does not roll off tables
- Durable for young kids
Cons and limitations:
- Not for fine detail work
- Thick bristles only
- Designed for children, not adults
Buying consideration: Pair with washable paint and an easel to practice grip and wrist position together.
2. Golden Maple Miniature Painting Handle — Best for Steady Detail Work

For miniature painters, half of good brush control is holding the model still. This handle has an ergonomic grip and a metal finger bracket you rest your painting hand on to reduce shaking. It includes five interchangeable round bases that rotate 360 degrees on a larger base, so you can reach any angle without touching the model.
Models attach with a gentle sticky putty, and the kit includes a cork base, a wire stabilizer and a storage pouch.
Best suited for: Miniature and model painters who struggle with shaky hands on fine details.
Key features:
- Ergonomic handle with metal finger bracket
- 5 rotating bases plus large bottom base
- Cork base and wire stabilizer
- Storage pouch
Pros:
- Finger rest steadies the brush hand
- Rotating bases reduce handling
- Holds up to 5 models
Cons and limitations:
- Mid price tier
- Only relevant for miniatures and small models
- Putty holds lighter models best
Buying consideration: Use it with the near-ferrule tripod grip and brace both wrists for the steadiest results.
3. DUGATO 3-in-1 Paint Brush Cleaner Basin — Best for Keeping Brushes in Shape

A splayed brush is hard to control no matter how you hold it. DUGATO’s basin combines a dual-chamber washer with ribbed scrubbing and a fresh-water rinse cup, a 16-slot holder that keeps brushes upright to dry without bending, a saw-tooth edge to rest brushes while working, and an 18-well palette with lid.
It measures about 8.9 x 5.25 x 4.5 inches, weighs 0.66 lb and includes two sponges. Brushes are not included.
Best suited for: Painters who want one compact station for rinsing, resting and storing brushes.
Key features:
- Dual-chamber washer with ribbed scrubbing area
- 16-slot brush holder plus saw-tooth rest
- 18-well palette with lid
- 2 sponges included
Pros:
- Keeps bristles from resting on their tips
- All-in-one desk organizer
- Low price tier
Cons and limitations:
- Plastic build
- Small for large brushes
- Palette lid is not airtight
Buying consideration: Never leave brushes standing bristles-down in water; use the holder slots instead.
4. Paint Puck Ultimate Rinse Cup — Best for Gentle Cleaning

This 4 inch rinse cup has silicone rubber at the bottom to lift paint from bristles without damaging soft brushes, a flexible silicone lid with brush rests inside and outside, and a wide water-catching base. It is listed for acrylic, watercolor and water-based paints and is dishwasher safe.
Gentler cleaning keeps a point on rounds and a sharp edge on flats, which keeps your grip and stroke predictable.
Best suited for: Watercolor and acrylic painters with soft brushes, and classrooms that need a stable rinse cup.
Key features:
- Silicone bristle-cleaning base
- Silicone lid with brush rests
- Wide, stable base
- Dishwasher safe
Pros:
- Gentle on soft bristles
- Stable base resists tipping
- Brushes rest upright while you work
Cons and limitations:
- Mid price tier for a cup
- Not for oil solvents
- Single water chamber
Buying consideration: Rinse frequently during a session; paint drying near the ferrule ruins brush shape faster than anything.
Buying Guide: Brush Features That Make Holding Easier
Handle length
Short handles suit close work at a table, watercolor and kids. Long handles suit oil and acrylic painting at an easel, where you hold the brush further back. Choosing the right length makes the right grip feel natural.
Handle shape and thickness
Thicker or triangular handles reduce grip strain, which matters for children and for painters with arthritis or hand fatigue. Thin handles give a more delicate feel for detail. Foam grip sleeves can thicken a handle cheaply.
Balance
A well-balanced brush feels neutral when held mid-handle. Brushes that are very top-heavy tire your hand. If a brush feels awkward, try holding it slightly further forward or back before replacing it.
Bristle stiffness
Stiff bristles push thick paint and tolerate firmer pressure. Soft bristles respond to light pressure and need a gentler grip. Match your pressure to the bristle, not the other way around.
Ferrule condition
Paint that dries inside the ferrule spreads bristles and makes the brush unpredictable. Regular rinsing and drying brushes flat or upright keeps the shape your grip depends on.
Keep Building Your Brush Skills
Grip and loading go together. Our guide on how to load a paint brush correctly explains how much paint to pick up and where it should sit in the bristles. For fine lines, see using a liner brush for detail work, and for the tapping motion described above, our tips on using a stencil brush correctly go deeper.
Common Mistakes to Avoid
- Using the pencil grip for everything: it produces tight, overworked paintings.
- Gripping too hard: tension causes shaky lines and hand cramps.
- Painting long lines from the wrist: move from the elbow or shoulder instead.
- Holding too close to the ferrule for washes: slide back for broad areas.
- Pressing a soft brush like a stiff one: it splays the bristles and ruins the point.
- Not anchoring the hand for details: rest a finger or the heel of the hand on a stable surface.
- Letting paint dry near the ferrule: it changes how the brush handles.
FAQs
How should a beginner hold a paint brush?
Start with a light pencil grip around the middle of the handle. Move toward the ferrule for detail and toward the end of the handle for loose, broad strokes. Keep your grip relaxed.
Should I hold a paint brush like a pencil?
For detail work, yes. For most other strokes, holding it further back and more loosely gives better results. Painters switch grips constantly.
Why do oil painting brushes have long handles?
Oil painters traditionally work at an easel from a distance. Long handles let them hold the brush near the end for loose strokes while seeing the whole canvas.
How do I stop my hand from shaking while painting details?
Anchor your hand on the table, a mahl stick or a bridge, brace your wrists together for small work, breathe out during the stroke, and avoid gripping too tightly.
How do I teach a child to hold a paint brush?
Let toddlers use a fist grip at first. Around preschool age, offer chunky or triangular handles that encourage a tripod grip, and paint at an easel to build wrist strength.
Does brush grip differ for watercolor and acrylic?
The grips are the same, but watercolor uses lighter pressure and more overhand grips for washes, while acrylic benefits from confident mid-handle strokes because it dries quickly.
Final Recommendation
Learn three grips first: the tripod near the ferrule for detail, the mid-handle tripod for everyday shaping, and the overhand grip for broad, loose work. Add the baton grip at the easel and the fist grip for texture as you need them, and keep pressure light throughout.
If you are teaching a young child, triangle-grip brushes make the right grip easier. Miniature painters gain the most from a stabilizing handle, and everyone benefits from keeping brushes in shape with a brush basin or a gentle rinse cup.




