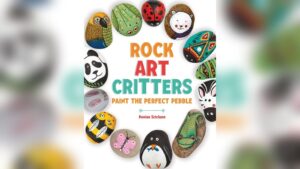
Making painted rock critters is a classic, joyful activity for children. It’s creative, simple, and surprisingly satisfying—turning ordinary stones into adorable animals, bugs, or even wild imaginary creatures. Not only do kids love the painting part, but these critters also become fun toys, gifts, or garden decorations.
If you’re searching for a hands-on project that encourages both creativity and patience, painted rock critters are a perfect choice.
In this guide, you’ll discover everything you need to start making painted rock critters with kids. Whether you’re a parent, teacher, or group leader, these steps will ensure success for all ages. From gathering the right materials to painting techniques, safety tips, and creative ideas, you’ll have all the tools for a memorable crafting experience.
Why Painted Rock Critters Are Great For Kids
Painting rocks isn’t just about making something pretty. It’s an activity packed with benefits. First, it lets children use their imagination. Each rock can become anything—a ladybug, a puppy, or a fantasy monster. Kids also practice fine motor skills as they hold brushes and paint details. This kind of project teaches patience because each step, from washing rocks to waiting for paint to dry, is important.
There’s also a sense of pride and accomplishment when kids see their finished critter. These creations can brighten gardens, decorate desks, or be shared with friends. Painted rock critters are also inexpensive and easy to organize, making them ideal for classrooms, birthday parties, or family weekends.
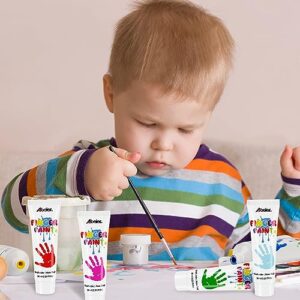
Materials Needed For Painted Rock Critters
To start this project, you’ll need a few basic supplies. Quality materials make the process smoother and the results more durable. Here’s a clear breakdown:
| Material | Purpose | Tips |
|---|---|---|
| Clean, smooth rocks | Base for painting | Choose oval or round rocks; avoid sharp edges |
| Acrylic paints | Color for critters | Use non-toxic, kid-safe paints |
| Paintbrushes | Applying paint | Get fine tips for details, larger for backgrounds |
| Permanent markers | Outlining features | Great for eyes, noses, and patterns |
| Googly eyes | Fun, animated look | Optional but very popular with kids |
| White glue or hot glue | Attaching extras | Adult supervision required for hot glue |
| Sealer spray or Mod Podge | Protecting the paint | Choose water-based for safety |
| Palette or paper plate | Mixing paint | Disposable plates work well |
| Paper towels or rags | Wiping brushes, cleaning spills | Keep plenty nearby |
| Aprons or old shirts | Protecting clothes | Paint can stain! |
Non-obvious tip: If you want super smooth rocks but can’t find them outside, craft stores often sell bags of river rocks that are perfect for painting.

Credit: www.amazon.com
How To Prepare Your Rocks
Preparation is key for painted rock critters that last. Start by washing the rocks with warm soapy water. Scrub away any dirt or loose pieces using an old toothbrush. This helps the paint stick better. Let the rocks dry completely—wet rocks make the paint peel or bubble.
If you want an extra-smooth surface, you can gently sand rough spots with fine sandpaper. This step is especially helpful for younger kids who may struggle with uneven rocks.
After cleaning, sort the rocks by shape and size. Flat, oval rocks are best for animals like ladybugs or turtles, while tall, round rocks make great owls or penguins. Let kids pick rocks that inspire their ideas.
Step-by-step Guide To Making Painted Rock Critters
Here’s a practical, easy-to-follow process for turning rocks into colorful critters:
- Set up your workspace. Cover the table with newspaper or a plastic tablecloth. Lay out paints, brushes, and extras so kids can see all their choices.
- Prime the rocks (optional). For bright colors, you can paint a base coat of white acrylic. This step is optional but gives a crisp finish, especially on dark rocks.
- Sketch your design. Use a pencil to lightly draw the outline of your critter. Simple shapes are easiest for kids. For example, a ladybug starts with an oval body and a line for wings.
- Paint the base colors. Fill in large areas first—like the body or face. Let this layer dry before adding details. Acrylic paint dries quickly, usually in 10-20 minutes.
- Add details. Use smaller brushes or permanent markers for eyes, spots, stripes, or tiny feet. This is where critters come to life! Attach googly eyes or foam pieces with glue for extra fun.
- Seal the critters. When the paint is fully dry, spray with a sealer or brush on Mod Podge. This protects the design and makes colors pop, especially if the critters will live outdoors.
Practical insight: Kids often want to rush through steps. Remind them that waiting for paint to dry means their designs won’t smudge. Patience pays off!
Popular Painted Rock Critter Ideas
If you need inspiration, here are some favorite critter designs that are easy for kids:
| Critter Type | Base Color | Key Details |
|---|---|---|
| Ladybug | Red or yellow | Black spots, line down the back, white eyes |
| Bumblebee | Yellow | Black stripes, white wings, big smile |
| Turtle | Green | Hexagon pattern for shell, glued-on foam feet |
| Frog | Bright green | Big eyes, wide mouth, pink cheeks |
| Owl | Brown or gray | Large round eyes, feather patterns, orange beak |
| Fish | Blue, orange, or gold | Wavy stripes, glitter fins, shiny scales |
| Dog or Cat | Any color | Ears, nose, whiskers, tail (can use felt or foam) |
| Monster | Bright or neon colors | Extra eyes, silly teeth, wild hair (yarn or felt) |
Extra tip: Let kids invent their own creatures—maybe a rainbow unicorn, a dragon, or a butterfly. There are no rules, just imagination!
Comparing Paint Types For Rock Critters
Choosing the right paint can affect how your critters look and last. Here’s a side-by-side comparison of common paint options:
| Paint Type | Pros | Cons | Best For |
|---|---|---|---|
| Acrylic | Bright colors, dries fast, water-based, durable | May stain clothes, needs sealing for outdoors | All ages |
| Tempera | Washes out easily, safe for kids | Less durable, can flake off rocks | Young children, indoor crafts |
| Paint pens | Easy details, no mess, precise lines | May dry out fast, less coverage for large areas | Older kids, outlining |
For most projects, acrylic paint is the best mix of color, safety, and durability. Always check labels for non-toxic certification, especially for young children.

Credit: livingtickled.com
Safety And Supervision Tips
While making painted rock critters is very safe, a few precautions keep the activity fun and accident-free:
- Use non-toxic paints and glues to avoid skin irritation or accidental ingestion.
- Supervise glue guns or hot glue—adults should handle these steps.
- Protect clothes and surfaces with aprons and table covers.
- Ventilate the area when using spray sealers. Use outdoors if possible.
- Keep small decorations like googly eyes or beads away from children under 3, as they can be a choking hazard.
Often missed: Some sealers have strong fumes. Always read instructions and avoid spraying near food or pets.
Creative Ways To Use Painted Rock Critters
After making critters, kids love to show them off. Here are some clever ways to use painted rocks beyond just display:
- Garden markers: Use critters to label plants. A painted bee for basil, a turtle for thyme.
- Story stones: Create a set of animal critters and use them to tell stories or act out adventures.
- Kindness rocks: Paint uplifting critters and leave them in parks or playgrounds for others to find.
- Paperweights: Heavier rocks make colorful desk accessories for parents or teachers.
- Game pieces: Use critters as tokens for board games or scavenger hunts.
Hidden benefit: Making kindness rocks encourages empathy and community spirit—kids love the idea of brightening someone’s day with their art.
Troubleshooting Common Problems
Even with good preparation, you may run into a few bumps. Here’s how to handle the most frequent issues:
- Paint peels or flakes off: The rock may not be clean or dry enough, or the paint isn’t suitable for stone. Wash, dry, and use acrylics for best results.
- Colors look dull: A white base coat helps colors stand out. Sealing the finished critter also makes colors richer.
- Details are messy: Let each color dry before adding the next layer. Use fine brushes or markers for small features.
- Googly eyes fall off: Use strong white glue and press down for 10 seconds. Let the glue dry completely before moving the critter.
- Paint smudges: Remind kids to paint one side at a time and wait for it to dry before flipping or adding extras.
Making Painted Rock Critters With Groups
If you’re organizing this craft for a class, party, or scout troop, a little planning helps:
- Pre-wash and dry rocks ahead of time.
- Set up painting stations by color or critter type.
- Offer design templates for younger children or those who need inspiration.
- Encourage sharing and teamwork—kids can swap rocks or help each other with tricky steps.
- Display finished critters on a table or garden area for a group photo.
Useful insight: Kids often get more creative when they see each other’s designs—group projects spark new ideas!
Cleaning Up After Crafting
Painting can get messy, but cleanup is simple if you’re prepared:
- Wipe brushes with water between colors and wash well at the end.
- Use wet wipes or damp cloths for hands and tables.
- Collect leftover paint on palettes and cover with plastic wrap to reuse later.
- Store extra rocks, eyes, and decorations in labeled bins for future crafts.
Remind kids to help with cleanup—it teaches responsibility and respect for materials.
Frequently Asked Questions
What Kind Of Rocks Are Best For Painting Critters?
Smooth, flat rocks are easiest to paint and decorate. River rocks or beach stones are ideal, but store-bought craft rocks work too. Avoid porous or crumbly stones, as paint won’t stick well.
Can I Use Regular Craft Paint Instead Of Acrylic?
You can use tempera paint for very young children, but it doesn’t last as long and may rub off. Acrylic paint is best for durability and bright colors. Always choose non-toxic types for kids.
How Do I Make Painted Rock Critters Waterproof?
After painting and drying, seal the rocks with a clear spray sealer or brush-on Mod Podge. This protects the paint from rain, sun, and dirt—especially important for outdoor critters.
Is It Safe For Toddlers To Make Painted Rock Critters?
Yes, with supervision. Use only non-toxic paints and glues. Skip small parts like googly eyes for children under three, as these can be choking hazards. Help toddlers with larger brushes and simple designs.
Where Can I Find More Painted Rock Critter Ideas?
You’ll find inspiration on craft blogs, social media, and community art projects. For more creative ideas, visit The Spruce Crafts for a wide collection of tutorials and photos.
Painting rock critters is more than a simple craft—it’s a fun, creative journey that brings kids closer to art and nature. With a little patience and the right materials, you’ll watch children light up as their critters come alive. Whether you’re making one or a whole zoo, these painted rocks will become treasures for years to come.

Credit: childhoodmagic.com