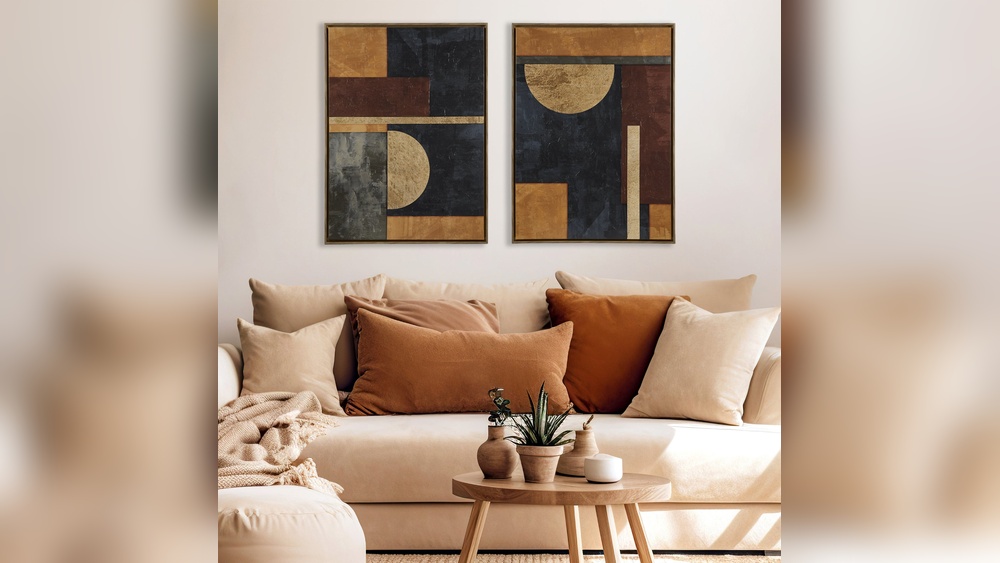
Quick answer: To paint a multi-canvas wall art set, decide on the layout first (row, grid, staggered or mixed sizes), map it full size on the floor or wall with paper templates, and choose a limited palette of three to five colors that repeats on every canvas. Paint all canvases at the same time with batch-mixed colors, using a continuous design, repeated motif or shared color blocks to tie them together. Finish every canvas with the same edge treatment and varnish, then hang with equal gaps measured from a single center point.
A multi-canvas wall art set fills big walls in a way a single canvas often cannot. Four squares in a grid, five tall panels in a row, or a cluster of mixed sizes can stretch across a whole sofa wall or stairwell for a fraction of the cost of one huge canvas, and smaller canvases are easier to paint, store and move.
This guide explains how to paint a multi-canvas wall art set that looks unified rather than random. It covers layouts and sizing, the design strategies that connect separate canvases, a painter’s tape geometric project, and how to measure and hang a set so the gaps stay even.
Start with the Wall, Not the Canvas
Planning backward from the wall avoids the most common mistake: a set that looks lost or cramped once it is hung.
- Measure the wall area you want to fill. Above furniture, aim for the whole set to span about two-thirds to three-quarters of the furniture’s width.
- Choose the arrangement (see layouts below).
- Do the math. Total width = (number of canvases across x canvas width) + (number of gaps x gap width).
- Adjust canvas size until the total fits.
Example: a sofa 84 inches wide suits art about 56 to 63 inches wide. Three 18 x 24 inch canvases with two 3-inch gaps span 60 inches. Four 12 x 12 canvases in a 2 x 2 grid with 2-inch gaps span 26 inches, which would look small above that sofa but works well over a side table or in a hallway.
If you want help choosing sizes and formats for a specific room, our guide to canvas for wall art covers large and multi-panel formats with layout examples.
Popular Multi-Canvas Layouts
| Layout | Canvases | Look | Best wall |
|---|---|---|---|
| Horizontal row | 3 to 5 equal canvases | Calm, panoramic | Above sofas, beds, sideboards |
| Square grid | 4 (2×2), 6 (2×3) or 9 (3×3) | Modern, orderly | Feature walls, offices, dining rooms |
| Vertical stack | 2 to 3 canvases | Tall, elegant | Narrow walls, beside doors |
| Staggered heights | 3 to 5 tall panels at different heights | Dynamic, like a skyline or sound wave | Wide living room walls |
| Mixed sizes | One large plus several smaller | Curated, gallery-like | Stairwells, large open walls |
Equal-size layouts are easiest to paint and hang. Mixed sizes look curated but need more planning so the visual weight balances.
Balancing a Mixed-Size Set
Mixed-size arrangements are the trickiest to get right, because larger canvases carry more visual weight. A few principles keep them balanced:
- Anchor with the largest canvas. Place it slightly off-center, then balance it with two or three smaller canvases on the opposite side.
- Keep one consistent edge. Align either the tops, the bottoms or the center line of all canvases. One shared line makes a varied group look intentional.
- Distribute color as well as size. A small canvas painted in a strong, dark color can balance a larger, paler one.
- Keep gaps equal even when sizes vary. Consistent spacing is what makes an irregular group read as a set.
Lay the canvases on the floor and rearrange them several times before painting. Take a photo of each arrangement and compare them on your phone; it is often easier to judge balance in a small image.
Choosing Canvases for a Set
For a cohesive set, match the canvases in depth and surface. Stretched canvas multi-pack sets solve this automatically because every canvas comes from the same batch. Look for:
- Consistent depth. Gallery-depth (about 1.5 inches) gives a substantial look frameless; standard depth (about 3/4 inch) is lighter and cheaper.
- Same primer and weave. Different surfaces absorb paint differently, which can shift colors.
- Square corners and tight canvas. Loose or warped canvases are obvious when lined up together.
Canvas boards sets are a good budget option for small grids, especially if you plan to frame each piece. For large canvas sets above a sofa or bed, stretched canvas hangs more easily and looks more substantial.
Five Ways to Tie a Multi-Canvas Set Together
The difference between a set and a random group is a shared visual system. Pick one or combine two.
1. Continuous image
One painting split across all canvases: a landscape, a large abstract, a giant flower. The gaps become part of the design, so avoid placing small focal details on gap lines.
2. Repeated motif
The same subject painted on each canvas with variations: four leaves, five birds, six circles in different color combinations. This works especially well for grids.
3. Shared palette
Different subjects or abstract compositions, but every canvas uses the same three to five colors. This is the most flexible approach and the easiest for beginners.
4. Color progression
Each canvas shifts gradually along a color sequence, such as light blue to navy, or yellow through orange to red. The set reads as a deliberate gradient across the wall.
5. Crossing lines and shapes
Geometric lines, curves or color blocks that cross from one canvas to the next. Even if each canvas has its own design, the lines that continue across gaps lock the set together.
How to Paint a Multi-Canvas Wall Art Set: Step by Step
Step 1: Make a small mock-up
Sketch the layout to scale on paper, including the gaps. Color it with markers or colored pencils to test the palette. This takes 20 minutes and prevents hours of repainting.
If you work digitally, a photo of the empty wall plus simple colored rectangles in any drawing app gives an even better preview. You can try different palettes, swap the order of canvases and see how the set will sit next to furniture, windows and light switches before a single brushstroke.
Step 2: Lay out the canvases
Arrange the canvases on the floor or a large table exactly as they will hang, with spacers in the gaps. Number them on the back and mark the top edge.
Step 3: Prime and tone together
If adding extra gesso or a toned ground, apply it to every canvas in the same session with the same mix.
Step 4: Sketch across the set
Draw your design across all canvases at once. For a continuous image or crossing lines, use a long straightedge and mark where lines meet each canvas edge.
Step 5: Batch mix colors
Mix every color in a quantity large enough for the whole set, and store mixes in airtight containers. Color matching later is difficult, and even slight differences stand out when canvases sit side by side.
Step 6: Paint color by color, not canvas by canvas
Apply each color across all canvases before moving to the next. This keeps color, brushwork and texture consistent throughout the set.
Step 7: Paint the edges
Decide on one edge treatment and use it everywhere: continuing the image around the sides, a solid color, or white. Inconsistent edges are noticeable from the side.
Step 8: Review as a group
Stand the canvases up in their layout and view them from across the room. Look for an empty or overly busy canvas and adjust so the visual weight feels balanced.
Step 9: Varnish together
Use one varnish product and sheen for all canvases, applied in the same session.
Beginner Project: Painter’s Tape Geometric Set
This is one of the easiest ways to make a striking multi-canvas set, and it is ideal canvas art for beginners.
- Line up three or four canvases with spacers.
- Paint all canvases with a light base color and let them dry.
- Run strips of painter’s tape diagonally across all canvases, crossing the gaps, to create triangles and polygons. Press the tape firmly at the canvas edges.
- Paint each section a different color from your palette of four or five. Spread colors so no two adjacent sections match.
- Paint a thin layer of base color over tape edges first to seal them and prevent bleeding.
- Peel the tape while the last coat is slightly damp to reveal crisp white or base-color lines.
Because the tape lines cross from canvas to canvas, the set reads as one composition even though each canvas looks good alone.
More Multi-Canvas Ideas
- Abstract pour across a set: Line up canvases tightly and pour paint across all of them at once for a connected flow.
- Botanical grid: Nine small canvases, each with a different leaf in the same color scheme.
- Ocean panorama: Five tall panels showing a continuous seascape.
- Color gradient row: Five canvases moving from pale to deep shades of one color.
- Circle series: Each canvas holds one painted circle, overlapping canvas edges in a few places.
- Mountain range with staggered heights: Tall panels hung at different heights following the peaks.
- Quote split across canvases: One word per canvas for a bold typographic statement. Our guide on painting a quote on canvas wall art covers layout and lettering techniques.
Hanging a Multi-Canvas Set
- Make paper templates for each canvas and mark hanging hardware positions on them.
- Find the center point of the whole arrangement and mark it on the wall, typically 57 to 60 inches from the floor for eye level, or 8 to 10 inches above furniture for the bottom edge.
- Tape templates to the wall outward from the center with equal gaps. Use a level and a spacer block.
- Install hardware through the templates, then remove the paper.
- Hang the center canvas first and work outward, checking gaps and level after each.
D-rings hung on two hooks per canvas keep each piece from tilting, which is important in a grid where any crooked canvas is obvious.
How to frame a canvas art set
Multi-canvas sets usually look best frameless with painted edges, which keeps gaps clean. If you prefer frames, use identical floater frames on every canvas and increase the gap slightly to account for frame width.
Common Mistakes
- Sizing the set too small for the wall. Measure and calculate before buying canvases.
- Unequal gaps. Use spacer blocks both when painting and hanging.
- No shared system. Without a common palette, motif or continuous design, canvases look unrelated.
- Mixing colors per canvas. Leads to subtle mismatches.
- Different edge treatments or sheens. Breaks the unity of the set.
- Focal details on gap lines. Keep important small elements fully on one canvas.
FAQs
How many canvases should a multi-canvas set have?
Three is the most common because it balances naturally, but sets of two, four, five, six and nine all work. Odd numbers feel dynamic in rows; even numbers suit grids.
What size gap should be between canvases?
About 2 to 3 inches for small and medium canvases, and 3 to 4 inches for large ones. Keep every gap identical.
Should multi-canvas art be one continuous image?
Not necessarily. A shared palette, repeated motif or crossing lines can unify separate designs just as effectively. Continuous images are striking but need more careful alignment.
Are stretched canvas multi-pack sets good for wall art?
Yes. Multi-packs keep depth, weave and primer consistent across canvases, which helps the set look unified. Gallery-depth packs suit frameless display.
How do I keep colors consistent across a canvas set?
Batch mix every color in enough quantity for all canvases, store mixes in airtight containers, and paint one color across every canvas before moving to the next.
What is the easiest multi-canvas painting for beginners?
A painter’s tape geometric design across three or four canvases. It needs no drawing skill and produces crisp, modern results.
Final Thoughts
A multi-canvas wall art set succeeds through planning: measure the wall first, choose a layout, give every canvas a shared visual system, and paint them together with batch-mixed colors. Consistent edges, matching varnish and equal gaps make it read as one piece.
When you are ready to choose canvases for your next set, compare formats and sizes in our guide to large abstract canvas options for wall art.