
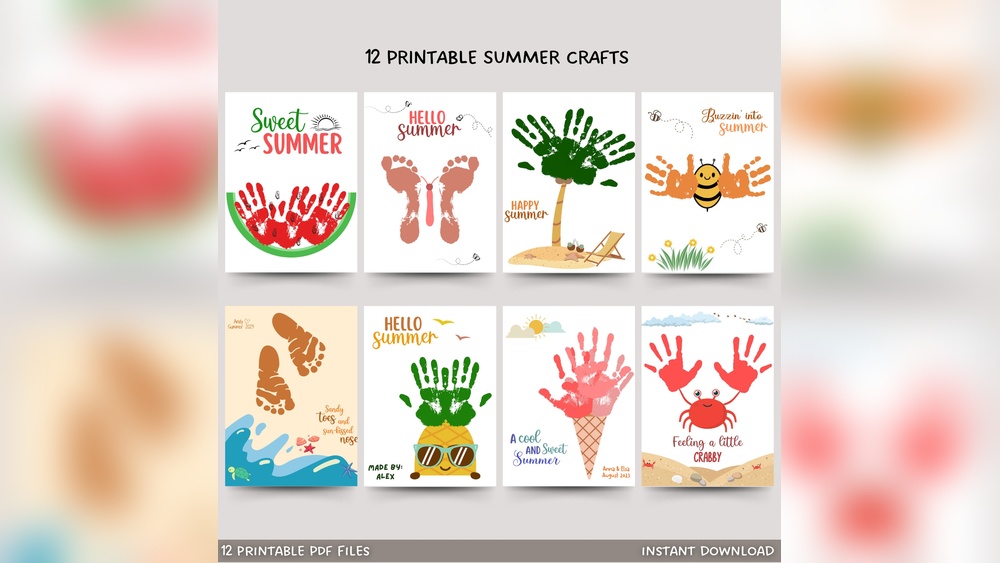
Quick answer: For foot and handprint painting with kids, brush a thin, even coat of washable, non-toxic paint onto the child’s palm or sole with a foam brush, then press the hand or foot flat onto heavy paper or cardstock and hold it for two or three seconds. Lift straight up, wipe the skin right away, and let the print dry. Thin paint and a firm, still press are what give clear lines and fingertip detail instead of a blurry blob.
Handprints and footprints are one of the few kinds of children’s art that become more precious with time. A print from a six-month-old next to one from the same child at five shows growth in a way photos rarely do. The catch is that babies and toddlers do not hold still, and a smudged print is hard to redo once the moment has passed.
This guide explains how to do foot and handprint painting kids will enjoy and parents will want to keep: which paint is safe for skin, how to get a crisp print from a wriggling baby, more than a dozen handprint and footprint art ideas, and how to preserve the results. If you are choosing paint first, our comparison of the best paint for kids’ handprints covers washable, skin-safe options in detail.
Choosing Paint for Handprint and Footprint Art
Paint goes directly on skin here, so choice matters more than in most kids’ projects. Look for these qualities:
- Non-toxic with appropriate labeling. Check for an ASTM D-4236 conformance statement and the age guidance on the label. Some products are specifically marketed for use on skin.
- Washable. It should come off skin with warm water and mild soap. “Non-toxic” alone does not mean washable.
- Smooth, creamy consistency. Thick enough not to run, thin enough to spread in a light film.
- Strong pigment. A thin coat should still give an opaque print.
Paint types compared
| Paint type | Suitability on skin | Print quality | Notes |
|---|---|---|---|
| Washable tempera | Commonly used for kids’ handprints | Good, bold color | Can crack on flexible surfaces once dry |
| Washable finger paint | Designed for hands | Fair to good; can be thick | Thin slightly for crisper detail |
| Ink pads labeled safe for baby prints | Made for skin | Very fine detail | Small prints only; limited colors |
| Craft acrylic | Not ideal; harder to wash off and not designed for skin | Excellent and permanent | Better avoided on babies and toddlers |
| Fabric paint | Check label; many are not meant for skin | Permanent on cloth | Use only products labeled appropriate for this use |
If your child has sensitive skin or eczema, test a small dab on the inside of the wrist and wait 10 to 15 minutes before doing a full handprint. Avoid painting broken or irritated skin.
Supplies
- Washable, non-toxic paint in a few colors
- A 1 to 2 inch foam brush or soft flat brush (foam spreads the thinnest, most even layer)
- Heavy paper: cardstock, mixed-media paper or watercolor paper. Canvas panels work for keepsakes.
- Baby wipes and a bowl of warm, soapy water with a washcloth
- Paper towels
- A second adult, if possible, for babies
- A pen for writing names and dates
How to Do Handprint Painting: Step by Step
- Set up everything first. Paper taped down, paint on a plate, wipes open. Once paint is on a child’s hand, you have seconds before it ends up elsewhere.
- Wash and dry the hand. Clean, dry skin takes paint more evenly. Lotion or food residue causes patchy prints.
- Brush on a thin coat. Hold the child’s wrist gently and brush paint over the palm and fingers in one or two quick strokes. Cover the fingertips and the sides of fingers. Too much paint fills the creases and loses detail.
- Spread the fingers. Ask older kids to “make a starfish.” For babies, gently open the hand; pressing on the back of the hand often relaxes the fingers.
- Press down firmly. Place the hand flat and press on the back of the hand and each finger for two to three seconds. Keep the hand still.
- Lift straight up. Peel the hand off in one motion. Sliding causes smears.
- Wipe immediately. Clean the hand with a wipe, then wash with warm soapy water.
- Label and dry. Write the name and date near the print. Dry flat for about 30 minutes to an hour.
How to Do Footprint Painting: Step by Step
Footprints are trickier because feet curl and toddlers want to walk off with wet soles. Have towels on the floor between the paper and anywhere carpeted.
- Seat the child. A child sitting on a lap or in a high chair is easier to manage than one standing.
- Paint the sole. Brush a thin coat over the sole, heel and toes, including the pads of the toes.
- Bring the paper to the foot. For babies, it is often easier to press a sheet of cardstock (on a clipboard or a book) up against the foot instead of placing the foot on paper. Press from heel to toe, then hold.
- For toddlers, stand and step. Hold the child under the arms and lower the painted foot straight down onto paper on the floor. Let them put weight on it, then lift straight up.
- Clean before feet touch the floor. Have a wipe and towel ready.
Tips for crisp prints from babies
- Try when the baby is drowsy, fed and calm, or even asleep for footprints.
- Work with two adults: one holds and soothes, one paints and presses.
- Make several prints in one go and keep the best. Expect a few to be partial.
- Small paper on a clipboard is easier to maneuver than a big sheet on a table.
Handprint and Footprint Art Ideas
Prints become pictures with a few added details. Let the print dry fully before drawing on it.
Handprint animals
- Fish: Turn a handprint sideways with the fingers as the tail. Add an eye and bubbles.
- Peacock or turkey: Overlap several handprints in different colors in a fan for tail feathers; add a body in the center.
- Octopus: Upside-down hand with fingers as tentacles. Add a fourth color for spots.
- Lion: A circle of yellow and orange handprints around a face forms the mane.
- Elephant: Print a hand with the thumb pointing down as the trunk; fingers become legs.
- Butterfly: Two handprints with the palms touching at the center form the wings.
Footprint pictures
- Penguin: A black footprint with a white belly painted in the middle; add orange feet and beak.
- Ghost: A white footprint on black paper with the heel as the head.
- Pineapple: A yellow footprint with criss-cross lines and green leaves at the heel.
- Snowman: Two white footprints heel to heel make a snowman body; add a hat and scarf.
- Butterfly: Two footprints with the heels touching form wings.
Seasonal and keepsake ideas
- Handprint tree: Paint a trunk and branches; children add handprints in green for spring or red, orange and yellow for fall.
- Family handprint canvas: Each family member prints in a different color, overlapping, with names and the year.
- Growth chart: One handprint per birthday on the same long sheet or canvas.
- Holiday cards: Reindeer from brown handprints (fingers as antlers), wreaths from green handprints in a ring.
- Mother’s or Father’s Day: A handprint flower bouquet with painted stems.
Starting a Yearly Handprint Tradition
Many families make a handprint on the same date every year, often a birthday or the first day of school. A little planning makes the collection more meaningful later:
- Use the same paper size and color each year so the prints line up neatly in a folder or frame.
- Keep the same paint color for the main print. Growth is easier to see when only the size changes.
- Add a short note each year: favorite food, best friend, something the child said. These details are what people tend to treasure.
- Store prints flat in an acid-free portfolio or archival box with sheets of plain paper between them.
- Try a single long canvas where each year’s print goes beside the last, with the age written underneath.
Doing Handprints With Several Children
Classrooms, siblings and playdates add a new challenge: several painty hands at once. Run it as a station with one child at a time while the others draw or play nearby. Pre-label each sheet with a name before painting begins, and keep a basin of soapy water and a stack of washcloths at the station so each child is cleaned up before rejoining the group. For group projects like a handprint tree or a class flag, assign each child a color in advance to avoid the paint plates getting mixed.
Handprint Painting by Age
| Age | What works | Biggest challenge |
|---|---|---|
| Newborn to 6 months | Footprints while sleeping or calm; small handprints on a clipboard | Fists stay closed; use gentle back-of-hand pressure |
| 6 to 18 months | Quick prints with two adults | Grabbing and mouthing painty hands |
| 18 months to 3 years | Simple prints, handprint animals with adult details | Wanting to smear and play in the paint |
| 3 to 6 years | Child presses own hand; adds details with markers | Fingers sliding during the press |
| 6 and up | Child paints own hand and designs the picture | Using too much paint |
Troubleshooting Blurry or Patchy Prints
| Problem | Cause | Fix |
|---|---|---|
| Print is a solid blob, no creases | Paint too thick | Brush a thinner coat; blot hand once on scrap paper |
| Missing palm center | Palm is naturally cupped | Press down on the back of the hand at the center |
| Smudged fingers | Hand moved or slid | Hold each finger down briefly; lift straight up |
| Faint, patchy color | Too little paint or oily skin | Wash and dry skin; add a little more paint |
| Paper wrinkles | Thin paper | Use cardstock or watercolor paper |
Preserving Handprint and Footprint Art
- Dry completely before stacking or framing. Thick areas can stay tacky longer than they look.
- Use acid-free paper for keepsakes so the paper is less likely to yellow over the years.
- Frame behind glass or keep in a sleeve. Tempera can flake if the paper bends often.
- Seal canvas prints with a clear acrylic varnish once fully dry, following the varnish label.
- Keep out of direct sun. Many kids’ paints fade over time with strong light exposure.
- Scan or photograph each print to keep a digital copy at full size.
- Write details on the back: name, age in months or years, and the date.
Cleaning Up
Wipe skin immediately, then wash with warm water and mild soap. Paint lodged in nail edges or skin creases usually comes out with a soft washcloth. For clothing, rinse fresh washable paint from the back of the fabric with cold water, then launder. Wipe tabletops and high chair trays with a damp cloth before the paint dries.
FAQs
What paint is safe for kids’ handprints?
Washable, non-toxic paints labeled for children’s use, such as washable tempera or finger paint, are the usual choices. Check labels for age guidance and an ASTM D-4236 statement, and avoid craft acrylics on babies and toddlers.
How do I get a clear handprint from a baby?
Use a very thin coat of paint, gently open the fingers by pressing on the back of the hand, and press the paper up to the hand rather than the other way around. Two adults and a calm, fed baby make it much easier.
What paper is best for handprint art?
Cardstock, mixed-media paper or watercolor paper. Heavier paper does not wrinkle and holds up to framing. Use acid-free paper for keepsakes.
How do you do footprints on a toddler?
Seat the toddler, paint the sole thinly, then hold them under the arms and lower the foot straight down onto paper on the floor. Lift straight up and wipe the foot before it touches anything else.
How long does handprint paint take to dry?
Thin coats of washable tempera usually dry in 30 minutes to an hour. Thicker areas and humid rooms take longer, so wait before adding marker details or framing.
Can I do handprints on canvas or fabric?
Yes, on canvas with washable tempera for a keepsake, sealed with varnish once dry. For fabric, use paint labeled for fabric and check that the product is appropriate for contact with skin before using it on a child’s hand.
Final Thoughts
Foot and handprint painting is quick to set up and creates keepsakes families hold onto for years. Prepare everything before the paint comes out, keep the coat thin, press firmly and lift straight up, then turn the prints into animals, trees or cards once they dry. Before your first session, read our guide to safe, washable paints for handprint art so you start with a product suited to young skin.




