
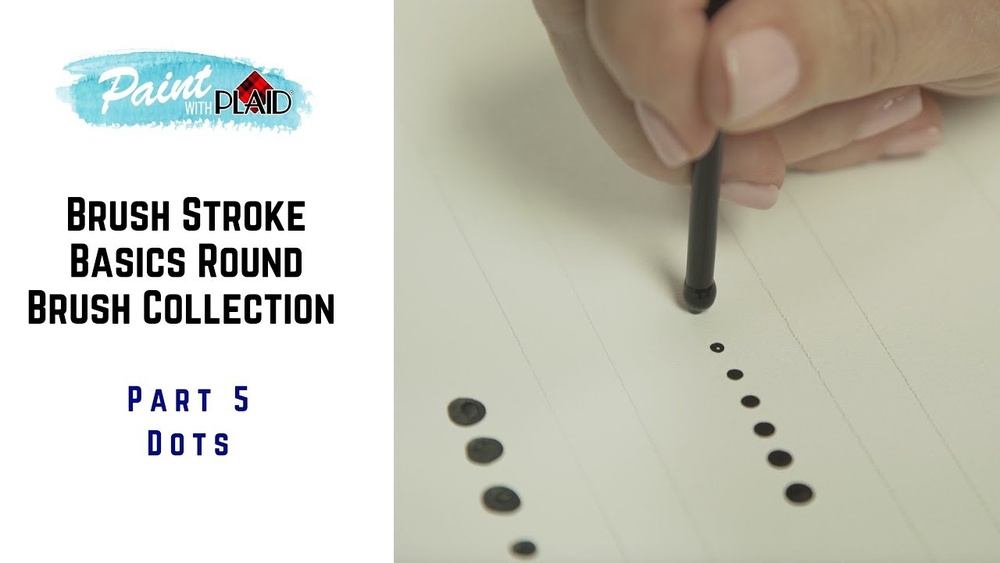
Quick answer: To paint dots with a round brush, thin your paint to a smooth, creamy consistency, load the front half of the brush and form a point. Hold the brush upright (about 90 degrees to the surface), touch the tip down, press gently until the hairs spread to the dot size you want, then lift straight up without twisting or dragging. Lighter pressure makes small dots, more pressure makes larger ones, and reloading every one to three dots keeps them consistent.
Dots look simple until you try to make twenty that match. Some come out lopsided, some leave a little tail, some flatten into smudges. The round brush is the most versatile tool for dots because a single brush can make pinpricks with its tip and wide, soft circles when pressed down. The secret is controlling three things: pressure, paint consistency and the angle of the lift.
This guide explains how a round brush makes a dot, the step-by-step method, how to size dots consistently, and fixes for the problems that make dots look uneven.
What Is a Round Brush?
A round brush has hairs gathered in a round ferrule, forming a full “belly” that tapers to a point. That shape gives it a range no other brush matches: the tip draws fine lines and tiny dots, while the belly, pressed down, lays broad strokes and large dots. Rounds come in sizes from tiny 20/0 or 10/0 detail brushes up to size 20 and beyond. Sizes are not standardized between brands, so a size 6 from one maker can be noticeably larger than a size 6 from another.
Round Brush Differences That Affect Dots
| Feature | Effect on dots |
|---|---|
| Soft hair (sable, soft synthetic) | Smooth, rounded dots with soft edges; spreads easily under pressure |
| Firm hair (stiff synthetic, bristle) | More controlled spread; better with thick acrylic or oil |
| Fine point | Small, crisp dots from the tip |
| Full belly | Holds enough paint for several dots between reloads |
| Short hair length | Easier to control dot size; less spread under pressure |
| Long hair length | Larger range of dot sizes, but harder to keep consistent |
A round that keeps a sharp point after rinsing will give you far more consistent dots than one with a split or splayed tip. If your round has lost its point, it may be time for a replacement, and our guide to the best paint brushes, including round brushes for detail covers what to look for.
What You Need
- Two or three round brushes in different sizes, for example a size 1, size 4 and size 8
- Paint: acrylic, gouache or watercolor work well; oil works too with a little medium
- Water or medium for thinning
- A palette
- Scrap paper or card for practice
- Paper towel for blotting
Get the Paint Consistency Right
Consistency matters more for dots than for almost any other mark.
- Too thick: Paint clings to the brush, dots come out uneven and often form a peak or tail as you lift.
- Too thin: Dots spread, bleed into the paper or puddle into irregular shapes.
- Just right: Smooth and creamy, like heavy cream or melted ice cream for acrylic. The paint should flow off the brush easily and settle into a dome that self-levels.
For acrylic, add water a few drops at a time, or use a flow improver or fluid medium to keep the color strong. For watercolor, a richer mix than usual gives a crisper dot. For oil, a little medium helps the paint release cleanly from the brush.
How to Paint Dots With a Round Brush: Step by Step
- Dampen and blot the brush. A slightly damp brush releases paint more evenly than a dry one.
- Load the front half. Dip into the paint and roll the brush on the palette to work color into the belly and form a point.
- Hold the brush vertically. Keep it at roughly 90 degrees to the surface. An angled brush makes oval or teardrop dots.
- Brace your hand. Rest your little finger or wrist on the table or a mahlstick for steadiness.
- Touch down with the tip. For the smallest dot, stop here and lift.
- Press for a bigger dot. Push gently down so the hairs spread into a circle. The more pressure, the larger the dot.
- Lift straight up. Do not twist, drag or flick. A clean vertical lift prevents tails.
- Reload regularly. Reload after every one to three dots for consistent size, depending on the brush.
- Wipe the tip as needed. Dried paint at the tip causes ragged dots. Rinse and reshape every few minutes with acrylic.
Controlling Dot Size
Dot size depends on brush size, pressure and how much paint is on the brush. As a rough guide for a standard round with medium-length hair:
| Round size | Tip touch only | Medium press | Full press |
|---|---|---|---|
| 10/0 to 0 | Pinpoint | About 1 mm | About 1 to 2 mm |
| 2 to 4 | About 1 mm | About 2 to 3 mm | About 3 to 5 mm |
| 6 to 8 | About 1 to 2 mm | About 4 to 6 mm | About 6 to 10 mm |
| 10 to 14 | About 2 mm | About 6 to 10 mm | About 10 mm and up |
These are approximate; brand sizing and hair length vary. Make a test strip for each brush, labeled with the pressure you used, and keep it as a reference.
Making Dots the Same Size
- Use the same brush, same pressure and same paint load for every dot in a row.
- Reload on a fixed count, such as every two dots.
- Keep the paint consistency stable. Acrylic thickens on the palette as it dries, so add a drop of water every so often.
- Paint a few “warm-up” dots on scrap after each reload to remove excess.
Graduated Dots
For dots that shrink along a line, load once and keep dotting without reloading. Each dot uses up paint, so they naturally get smaller. This is a quick way to create decorative trails, petals or patterns that fade.
Other Ways to Make Dots With a Round Brush
The Handle End
The blunt end of a brush handle makes extremely uniform dots. Dip it in paint and touch it straight down. Different brushes have different handle diameters, so a set of brushes doubles as a set of dotting tools. This is the classic technique for dot mandalas, rock painting and folk art.
Stippling
Stippling uses many small dots to build texture, tone or shading. Hold the brush upright and tap rapidly with light pressure, using a slightly drier load. A worn round with a split tip can actually be useful here.
Pointillism
Pointillism places small dots of pure color side by side so they mix optically when viewed from a distance. A small round, size 2 to 4, gives control. Work from larger dots in backgrounds to smaller ones in detail areas.
How to Use a Round Paint Brush Beyond Dots
Practicing dots builds the pressure control you need for every round brush stroke. A few other uses to try:
- Thick-to-thin lines: Start with light pressure, press as you move, then lift. This makes leaves, petals and calligraphic strokes.
- Fine detail: Use just the tip for eyelashes, branches and highlights.
- Washes: Larger rounds hold enough water to lay small washes in watercolor.
- Comma strokes: Press, then pull and lift to make a teardrop shape, common in decorative painting.
Dots in Watercolor, Gouache and Oil
The basic motion is the same in every medium, but each paint behaves a little differently once it leaves the brush.
- Watercolor: Dots on dry paper stay crisp; dots on damp paper bloom into soft spots, which is useful for distant foliage or snow. Use a richer mix than usual, because watercolor dries lighter than it looks wet. A round with a full belly lets you place many dots before reloading.
- Gouache: Opaque and matte, gouache makes clean, flat dots that cover dark backgrounds well. Keep it at light-cream consistency; if it is too thick, the dots crack or look chalky.
- Acrylic: Dries quickly into a slightly raised dot. Add a drop of flow medium for smooth, domed dots on rock painting and mandalas. Rinse the brush often so paint does not harden at the tip.
- Oil: Stays wet for a long time, so you can adjust a dot after placing it. Dots of stiff paint hold texture, while dots thinned with a little medium settle flatter. Avoid placing new dots into wet ones unless you want them to merge.
Planning Dot Patterns and Spacing
Even, deliberate spacing is what makes a row of dots look intentional. A little planning goes a long way.
- Mark guides lightly. Use a pencil, a water-soluble pencil or a compass to draw faint lines or circles where dots should sit.
- Place anchor dots first. For a ring of dots, paint the top, bottom, left and right positions, then fill the spaces between. This keeps spacing balanced.
- Work from large to small. In layered designs, paint the biggest dots first and let them dry before adding smaller dots on top or around them.
- Let each layer dry. Stacking a dot on a wet dot makes both lose their shape.
- Turn the work. Rotate the surface so you always approach the next dot from the same comfortable angle.
Troubleshooting Dot Problems
| Problem | Likely cause | Fix |
|---|---|---|
| Dots have a peak or tail | Paint too thick, or brush lifted at an angle | Thin paint slightly; lift straight up |
| Dots are oval or lopsided | Brush tilted | Hold the brush vertical |
| Dots spread or bleed | Paint too thin, or paper too absorbent | Thicken paint; use heavier paper or prime the surface |
| Dots vary in size | Inconsistent pressure or paint load | Reload on a fixed count; brace your hand |
| Ragged edges | Split tip or dried paint on hairs | Rinse, reshape, or replace the brush |
| Hollow center or ring | Too little paint, brush pressed too flat | Load more paint; use slightly less pressure |
| Dots look flat, not domed | Paint too watery, or absorbed by surface | Use less water or a fluid medium |
Practice Exercises
- Pressure ladder: With one round, paint a row of dots from pinpoint to full press. Repeat until each step looks distinct.
- Matching row: Paint ten dots of identical size. Measure or compare by eye; repeat until consistent.
- Fading trail: Load once and dot until the brush is empty. Observe how size changes.
- Dot flower: Paint a large center dot with five medium dots around it, then small dots between.
- Stipple gradient: Build a value scale from dense dots to sparse dots.
Common Mistakes
- Pressing too hard on a small brush, which bends the hairs and damages the tip over time
- Letting acrylic dry on the brush between dots
- Using paint straight from the tube for small dots, where it is often too thick
- Painting dots on a wet underlayer, which makes them bleed (unless that softness is intended)
- Rushing; dots reward a steady, unhurried rhythm
Best Round Paint Brush Features for Dot Work
Without naming specific products, look for these features in a round brush meant for dots and detail:
- A tip that springs back to a sharp point when wet
- Medium spring, so the hairs return to shape after each press
- A full belly for holding paint between reloads
- A seamless, tightly crimped ferrule so the head stays straight
- Synthetic hair for acrylic; sable or soft synthetic for watercolor
Our Princeton synthetic brush review looks at one range of synthetic rounds often used for acrylic detail.
FAQs
How do you make perfect dots with a paint brush?
Use creamy paint, hold the brush vertical, touch down and press gently to the size you want, then lift straight up. Reload often and keep pressure consistent.
Why do my paint dots have points on top?
The paint is likely too thick, or you are lifting the brush at an angle. Thin the paint slightly and lift straight up without twisting.
What size round brush is best for dots?
For small to medium dots, sizes 2 to 6 cover most needs. Use 0 or smaller for tiny dots and 8 or larger for big, soft dots.
How to use a round brush for painting?
Use the tip for fine lines and small dots, and press the belly down for wider strokes and larger dots. Varying pressure during a stroke gives thick-to-thin lines.
Is the brush handle better than the tip for dots?
For perfectly uniform dots, the handle end is easier because its size does not change. The tip gives more range and softer, varied dots.
What is a round brush used for?
Round brushes handle detail, lines, dots, small washes and expressive strokes. Their pointed tip and full belly make them the most versatile brush shape.
Final Thoughts
Clean dots come from creamy paint, a vertical brush, consistent pressure and a straight lift. Practice a pressure ladder with each round you own, and you will quickly learn what each brush can do. A round with a sharp, springy point makes everything easier, so if yours has worn out, browse our guide to top-rated paint brushes for precise round-brush work for options by medium and budget.





16 Comments