A ripped canvas painting can feel like a disaster, especially if the artwork has sentimental or financial value. But don’t panic—many tears and holes in canvas paintings can be fixed with care, patience, and the right techniques. Whether you’re an artist, a collector, or someone who treasures a family heirloom, learning how to repair a ripped canvas gives you the power to save what matters.
In this article, you’ll discover practical steps, essential materials, and expert tips for restoring damaged canvases at home. You’ll also find guidance on when to call a professional, common mistakes to avoid, and answers to the most frequent questions.
Understanding Rips In Canvas Paintings
Canvas is made from tightly woven fabric, often cotton or linen, stretched over a wooden frame. While it’s sturdy, it’s not immune to accidents. A sharp object, a fall, or even age can cause tears. The type and size of the rip matter.
Small punctures are easier to repair than large gashes. Some tears run with the weave of the fabric, while others cut across, making them more visible.
Knowing the nature of the tear helps you choose the right repair method. For example, vertical or horizontal tears (following the weave) usually blend better after mending. Diagonal rips or holes, especially those with frayed edges, need extra care and often more support from behind.
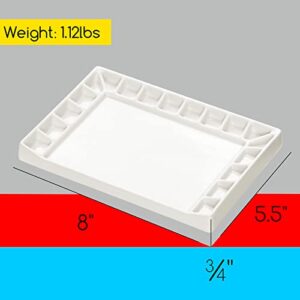
Essential Tools And Materials
Before starting any repair, gather the basic tools and materials. Having everything ready saves time and reduces stress during the process.
| Tool/Material | Purpose |
|---|---|
| Canvas patch | Backing for the ripped area |
| pH-neutral glue | Adhesive for attaching the patch |
| Fine artist’s brush | Applying glue precisely |
| Palette knife or small spatula | Smoothing glue and patch |
| Gesso or acrylic primer | Sealing and preparing the repaired area |
| Matching paints | Touching up the repaired area |
| Tweezers | Handling fine threads and patches |
| Small weights or clamps | Holding patch in place while drying |
| Soft cloth | Cleaning the surface |
Most items can be found at art supply stores. For valuable or antique works, use archival-quality materials to prevent chemical damage over time.
Step-by-step Repair: How To Fix A Ripped Canvas Painting
Fixing a canvas painting is a process that involves patience and attention to detail. Here’s a proven method that works for most rips, from small tears to larger splits.
1. Assess The Damage
First, examine the rip closely. Is it a straight tear or a hole with missing threads? Is the canvas still taut on the frame? If the tear is near the edge or the canvas is loose, you may need to re-stretch the painting after repair.
Take a photo of the damage for reference.
2. Clean The Area
Before starting, gently wipe the area with a soft, dry cloth. Remove any dust or loose paint flakes. If the painting is dirty, avoid using water or chemicals—these can cause further damage.
3. Align The Edges
Carefully bring the torn edges together so they meet as closely as possible. Use tweezers to gently nudge loose threads back into place. For best results, work from the back of the canvas to avoid disturbing the paint surface.
4. Prepare The Patch
Cut a piece of canvas patch slightly larger than the tear. Archival-quality canvas works best. Round the corners of the patch to prevent peeling. If possible, use a patch similar in weight and texture to the original canvas.
5. Attach The Patch
Lay the painting face down on a clean, flat surface. Apply a thin layer of pH-neutral glue around the edges of the patch. Place the patch over the tear, ensuring it covers all damaged threads. Press gently with a palette knife or your fingers. Place small weights or clamps to keep the patch flat while the glue dries (usually 2–4 hours).
6. Seal The Tear
Once the patch is dry, turn the painting over. Apply a small amount of glue along the tear seam on the front of the canvas, using a fine artist’s brush. Smooth any raised fibers or edges. Allow to dry completely.
7. Prime The Area
Lightly brush gesso or acrylic primer over the repaired area. This helps blend the patch with the original canvas and prepares the surface for paint. Let it dry thoroughly.
8. Touch Up With Paint
Mix matching paints to cover the repaired area. Use thin layers, building up color slowly. Blend carefully into the surrounding artwork. If the painting is varnished, wait until the paint is fully dry before reapplying varnish.
9. Inspect And Finish
Check your work in good light. The repaired area should feel smooth and blend with the rest of the canvas. If needed, add a final thin layer of varnish for protection and sheen.
When To Call A Professional Restorer
Some repairs are best left to experts. If your painting is very valuable, antique, or has sentimental value, professional restoration is often safer. Conservators have specialized tools and knowledge to handle complex damage, such as:
- Tears with missing paint or canvas
- Water, mold, or fire damage
- Paintings with multiple layers or delicate surfaces
A professional can also address any underlying issues, like weakened canvas or unstable paint layers. Costs vary, but expert repair preserves both the artwork’s value and its appearance.
Credit: www.chrischalkart.com
Common Mistakes To Avoid
Many beginners make simple errors that can make the damage worse. Avoid these pitfalls for a better result:
- Using household glues (like super glue or school glue). These can turn yellow, weaken the canvas, or damage the paint.
- Over-applying glue. Too much adhesive can seep through the canvas and stain the front.
- Rushing the drying process. Give each step enough time—patience is crucial.
- Using mismatched canvas for patches. This can create visible lines or textures.
- Ignoring the importance of color matching. Poor paint blending makes repairs stand out.
- Skipping the primer. Paint will look uneven and may not stick well without a primed surface.
Alternative Repair Methods
While patching is the most common approach, some rips—especially small ones—can be fixed using other methods.
Thread-by-thread Mending
For minor tears, gently align the threads and glue them without a patch. Use a fine brush to apply glue along the tear, pressing threads together. Once dry, touch up with paint as needed. This method works best for new, clean tears.
Heat-activated Lining
Some conservators use heat-activated adhesives and a special lining cloth. The repair is set with a heated spatula or iron. This method is more advanced and should be done with caution to avoid heat damage.
Self-adhesive Canvas Patches
Pre-glued patches are available at some art stores. These can be helpful for quick fixes on non-valuable works, but they may not last as long or blend as seamlessly as traditional methods.
Comparing Home Repair Vs. Professional Restoration
It’s important to weigh the pros and cons before deciding how to fix your canvas painting. Here’s a quick comparison:
| Aspect | Home Repair | Professional Restoration |
|---|---|---|
| Cost | Low (just materials) | High (can be $100–$500+) |
| Skill required | Basic to moderate | Advanced/expert |
| Risk | Possible permanent damage | Low (with guarantees) |
| Best for | Non-valuable art, practice pieces | Antiques, valuable works |
If you’re unsure, get a quote from a restorer before attempting a home repair.
Tips For Preventing Future Rips
Prevention is always better than cure. Here are some proven ways to protect your canvas paintings:
- Hang paintings away from high-traffic areas and sharp objects.
- Use proper hooks and wall anchors to avoid falls.
- Store unframed canvases upright, with cardboard or foam between them.
- Avoid stacking paintings or placing heavy items against them.
- Keep humidity stable and avoid direct sunlight to prevent canvas brittleness.
- Check for loose or damaged stretchers and tighten as needed.

Credit: www.canvasdiscount.com
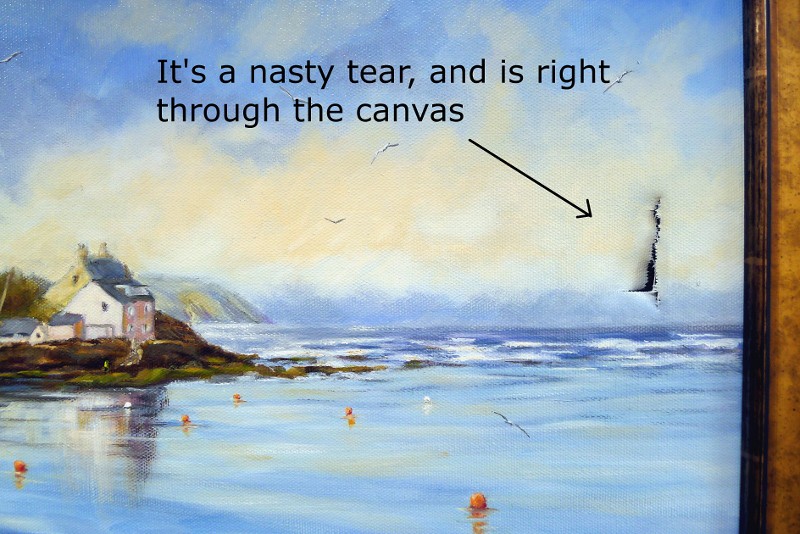
Real-world Example: Fixing A Ripped Canvas At Home
Imagine you accidentally poke a hole in a favorite landscape painting. The tear is about two inches long, running diagonally. Here’s how you could fix it:
- You align the tear, gently pressing the fibers together.
- Cut an archival canvas patch about one inch larger than the tear on all sides.
- Apply a thin layer of pH-neutral glue to the patch, place it behind the tear, and press gently.
- Leave it to dry with a small book as a weight.
- Once dry, you use a small brush to apply glue to the front seam, press fibers flat, and let it dry.
- Prime with gesso, let dry, then blend in matching paint.
- The repair is nearly invisible, and the painting is ready to hang again.
How To Choose The Right Repair Method
Selecting the best fix depends on the size, location, and value of the artwork.
| Type of Damage | Best Repair Method |
|---|---|
| Small, clean tear | Thread-by-thread mending, touch-up paint |
| Large rip, missing fibers | Canvas patch, priming, retouching |
| Edge tear or loose canvas | Re-stretching, patching, possible framing |
| Water or mold damage | Professional restoration only |
If you’re ever in doubt, consult an expert. Some damage, like mold or severe tears, is risky to handle without experience.

Credit: www.chrischalkart.com
Non-obvious Insights For Canvas Repair
Many beginners overlook the importance of humidity control after repair. If the air is too dry or too humid, the patched area can shrink or swell, making the repair visible. Store the painting in a stable environment for at least a week after fixing.
Another tip: always keep a small amount of original paint or note the paint brands and colors you used in the artwork. This makes color matching much easier if future repairs are needed.
Where To Learn More
If you want to see detailed visuals or advanced restoration tips, visit the Wikipedia page on painting conservation. It offers a deeper look at professional methods and history.
Frequently Asked Questions
How Can I Tell If My Painting Needs Professional Repair?
If the artwork is valuable, has complex damage (like missing paint or mold), or if you’re unsure about your skills, seek a conservator. Home repairs are best for practice pieces or less valuable art.
What Type Of Glue Should I Use For Canvas Repair?
Always use pH-neutral or archival-quality glue. Avoid household glues, as they can discolor, weaken the canvas, or damage the paint over time.
Will The Repair Be Visible After I Finish?
If you align the tear, use a matching patch, and blend paint carefully, most repairs are nearly invisible from a normal viewing distance. However, some texture or color difference may be visible up close.
Can I Use Iron-on Patches For Quick Repairs?
Iron-on patches can work for non-valuable art, but they may not last long and can damage heat-sensitive paint. Always test on a small area first and avoid heat on delicate or antique paintings.
How Long Does It Take To Repair A Ripped Canvas Painting?
Most repairs take one to two days, including drying time between steps. Rushing the process often leads to poor results, so allow glue and paint to dry fully before moving to the next step.
Repairing a ripped canvas painting isn’t just about fixing a surface—it’s about restoring memories and value. With patience and attention to detail, you can bring damaged art back to life. If in doubt, don’t hesitate to ask a professional for help.
Your artwork deserves the best care possible.