Painting dinosaurs is a classic art activity that sparks the imagination of kids everywhere. The idea of bringing a mighty Tyrannosaurus Rex or a gentle Brachiosaurus to life with bright colors is both educational and fun. If you’re a parent, teacher, or someone guiding children, you might wonder how to make the process simple, enjoyable, and successful—even for beginners. This guide will walk you through every step, from choosing materials to adding the final touches, while sharing tips that make painting dinosaurs easy and rewarding for kids.
Why Painting Dinosaurs Is Great For Kids
Dinosaur painting is more than a creative pastime. It helps children develop important skills. As kids paint, they improve their hand-eye coordination and fine motor skills. The process also encourages patience and focus, as painting takes time and attention to detail.
Beyond the physical benefits, painting dinosaurs lets kids explore history and science. They can learn about different species, their habitats, and the colors scientists believe these creatures had. This mix of creativity and learning makes dinosaur painting a favorite in homes and classrooms alike.
Gathering Materials: What You Really Need
Many people think you need fancy art supplies to paint well. The truth is, you can start with basic, easy-to-find items. Here’s a comparison of essential and optional materials for painting a dinosaur with kids:
| Essential Materials | Optional Extras |
|---|---|
| Thick white paper or canvas | Googly eyes |
| Pencil and eraser | Stickers |
| Water-based paints (like tempera or watercolor) | Glitter glue |
| Paintbrushes (one small, one medium) | Sponges |
| Cup of water | Cotton swabs |
| Palette or plate for mixing | Plastic dinosaurs for inspiration |
| Paper towels or old cloth | Aprons or old shirts |
You don’t need to buy everything. Simple supplies are best for younger children, as they’re easy to use and clean up. For older kids, adding extras like sponges or googly eyes makes the project even more fun.
Credit: www.deepspacesparkle.com
Choosing The Right Dinosaur
Picking the right dinosaur is important. Some dinosaurs are simple to draw and paint, while others have more details. For beginners, start with dinosaurs that have clear shapes and not too many tiny features.
Here’s a quick look at how easy or hard different dinosaurs are for kids to paint:
| Dinosaur | Shape Complexity | Recommended For |
|---|---|---|
| Tyrannosaurus Rex | Medium | Kids with some experience |
| Stegosaurus | Easy | Complete beginners |
| Brachiosaurus | Easy | All ages |
| Triceratops | Medium | Kids who like details |
| Pterodactyl | Medium | Older kids |
Stegosaurus and Brachiosaurus are favorites for young children because their bodies are made of simple curves and shapes.
Step-by-step Guide: How To Paint A Dinosaur For Kids Easy
Let’s break the process into easy steps. These instructions are designed for children, but work well for adults guiding them, too.
1. Set Up Your Space
Before you start, make sure your workspace is ready. Lay down old newspapers or a plastic tablecloth to protect surfaces. Put on aprons or old shirts to keep clothes clean. Place all your materials within easy reach. A little preparation makes the activity less stressful and more enjoyable.
2. Draw The Dinosaur Outline
Even if painting is the main focus, starting with a simple pencil outline helps kids feel confident. Show them how to use basic shapes:
- A long oval for the body
- A small circle for the head
- Curved lines for the tail and neck
- Four stumpy rectangles for legs
Keep the lines light so they can be erased or painted over easily. For younger children, you can offer dinosaur coloring pages or stencils.
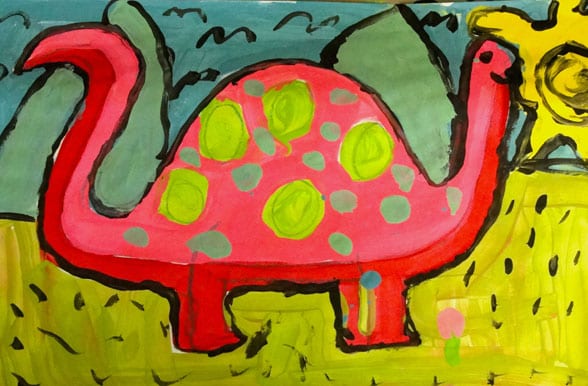
3. Pick Your Paint Colors
Let kids choose their favorite colors. Remind them that dinosaurs probably weren’t just green or brown. Scientists now think dinosaurs might have had patterns, stripes, and even bright colors. Encourage kids to use their imagination.
Mixing paints on the palette is a fun way to learn about color. Show how blue and yellow make green, or how adding white makes a lighter shade.
4. Paint The Body
Start with the largest area—the dinosaur’s body. Use a medium brush and fill in the shape with the main color. If the paint is too thick, add a little water. If it’s too watery, use less on the brush.
Painting in one direction helps the color look smooth. Remind kids to cover all the pencil lines, but not to worry about being perfect—imperfections make each dinosaur unique.
5. Add Details And Features
Once the body is dry, it’s time for details:
- Use a smaller brush for spikes, plates, or horns
- Paint stripes, spots, or patches for a creative look
- Add eyes with a dot of black or glue on a googly eye
- Draw a smile or open mouth with a thin brush or marker
- Paint the claws or toes a different color
Let each layer dry before adding the next. This keeps colors from mixing accidentally.
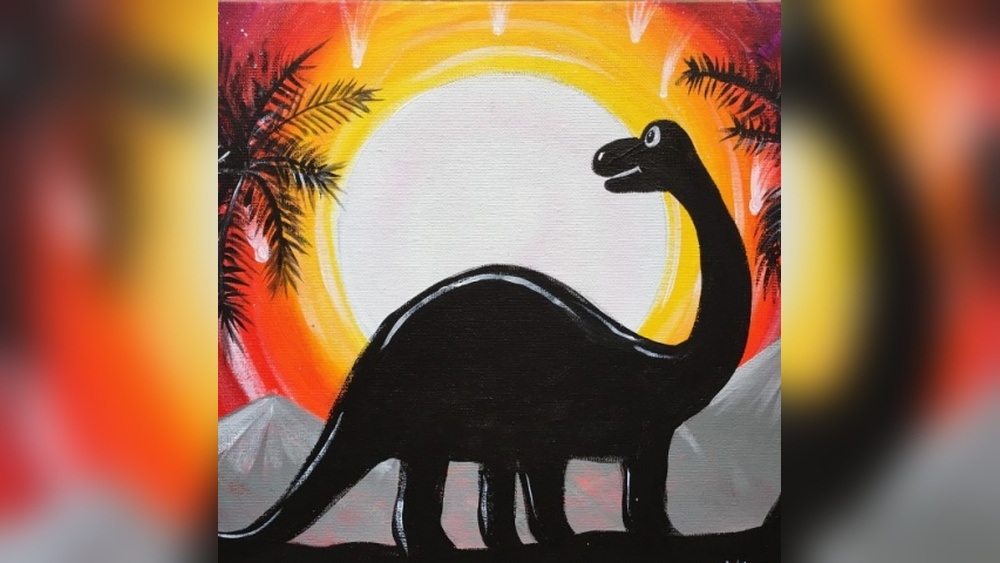
6. Create A Background
A background makes the dinosaur painting more interesting. Simple ideas include:
- Blue sky and green grass
- Volcanoes and mountains
- Palm trees or ferns
- Other dinosaurs in the distance
Encourage kids to keep the background simple, so the dinosaur stands out.
7. Final Touches
Check if any spots need more color or details. Use a clean brush to fix small mistakes or smooth out rough edges. Let the painting dry fully before moving it.
If you want, add a name or date at the bottom. Kids love signing their artwork!
Common Beginner Mistakes (and How To Fix Them)
Even with simple steps, kids (and adults) make mistakes. Here’s how to avoid or fix common problems:
- Using too much water: This can make colors run and paper wrinkle. Solution: Use a dry brush or blot with paper towel.
- Painting over wet paint: Colors will mix and look muddy. Solution: Wait for one layer to dry before adding another.
- Pressing too hard with the brush: This can tear the paper. Solution: Show kids how to use gentle strokes.
- Skipping the outline: Kids often want to start painting right away. A light outline helps them stay on track.
- Not cleaning brushes between colors: This causes unwanted mixing. Keep a cup of clean water handy and remind kids to rinse brushes often.
Creative Variations To Try
Once your child is comfortable with basic dinosaur painting, add some variety:
- Use sponges to make texture on the dinosaur’s skin
- Paint on colored paper for a different look
- Try salt painting: Sprinkle salt on wet paint for a cool effect
- Use cotton swabs to make small dots or patterns
- Add a 3D effect with glued-on materials (like sand or small stones)
These extras help kids experiment and discover new techniques.

Credit: www.youtube.com
Making Dinosaur Painting A Group Activity
Painting dinosaurs is even more fun with friends or classmates. Group painting encourages teamwork and sharing. Try these ideas:
- Collaborative mural: Each child paints a different dinosaur on a big sheet of paper.
- Dinosaur parade: Line up finished paintings to make a “parade” on the wall.
- Themed day: Pair the painting with dinosaur stories or a short educational video.
Group activities can inspire kids to try new ideas and learn from each other.
How To Display And Preserve Kids’ Dinosaur Art
Finished paintings deserve to be seen. Displaying artwork boosts kids’ confidence and shows their effort is valued.
Some display ideas:
- Frame the best paintings and hang them on a wall
- Use string and clothespins to hang a row of dinosaurs
- Create a “gallery” on the fridge or a bulletin board
- Scan or photograph paintings to share with family and friends
To preserve art, let it dry completely before storing. If paint is thick, it may take a few hours. For special pieces, consider laminating or placing in a plastic sleeve to keep them safe.
Non-obvious Insights For Success
Many guides forget these important tips:
- Keep it short: For young kids, painting sessions should last 20–30 minutes. Long sessions lead to frustration or messy results.
- Let kids lead: Adults often want to “fix” children’s work. Guide gently, but let kids make choices, even if the colors are wild or the shapes are funny.
- Celebrate creativity: If a child paints a purple dinosaur with yellow spots, that’s great! Creativity is more important than realism.
Kids remember fun experiences, not perfect paintings.
Benefits Beyond The Canvas
Painting dinosaurs helps with more than art skills. Kids practice decision-making by choosing colors and shapes. They gain confidence as they finish each step. When children share their work, they learn to express themselves and appreciate others’ ideas.
These lessons last longer than the painting itself.

Credit: www.youtube.com
Frequently Asked Questions
What Age Is Best For Dinosaur Painting?
Most kids ages 4 and up can enjoy dinosaur painting. For younger children (under 6), use larger brushes, thick paper, and simple shapes. Older kids can handle more details and new techniques. Adapt the activity to fit the child’s attention span and interests.
How Do I Help A Child Who Says “i Can’t Draw”?
If a child feels unsure, use stencils, simple step-by-step guides, or even print basic outlines for them to paint. The focus is on fun, not perfect results. Encourage the child to try, praise effort, and remind them that every artist started as a beginner.
What Kind Of Paint Is Safest For Kids?
Choose non-toxic, water-based paints like tempera or washable watercolor. These are easy to clean and safe for young children. Always check labels for safety information. For more on safe art materials, visit the Crayola official site.
Can I Use Markers Or Crayons Instead Of Paint?
Yes! Markers, crayons, and colored pencils are great alternatives, especially for younger kids or quick sessions. Paint adds texture and excitement, but any medium works. Try combining materials—paint the body, then add details with markers.
How Do I Clean Up After Painting?
Clean brushes with water right after use. Wipe tables and hands with wet wipes or a damp cloth. If paint gets on clothes, rinse with cold water before washing. Set up a cleaning area before starting to make cleanup easier.
Painting dinosaurs is a simple and joyful way to combine art, science, and play. Whether you’re guiding one child or a whole group, the process is as valuable as the finished picture. With the right materials, a little patience, and lots of encouragement, every child can create their own colorful dinosaur world.