Painting a sun is one of the first creative steps for kids who are learning to express themselves through art. Kids love the sun because it is bright, cheerful, and easy to draw. But if you want to guide children to paint a sun that looks great and helps them learn, you need more than just a yellow circle.
With the right tips, anyone can make this activity fun, simple, and educational.
In this guide, you’ll learn exactly how to paint a sun for kids in easy steps. Whether you’re a parent, teacher, or even a beginner artist, you’ll find clear instructions, practical advice, and creative ideas. By the end, you’ll not only know how to help kids paint a sun, but also how to make the process joyful and full of learning.
Why Painting A Sun Is Great For Kids
Painting a sun is more than just art. It’s an exercise in creativity, color recognition, and fine motor skills. Kids can explore different shapes, try new colors, and experiment with brushes. These activities help build confidence and hand-eye coordination. For younger children, painting a sun also introduces basic science ideas, like why the sun is important.
Painting with children can also strengthen your bond with them. When you paint together, you’re sharing time, talking, and working towards a common goal. This makes the sun painting project valuable in many ways.
What You Need Before You Start
Before you begin, gather all the materials. Preparing ahead saves time and keeps kids focused.
| Item | Purpose | Tips |
|---|---|---|
| Thick paper | Painting surface | Use watercolor or drawing paper for best results |
| Paints | Color the sun | Yellow, orange, and red are must-haves |
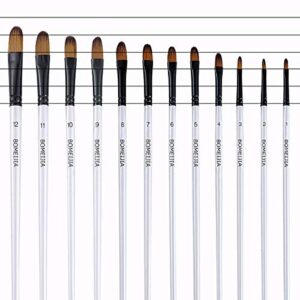
| Brushes | Apply paint | Get one thick brush and one thin brush |
| Water cup | Clean brushes | Use a plastic cup with clean water |
| Palette or plate | Mix colors | Any flat surface works |
| Paper towels | Wipe brushes | Helps avoid unwanted color mixing |
| Pencil | Sketch the sun | Use a soft pencil for easy erasing |
| Apron or old shirt | Protect clothing | Essential for messy young painters |
Extra tip: If you want less mess, try washable paints. These clean up easily and are safe for kids.

Credit: www.youtube.com
Step-by-step Guide: How To Paint A Sun For Kids
Let’s walk through the simple steps to paint a sun. Each step is easy to follow and includes tips for making it extra fun for kids.
1. Draw A Big Circle
Start by drawing a large circle in the center of the paper. Use a pencil so mistakes can be erased. The circle is the face of the sun.
- Show kids how to use a bowl or cup as a guide if they struggle to draw a neat circle.
- Encourage them to make the circle as big as they want—there are no rules.
Non-obvious insight: Let kids try drawing the sun “off-center” for a creative look. This teaches that art doesn’t always have to be exact.
2. Add Sun Rays
Next, draw lines around the circle. These are the sun’s rays.
- Rays can be straight, wavy, or zig-zag.
- Ask kids how many rays they want. Some might like only a few, others may fill the whole page.
Practical tip: If working with very young children, model a few rays and then let them try. This builds confidence.
3. Paint The Sun’s Face
Pour yellow paint onto the palette or plate. Show kids how to dip the thick brush into the paint and fill in the circle.
- Use smooth strokes for a bright, even color.
- For a textured look, dab the brush gently instead of brushing.
Beginner mistake: Kids often use too much water, making the color pale. Remind them to use less water for bright yellow.
4. Paint The Sun Rays
Use orange or red paint for the rays. Switch to a thin brush for more control. Kids can paint each ray one color or mix colors for a sunset effect.
- Let them experiment: Some rays can be orange, others red, or even a mix.
- Show how to start at the circle edge and paint outward.
Non-obvious insight: If you mix a little white into orange or red, you get pastel rays that look soft and sunny.
5. Add A Fun Face (optional)
Kids love adding eyes, a nose, and a smile to their sun. Wait until the yellow paint is dry. Then, use a black or brown marker, or a thin brush with paint.
- Draw two eyes—round, oval, or even sunglasses!
- Add a small nose and a big, happy mouth.
- Encourage creativity: The sun can wink, wear glasses, or have rosy cheeks.
6. Decorate The Background
Now, fill the rest of the page. Kids can paint a blue sky, clouds, birds, or even other suns.
- For clouds, use a sponge or the side of a brush with white paint.
- For extra sparkle, sprinkle a little glitter while the paint is still wet.
Common mistake: Kids sometimes paint the background before the sun is dry. This can cause colors to mix and turn muddy. Remind them to wait a few minutes.
7. Let The Painting Dry
Put the painting somewhere safe. Wait at least 20–30 minutes for the paint to dry. This helps prevent smudges or drips.
- If you need to move the artwork, hold it by the edges.
- Let kids admire their work and talk about what they made.
Practical tip: Use this drying time to clean brushes and put away supplies together.
Creative Variations For Painting A Sun
Every child is different. Here are ways to make sun painting exciting for everyone:
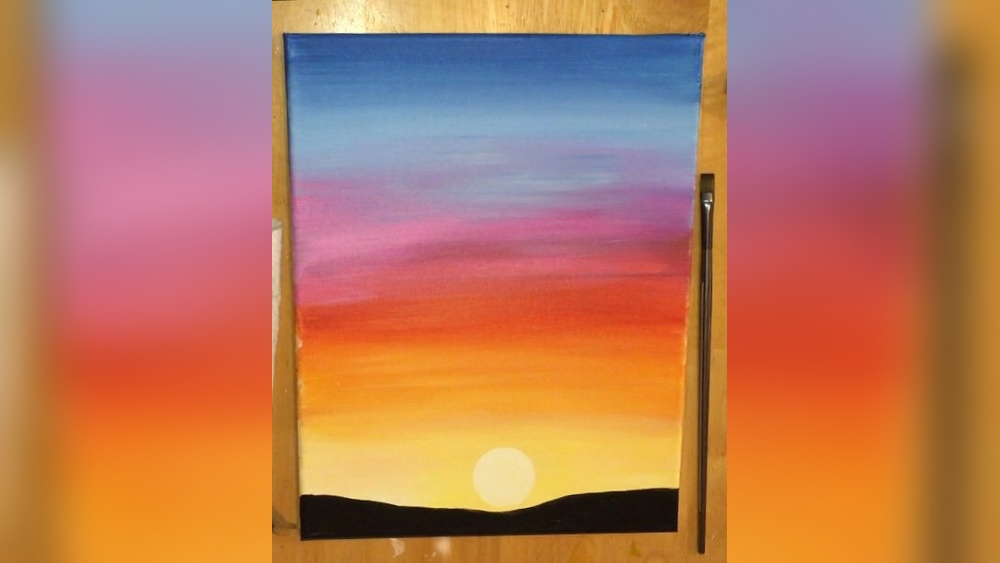
- Sunset Sun: Use pink, purple, and orange for a sun that looks like it’s setting.
- Rainbow Rays: Paint each sun ray a different color for a magical effect.
- Textured Sun: Mix sand or salt into the yellow paint to make the sun’s face rough and interesting.
- Collage Sun: Cut out rays or the face from colored paper and glue them on.
- Stencil Sun: Use a sun-shaped stencil for younger kids who need extra help.
These ideas keep kids interested and show that art is about creativity, not just copying.

Credit: feelingnifty.com
Comparing Painting Materials For Kids
Which painting supplies are best for young artists? Here’s a quick look at some options:
| Material | Pros | Cons | Best For |
|---|---|---|---|
| Watercolor | Easy to mix, gentle colors | Can be messy, colors may blend | Older kids (5+), patient artists |
| Tempera | Bright, washable, dries fast | May crack when thick | Young kids, group projects |
| Acrylic | Strong color, durable | Harder to wash off, dries quickly | Teens, advanced kids |
| Finger Paint | Safe, tactile fun | Less control, not detailed | Toddlers, sensory play |
Pro tip: For most home projects, tempera paint is the best balance of safety, color, and easy cleaning.
Safety Tips For Painting With Kids
Painting should be safe as well as fun. Here are some key safety reminders:
- Always use non-toxic paints. Check labels for child safety.
- Cover tables and floors with old newspaper or plastic sheets.
- Remind kids not to put brushes or paint in their mouths.
- Wash hands after painting.
- Supervise children, especially when using scissors or glue for creative suns.
If you’re unsure about a product, look for reviews or check guidelines from organizations like the American Academy of Pediatrics.
Making Sun Painting Educational
You can turn painting time into a learning experience:
- Talk about the science of the sun—why it’s hot and why it helps plants grow.
- Count the rays together for math practice.
- Mix colors and ask kids what happens, teaching basic color theory.
- Tell stories about the sun from different cultures.
This approach turns a simple art project into a cross-curricular lesson.
Common Mistakes And How To Avoid Them
Even adults make mistakes! Here are problems beginners often face and how to fix them:
- Colors turn brown: This happens when kids mix too many colors. Teach them to clean the brush before switching colors.
- Paper rips: Too much water can make paper soggy. Use thick paper and less water.
- Sun is too small: Encourage kids to use the whole page for a bold sun.
- Paint dries too fast: If the paint dries on the palette, add a drop of water and mix again.
- Smudges: Wait until one color dries before painting next to it.
Sharing these common issues makes kids feel better if something goes wrong—and helps them learn for next time.
Sun Painting For Different Age Groups
Not all kids have the same skills. Here’s how to adjust the sun painting project:
| Age Group | Best Approach | Extra Tips |
|---|---|---|
| 2–4 years | Finger paint, simple circles | Let them explore; keep it short |
| 5–7 years | Brushes, guided steps | Encourage big, bold suns |
| 8–10 years | Details, backgrounds, color mixing | Let them add landscapes or faces |
| 11+ years | Experiment with style, shading | Try sunset effects or abstract suns |
Adjust your instructions to suit the child’s age and interest for the best results.
How To Display And Share Kid’s Sun Paintings
Showcasing finished art builds pride and encourages kids to keep creating. Here are some simple ways:
- Hang artwork on the wall or fridge with magnets.
- Frame the sun painting for a special gift.
- Take photos and create a digital gallery.
- Share pictures with friends or on family group chats.
- Make a “sunny day” art line in the classroom or playroom.
Encourage kids to talk about their artwork. Ask questions like, “What do you like most about your sun? ” or “How did you choose your colors? ”
Inspiring Kids To Try More Art
After painting a sun, many kids want to paint more. Suggest related projects:
- Paint a moon and stars for a night sky.
- Try a rainbow with clouds.
- Draw or paint a landscape with sunflowers.
You can find more fun art ideas on educational sites like Crayola Crafts.
These projects keep kids interested and show that art is a journey, not just a one-time event.
Frequently Asked Questions
What Kind Of Paint Is Safest For Young Children?
The safest paint for young kids is washable tempera. It is non-toxic and easy to clean. Always check the label for “child-safe” or “AP certified non-toxic.”
How Do I Prevent The Colors From Turning Brown?
To keep colors bright, teach kids to wash the brush with water between colors. Also, use a fresh area of the palette for each new color.
Can I Use Regular Printer Paper For Painting?
Regular printer paper is too thin for most paints. It can tear or wrinkle. It’s better to use thick watercolor paper or drawing paper for best results.
How Long Does It Take For Kids’ Paintings To Dry?
Drying time depends on the paint. Tempera usually dries in 20–30 minutes. Watercolor dries faster, while acrylic can take longer. For thicker paint, wait at least one hour.
What If My Child Doesn’t Want To Paint A Sun?
That’s okay! Let them paint what they enjoy. The goal is to build creativity and confidence. Sometimes, joining in and painting your own sun can inspire them.
Painting a sun is a classic children’s art project for good reasons. It’s simple, joyful, and full of learning. By following these steps and tips, you can help any child create a bright, beautiful sun—and have fun along the way.
The most important thing is to encourage creativity and celebrate their unique vision. Happy painting!

Credit: www.123homeschool4me.com