Are you ready to bring your creative ideas to life on canvas? Painting with acrylics is one of the most exciting and accessible ways to express yourself through art.
Whether you’re a complete beginner or looking to refine your technique, knowing how to paint acrylic on canvas can open up a world of vibrant colors and endless possibilities. In this guide, you’ll discover simple, step-by-step tips to help you master acrylic painting, from setting up your workspace to blending colors like a pro.
Get ready to transform a blank canvas into a stunning masterpiece that’s all your own. Keep reading, and let’s unlock your artistic potential together!
Materials Needed
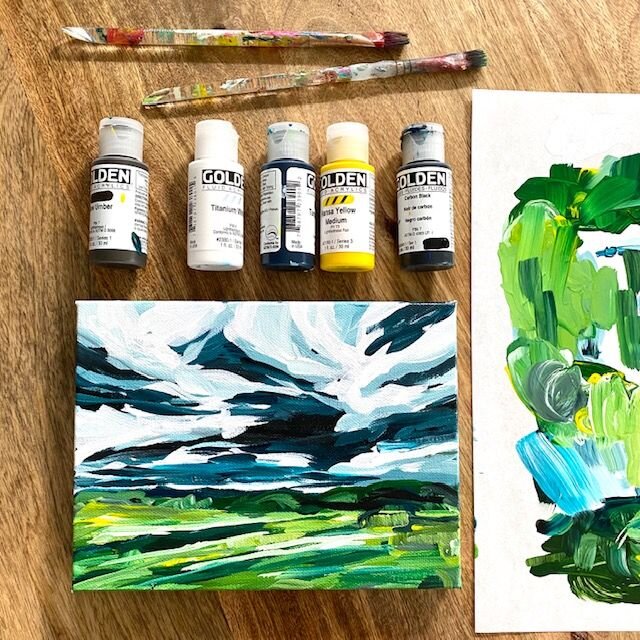
Gathering the right materials makes acrylic painting easier and more enjoyable. Each tool plays an important role in creating your artwork. Using quality supplies helps you achieve better results and saves time. Below are key materials needed for painting acrylic on canvas.
Choosing Acrylic Paints
Select acrylic paints with vibrant, rich pigments. Tubes or jars work well for most projects. Start with basic colors like red, blue, yellow, white, and black. These allow mixing many shades. Look for paints labeled as “artist quality” for smoother texture and better coverage.
Selecting Brushes
Pick brushes designed for acrylic paint. Synthetic bristles hold paint well and clean easily. Use a variety of shapes: flat brushes for broad strokes and round brushes for details. Small brushes help with fine lines and larger brushes cover big areas fast. Keep brushes in good condition by rinsing after each use.
Preparing Your Canvas
Use pre-primed canvases for smooth painting. Canvas boards or stretched canvases both work fine. If your canvas is raw, apply a layer of gesso to seal and prime it. Let the gesso dry completely before painting. A smooth surface prevents paint from soaking in and enhances color vibrancy.
Additional Supplies
Gather a palette to mix colors. Plastic, glass, or disposable palettes all work well. Have clean water nearby to rinse brushes often. Paper towels or rags help wipe brushes and control paint amount. An easel holds your canvas steady. Use a spray bottle to keep paint moist during breaks.
Setting Up Your Workspace
Setting up your workspace is the first step in painting acrylic on canvas. A well-prepared area helps you focus and work comfortably. It also keeps your supplies organized and your surroundings clean. Below are key points to prepare your painting space effectively.
Finding The Right Location
Choose a spot with good natural light or bright artificial lighting. Light helps you see true colors and details. Pick a quiet place with minimal distractions. Make sure there is enough room for your canvas and tools. A flat, stable surface is best for your easel or table.
Organizing Your Tools
Keep brushes, paints, and palettes within easy reach. Arrange your supplies by type or color. Use jars for water and containers for brushes to avoid spills. A palette knife, rags, and paper towels should be close by. Clear clutter to prevent accidents and save time searching for items.
Protecting Your Area
Cover your work surface with newspaper or a plastic sheet. This protects from paint splashes and spills. Wear old clothes or an apron to keep paint off your skin. Place a trash bin nearby for waste materials. Clean up immediately after painting to keep your space ready for next time.
Preparing The Canvas
Preparing the canvas is the first and most important step in acrylic painting. A well-prepared canvas ensures your paint sticks well and lasts longer. It also helps your artwork look smooth and professional. Take your time to get this step right.
Priming The Surface
Start by applying a layer of gesso to your canvas. Gesso creates a smooth, white surface and seals the fabric. It prevents the paint from soaking into the canvas. Use a wide brush and spread the gesso evenly. Let it dry completely before you add another coat. Two or three coats work best for a solid base.
Creating A Rough Sketch
After priming, sketch your design lightly on the canvas. Use a pencil or charcoal for easy corrections. This sketch guides your painting and helps place elements correctly. Keep the lines simple and loose. Avoid pressing too hard to prevent marks showing through the paint.
Planning Your Composition
Plan the layout of your painting carefully. Think about where to place key objects and colors. This step saves time and reduces mistakes. Use small thumbnails or rough drafts on paper first. Decide on the balance, focus, and flow of your artwork before painting.
Credit: willkempartschool.com
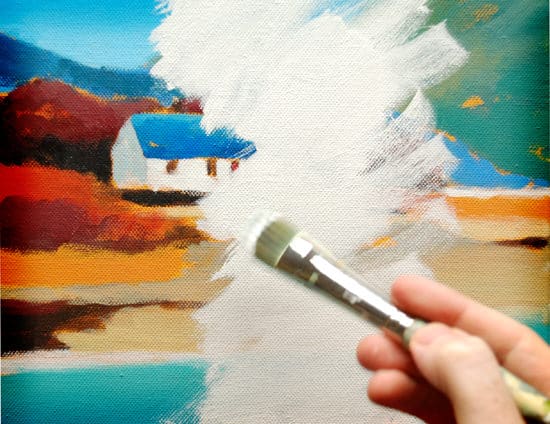
Painting Backgrounds
Painting backgrounds sets the stage for your acrylic artwork. A well-painted background enhances your subject and adds mood to the piece. It also creates depth and space on the canvas. Starting with the right background colors and techniques improves the entire painting process.
Starting With Background Colors
Choose colors that match the mood of your painting. Use large brushes to cover the canvas quickly. Apply a thin, even layer of paint as a base. This layer should dry before adding details. Avoid thick paint at this stage to keep the surface smooth.
Techniques For Smooth Blending
Blend colors while the paint is still wet. Use a soft brush and gentle, circular strokes. Work quickly to avoid harsh lines. Adding a bit of water or acrylic medium helps paint flow. Blend edges between colors to create smooth transitions.
Building Depth And Layers
Apply multiple layers for richer backgrounds. Let each layer dry before adding the next. Use lighter colors on top to highlight areas. Darker shades can create shadows and depth. Layering adds texture and makes the background more dynamic.
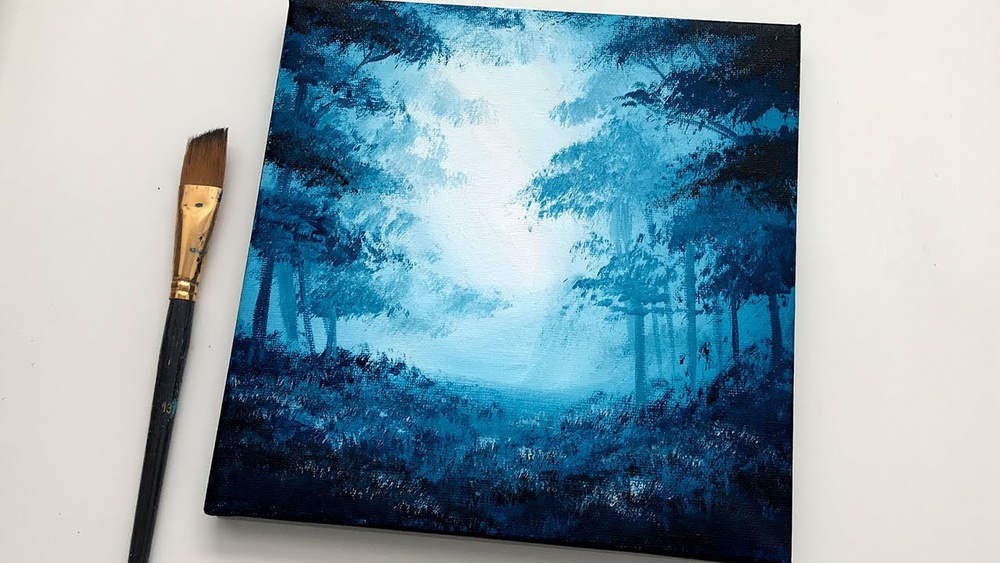
Painting The Foreground
Painting the foreground sets the scene for your acrylic artwork. This area draws the viewer’s eye first and holds the main focus. It gives depth and life to your canvas. Work carefully here to bring your subject forward. Use bold colors and clear shapes. The foreground should feel closer and more detailed than the background.
Adding Details
Details make your foreground come alive. Use small brushes for fine lines and textures. Paint leaves, grass, or fabric folds with care. Vary your brush strokes to show different surfaces. Sharp edges and clear forms help focus attention. Add tiny highlights or shadows to create realism. Avoid overloading the area with too many details.
Highlighting The Subject
Highlighting brings light and focus to your subject. Use lighter colors on areas that catch light. Apply white or pale tones sparingly to avoid flatness. Contrast highlights against darker shadows for depth. This makes your subject stand out from the rest. Soft blending around highlights keeps them natural. Highlights guide the viewer’s eye across the painting.
Layering Techniques
Layering builds richness and texture in the foreground. Start with thin paint layers to set colors. Let each layer dry before adding the next. Use thicker paint for the top layers to create dimension. Blend edges softly to connect layers smoothly. Experiment with glazing to add color depth. Layering helps your painting look vibrant and alive.
Blending Acrylics
Blending acrylics on canvas creates smooth transitions between colors. It helps give your painting depth and a professional look. Acrylic paint dries fast, so blending requires quick and careful work. Use the right techniques to mix colors seamlessly. This section covers key blending methods for acrylic painting.
Using Circular Motions
Move your brush in small circles to blend colors. Circular motions help soften edges between hues. Start from the center of the area and move outward. Avoid pressing too hard to keep the paint smooth. This method spreads paint evenly and avoids harsh lines. It works well for skies, skin tones, and backgrounds.
Maintaining Paint Consistency
Keep the paint creamy and wet for easy blending. Thick paint can be difficult to mix smoothly on canvas. Add a little water or acrylic medium to thin the paint. Use enough paint so it stays workable longer. Consistent paint texture helps colors merge without streaks or patches. Test the paint on a palette before applying.
Timing For Best Results
Blend quickly before the paint dries on canvas. Acrylics dry fast, so timing is essential. Work in small sections to keep paint wet. Stop blending as soon as edges soften to avoid muddy colors. If paint dries too fast, use a spray bottle to mist water lightly. Practice timing to find what suits your style best.
Common Techniques
Acrylic painting on canvas offers many ways to express creativity. Using common techniques helps you achieve different textures and effects. Each method changes how the paint looks and feels on the canvas. Understanding these techniques improves your painting skills.
Dry Brushing
Dry brushing uses a brush with very little paint. The brush is almost dry, so it creates a rough, scratchy texture. This technique is great for adding highlights or rough details. It works well for creating texture on wood, fabric, or skin.
Scumbling
Scumbling means applying a thin, broken layer of paint. Use a dry, stiff brush to scrub the paint lightly over the surface. This lets the colors underneath show through. It adds depth and softness to your painting. Scumbling is perfect for skies and soft backgrounds.
Glazing
Glazing involves layering thin, transparent paint over dry layers. Use a lot of water or medium to make the paint see-through. This builds rich colors and subtle shading. Glazing can make your painting glow and look more realistic. It works well for shadows and light effects.
Credit: ellebyers.com
Troubleshooting Tips
Troubleshooting is key to a smooth acrylic painting experience. Small problems can slow your progress or affect your artwork’s look. Knowing simple fixes helps keep your painting fun and stress-free. Below are some common issues and how to solve them quickly.
Avoiding Paint Drying Too Fast
Acrylic paint dries quickly, which can make blending hard. Work in small sections to keep paint wet longer. Use a spray bottle with water to mist your palette and canvas lightly. This keeps the paint moist and easier to blend. Another tip is to add a slow-drying medium to your paint. It gives you more time to work before the paint sets.
Fixing Mistakes
Mistakes happen, but acrylic paint is easy to correct. Let the paint dry fully, then paint over the area with a matching base color. You can also use a damp cloth or brush to wipe off wet paint before it dries. For small errors, gently scrape the paint with a palette knife once dry. This removes unwanted paint without damaging the canvas.
Preventing Cracks
Cracks appear when paint layers are too thick or dry unevenly. Apply thin layers of paint and let each dry before adding more. Avoid using too much water, which can weaken the paint film. Use quality acrylic paint and a properly primed canvas to reduce cracking risk. Keep your painting in a stable environment without extreme temperature changes.
Finishing Touches
Finishing touches bring your acrylic painting to life. They enhance depth, clarity, and overall impact. This stage focuses on refining the artwork with small but powerful adjustments. It ensures your painting looks polished and complete.
Adding Highlights And Shadows
Highlights and shadows create a sense of volume and space. Use lighter colors to add highlights where light hits the object. Darker shades help form shadows in less exposed areas. This contrast makes your painting look more realistic and dynamic.
Apply highlights carefully to avoid overdoing them. Shadows should blend smoothly with mid-tones for a natural feel. Use a fine brush for controlled strokes and gradual transitions.
Refining Details
Details bring personality and focus to your artwork. Look closely at edges, textures, and shapes. Sharpen important lines and soften others to guide the viewer’s eye. Add small strokes to define features like leaves, hair, or fabric folds.
Work slowly and step back often to see the overall effect. Use thin paint and small brushes for precision. Avoid cluttering the painting; keep details clear and purposeful.
Sealing Your Artwork
Sealing protects your painting from dust, moisture, and fading. Choose a varnish suitable for acrylics, either matte, satin, or glossy finish. Apply it evenly with a clean brush or spray in thin layers.
Let each coat dry completely before adding another. Sealing also enhances color depth and durability. Store your finished painting in a safe, dry place to keep it looking fresh for years.

Credit: www.wikihow.com
Frequently Asked Questions
How To Do Acrylic Painting On Canvas Step By Step?
Set up your workspace and prime the canvas. Sketch your design lightly. Apply background colors first. Add mid-tones and details next. Use layers to build depth. Blend colors smoothly. Let each layer dry before adding the next. Finish with highlights and seal the painting to protect it.
Can You Put Acrylic Paint Straight On Canvas?
Yes, you can apply acrylic paint directly on a pre-primed canvas. It ensures better adhesion and vibrant colors.
Do You Paint The Background First Or Last With Acrylic?
Paint the background first with acrylics to build depth and avoid outlining around the subject. Layer details on top smoothly.
How Do I Prepare My Canvas For Acrylic Painting?
Stretch your canvas tightly on a frame. Apply one or two coats of acrylic gesso using a brush. Let each coat dry fully. Sand lightly for smoothness if needed. This primes the surface, improves paint adhesion, and prevents paint from soaking into the canvas.
Conclusion
Painting acrylic on canvas opens a world of creativity. Start with simple steps and practice often. Use good brushes and quality paint for best results. Remember to layer colors from background to foreground. Keep your paint wet for smooth blending.
Don’t rush; allow each layer to dry well. Clean your brushes after each session. Most importantly, enjoy the process and express yourself freely. With patience and practice, your skills will grow naturally. Acrylic painting is fun and rewarding for everyone.
Give it a try and see what you create!