
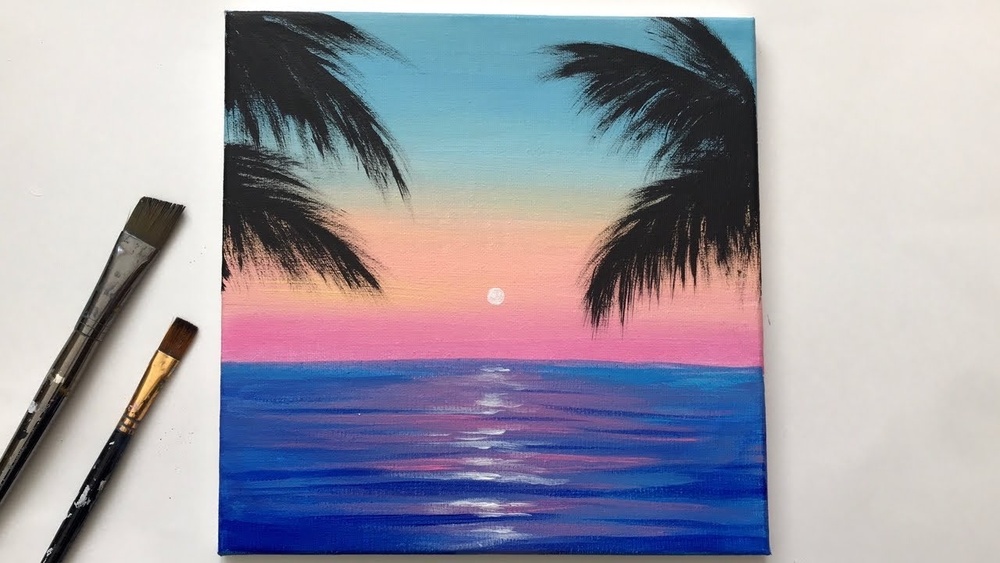
Quick answer: To paint on canvas using acrylic, work on a primed canvas, keep your paint wet with a stay-wet palette or a light water mist, and build the painting from back to front: background first, then middle ground, then foreground and details. Use large brushes and thin layers early, thicker paint and smaller brushes later, and let each layer dry (usually 10 to 30 minutes) before glazing over it. Finish with an isolation coat and a varnish once the painting has dried for a few days.
Acrylic is the most approachable paint for canvas. It cleans up with water, dries fast enough to finish a piece in an afternoon, and is flexible enough to thin like watercolor or pile on like oil. That speed is both its biggest advantage and the thing beginners struggle with most: blends set before you are done, and colors look darker once dry.
This guide explains how to paint on canvas using acrylic, from setting up your palette to varnishing the finished work. It includes a step-by-step practice painting, essential techniques, how mediums change the paint, and fixes for the problems that come up most.
What You Need
- Canvas: Pre-primed stretched canvas or canvas board, 11 x 14 or 12 x 16 inches is a comfortable size to learn on.
- Acrylic paint: Titanium white, mars black (optional), cadmium yellow light or hue, yellow ochre, cadmium red or naphthol red, alizarin crimson or quinacridone magenta, ultramarine blue, phthalo blue and burnt umber.
- Brushes: Synthetic brushes made for acrylic: a 1-inch flat, a size 10 and size 6 filbert, a size 4 round and a liner.
- Palette: A stay-wet palette or a plate plus a spray bottle.
- Water: Two jars, one for rinsing and one for clean water.
- Paper towels, a palette knife and an easel (or a table with the canvas propped at an angle).
Canvas texture affects how acrylic behaves. A smooth, fine weave makes detail easier, while a coarse weave suits loose, textured work. If you are deciding what to buy, see our guide on which canvas is best for acrylic, which compares stretched canvas, panels, boards and rolls for acrylic painting.
Before You Paint: Quick Canvas Prep
Most store-bought canvases come primed with acrylic gesso and are ready to use. An extra coat of gesso can make cheaper canvases less absorbent and smoother. Toning the canvas with a thin wash of a mid-value color, like burnt sienna or a soft gray, also helps you judge values better than stark white. For full detail on gesso, sanding and toning, read our guide on how to prepare canvas for acrylic painting.
Understand How Acrylic Behaves
A few properties shape every decision you make with acrylic:
| Property | What it means | How to work with it |
|---|---|---|
| Fast drying | Thin layers dry in about 10 to 30 minutes | Work in sections, use a stay-wet palette, add retarder if needed |
| Dries darker | Colors shift slightly darker as they dry | Mix a little lighter than your target; test on a scrap |
| Water-resistant when dry | Dry layers do not lift | Great for glazing and layering, but brushes must be cleaned before paint dries |
| Flexible film | Bends without cracking | Safe on stretched canvas and for thick textures |
| Thinning limits | Too much water weakens adhesion | Keep water to about a quarter or less of the mix, or use medium |
How to Paint with Acrylics on Canvas: Step by Step
The steps below walk through a simple landscape of sky, distant hills, a field and a tree. The same order works for most subjects.
Step 1: Sketch the composition
Lightly sketch the horizon, hills and tree with a pencil or thinned paint. Place the horizon one-third from the top or bottom rather than in the middle; it usually creates a more interesting composition.
Step 2: Set up your palette
Squeeze out small amounts of each color around the edge of the palette, with a larger pile of white. On a stay-wet palette, paint stays usable for hours or even days. On a dry palette, mist it lightly every 10 to 15 minutes.
Step 3: Paint the sky
Start with the area farthest away. Mix ultramarine blue with white for the upper sky, and a lighter, slightly warmer mix near the horizon. Use the large flat brush and horizontal strokes. While both are wet, blend where they meet with a clean, slightly damp brush. Work quickly; if the paint starts to drag, mist lightly or move on and fix it with a second layer.
Step 4: Paint distant hills
Distant objects look lighter, cooler and less detailed because of atmosphere. Mix a blue-gray-green with plenty of white and paint the far hills. Keep edges soft.
Step 5: Paint the middle ground
Closer hills or fields get warmer, more saturated greens: mix yellow, blue and a touch of red or burnt umber to dull pure green into natural tones. Paint shapes, not individual blades of grass.
Step 6: Paint the foreground
The nearest areas have the strongest color, darkest darks and most texture. Use a filbert to dab in grass, flowers or rocks. Thicker paint here adds physical texture that brings the area forward.
Step 7: Add the focal subject
Paint the tree trunk with burnt umber and ultramarine using a round brush. Dab in foliage with a filbert or old fan brush in three values: dark first, then middle, then a few light highlights on the side facing the light.
Step 8: Add details and highlights
Switch to the liner or small round for branches, a few grass blades and highlights. Less is more; a few well-placed details read better than many.
Step 9: Evaluate and adjust
Step back several feet or take a photo and view it in black and white on your phone. This shows whether values are working. Darken or lighten areas as needed with glazes or opaque paint.
Essential Acrylic Techniques
Wet-on-wet blending
Lay two colors side by side and blend at the boundary while both are wet. Works best in small areas or with a retarder or slow-drying medium.
Layering and glazing
Once a layer is dry, brush over a thin, transparent layer of color mixed with glazing medium. This shifts the hue or deepens shadows without hiding the layer underneath. Several glazes build rich, luminous color.
Dry brushing
Load a stiff brush with a small amount of paint, wipe most of it off, and drag it lightly over dry paint. The paint catches on the canvas texture, perfect for wood grain, grass and weathered surfaces.
Scumbling
Scrub a thin, lighter, semi-opaque layer over a darker dry layer. It softens and adds atmosphere, ideal for mist, sunlight and distance.
Impasto
Apply thick paint with a knife or stiff brush so strokes stand off the surface. Heavy body acrylics or paint mixed with gel medium hold peaks best.
Stippling and sponging
Dab paint with the tip of a brush or a sponge for foliage, flowers and texture.
How to Use Acrylic Medium on Canvas
Mediums let you change how acrylic flows, dries and looks without weakening it like excess water can.
| Medium | What it does | When to use it |
|---|---|---|
| Glazing medium | Makes paint transparent and slows drying slightly | Glazes, color shifts, luminous layers |
| Retarder / slow-dri medium | Extends working time | Blending skies, skin tones, gradients |
| Flow improver | Makes paint flow smoothly without losing color strength | Fine lines, lettering, smooth flat areas |
| Gel medium | Thickens paint and adds body | Impasto, texture, extending paint |
| Matte or gloss medium | Changes sheen | Controlling finish across the painting |
| Modeling paste | Builds hard texture | Sculptural surfaces under paint |
Mix mediums with paint on the palette using a knife, and follow the label for maximum ratios. Retarder in particular should be used sparingly; too much can leave the surface tacky.
Acrylic Gouache on Canvas
Acrylic gouache combines the flat, matte look of traditional gouache with the water resistance of acrylic. It dries to an even, velvety finish and does not reactivate with water, so you can layer it freely. It works well on primed canvas, especially smooth or fine-weave canvas and panels, and is popular for illustrative styles and flat color shapes. Because it is matte, varnishing will change the look; a matte varnish keeps it closest to the original appearance.
Acrylic Paint Markers for Canvas
Acrylic paint markers are useful for lines, lettering, patterns and fine details over dry acrylic. Prime the tip on scrap paper before using it on the painting, use light pressure, and let the marker paint dry fully before varnishing. They pair well with loose brushwork underneath.
How to Varnish an Acrylic Painting on Canvas
- Wait for the paint to dry thoroughly. Thin layers may be ready in a day or two; thick layers can need longer. Check the varnish label for its recommendation.
- Apply an isolation coat (recommended). A clear, non-removable layer of gloss medium thinned slightly with water seals the paint and evens out absorbency, so the final varnish goes on evenly.
- Let it dry for a day.
- Apply varnish. Lay the canvas flat, use a wide soft brush, and apply thin, even coats in one direction. Gloss deepens colors; matte reduces glare; satin is in between.
- Add a second coat in the perpendicular direction once the first is dry, if desired.
Work in a dust-free room and avoid overbrushing, which can create bubbles or cloudiness.
Common Problems and Fixes
- Paint dries too fast: Use a stay-wet palette, mist lightly, add retarder, and avoid painting near heaters or fans.
- Streaky coverage: Use two thin coats rather than one thick one; some colors, like many reds and yellows, are naturally less opaque.
- Colors look dull or muddy: Mix fewer colors together, clean brushes thoroughly between colors, and let layers dry before glazing.
- Visible brushstrokes where you want smooth: Add flow improver and use a soft synthetic brush.
- Hard edges in blends: Work smaller areas at once or use a slow-drying medium.
- Ruined brushes: Never let acrylic dry in brushes. Rinse often and wash with soap at the end of the session.
Tips by Skill Level
Beginners: Use a limited palette of primaries plus white, larger brushes, and simple subjects. Focus on values, not detail.
Intermediate: Practice glazing, use mediums deliberately, and explore toned grounds and color harmonies.
Advanced: Combine acrylic gouache, impasto, paint markers and mixed media, and plan paintings around controlled sheen and layered transparency.
Related Reading
FAQs
How do you use acrylic paint on canvas for the first time?
Start with a primed canvas, a limited palette and a simple subject. Paint from background to foreground, keep early layers thin, and let each layer dry before adding details or glazes.
Do you need to wet the canvas before acrylic painting?
No. Primed canvas does not need to be wet. Some painters lightly mist the canvas to extend drying time when blending large areas, but it is optional.
How much water should I add to acrylic paint?
Keep water to roughly a quarter of the mix or less for good adhesion. For thinner, more transparent paint, use glazing or flow medium instead of more water.
Can I use acrylic gouache on canvas?
Yes. Acrylic gouache adheres well to primed canvas, dries matte and water-resistant, and layers easily. Smooth canvas or panels give the cleanest flat color.
How long should acrylic dry before varnishing?
Thin layers may be ready within a day or two, while thick paint can need longer. Follow the varnish manufacturer’s guidance, and apply an isolation coat first for an even finish.
Can I use acrylic paint on canvas board?
Yes, canvas boards work well with acrylic and are a budget-friendly choice for practice. See our guide on using acrylic paint on canvas board for tips on getting the best results.
Final Thoughts
Painting on canvas with acrylic rewards a simple routine: prime, keep paint workable, paint from back to front, layer thin to thick, and varnish at the end. Once you learn to work with the drying time instead of against it, acrylic becomes one of the most versatile paints you can use.
The canvas you choose affects texture, absorbency and detail. For a clear comparison of surfaces, see our full guide to choosing the right canvas for acrylic painting.




