
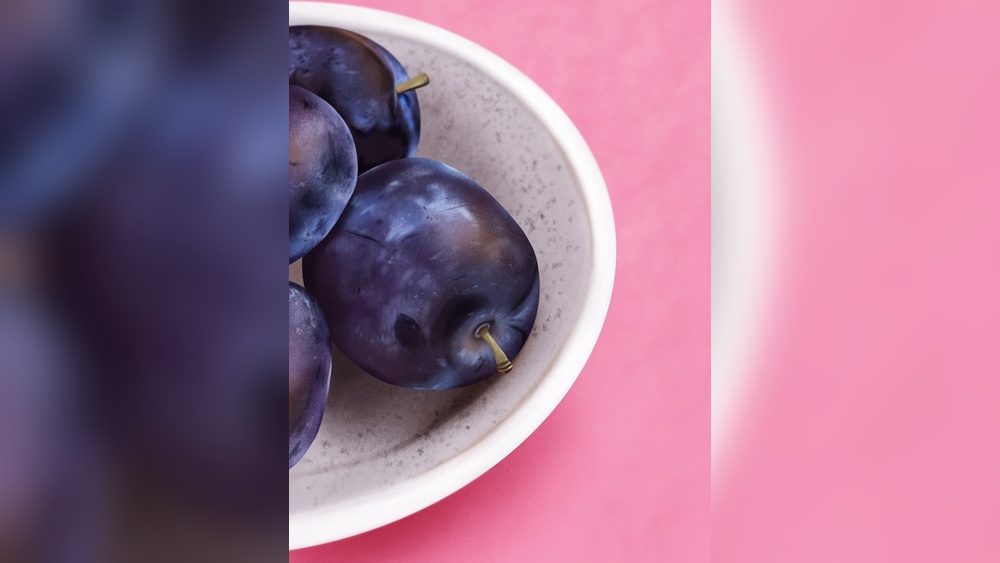
Quick answer: Here is how to create textures in Procreate. There are four main ways: paint them with textured brushes (or custom brushes whose Grain and Shape come from your own images), overlay photo or scanned textures on a layer set to Multiply, Overlay or Soft Light, add surface noise through Adjustments > Noise, and build texture by hand with stippling, hatching and dry-brush strokes. Clip texture layers to the shapes below with Clipping Mask so they stay inside your forms, and lower opacity until the texture supports the image rather than dominating it.
Smooth digital color can look sterile. Real paint has tooth, paper has grain, and every material in the world, from tree bark to denim, has a surface that catches light differently. Adding texture is often the step that makes a Procreate illustration feel tactile and finished instead of flat and vector-like.
This guide explains how to create textures in Procreate from scratch: with brushes, with images and overlays, with adjustments, and by hand. It also covers material-specific recipes and how to keep texture from turning into noise. Most of these workflows translate to other apps; if you split time between iPad and PC, our roundup of Windows apps that work like Procreate highlights which ones support custom grain and texture brushes.
Four Ways to Add Texture in Procreate
| Method | How it works | Best for | Control level |
|---|---|---|---|
| Textured brushes | Grain and shape built into each stroke | Painted surfaces, natural media looks | High; follows your hand |
| Texture overlays | An image layer blended over the art | Paper, canvas, grunge, global grain | Medium; adjustable via blend mode and opacity |
| Noise adjustment | Adds random grain to a layer | Film grain, reducing banding, subtle unity | Low to medium |
| Hand-drawn texture | Stippling, hatching, scribbles, dry brush | Stylized and illustrative textures | Highest; most time |
Most finished pieces combine at least two of these. A common recipe is textured brushes for the main painting plus a subtle paper overlay across the whole image.
Method 1: Paint With Textured Brushes
Understanding Grain and Shape
Every Procreate brush is built from two images:
- Shape: the stamp that forms each mark, like the bristle pattern or tip outline.
- Grain: the texture inside the stroke, like paper tooth or canvas weave.
In Brush Studio (tap a brush in the library to open it), you can see and edit both. Grain behavior matters too. With Moving grain, the texture travels with the stroke like a rolling stamp. With Texturized grain, the texture stays fixed to the canvas, like paper under a pencil, so overlapping strokes reveal the same texture. Texturized is generally better for paper and canvas effects; moving grain suits brushy or rolling textures.
Using built-in texture brushes
Procreate’s default library includes texture-focused sets, along with charcoal, sketching, painting and spray brushes that carry strong grain. Before creating anything custom, explore these and note which ones produce effects you like.
Tips for painting with texture
- Vary pressure. Light pressure often reveals more grain because less paint is laid down.
- Change brush size. Scaling a texture brush changes how dense or coarse the texture looks.
- Follow the form. Rotate strokes to follow the surface: around a tree trunk, along fabric folds, across a rock face.
- Layer textures. Paint a base with a soft textured brush, then add finer texture only in lit areas, where texture is most visible.
Method 2: Make Your Own Texture Brush
Custom brushes let you capture textures that are unique to your work, such as a sponge print, a crumpled paper scan or a photo of tree bark.
Steps
- Collect a source image. Photograph or scan a texture in even light, avoiding strong shadows. A black and white, high-contrast image works best. In Procreate grain and shape images, white generally represents where paint appears and black where it does not, so invert in Adjustments if needed.
- Create a new brush. In the Brush Library, tap the plus icon to open Brush Studio with a new brush.
- Set the Grain. Go to Grain source, tap Edit, then Import to bring in your texture image. Adjust Scale and Zoom so the texture repeats at the right size.
- Set the Shape. Use a simple round shape for a general texture brush, or import your own for an irregular tip.
- Adjust Stroke Path spacing. Lower spacing for continuous strokes, higher for stamped effects.
- Set pressure dynamics. Link pressure to opacity for subtle buildup, or to size for expressive marks.
- Test and name. Use the drawing pad in Brush Studio to test, then name the brush clearly by its job.
Duplicating an existing brush and swapping its grain is often faster than building one from nothing, since the stroke behavior is already tuned.
Method 3: Use Texture Overlays
Overlays add texture across an area or the entire image using a separate layer.
Steps
- Tap Actions > Add > Insert a photo or Insert a file, and choose a texture image such as paper, canvas, concrete or grunge.
- Scale it to cover the area you need.
- Tap the N on the layer and set a blend mode:
- Multiply: darkens; texture appears as dark grain. Good for paper and dirt.
- Overlay or Soft Light: adds texture while keeping color and contrast. Good for most surface textures.
- Screen: lightens; texture appears as light flecks. Good for dust and scratches on dark images.
- Lower opacity until it looks natural. Often 10–40% is enough.
- Use Clipping Mask to restrict the texture to a specific shape, or mask parts out with a layer mask.
- Desaturate the texture first if its color shifts your palette unpleasantly.
Making a seamless pattern tile
To cover large areas without visible repeats, a seamless texture helps. One approach: duplicate the texture layer, move copies so the edges meet with snapping turned on, then use a textured brush or the Smudge tool to blend visible seams. Check by placing several tiles side by side. Dedicated pattern features in other apps can do this more automatically.
Method 4: Add Noise and Grain With Adjustments
Procreate’s Adjustments menu includes Noise, which applies random grain to a layer.
- Create a new layer filled with a mid-gray, or duplicate a flattened version of the art.
- Tap Adjustments > Noise, choose Layer, and slide across the screen to set the amount.
- If using a gray layer, set it to Overlay or Soft Light so only the grain shows.
- Reduce opacity until the grain is subtle.
Noise is useful for a film-grain look, for unifying digital paintings, and for reducing banding in smooth gradients like skies. If you paint skies often, our guide to painting realistic clouds in Procreate shows where a touch of texture helps soft forms look natural.
Method 5: Hand-Drawn Texture Techniques
Hand-drawn textures give the most control and suit stylized illustration.
- Stippling: dots that cluster densely in shadows and thin out in light. Classic for illustration, sand and skin pores.
- Hatching and cross-hatching: parallel or crossing lines to build tone and suggest surface direction.
- Dry brush: a textured brush at low pressure dragged so color skips across the grain, great for wood, rust and weathered surfaces.
- Scribble texture: loose, small marks for foliage, fur and moss.
- Splatter: spray or splatter brushes for speckled stone, galaxy skies or grunge.
Why Light Decides How Much Texture Shows
Texture is really a pattern of tiny lights and shadows across a surface. That has practical consequences for how you paint it.
- Grazing light reveals texture. When light skims across a surface at a low angle, every bump casts a small shadow. Brick walls at sunset or a canvas lit from the side show their texture strongly. Paint more texture where light rakes across a form.
- Frontal light flattens texture. Light coming from the viewer’s direction fills in tiny shadows. Surfaces facing the viewer under flat light need only a hint of texture.
- Shadows swallow texture. In deep shadow, there is too little light to create contrast between bumps. Keep shadows simpler.
- Edges show texture in silhouette. A rough object’s outline is broken and irregular. Breaking up an edge with a textured eraser often sells texture more than detailed interior marks.
Keep these rules in mind and texture will look like part of the object instead of a filter laid on top.
Texture Recipes for Common Materials
| Material | Base approach | Texture technique |
|---|---|---|
| Wood | Base color with long strokes along the grain | Dry brush lines, darker knots, subtle highlight streaks |
| Stone | Blocky planes with a flat brush | Splatter for speckles, cracks drawn with a fine liner |
| Metal | Smooth gradients, sharp highlights | Fine scratches on Screen layer; noise for brushed metal |
| Fabric | Soft shading along folds | Canvas or weave overlay clipped to the garment |
| Fur | Base value shapes | Short directional strokes, finer in lit areas |
| Skin | Smooth blending | Very subtle noise or stipple; avoid heavy grain |
| Paper or canvas look | Finished painting | Paper scan on Multiply or Overlay across the whole image |
| Foliage | Value clusters | Scatter leaf brush, then hand-painted edge leaves |
Step-by-Step: Adding Texture to a Finished Illustration
- Finish the main painting first. Texture cannot fix weak values or composition.
- Identify where texture belongs. Usually at the focal point and on materials that are naturally rough.
- Add material textures with clipped layers above each element: bark on the tree, weave on the jacket.
- Add a global paper or canvas overlay on top in Multiply or Soft Light at low opacity.
- Add light noise to unify digital smoothness, especially in gradients.
- Erase texture from areas that should stay clean, such as eyes, faces or highlights.
- Check at full view. Texture that looks right zoomed in can be invisible or overwhelming at normal size.
For global color and contrast fine-tuning after texture, see our guide to adjustment layers in Procreate.
Common Mistakes With Textures
- Too much texture everywhere. Texture competes for attention. Use it selectively, strongest where you want focus.
- Texture fighting form. A flat overlay on a round object looks pasted on. Warp or paint texture to follow form, using Transform > Warp if needed.
- Same texture on every material. One grain for skin, wood and metal makes everything look the same. Match texture to material.
- Visible repeats. Tiled textures show patterns. Rotate, scale and break them up.
- Low-resolution textures. Small images scaled up look blurry. Use textures at or above canvas resolution.
- Ignoring light. Texture is most visible in light and grazing light; shadows hide it. Reduce texture in deep shadows.
Where to Get Texture Sources
- Your own photos: walls, pavement, fabric, bark, paper. Shoot in diffused light for even texture.
- Scans of traditional marks: paint swatches, sponge prints, charcoal smudges, ink splatters.
- Procreate-made textures: paint a texture with brushes, then export as an image for use as grain.
- Licensed texture libraries: check the license permits your intended use, especially commercial work.
FAQs
How do I add a paper texture in Procreate?
Insert a paper texture image on a top layer, set it to Multiply or Soft Light, and lower opacity until the grain looks natural. Alternatively, use brushes with texturized grain.
What is the difference between moving and texturized grain?
Moving grain travels with the stroke, so each stroke looks like a rolling stamp. Texturized grain stays fixed to the canvas, like paper underneath, so overlapping strokes share the same texture.
Can I make a brush from a photo in Procreate?
Yes. In Brush Studio, import a photo as the Grain or Shape source. High-contrast black and white images give the clearest results.
How do I keep textures inside a shape?
Place the texture layer directly above the shape’s layer and set it as a Clipping Mask, or turn on Alpha Lock and paint texture directly on the shape layer.
Why does my texture look fake?
Common causes are too high opacity, a texture that ignores the object’s form, or the same texture repeated across different materials. Lower opacity, warp to fit and vary textures by material.
How do I add grain to a digital painting?
Use Adjustments > Noise on a gray layer set to Overlay or Soft Light, then lower opacity. This adds subtle grain without changing your colors.
Final Thoughts
Learning how to create textures in Procreate opens up a huge range of looks, from subtle paper grain to rugged stone and weathered wood. Use textured brushes for the painting itself, overlays for global surfaces, noise for unity, and hand-drawn marks for style. Above all, use texture selectively.
If you plan to bring the same texture workflow to a Windows computer, our guide to top Procreate alternatives for PC covers which programs support custom grain, blend modes and texture overlays.




