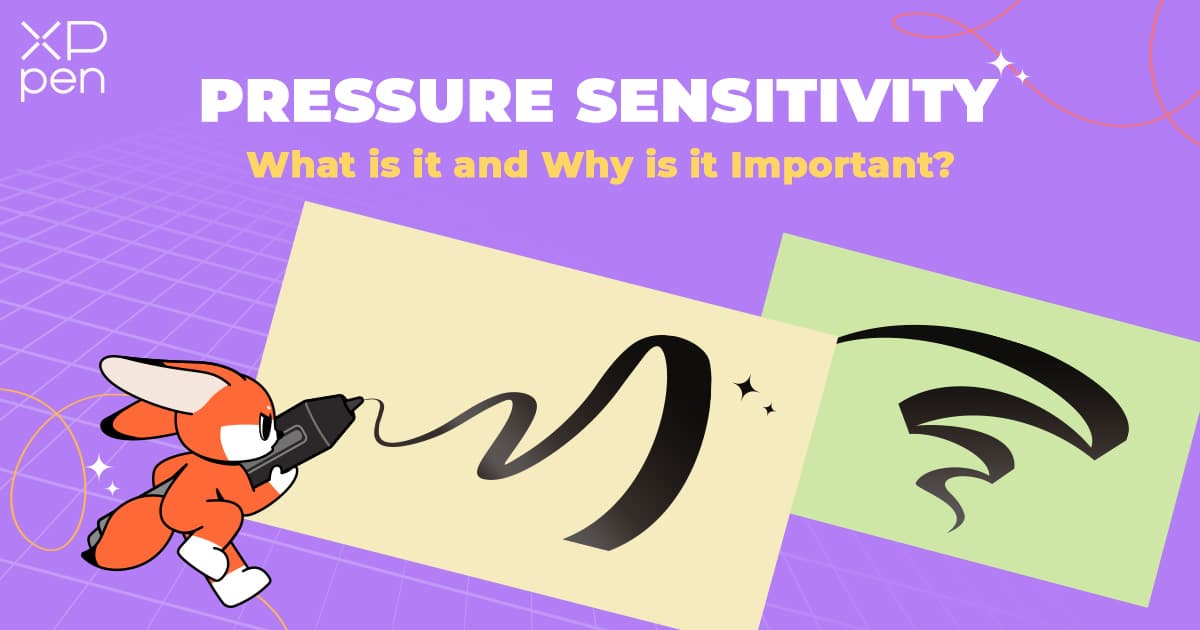
If you want your digital drawings to feel natural and smooth, getting your pen pressure settings just right is key. When your tablet responds perfectly to how hard or soft you press, every stroke becomes more expressive and true to your style.
But figuring out the best pen pressure settings can be tricky—and if it’s off, your lines might look stiff or uneven. You’ll discover simple yet powerful tips to fine-tune your pen pressure, so your tablet feels like an extension of your hand.
Ready to unlock your full drawing potential? Keep reading to learn how to adjust your settings for the best results.
Pen Pressure Basics
Understanding pen pressure basics helps improve your digital art skills. It controls how your tablet reacts to how hard you press the stylus. This affects line thickness, opacity, and brush effects. Learning these basics is key to creating natural, expressive drawings.
What Pen Pressure Does
Pen pressure detects how much force you apply on the tablet. Light pressure makes thin, faint lines. Hard pressure creates thick, dark strokes. It lets you control your drawing tools like real pencils or brushes. This makes your art look more lively and detailed.
Impact On Digital Art
Pen pressure adds depth and emotion to your work. It helps you vary line weight smoothly. This makes sketches look more natural and finished. Pressure sensitivity also controls shading and texture. It gives your artwork a professional, polished feel.
Common Pressure Sensitivity Levels
Most tablets have pressure levels from 2048 to 8192. Higher levels mean more control and finer detail. Beginners may start with 2048 levels, which is enough for basic work. Advanced artists prefer 4096 or 8192 for more precision. Choose a level that fits your drawing style.
Credit: www.clipstudio.net
Tablet Calibration Tips
Calibrating your drawing tablet is key to a smooth and natural drawing experience. Tablet calibration helps the pen pressure match your drawing style. It improves line control and brush behavior. Proper calibration reduces frustration and boosts creativity. Follow these simple tips to get your tablet ready for perfect pen pressure settings.
Setting Up Your Device
Start by installing the latest tablet drivers from the manufacturer’s website. Connect your tablet to your computer and open the tablet software. Select your tablet model and set the screen area to match your monitor. This step ensures your pen position aligns with the cursor on screen. Proper setup lays the foundation for accurate pressure sensitivity.
Adjusting Tip Feel And Sensitivity
Most tablets let you adjust how the pen tip feels when you press it. Choose a firmness level that feels comfortable for you. Softer tip feel requires less pressure to draw thick lines. Higher sensitivity means the tablet detects even light touches. Adjust these settings until pen pressure responds naturally to your hand. Take your time to find the best balance.
Testing Pressure Accuracy
Open a drawing app that supports pressure sensitivity. Use a brush tool and gently draw lines with varying pressure. Check if light presses create thin lines and hard presses create thick lines. If lines look uneven, return to the settings and tweak sensitivity. Repeat testing until pen pressure matches your intended strokes. Accurate pressure makes your art look polished and professional.
Optimizing Pressure Curves
Optimizing pressure curves is essential for a smooth drawing experience. Adjusting these curves shapes how your tablet reacts to pen pressure. It controls line thickness, opacity, and brush flow. Proper settings help your strokes feel natural and responsive. This section explains how to work with pressure curves effectively.
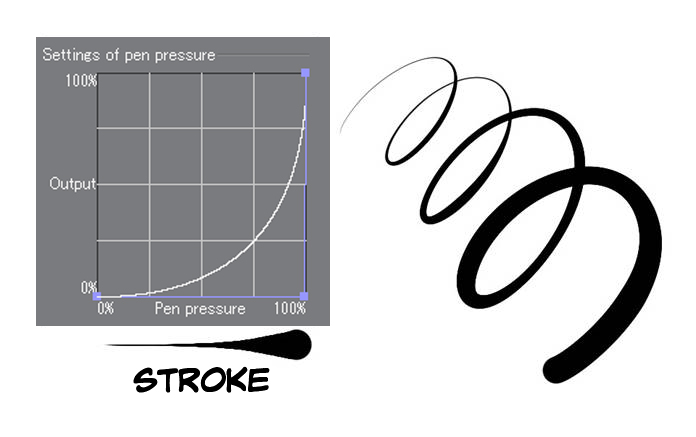
Understanding Pressure Curves
Pressure curves map the force you apply to the pen with the brush effect. The graph usually shows pressure on the horizontal axis and brush response on the vertical axis. A straight diagonal line means a direct, linear response. Curves can be adjusted to make the pen more or less sensitive at different pressure levels. This customization helps match the tablet to your drawing style.
Customizing Curves For Different Brushes
Different brushes require different pressure settings. Soft brushes work best with gentle pressure curves. Hard brushes need steeper curves for quick size change. You can create multiple curve profiles and switch them based on the brush you use. This approach improves control and accuracy. Testing each curve with specific brushes is key to finding the right balance.
Balancing Soft And Hard Pressure
Balancing soft and hard pressure ensures smooth transitions in strokes. Too much sensitivity can cause accidental thick lines. Too little sensitivity forces you to press too hard. Adjust the curve to start responding at low pressure but limit extreme thickness at full pressure. This balance allows better control over shading and line weight. Small changes can make a big difference in your artwork.
Software-specific Settings
Adjusting pen pressure settings depends greatly on the software you use. Each drawing app offers unique controls to fine-tune pressure sensitivity. Customizing these settings improves line quality and drawing comfort.
Understanding software-specific options helps create natural strokes. Some apps allow pressure curves, while others offer simple sliders. Explore these tools for better control.
Clip Studio Paint Adjustments
Clip Studio Paint provides detailed pressure curve adjustments. You can add points on the curve to change sensitivity at different pressure levels. This lets you control how hard or soft you must press for thicker or thinner lines.
Resetting the curve helps if your pressure feels off. The software also lets you save different curves for each brush. This feature is useful for varied drawing styles and effects.
Photoshop Pressure Controls
Photoshop uses a simple pressure sensitivity option in brush settings. The control called “Shape Dynamics” adjusts size jitter based on pen pressure. You can change the minimum size to avoid too thin lines when pressing lightly.
Photoshop does not offer pressure curves like Clip Studio Paint. Instead, it relies on sliders to tweak pressure effects. Experiment with these sliders for a smoother drawing experience.
Other Popular Drawing Apps
Many other apps like Krita and Procreate offer pressure curve adjustments. Krita’s brush editor includes a pressure curve similar to Clip Studio Paint. Procreate allows you to change pressure and streamline settings for better control.
Each app may label settings differently but usually includes pressure sensitivity options. Learning these controls helps you create natural brush strokes across software.
Brush Settings And Pressure
Brush settings and pressure control are vital for smooth, natural digital drawing. Adjusting these settings improves line quality and drawing comfort. Proper pressure settings help mimic real brushes and pens. This section covers key aspects of brush pressure customization.
Setting Minimum And Maximum Pressure
Minimum pressure sets how light your stroke begins. Too low can cause unwanted marks. Too high requires more force to start drawing. Maximum pressure controls how thick or dark your stroke gets. Setting it right avoids sudden jumps in line width. Balance these to suit your style and tablet sensitivity.
Stabilization And Smoothing
Stabilization helps steady shaky hand movements. It smooths lines for cleaner strokes. Adjust smoothing levels to find your sweet spot. Too much smoothing can slow response. Too little keeps every hand tremor visible. Use this to create fluid, polished artwork without losing natural feel.
Starting And Ending Stroke Control
Control over stroke start and end improves line flow. Soft starts avoid harsh edges at the beginning of a line. Soft ends prevent abrupt stops and jagged edges. Adjust these settings to create strokes that taper naturally. This adds realism and finesse to your digital art.
Troubleshooting Pressure Issues
Pen pressure issues can disrupt your digital art flow. Many users face problems like inconsistent lines or no pressure response. Troubleshooting these issues ensures smoother and more natural drawing. This section helps you fix common pressure problems quickly.
Common Problems And Fixes
Pressure sensitivity may stop working or feel off. Check if the pen tip is worn out and replace it if needed. Clean the tablet surface to remove dust or dirt. Restart your drawing software and tablet to refresh connections. Try using different brushes to see if pressure responds. Adjust pressure settings inside your art program for better control.
Driver Updates And Compatibility
Outdated or incorrect drivers cause many pressure problems. Visit your tablet manufacturer’s website for the latest driver version. Install the correct driver for your operating system. Remove old drivers before installing new ones to avoid conflicts. Confirm your drawing software supports your tablet model. Compatibility issues often arise after system updates, so keep drivers current.
Resetting To Default Settings
Resetting pressure settings can solve calibration errors. Open your tablet’s control panel and find the reset option. This action restores factory defaults for pen pressure and buttons. After resetting, recalibrate your pen for accuracy. Resetting also removes any conflicting custom profiles. It gives you a clean start to adjust settings properly.
Advanced Pressure Techniques
Advanced pressure techniques help digital artists control their lines and strokes better. They allow more creativity and precision in drawing. These methods can improve how you use your drawing tablet’s pen pressure settings.
Experimenting with these techniques helps find the best fit for your art style. Adjusting pressure settings beyond basics can lead to smoother and more natural artwork. Let’s explore some ways to enhance your pen pressure use.
Using Multiple Pressure Profiles
Create different pressure profiles for various brushes or tasks. Each profile can have unique settings for hardness, opacity, or size. This lets you switch quickly without adjusting settings every time. Many drawing programs support saving and loading multiple profiles.
Use softer pressure for sketching and firmer pressure for inking. Profiles help keep your workflow fast and organized. They also reduce frustration by matching pressure response to your needs.
Pressure Settings For Specific Art Styles
Different art styles need different pressure sensitivity setups. For example, comic art often requires sharp, clean lines with clear pressure changes. Watercolor styles benefit from smooth, gradual pressure curves for soft fades.
Adjust pressure curves to fit the style’s line quality and shading. Use light pressure for fine details and heavier pressure for bold strokes. Tailoring settings to your style improves the final look of your work.
Combining Pressure With Other Tablet Features
Pen pressure works well with other tablet features like tilt and shortcut buttons. Tilt can change brush shape or texture based on pen angle. Shortcut buttons speed up tasks like switching brushes or undoing strokes.
Use pressure and tilt together for natural brush effects. Customize buttons to fit your drawing habits. Combining these features creates a more fluid and efficient drawing experience.

Credit: www.youtube.com
Credit: www.xp-pen.com
Frequently Asked Questions
What’s A Good Pressure Level For A Drawing Tablet?
A good pressure level for a drawing tablet ranges between 2048 and 8192 levels. Higher levels offer smoother, more precise strokes. Adjust settings to match your drawing style and comfort for optimal control.
Is 4000 Pressure Sensitivity Good?
A pressure sensitivity of 4000 levels offers smooth, precise control for digital drawing. It suits most artists and designers well.
What Is 4096 Pressure Sensitivity?
4096 pressure sensitivity means a stylus detects 4096 pressure levels. It allows precise control over line thickness and opacity in digital art. This enhances drawing accuracy and creates natural, detailed strokes. High pressure sensitivity improves user experience for professional and hobbyist artists.
What Are The Best Pen Pressure Settings For Drawing Tablets?
The best pen pressure settings balance sensitivity and control. Adjust the pressure curve to respond naturally to your hand pressure. Start with medium pressure and tweak based on your drawing style for smooth, consistent lines.
Conclusion
Finding the best pen pressure settings improves your drawing flow. Adjust the pressure curve to match your style and comfort. Test different levels to see what feels natural and smooth. Proper settings help create lines that respond well to your hand.
Keep tweaking until your strokes look balanced and controlled. This simple step makes digital art more enjoyable and precise. Remember, every artist’s needs differ, so personalize your tablet settings. Happy drawing and keep experimenting with your pen pressure!