
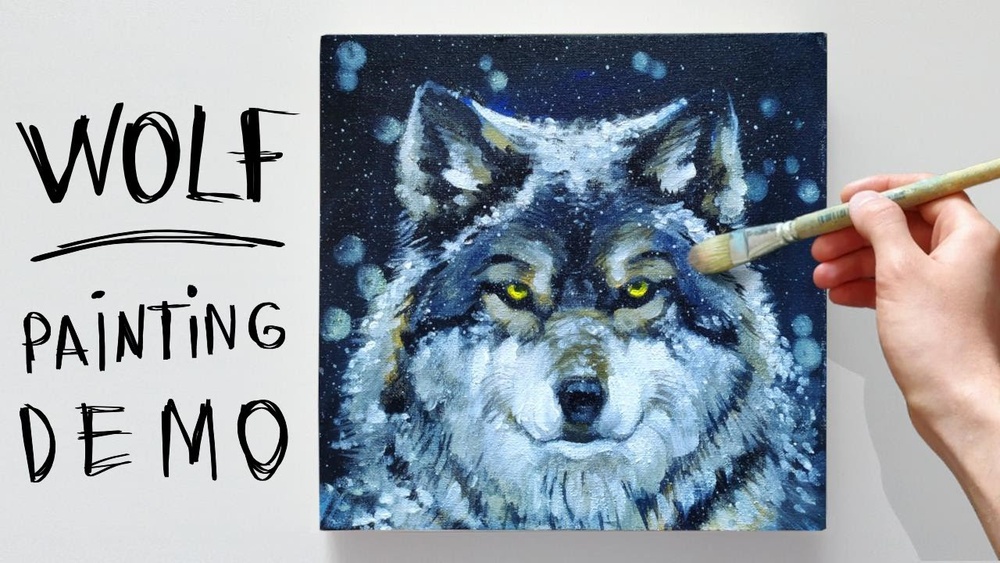
Quick answer: To paint a wolf with acrylic paint, sketch the head from simple shapes (a circle for the skull, a tapered block for the muzzle, triangles for the ears), block in the darkest fur areas first, then build the coat in layers of short, directional strokes from dark to light, following how the fur grows. Paint the eyes with a golden-amber iris, a dark rim and a sharp catchlight, and finish with fine light hairs along the edges of the head and ears. Fur reads as fur when stroke direction, value and edge softness are right, not when every hair is painted.
Wolves are a favorite subject because they combine a strong, recognizable silhouette with expressive eyes and a complex coat. The coat is where most painters get stuck. A gray wolf is rarely gray. It’s a mix of cream, tan, charcoal, warm brown and silvery white, arranged in distinct patterns around the face.
This guide on how to paint a wolf with acrylic paint focuses on a wolf portrait, head and shoulders, in a three-quarter view. That’s where most of the challenge lives: proportion, fur direction, the eyes and the facial markings. A short section at the end covers full-body wolves and silhouette scenes.
Know the Wolf Before You Paint It
Wolves are often painted like large dogs, and the difference is in a few proportions and markings.
- Ears: relatively short, rounded at the tips and thickly furred, set wide on the head. Tall, pointed ears look more like a German shepherd.
- Muzzle: long and fairly narrow, with a strong, straight top line from the forehead to the nose.
- Eyes: almond-shaped and angled upward toward the ears. Adult wolves commonly have yellow, amber or golden eyes.
- Cheek ruff: thick fur that flares out below and behind the cheeks, making the face look wider than the skull.
- Markings: gray wolves often have pale fur on the muzzle, cheeks and above the eyes, a darker “saddle” on the back, and dark lines framing the eyes and the top of the muzzle.
Coat colors vary widely. Gray wolves can range from near-white to black, with every shade of grizzled gray and tan between. Arctic wolves are white with cream and gray shadows. Choose a good reference photo and study its specific pattern.
Materials
- Canvas or panel, 11×14 or 12×16 inches. A smooth surface helps with fine fur.
- Brushes: a 1-inch flat for the background, a size 8 filbert, a size 4 round, a size 2 round, a 10/0 liner or rigger, and a small fan brush or worn filbert for fur texture.
- Paints: titanium white, burnt umber, raw umber, burnt sienna, yellow ochre, ultramarine blue, cadmium yellow medium or hansa yellow deep, and optionally Payne’s gray.
- Glazing medium, flow improver and a stay-wet palette.
Wolf fur palette
| Fur area | Typical mix |
|---|---|
| Darkest fur (eye lines, ear backs, saddle) | Burnt umber + ultramarine |
| Cool gray fur | White + ultramarine + burnt umber |
| Warm tan fur | Yellow ochre + burnt sienna + white |
| Cream and pale areas | White + a touch of ochre |
| Silver highlights | White + a hint of ultramarine |
| Nose and lips | Burnt umber + ultramarine, highlighted with blue-gray |
| Iris | Hansa yellow deep or cadmium yellow + ochre, darkened with burnt sienna |
Wolf coats live in the subtle zone between warm and cool grays. Mixing them cleanly from umber, blue, ochre and white works best with paints that have a solid pigment load; thin, filler-heavy paints tend to go flat and chalky in these mixes. For help choosing, see our comparison of the best acrylic paints for subtle fur and wildlife tones.
How to Paint a Wolf With Acrylic Paint: Step by Step
Step 1: Background
Choose a background that contrasts with the wolf. A dark forest green-blue or a deep blue-gray works well behind a light gray wolf. For a dark wolf, use a lighter, misty background. Paint it loosely and let it run under the edges of where the wolf will be, so you can paint soft fur edges over it later.
Step 2: Draw the head with simple shapes
- Draw a circle for the skull.
- Add a tapered block extending from the lower front of the circle for the muzzle. In a three-quarter view, it angles toward the viewer’s side.
- Draw a center line from the top of the head down the muzzle to the nose. It curves with the turn of the head.
- Place the eyes on a line about one-third of the way down the circle, angled upward toward the ears. The far eye is partly hidden behind the bridge of the nose.
- Add the ears as rounded triangles set wide on the top of the circle.
- Draw the cheek ruff as a broad, shaggy shape flaring out from below the ears to the jaw.
- Sketch the neck and chest fur as a large, downward-flowing mass.
Mark the main boundaries between light and dark fur: the dark eye lines, the pale muzzle, the cheek patches and the dark areas behind the ears.
Step 3: Block in the darks
With your darkest mix and a size 4 round, paint the eye outlines, the nose, the mouth line, the dark fur lines running from the eyes, the insides of the ears and any dark patches on the head and neck. These anchor everything else.
Step 4: Lay in the mid-tones
Using a filbert, fill the rest of the fur with mid-value grays and tans. Don’t paint flat areas; use strokes that already follow the direction of the fur. A quick map of fur direction on a wolf’s head:
- On the muzzle, fur flows from the nose back toward the eyes.
- Above the eyes, it flows up and back toward the ears.
- On the cheeks, it flows down and outward into the ruff.
- On the neck and chest, it flows downward in long, layered clumps.
- On the ears, it flows from the base outward toward the tips.
Step 5: Paint the eyes
Eyes give the portrait its life. Paint them before the detailed fur so you can adjust the surrounding fur to frame them.
- Fill the iris with a golden yellow mix.
- Darken the top of the iris with burnt sienna, because the upper lid and brow cast shadow there.
- Add a dark ring around the iris edge and a round black-brown pupil.
- Glaze a little lighter yellow on the lower part of the iris, opposite the light.
- Paint the dark rim of the eyelid fully around the eye.
- Add one crisp white catchlight overlapping the pupil and iris.
Step 6: Build fur in layers
Here’s the heart of the process. Work from dark to light in three or four passes.
- Dark texture pass: thin a dark gray and use a liner or the tip of a round to paint clumps of fur in the shadow areas. Think in clumps, not single hairs.
- Mid pass: with a slightly lighter mix, paint fur strokes over the mid-tone areas, overlapping the dark clumps slightly so they look layered.
- Light pass: use cream, light gray or tan for the top layer of fur on the lit areas: the forehead, the top of the muzzle, the cheek patches and the chest.
- Highlight pass: with nearly white paint thinned with flow improver, flick a few fine hairs on the brightest areas and along edges where fur catches the light.
Thin paint is essential for fur. Paint at the consistency of light cream or ink flows off a liner in long, tapering strokes. Thick paint gives blunt, blobby marks.
A worn fan brush can speed up large fur areas. Load it lightly, hold it at an angle, and flick in the direction of growth to create several hairs at once.
Step 7: Nose and mouth
The nose is dark, but not flat black. Paint it in your darkest mix, then add a blue-gray highlight across the top and the nostril edges. The lips are a dark line with a slight highlight on the upper edge. Add a few faint dots on the muzzle where the whiskers grow, and paint a few thin, light whiskers with a liner as the very last touch.
Step 8: Soften edges and refine
Fur edges against the background should be soft and broken. Flick a few hairs outward over the background, and glaze a little background color over parts of the outer edge to push them back. Keep the sharpest edges and strongest contrast around the eyes, which should be the focal point.
Painting Different Wolf Types
| Wolf type | Key colors | Painting focus |
|---|---|---|
| Gray wolf | Cool grays, warm tans, cream, charcoal | Facial mask pattern and grizzled texture |
| Arctic or white wolf | White, cream, blue-gray and violet-gray shadows | Describing form with temperature, not value |
| Black wolf | Blue-black, warm brown-black, cool silver highlights | Reflected light and subtle edge highlights |
| Red or tan-toned wolf | Burnt sienna, ochre, cream | Warm saturated fur without losing gray undertones |
White wolves are a great exercise. Their shadows are cool blue-violet grays and their lit areas warm cream, so you learn to model form with color temperature.
Wolf Silhouette and Full-Body Scenes
A howling wolf silhouetted against a full moon is a classic beginner project. Paint a gradient sky (deep blue to purple at the top, lighter near the moon), a large pale moon, then the wolf as a solid black shape on a rock or hill. Concentrate on a clean, accurate outline: raised muzzle, ears back, thick neck fur and a bushy tail.
For a full-body realistic wolf in a landscape, keep the wolf as the area of greatest detail and contrast, and paint the surroundings more loosely. Snow scenes work well because the cool blue shadows and warm light on the wolf create natural contrast.
Common Mistakes When Painting a Wolf
- Ears too tall and pointed. The wolf turns into a dog or a fox. Keep ears short, rounded and furry.
- Painting every hair. It looks stiff and busy. Paint clumps and suggest individual hairs only on edges and highlights.
- Ignoring fur direction. Random strokes make the coat look scruffy and flat.
- Using only gray. Real wolf fur mixes warm and cool tones. Add ochre and sienna to your grays.
- Thick paint for fine fur. Thin your paint for liner work.
- Dull eyes. Without a dark rim and crisp catchlight, the eyes lose intensity.
For crisp whiskers and fine hairs, some painters prefer acrylic ink over thinned tube paint. Our Daler-Rowney acrylic ink review covers how that ink behaves in fine linework.
FAQs
What colors do you need to paint a gray wolf?
Titanium white, burnt umber, raw umber, burnt sienna, yellow ochre and ultramarine blue cover the coat. Mix warm grays with umber and ochre and cool grays with ultramarine. Add a yellow for the eyes.
How do you paint wolf fur with acrylics?
Block in darks and mid-tones, then build fur in layers of short, directional strokes from dark to light using thinned paint and a liner or worn fan brush. Paint clumps rather than single hairs, and save fine light hairs for the final layer.
What color are wolf eyes?
Adult wolves most often have yellow, amber or golden-brown eyes. Paint the iris in a golden mix, shade the top under the lid, and add a dark rim and a crisp catchlight.
How long does it take to paint a wolf?
A simple silhouette scene can be finished in one to two hours. A detailed wolf portrait with layered fur typically takes six to twelve hours across several sessions.
Is a wolf a good subject for beginners?
A silhouette against the moon is beginner-friendly. A realistic portrait is better suited to painters who have practiced fur and eyes on smaller studies first.
What brush is best for wolf fur?
A liner or rigger for fine hairs, a worn fan brush for quick texture over larger areas, and a filbert for blocking in. Synthetic brushes with a good point are easiest to control.
Final Thoughts
A wolf portrait comes together when you respect three things: the proportions that separate a wolf from a dog, the direction of fur growth, and the eyes as the sharpest, most contrasting point of the painting. Build the coat in thin, layered passes and resist painting every hair.
Mixing believable fur grays depends on clean, well-pigmented paint. To find a palette that handles these subtle mixes, read our guide to the best acrylic paint brands for artists at every level.




