Ribbon bookmarks have a softness that paper bookmarks lack. They drape between pages without creasing them, they can stay tucked in a book for years, and a painted design turns a plain length of ribbon into something personal. Painting on ribbon is a little different from painting on paper, though. Fabric absorbs, frays and flexes, so the right ribbon, paint and finishing steps make all the difference.
Quick answer: To make painted ribbon bookmarks, cut 1 to 1.5 inch wide cotton twill, grosgrain or canvas ribbon to about 10 to 12 inches, seal the cut ends with fray check or a quick pass near a flame (synthetics only), and tape the ribbon flat. Paint your design with fabric paint or acrylic mixed with fabric medium using thin coats and a small brush, let it dry for 24 hours, heat-set with an iron through a pressing cloth, then add a charm, bead or tassel to one end.
This guide covers choosing ribbon, the best paints for fabric, preventing bleeding and fraying, design ideas, finishing hardware, and how to combine ribbon and paper for sturdier bookmarks. You will also find answers to common questions about washing and durability.
Nature motifs suit the long, narrow shape of a ribbon especially well, and one favorite is a small turtle painted at the tail end so it peeks out below the pages. If you like that idea, our profile of the eastern painted turtle shows the red, yellow and olive shell coloring that makes the species such a good painting subject. There is a step-by-step version of that design later in this guide.
Choosing the Right Ribbon
Ribbon type matters more than anything else in this project. Some ribbons take paint beautifully; others resist it or let it bleed into a blur.
| Ribbon | Paint absorption | Fraying | Best for |
|---|---|---|---|
| Cotton twill tape | Excellent; matte | Moderate | Lettering, simple illustrations, rustic look |
| Grosgrain (polyester) | Good on the ribbed surface | Low; seals with heat | Patterns, stripes, bold designs |
| Canvas or cotton webbing | Excellent | Moderate | Detailed painting, sturdy bookmarks |
| Satin | Poor; paint can bead or crack | High | Accents and metallic paint only |
| Linen ribbon | Very good | High | Botanical, natural-look designs |
| Velvet | Poor | Moderate | Not recommended for painting |
Cotton twill tape and grosgrain are the easiest starting points. A width of 1 to 1.5 inches gives enough space for a design while still slipping easily between pages. Narrow ribbon, around 3/8 inch, works as a simple page marker but leaves little room for painting.
Supplies
- Ribbon: cotton twill, grosgrain, canvas or linen, 1 to 1.5 inches wide
- Fabric paint, or acrylic paint plus fabric medium
- Fine round brushes (sizes 0 to 4) and a liner brush
- Fabric markers or fine-tip fabric pens for details
- Painter’s tape and a piece of cardboard or a cutting mat
- Fray check liquid or clear-drying fabric glue
- An iron and a pressing cloth (a thin cotton dish towel works)
- Sharp fabric scissors
- Optional: charms, beads, jump rings, ribbon end crimps, tassels, paper or card stock for backing, stencils
Paint for Ribbon: What Works and Why
Fabric paint
Fabric paint is formulated to stay flexible on textiles and to bond with fibers after heat-setting. It is the most durable option and keeps ribbon soft. Many lines include soft, opaque, metallic and glitter versions.
Acrylic paint plus fabric medium
If you already have acrylic craft paint, mixing it with a textile or fabric medium makes it more flexible and helps it penetrate the fibers. A common ratio is around 1 part medium to 2 parts paint, but follow the medium’s label. Without a medium, plain acrylic can stiffen ribbon and crack when bent.
Fabric markers
Fabric markers are great for lettering, outlines and small details. They give more control than a brush on narrow ribbon. Some require heat-setting too.
Watercolor and gouache
These reactivate with moisture and tend to rub off fabric, so they are not ideal for ribbon unless the ribbon is mounted on paper and sealed.
Step-by-Step: How to Make Painted Ribbon Bookmarks
- Cut the ribbon. Cut a piece 10 to 12 inches long for standard books. Cut a little extra if you plan to fold the ends or add hardware. Angle cuts or V-cuts at the ends reduce fraying and look neat.
- Seal the ends. Apply fray check or a thin line of clear fabric glue to cut edges. For 100% polyester grosgrain, an adult can pass the cut edge quickly near a candle flame to melt fibers slightly; never do this with cotton or linen, which burn rather than melt.
- Prewash cotton ribbon (optional). Washing removes sizing so paint absorbs evenly. Dry and iron flat before painting.
- Tape it down. Lay the ribbon flat on cardboard and tape both ends. Pull it gently taut. A flat, stretched ribbon gives cleaner lines and keeps the paint from pooling in creases.
- Sketch lightly. Use a fabric pencil, chalk, or a water-soluble marker. Keep designs simple, since fabric texture softens fine detail.
- Paint thin coats. Load the brush lightly and apply thin layers. Heavy paint bleeds along the fibers, especially on cotton. Two thin coats look crisper than one thick coat.
- Add details. After the base coats dry, add outlines, highlights and lettering with a liner brush or fabric marker.
- Dry fully. Leave the ribbon taped flat for 24 hours or as directed on the paint.
- Heat-set. Place a pressing cloth over the painted side and iron at the setting your paint recommends, usually for a few minutes, keeping the iron moving. Check the ribbon’s fiber content; polyester ribbons need a lower heat setting.
- Finish the ends. Add a charm, bead, tassel or metal ribbon end.
Preventing Bleeding on Ribbon
Bleeding, where paint wicks along the threads beyond your lines, is the most common frustration with painted ribbon.
- Use thicker paint. Do not thin fabric paint with water. Watery paint travels along fibers.
- Use a drier brush. Wipe excess paint off the brush before touching the ribbon.
- Outline first. Draw outlines with a fabric marker or a thin line of paint and let it dry. It acts as a partial barrier for the fill.
- Choose tighter weaves. Grosgrain and tightly woven twill bleed less than loose linen.
- Test on a scrap. Paint a small sample on an offcut first.
Painted Ribbon Bookmark Design Ideas
Simple designs
- Stripes and color blocks: Tape off sections and paint bands of color.
- Polka dots: Use the end of a brush handle or a dotting tool.
- Hearts or stars: Small repeated shapes down the length of the ribbon.
- Ombre: Blend from light to dark along the ribbon while the paint is wet.
Illustrated designs
- Vines and leaves: A single stem winding down the ribbon, with leaves painted in one press-and-lift stroke.
- Wildflowers: Tiny daisies, lavender and forget-me-nots scattered along the length.
- Feathers: A long, narrow subject that suits the shape of a ribbon perfectly.
- Book stack: A vertical stack of tiny painted books.
- Animal motifs: A small turtle, fox or owl at the bottom end of the ribbon, where it peeks out of the book.
A painted turtle bookmark
Turtles are a charming motif for slow, cozy reading, and the eastern painted turtle is a natural fit for a painted ribbon, since its dark shell with red and yellow edging translates well into a few simple colors. Paint an olive-dark oval shell, add thin red-orange marks around the edge, then a head and legs with yellow stripes. Keep the shell to three colors at most, and outline it with a fine fabric marker once the paint is dry so it reads clearly at small size.
Lettering
- A short quote, written vertically or in short lines.
- The reader’s name or initials.
- A dedication for a gift: “Happy reading, Mia.”
Fabric markers or a fine liner brush give the cleanest lettering. Practice on a scrap first, because ribbon texture makes small letters harder to control.
How to Make Painted Paper to Pair With Ribbon
Combining paper and ribbon gives you the best of both: a stiff painted paper bookmark with a soft ribbon tail. You can also make painted paper to back a ribbon for extra structure.
- Paint a sheet of watercolor paper or heavy card stock with an abstract wash, splatter, or a pattern.
- Let it dry, flatten it under books, and cut it into strips about 2 x 6 inches.
- Punch a hole at the top of each strip.
- Thread a painted ribbon through the hole, fold it in half, and knot it, leaving the tails to hang below the book.
- Alternatively, glue a painted ribbon down the center of a paper strip with fabric glue, then laminate or seal.
Finishing Hardware and Details
| Finish | How to attach | Look |
|---|---|---|
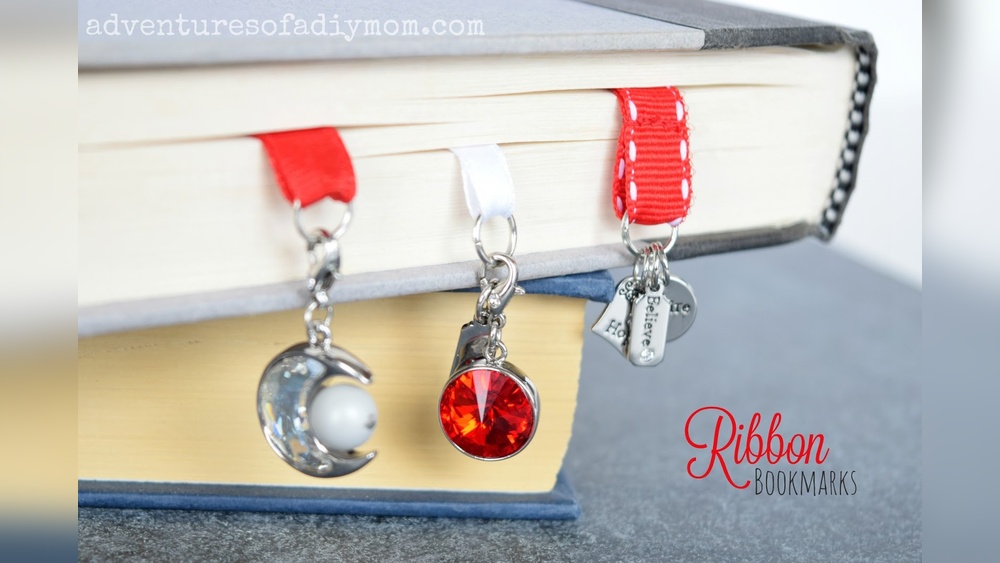
| Charm | Fold ribbon end, stitch or glue a loop, add a jump ring | Personal, giftable |
| Bead | Thread ribbon end through a large-hole bead, knot below | Simple, weighted end |
| Tassel | Stitch or tie a small tassel to one end | Classic, elegant |
| Metal ribbon crimp | Clamp over a straight-cut end with pliers | Polished, jewelry-like |
| Fishtail cut | Fold ribbon in half lengthwise and cut at an angle | Traditional ribbon finish |
Choose lightweight charms. Heavy metal pieces can dent pages or pull the bookmark out of the book.
Making Ribbon Bookmarks With Kids
- Use fabric markers instead of paint for younger kids; they are easier to control and less messy.
- Pre-cut and seal the ribbon ends before the session.
- Tape each ribbon down on a piece of cardboard with the child’s name on it.
- Offer stencils for shapes like hearts, stars and letters.
- An adult should handle the iron for heat-setting.
Common Mistakes and Fixes
| Mistake | Result | Fix |
|---|---|---|
| Using satin ribbon | Paint cracks or beads up | Use cotton twill or grosgrain |
| Watered-down paint | Bleeding lines | Use paint at full thickness, thin coats |
| Plain acrylic without medium | Stiff ribbon that cracks | Mix with fabric medium or use fabric paint |
| Unsealed ends | Fraying | Use fray check or heat-seal polyester ends |
| Skipping heat-setting | Paint wears off with handling | Heat-set per paint directions |
| Ironing directly on paint | Shiny or sticky spots | Always use a pressing cloth |
Caring for Painted Ribbon Bookmarks
Ribbon bookmarks rarely need washing, but they can collect dust and oils from handling. Spot-clean gently with a damp cloth and a drop of mild soap, then lay flat to dry. Avoid soaking or machine washing, especially if the bookmark has charms or glued parts. Store spare bookmarks flat or loosely rolled, away from direct sunlight that can fade colors.
Gift Ideas
- Matching sets for book club members, each with a different flower.
- Personalized bookmarks with a child’s name for a first library card.
- Teacher gifts with a hand-lettered thank-you.
- Wedding favors painted with the couple’s initials and date.
- Paired with a used copy of a favorite book, tucked at the first chapter.
FAQs
What kind of ribbon is best for painting?
Cotton twill tape, grosgrain, canvas and linen ribbons all take paint well. Satin and velvet are slippery or textured in ways that make paint bead, crack or look uneven.
Can you use acrylic paint on ribbon?
Yes, but mix it with a fabric medium so it stays flexible and bonds with the fibers. Plain acrylic can make ribbon stiff and may crack when the ribbon bends.
How do I keep paint from bleeding on ribbon?
Use paint at full thickness, wipe excess from the brush, apply thin coats, outline shapes first, and choose tightly woven ribbon. Always test on a scrap.
How long should a ribbon bookmark be?
About 10 to 12 inches suits most books, leaving a tail visible at the bottom. Large hardcovers may need 14 inches or more.
Do I need to heat-set painted ribbon?
Heat-setting is recommended for fabric paint and acrylic with fabric medium. It improves durability. Follow the paint’s directions and use a pressing cloth and an appropriate iron setting for the ribbon fiber.
How do you stop ribbon ends from fraying?
Apply fray check or clear fabric glue to the cut edges, or cut at an angle or in a fishtail. Polyester ribbons can be heat-sealed carefully by an adult.
Final Thoughts
Painted ribbon bookmarks come out best when you start with absorbent ribbon, paint in thin coats with fabric-friendly paint, and finish with heat-setting and sealed ends. From simple stripes to a tiny painted turtle peeking from the bottom of a book, the narrow format rewards simple, bold designs.
If you want to try the turtle design, the eastern painted turtle profile is a useful visual reference for its distinctive shell colors and head stripes.