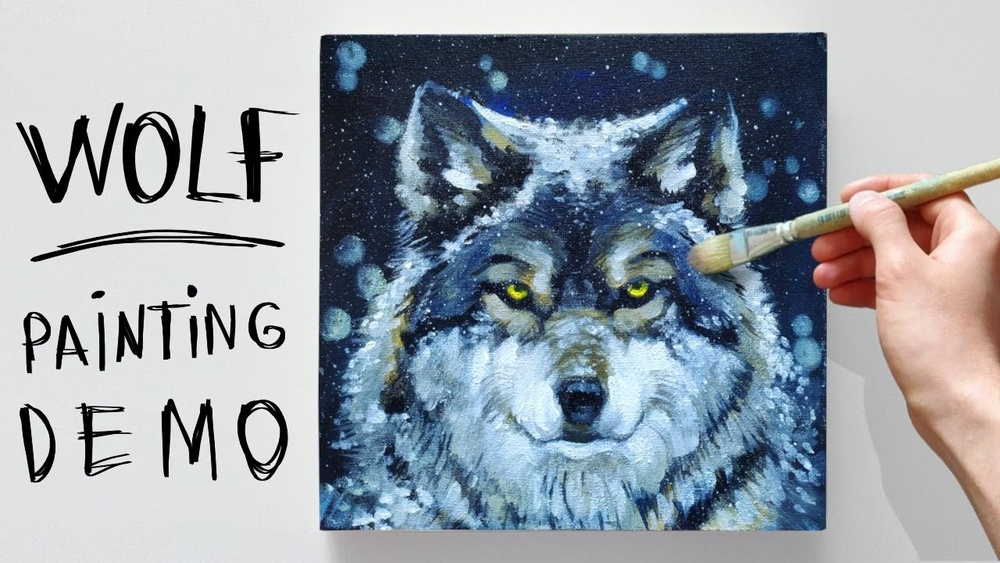
Have you ever wanted to capture the wild beauty and fierce spirit of a wolf on your canvas? Painting a wolf with acrylics might seem tricky at first, but with the right steps, you can create a stunning piece that feels alive.
This guide will walk you through simple and clear techniques, helping you bring your vision to life. Whether you’re a beginner or looking to improve your skills, you’ll find tips that make painting fur, eyes, and shadows easier than you imagined.
Ready to unleash your creativity and paint a wolf that truly stands out? Let’s dive in and make your artwork unforgettable.
Materials Needed
Gathering the right materials sets the foundation for a successful wolf painting. Choosing quality supplies makes the process easier and the results better. Prepare everything before you start to avoid interruptions.
Selecting Acrylic Paints
Pick vibrant acrylic paints with good coverage. Basic colors like white, black, gray, brown, and blue work well for wolf fur and background. Choose paints labeled as artist quality for richer pigment and smooth blending. Avoid cheap paints as they may crack or fade over time.
Choosing The Right Brushes
Use a variety of brushes to capture different details. Flat brushes help cover large areas quickly. Round brushes are perfect for fine lines and fur texture. Small detail brushes allow you to paint eyes and nose precisely. Synthetic brushes work well with acrylics and clean easily.
Additional Supplies
Prepare a palette for mixing colors. Use a canvas or acrylic paper as your painting surface. Have a jar of clean water to rinse brushes often. Keep paper towels or a cloth nearby to wipe excess paint. A pencil and eraser help sketch the wolf’s outline before painting.

Credit: stepbysteppainting.net
Preparing Your Workspace
Preparing your workspace is the first step to a smooth painting process. A clean and organized area helps you focus on your wolf painting. It reduces distractions and keeps your materials within reach. Setting up your canvas and organizing tools properly makes painting easier and more enjoyable.
Setting Up Canvas
Choose a flat, sturdy surface for your canvas. Use an easel or lay it on a table at a comfortable angle. Make sure your canvas is clean and dry before starting. Tape the edges if you want clean borders on your painting. Proper setup prevents the canvas from moving while you paint.
Organizing Tools
Gather all your acrylic paints, brushes, water cups, and palettes. Arrange them in order of use or color. Keep paper towels or rags nearby to clean brushes quickly. Use containers to separate brushes by size or type. A well-organized tool area saves time and keeps your workflow smooth.
Sketching The Wolf
Sketching the wolf is the first step in your acrylic painting process. This stage lays down the basic outline and guides your work. A good sketch helps capture the wolf’s shape and spirit. It makes painting easier and more accurate.
Start with light pencil marks. These allow changes without damaging the paper or canvas. Keep your lines soft and simple. Focus on the overall form before details. This method saves time and effort later.
Basic Shapes And Proportions
Begin by drawing simple shapes to form the wolf’s body. Use circles for the head and body. Add ovals for the legs. This breaks down the complex animal into easy parts.
Check the size of each shape. The head should be smaller than the body. Legs must match in length and thickness. Keep the shapes balanced and connected. This helps keep the wolf’s look natural.
Use light lines to sketch these shapes. Avoid pressing too hard. You can erase or adjust as you go. This step is the foundation of your painting.
Marking Key Features
Next, mark the wolf’s main features. Draw lines for the eyes, nose, and mouth. Place the ears on top of the head. Mark the tail’s position and curve. These points give your wolf character.
Pay attention to the eyes. They show the wolf’s expression. Place them evenly on the head. Add the nose at the front center. Sketch the mouth slightly below the nose. These details bring life to your drawing.
Use short lines to indicate fur direction. This guides your brush strokes later. Keep your marks light and clear. This sketch is your map for the painting stage.
Blocking In Colors
Blocking in colors is a crucial first step in acrylic painting. It helps set the stage for your wolf artwork. This process involves painting large areas with simple shapes and colors. It allows you to see the overall composition before adding details. Starting with broad strokes saves time and guides the rest of your painting.
Use thin paint layers and avoid heavy brushwork. This approach keeps the canvas flexible for changes. Focus on the main shapes and tones rather than details. Blocking in colors creates a strong foundation and improves the final look.
Background Layers
Begin by painting the background before the wolf. Choose colors that complement the wolf’s fur and setting. Soft blues, grays, or earthy tones work well for natural scenes. Use a large brush and cover the canvas evenly. Keep the background simple to avoid distraction.
Apply light washes of paint. Let these dry before adding more layers. This builds depth and atmosphere. Avoid sharp edges in the background. Blurry or smooth transitions help the wolf stand out later.
Base Colors For The Wolf
Next, block in the wolf’s base colors. Use mid-tone grays, browns, or whites depending on your wolf type. Paint the general shapes of the head, body, and legs. Do not focus on fur details yet.
Keep brush strokes loose and broad. This step defines the wolf’s form and size. Make sure the colors contrast enough against the background. This contrast helps the wolf become the painting’s focal point.
Adding Details
Adding details transforms your wolf painting from simple shapes to a lifelike image. Details bring depth and texture. They make the wolf appear real and dynamic. Focus on small elements to create a natural look. Use fine brushes and steady strokes. Work slowly to build layers of detail. This section covers three key steps to refine your painting.
Painting Fur Texture
Fur texture adds realism to your wolf. Use short, thin strokes with a fine brush. Paint in the direction of the fur growth. Mix different shades of gray, white, and brown. Layer these colors to create depth and variation. Avoid flat colors; add highlights and shadows. Use a dry brush technique for soft, wispy fur. Thin paint helps create delicate hair strands. Vary stroke length and pressure for natural fur.
Defining Facial Features
Facial features give personality to the wolf. Outline the nose, mouth, and ears carefully. Use darker shades to define shadows and contours. Add lighter colors for highlights on the snout and cheeks. Pay attention to the shape of the nose and lips. Use small, precise strokes for whiskers and fine details. Keep the edges soft to blend features naturally. This step adds structure and form to the face.
Capturing The Eyes
The eyes are the soul of your painting. Paint the iris with a bright, clear color. Add a small white dot to show light reflection. Use dark paint for the pupil and surrounding shadows. Paint the eyelids and lashes with fine, gentle strokes. Keep the eyes sharp and focused. This draws viewers in and creates emotional impact. Take time to perfect this part for a striking result.
Creating Depth
Creating depth is essential to make your wolf painting look real and alive. Depth adds a three-dimensional feel that pulls the viewer into the artwork. It helps show the wolf’s fur texture, facial structure, and the play of light on its body.
Without depth, a painting can appear flat and dull. Using acrylic paint, you can build this depth by carefully applying shadows, highlights, and layers. These techniques work together to bring your wolf to life on the canvas.
Using Shadows And Highlights
Shadows give your wolf shape and form. Paint darker tones in areas where light is blocked. Common shadow spots include under the chin, behind the ears, and around the eyes. Use a soft brush to blend shadows smoothly.
Highlights are lighter spots that show where light hits the fur. Use white or light colors to paint highlights on the nose, forehead, and edges of the fur. Highlights contrast with shadows to create a rounded look. They add shine and texture to the painting.
Layering Techniques
Layering means applying paint in multiple thin coats. Start with a base color for the wolf’s fur. Let it dry before adding more layers on top. Each layer adds more detail and depth.
Use thin brushes for fine fur strokes on the top layers. Mix different shades of gray, brown, or white to mimic natural fur colors. Layering helps build complexity and richness in the painting.
Finishing Touches
The finishing touches bring your acrylic wolf painting to life. This stage sharpens your work and adds subtle details that capture the wolf’s spirit. Carefully refining edges and adding final details will give your painting depth and realism. These steps make your artwork look polished and complete.
Refining Edges
Use a small, fine brush to clean up any rough edges. Smooth out the fur outlines and sharpen the wolf’s facial features. Pay close attention to the ears, eyes, and nose. Soft edges can be blended gently to create a natural fur look. Crisp lines highlight important parts and give your painting clarity.
Adding Final Details
Add tiny strokes of white or light gray to mimic fur texture. Highlight the eyes with a small dot of white to make them shine. Paint delicate whiskers and subtle shading around the muzzle. These small touches add character and realism. Work slowly and step back often to see the overall effect.
Credit: urartstudio.com
Tips For Realism
Capturing the true essence of a wolf in acrylic paint demands careful attention to detail. Realism brings your painting to life and connects viewers to the wild spirit of the animal. Small techniques can make a big difference in how natural your wolf looks on canvas.
Focus on texture, light, and shadows. These elements mimic the wolf’s fur and facial features. Use thoughtful brushwork and smooth color transitions to achieve a believable effect. The following tips help you create a realistic wolf painting step by step.
Brush Control
Good brush control shapes fine details in the wolf’s fur and face. Use smaller brushes for delicate strokes around the eyes and nose. Larger brushes work well for broad areas of fur. Change brush pressure to vary stroke thickness. Light pressure creates thin lines, perfect for wispy fur. Firm pressure makes thicker strokes for dense fur patches.
Practice steady hand movements. Avoid shaky or uneven strokes that break the flow of fur. Clean your brush often to keep colors sharp and prevent muddy blends. Using the right brush technique lets you mimic the direction and texture of real fur.
Color Blending
Blending colors smoothly creates depth and realism in your wolf painting. Start with base colors that match the wolf’s natural shades. Gradually add lighter or darker tones to suggest light and shadow. Use a dry brush or soft blending brush to merge colors softly.
Work quickly while paint is wet for easier blending. Avoid harsh lines between colors unless highlighting specific fur patterns. Layer thin glazes of paint to build rich, subtle color shifts. Accurate color blending gives your wolf a lifelike appearance full of texture and volume.
Common Mistakes To Avoid
Painting a wolf with acrylics is rewarding but tricky. Avoiding common mistakes helps create a lifelike wolf painting. These errors can ruin your work or waste time. Learn what to watch for during your painting process.
Incorrect Brush Choice
Using the wrong brush affects your painting details. Large brushes blur fine fur and facial features. Small brushes give control but take longer for big areas. Choose a mix of flat and round brushes for best results.
Ignoring Layer Drying Time
Not waiting for layers to dry causes colors to mix unintentionally. Acrylic paint dries fast but still needs time. Paint in thin layers and wait between them. This prevents muddy colors and keeps details sharp.
Overusing Black Paint
Many beginners use too much black for shadows. This makes the painting look flat and dull. Mix dark browns, blues, or purples for natural shadows. This adds depth and realism to your wolf’s fur.
Skipping Reference Images
Painting without a reference leads to wrong wolf proportions. Use photos to study fur patterns and facial structure. References guide your color choices and brush strokes. They improve accuracy and confidence.
Forgetting To Vary Fur Direction
Painting fur all in one direction looks unnatural. Wolf fur grows in many directions around the face and body. Change your brush strokes to match these patterns. This adds texture and life to your painting.

Credit: www.youtube.com
Care And Cleanup
Proper care and cleanup keep your acrylic painting tools in good shape. They help you save money and make painting easier next time. Cleaning right after painting stops paint from drying on brushes. Storing materials correctly protects them from damage and dust. Follow these simple steps for a smooth painting experience.
Cleaning Brushes
Rinse brushes with warm water immediately after use. Use mild soap to remove all paint from bristles. Gently work soap through bristles with your fingers. Rinse until water runs clear without paint color. Do not soak brushes for a long time; it can ruin bristles. Shape the bristles back to their original form. Let brushes dry flat or bristle side up.
Storing Materials
Store brushes in a dry place away from sunlight. Keep paint tubes tightly closed to prevent drying out. Organize paints and brushes in separate containers or boxes. Avoid leaving paint on palettes for long periods. Clean palettes after each painting session. Proper storage extends the life of your painting tools.
Frequently Asked Questions
What Basic Supplies Do I Need For Wolf Acrylic Painting?
You need acrylic paints, brushes, canvas, palette, water cup, and paper towels. Quality brushes help achieve fine details. A reference image of a wolf is also essential for accuracy.
How Do I Start Painting A Wolf With Acrylics?
Begin with a light pencil sketch on canvas. Block in basic shapes using thin paint layers. Gradually add details and shadows to build depth and realism.
What Techniques Create Realistic Wolf Fur In Acrylics?
Use short, fine brush strokes to mimic fur texture. Layer light and dark tones for dimension. Dry brushing helps add softness and natural highlights to the fur.
How Can I Mix Acrylic Colors For Wolf Fur?
Mix gray, white, black, and brown in varying ratios. Add small amounts of blue or yellow to create natural fur hues. Test colors on a palette before applying.
Conclusion
Painting a wolf with acrylics can be simple and fun. Start with basic shapes and build details slowly. Use light and dark colors to add depth. Take your time blending fur textures carefully. Practice helps you improve with each painting.
Enjoy the process and express your creativity freely. Your wolf painting will grow more lifelike with patience. Keep experimenting with colors and brush strokes. This guide gives you a strong foundation to create beautiful wolf art. Now, pick up your brush and start painting!