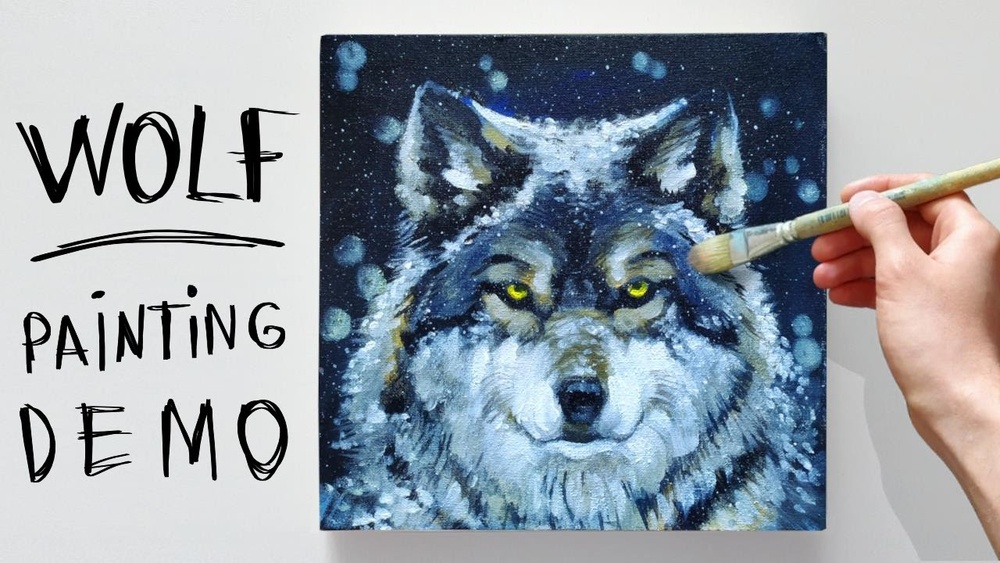
Have you ever wanted to capture the wild spirit and fierce beauty of a wolf on canvas? Painting a wolf with acrylic paint is a rewarding challenge that lets you bring this majestic animal to life with your own hands.
Whether you’re a beginner or looking to sharpen your skills, this guide will walk you through each step clearly and simply. By the end, you’ll have a stunning wolf painting to be proud of—and the confidence to create even more wildlife art.
Ready to unlock your creativity and paint your own wolf masterpiece? Let’s get started!
Gathering Materials
Before starting your wolf painting, gather all necessary materials. Having the right tools helps you create a smooth painting process. Preparation makes your work enjoyable and efficient.
Essential Acrylic Supplies
Choose high-quality acrylic paints for vibrant colors. Basic colors include white, black, brown, and gray. These shades help capture the wolf’s natural look. Also, get a cup for water and paper towels to clean brushes. An acrylic medium can improve paint flow and drying time. Keep a palette knife handy for mixing colors.
Choosing The Right Brushes
Select brushes with synthetic bristles made for acrylics. Use a variety of sizes: small detail brushes and larger flat brushes. Detail brushes help paint fur and facial features. Flat brushes cover big areas like the background. A fan brush adds texture for fur effects. Clean brushes often to keep paint from drying on them.
Selecting Canvas And Palette
Pick a canvas size that fits your workspace and vision. A medium-sized canvas (16×20 inches) works well for wolf paintings. Choose canvas with a smooth or medium texture for better brush control. Use a plastic or glass palette for mixing paints. These palettes clean easily and do not absorb paint.
Sketching The Wolf
Sketching the wolf is the first step in creating a striking acrylic painting. This stage sets the foundation for the entire artwork. A clear sketch helps capture the wolf’s form and character accurately. Take your time to outline the basic shapes and proportions before adding details. This approach ensures a balanced and lifelike representation of the wolf on your canvas.
Basic Shapes And Proportions
Begin with simple shapes to build the wolf’s body. Use circles for the head and joints. Draw ovals for the torso and limbs. These shapes help you map out the wolf’s size and posture. Keep the lines light for easy adjustments. Focus on the overall proportions, such as head size compared to the body. This step guides the painting process and prevents mistakes later.
Refining Details
After the basic shapes look right, start refining the sketch. Add the wolf’s facial features like eyes, nose, and ears. Sketch the fur direction with short, gentle strokes. Define the limbs and paws more clearly. Pay attention to muscle structure and curves. This stage brings life to your sketch and prepares it for painting. Keep the details simple but accurate.
Positioning On Canvas
Choose where to place the wolf on your canvas. Consider the composition and balance of your painting. Centering the wolf creates a strong focal point. Placing it off-center adds interest and movement. Leave enough space around the wolf for background elements. Lightly sketch the wolf in the chosen spot before starting to paint. This planning helps the final artwork look professional and well-composed.
Preparing The Background
Preparing the background sets the stage for your wolf painting. A well-prepared background enhances the wolf’s presence and mood. It helps the main subject stand out clearly. Proper background work creates a sense of space and atmosphere. This section guides you through choosing colors, applying base layers, and adding depth and texture.
Choosing Background Colors
Select colors that complement the wolf’s tones. Neutral or earthy shades work well. Blues and grays can create a cold, wintry feel. Warm browns and greens give a forest vibe. Keep the background colors muted to keep focus on the wolf. Avoid bright or clashing colors that distract from the subject.
Applying Base Layers
Start with a thin, even layer of paint. Use a large brush for smooth coverage. Cover the entire canvas area behind the wolf. Let this base dry before adding details. Thin layers help you build color gradually. Avoid thick paint at this stage to prevent cracking.
Creating Depth And Texture
Use darker shades around edges to add depth. Lighten colors near the wolf to create contrast. Apply paint with different brush strokes for texture. Dry brushing or sponging can add interesting effects. Texture gives the background a natural, lively look. Keep it subtle to not overpower the wolf painting.

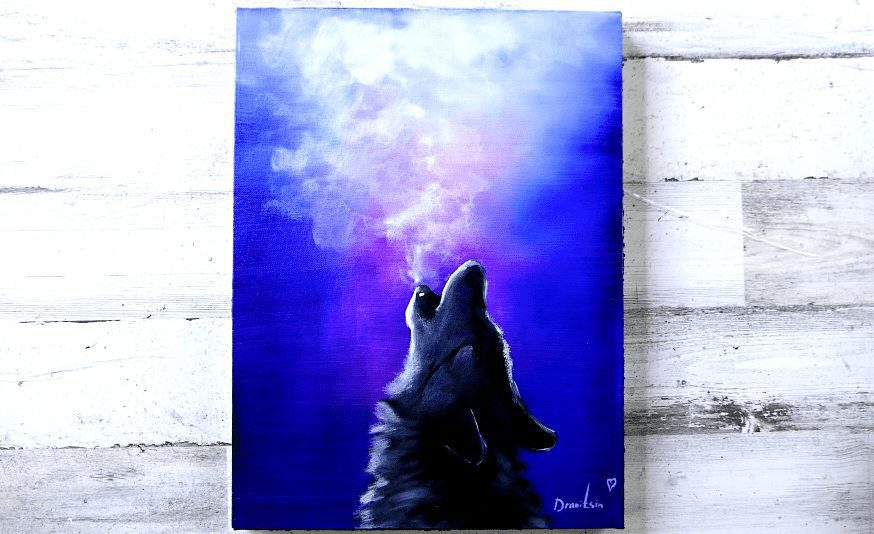
Credit: www.youtube.com
Blocking In Base Colors
Blocking in base colors is the first crucial step in painting a wolf with acrylics. It sets the foundation for all details and textures to come. This stage focuses on covering large areas quickly and laying down the essential hues. It helps in shaping the wolf’s form and defining the light and shadow patterns.
Work boldly and keep your brush strokes loose. Avoid getting caught up in small details. The goal is to map out the main color zones clearly. This approach makes the next steps easier and more effective.
Mixing Wolf Fur Colors
Start by mixing colors that match the wolf’s natural fur. Use a combination of grays, browns, and whites. Add small amounts of black or blue for cooler shadows. Use yellow or red tones for warmer highlights. Mix enough paint to cover large areas without running out mid-way.
Test your colors on a scrap piece of paper before applying. Adjust the mix for subtle variations. This will give the fur a more realistic look later.
Painting Large Areas
Use a bigger brush to fill in large sections of the wolf. Cover the body, head, and legs with the base colors. Apply paint smoothly with broad strokes. Avoid pressing too hard to keep the texture natural. Let the paint dry before adding more layers.
This step blocks out the main shapes and color regions. It prepares the canvas for adding details and fur texture.
Establishing Light And Shadow
Observe where the light hits the wolf’s body. Use lighter colors to mark these spots. Darker shades show the shadowed areas. This contrast creates depth and form. Paint shadows softly to blend with the base colors. Keep light areas bright but not too white.
Establishing light and shadow early guides the rest of the painting. It adds volume and realism to the wolf’s figure.
Adding Facial Features
Adding facial features brings your wolf painting to life. The face shows emotion and character. Focus on the eyes, nose, mouth, and ears carefully. These details make the wolf appear realistic and expressive.
Use thin brushes and controlled strokes. Work slowly and build layers for depth. Small touches create big effects on the face.
Painting The Eyes
Start with the eye shape using a small round brush. Paint the whites first, then add the iris and pupil. Use dark colors for the pupil and lighter colors for the iris highlights.
Add a tiny white dot to show light reflection. This makes the eyes look alive. Blend softly around the eye to create shadows and depth.
Shaping The Nose And Mouth
Use dark gray or black to outline the nose shape. Paint the nostrils carefully with a fine brush. Add lighter shades on the nose bridge for volume.
For the mouth, paint a soft line under the nose. Use dark tones inside the mouth and lighter shades on the lips. Add subtle highlights to show texture.
Detailing The Ears
Outline the ear shape with a medium brush. Use different grays and browns to add fur texture inside the ears. Paint shadows where the ear folds to show depth.
Highlight the edges with lighter colors. This makes the ears stand out from the head. Keep strokes short and follow the ear’s natural fur direction.
Building Fur Texture
Building fur texture brings your wolf painting to life. It creates depth and realism. You want the fur to look soft, thick, and natural. Acrylic paint works well for this because it dries fast and layers easily.
Start with broad strokes, then add finer details. Use different brush sizes to mimic the fur’s flow. Vary your brush pressure to create light and shadow effects. These steps help build a rich, textured look that captures the wolf’s wild essence.
Layering Brush Strokes
Begin with a base layer of the wolf’s main fur color. Use medium-sized brushes and long strokes. Let this layer dry before adding more. Add layers with slightly different shades. This adds dimension and depth to the fur.
Paint in the direction the fur grows. Overlapping brush strokes create a natural look. Use smaller brushes for shorter, detailed strokes on top. Keep layers thin to avoid a heavy look. Layering builds the illusion of thick, soft fur.
Using Dry Brush Techniques
Dry brushing means using very little paint on a dry brush. Lightly drag the brush over the canvas surface. This creates thin, wispy lines that look like fur strands. It works best for adding texture on top of base layers.
Use a stiff brush and flick small strokes. Focus on areas where fur is lighter or thinner. Dry brush in the fur’s growth direction. This technique adds softness and fine detail without heavy paint buildup.
Highlighting Fur Details
Highlights give fur a shiny, realistic effect. Use a small brush with light colors like white or pale gray. Apply highlights to raised parts of the fur. These include the tips of hairs and edges that catch light.
Add highlights sparingly. Too many can flatten the texture. Blend the edges gently to avoid harsh lines. Highlighting brings out volume and makes the fur look lively and three-dimensional.
Enhancing Shadows And Highlights
Enhancing shadows and highlights brings depth to your wolf painting. Shadows add weight and form. Highlights catch light and create a sense of realism. Combining both makes the acrylic painting vibrant and lifelike. Focus on where light naturally falls and where shadows deepen around the wolf’s fur and features.
Deepening Shadows
Start by mixing a darker shade of the base color. Use deep blues, browns, or grays for natural shadow tones. Apply these colors to areas under the wolf’s jaw, behind ears, and between fur layers. Use thin brush strokes to blend shadows smoothly. This creates a strong sense of volume and depth in the painting.
Adding Light Reflections
Choose a lighter color to add reflections where light hits the fur. Whites, light grays, or pale yellows work well. Paint small strokes on the nose, eyes, and tips of the fur. These touches make the wolf look alive and shiny. Keep reflections subtle for a natural look. Use a fine brush for precise light details.
Balancing Contrast
Balance shadows and highlights to avoid flatness. Check the painting from a distance to see if the contrast feels right. Adjust shadows and lights for smooth transitions. Strong contrast brings the wolf forward in the composition. This balance enhances the overall impact of your acrylic wolf painting.

Credit: stepbysteppainting.net
Finishing Touches
Finishing touches bring your acrylic wolf painting to life. This stage highlights the small details that add realism and depth. Careful attention here can make your wolf look vivid and complete. Take your time to refine, clean, and protect your artwork.
Refining Small Details
Use a fine brush for details like fur strands and eyes. Add tiny strokes to mimic fur texture. Enhance the wolf’s eyes with highlights to create a lifelike gaze. Adjust shadows and light spots for more depth. Small details make your painting stand out.
Cleaning Edges
Check the edges of your wolf and background. Use a clean brush or a small palette knife to sharpen lines. Remove any paint smudges or accidental marks. Crisp edges improve the overall neatness and focus of the painting. This step ensures your wolf looks clear and defined.
Sealing The Painting
Apply a clear acrylic sealer to protect your work. Choose a matte or glossy finish based on your preference. The sealer prevents dust and fading over time. Spray or brush the sealer evenly across the surface. This final step preserves your wolf painting for years.
Troubleshooting Common Issues
Painting a wolf with acrylics can be rewarding but may present some challenges. Common issues include color errors, proportion problems, and fast drying times. Fixing these problems helps improve your artwork and keeps frustration low. This section covers practical tips to troubleshoot these common painting issues.
Fixing Color Mistakes
Color mistakes happen often during painting. To fix them, wait until the paint is dry. Then, gently paint over the wrong color with a matching base tone. Use thin layers of paint for better control. Mixing colors carefully before applying prevents future errors. Always test colors on a scrap surface first.
Correcting Proportions
Incorrect proportions can make your wolf look unrealistic. Use light pencil sketches to map out the shape before painting. Compare parts of the wolf’s body to keep size balance. If proportions are off, paint over the area with the base color. Repaint with adjusted shapes to correct the issue. Step back often to check your progress.
Managing Acrylic Drying Time
Acrylic paint dries quickly, which can be tricky. To slow drying, mist your palette with water. Work in small sections to keep paint wet longer. Use a wet brush to blend colors smoothly before drying. If paint dries too fast on your canvas, apply a retarder medium. This helps keep edges soft and colors vibrant.
Credit: urartstudio.com
Frequently Asked Questions
What Materials Are Needed To Paint A Wolf With Acrylics?
You need acrylic paints, various brushes, a canvas, palette, water cup, and paper towels. Optional items include a palette knife and reference images for accuracy.
How Do I Start Painting A Wolf With Acrylic Paint?
Begin by sketching the wolf lightly on the canvas. Then, block in the main shapes and colors with a large brush before adding details.
What Techniques Help Create Realistic Wolf Fur In Acrylics?
Use layering and dry brushing to build texture. Vary brush strokes to mimic fur direction and blend colors for depth and realism.
How Can I Paint Wolf Eyes To Look Lifelike?
Focus on the eye shape and reflections. Use small brushes for detail, highlight the pupil, and add white spots to simulate light reflections.
Conclusion
Painting a wolf with acrylics takes patience and practice. Start simple, then add details step-by-step. Use light and dark shades to create depth. Keep your brush strokes smooth and controlled. Enjoy the process and learn from each attempt. With time, your wolf painting will look more lifelike.
Remember, every artist improves by doing. Grab your paints and create your own wild masterpiece today!