Are you looking to add a splash of color and personality to your garden? Painting your own DIY garden stepping stones is a simple and fun way to brighten up your outdoor space.
Whether you want to create a whimsical path or personalized accents, this project lets you express your creativity while enhancing your garden’s charm. In this guide, you’ll discover easy steps, the best materials to use, and expert tips to make your stepping stones stand out and last through the seasons.
Ready to transform your garden? Let’s dive in!
Materials Needed
Gathering the right materials is the first step to paint DIY garden stepping stones. This ensures your project looks great and lasts long outdoors. Materials include stones, paints, and tools for preparation and decoration. Each item plays a key role in your painting process.
Choosing the correct supplies helps prevent mistakes and saves time. It also makes the painting easier and more enjoyable.
Choosing Stepping Stones
Pick stones that are flat and smooth. Concrete stepping stones work best for painting. They offer a solid surface that holds paint well. Size matters; choose stones that fit your garden paths.
Avoid rough or uneven stones. These can make painting difficult and designs unclear. You can find stepping stones at home stores or garden centers.
Selecting Paint Types
Use outdoor acrylic paint for durability. It resists weather and fading. Acrylic paint dries quickly and sticks well to stone. Choose bright colors to make your designs pop in the garden.
Paint pens are useful for fine details. They provide control for small designs or writing. Avoid water-based paints that wash away easily.
Additional Supplies
Gather paintbrushes in various sizes. Large brushes cover big areas fast. Small brushes help with details and edges. Include a pencil to sketch your design first.
Sealant spray protects your painted stones from rain and sun. Use clear, weatherproof sealer for the best results. Gloves keep your hands clean while painting.
Preparing Stones
Preparing your garden stepping stones is the first step to creating a beautiful, lasting design. Proper preparation helps paint stick well and prevents peeling. It also ensures the colors stay bright through weather changes.
Follow these simple steps to get your stones ready for painting. Clean, sand, and prime each stone carefully. This process sets a strong base for your artwork.
Cleaning The Surface
Start by removing dirt and dust from the stones. Use a stiff brush and water to scrub the surface. Avoid using soap, as it can leave a residue. Rinse well and let the stones dry completely. Dry stones help paint stick better.
Sanding For Better Adhesion
Sanding roughens the stone surface slightly. This allows the paint to grip the stone firmly. Use medium-grit sandpaper to sand the entire surface. Focus on any smooth or glossy areas. After sanding, wipe off dust with a dry cloth.
Priming Steps
Apply a coat of primer to seal the stone. Choose a primer designed for outdoor use and concrete surfaces. Use a brush or roller to cover the stone evenly. Allow the primer to dry fully before painting. Priming protects the stone and improves paint adhesion.
Design Ideas
Designing your DIY garden stepping stones is a fun way to add character to your outdoor space. Simple ideas can create big impact. Choose designs that match your garden style and your personal taste.
Here are some easy design ideas that anyone can try. They will help you make beautiful, unique stepping stones.
Simple Patterns
Simple patterns like stripes, dots, or geometric shapes work well on stepping stones. They are easy to paint and look neat. Use contrasting colors to make the patterns stand out. These designs suit both modern and classic gardens.
Stencil Techniques
Stencils help create clean and precise designs. You can buy garden-themed stencils or make your own. Place the stencil on the stone and paint over it carefully. This method is great for repeating patterns or detailed shapes.
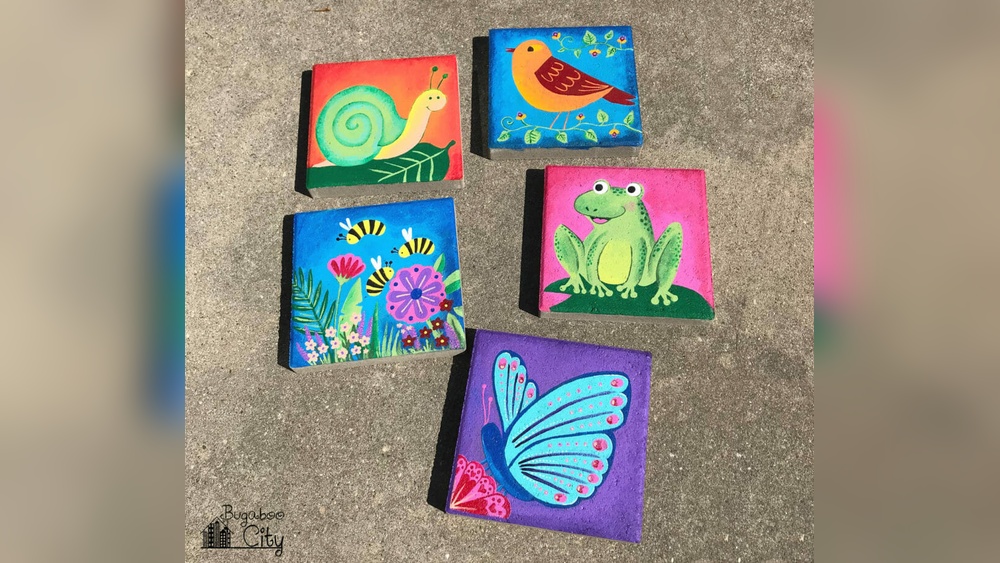
Hand-painted Details
Hand-painting adds a personal touch to your stones. Draw flowers, leaves, or small animals with fine brushes or paint pens. Take your time and work in layers. Hand-painted details make each stone one of a kind.

Credit: www.craftingcheerfully.com
Painting Process
The painting process brings your garden stepping stones to life. It requires patience and care. Each step builds the foundation for a beautiful finish. Follow these simple painting steps to create lasting designs. Use the right tools and materials for the best results.
Applying Base Coats
Start with a clean, dry stone surface. Use outdoor acrylic paint for durability. Apply a thin, even base coat with a wide brush. Let the paint dry completely before adding more layers. Two coats often give solid, vibrant coverage. This base will help your colors pop and last longer.
Layering Colors
Add more colors by layering carefully over the base coat. Use smaller brushes for better control. Allow each color layer to dry before adding the next. This prevents smudging and mixing of colors. Build your design gradually for a neat, clear look. Layering also adds depth and interest to your stones.
Using Paint Pens For Detail
Paint pens are perfect for fine details and writing. Choose waterproof, fade-resistant pens for outdoor use. Draw outlines, shapes, or words with steady, light strokes. Paint pens give you precision that brushes may lack. Let each detail dry fully before handling the stone. These small touches make your stepping stones unique and eye-catching.
Sealing And Protection
Sealing and protecting your painted garden stepping stones is a crucial step. It helps keep your artwork bright and safe from damage. Proper sealing also guards against water, dirt, and fading caused by sunlight. This section explains how to choose the right sealants and apply them effectively. It also covers how to weatherproof your stones for long-lasting beauty.
Choosing Sealants
Select a sealant designed for outdoor use. Look for waterproof and UV-resistant features. Acrylic spray sealants are popular for painted stones. They dry clear and do not yellow over time. Another option is a brush-on polyurethane sealant. It creates a thick protective layer. Avoid indoor sealants as they may peel quickly outside.
Application Tips
Apply sealants in thin, even coats. Hold spray cans about 6 to 12 inches away. Let each coat dry fully before adding the next. Use at least two coats for strong protection. Work in a well-ventilated area to avoid fumes. Protect surrounding plants and surfaces from overspray. Test sealant on a small area first to check compatibility.
Weatherproofing
Seal stepping stones before placing them outdoors. This prevents water from soaking in and causing cracks. Use sealants that resist rain, frost, and sun. Reapply sealant every year or after heavy weather. Store stones indoors during extreme winter months if possible. Proper weatherproofing extends the life and look of your stones.
Creative Tips
Creative ideas can make your garden stepping stones stand out. Simple painting is good, but adding unique touches brings life to your stones. Experiment with colors, textures, and natural items. These tips help you make each stone a special piece in your garden.
Mixing Colors
Start by blending different paint shades for a fresh look. Use a palette to mix two or three colors. Try soft pastels or bold contrasts to create depth. Layer colors by painting one over another after drying. This adds richness and visual interest to your stones.
Adding Textures
Textures give your stones a tactile feel and unique style. Use sponges, brushes, or even crumpled paper to dab paint. Create patterns by stamping or scratching the paint while wet. You can also apply a thick paint layer to add dimension. Textured stones catch light and draw attention.
Incorporating Natural Elements
Embed leaves, small stones, or flower petals into the paint for a natural touch. Press these items gently on wet paint and let it dry. Use clear sealant to protect the elements and keep them in place. This adds an organic feel and connects your stones with the garden.
Maintenance Advice
Proper maintenance keeps your painted garden stepping stones bright and lasting longer. Caring for them protects your artwork from weather and dirt. Follow simple steps to clean, touch up, and prepare your stones for each season.
Cleaning Painted Stones
Use a soft brush or cloth to remove dust and dirt gently. Avoid harsh chemicals that can damage paint. Mild soap and water work well for cleaning. Rinse with clean water and let stones dry fully in the sun. Regular cleaning prevents buildup and keeps colors fresh.
Touch-up Techniques
Inspect stones for chips or fading paint often. Use the same acrylic paint you applied originally for touch-ups. Apply thin layers and let each dry before adding more. Seal touch-up areas with a clear waterproof sealant. This refreshes your design and protects it from damage.
Seasonal Care
Move stones to a sheltered spot during harsh weather. Cover them in winter to avoid frost damage. In spring, check for cracks or wear and repair as needed. Proper seasonal care helps maintain the stones’ beauty year-round and extends their life.

Credit: www.amazon.com

Credit: www.amazon.com
Frequently Asked Questions
What Kind Of Paint Do You Use To Paint Stepping Stones?
Use outdoor acrylic paint to decorate stepping stones. It adheres well and withstands weather conditions. Apply two coats for vibrant color. Seal with a clear outdoor sealer to protect your design.
What Kind Of Paint To Use On Garden Stones?
Use outdoor acrylic paint for garden stones. It adheres well, resists weather, and offers vibrant, lasting colors. Seal with a clear waterproof sealer for durability.
How Do You Seal Painted Stepping Stones?
Clean the painted stepping stone and let it dry. Apply a clear outdoor sealer evenly. Allow it to dry fully before use. Repeat for extra protection.
How To Paint Garden Stone?
Clean the stone thoroughly and let it dry. Sketch your design lightly with a pencil. Apply outdoor acrylic paint in thin coats. Let each coat dry before adding another. Finish with a clear sealant to protect your artwork.
Conclusion
Painting DIY garden stepping stones adds charm to any outdoor space. Use acrylic paint for bright, lasting colors. Take time to prep stones well before painting. Apply two coats for a solid, even finish. Seal your stones to protect your artwork from weather.
Personalize designs to match your garden’s style and mood. Enjoy the creative process and pride in your work. Your garden will feel more welcoming and lively. Try this fun project to brighten your outdoor paths today!