
Are you ready to transform your pumpkins into eye-catching works of art without the mess of carving? Painting pumpkins is a fun, simple way to add a personal touch to your fall décor, and it’s perfect whether you’re a crafting newbie or a seasoned pro.
In this guide, you’ll discover easy DIY painted pumpkin tips that make the process smooth and enjoyable. From choosing the right paints to clever decorating tricks, these tips will help you create stunning pumpkins that stand out. Keep reading to unlock your creativity and impress your friends and family this season!

Credit: www.amazon.com
Choosing Your Pumpkin
Choosing the right pumpkin sets the stage for a beautiful painted project. Your choice affects how easy and fun the painting will be. Pick a pumpkin that fits your design and painting style. Consider the surface, size, and type carefully. This helps your art stand out and last longer.
Real Vs Artificial
Real pumpkins offer a natural look and texture. They come in many sizes and shapes. Their surface may be rough or smooth, which affects paint application. Artificial pumpkins provide a smooth, uniform surface. They are lightweight and last longer. Use real pumpkins for a fresh, authentic feel. Choose artificial ones for durability and reusability.
Size And Shape Tips
Pick a size that fits your painting idea. Small pumpkins work well for simple designs. Large pumpkins allow more detail and creativity. Look for a shape with a smooth, even surface. Round pumpkins are easier to paint. Odd shapes give your project a unique look but can be tricky. Avoid pumpkins with deep grooves or bumps if you want a clean paint job.
Clean your pumpkin before painting. Use a damp cloth to remove dirt and dust. For real pumpkins, wash with mild soap and water. Dry it completely to avoid paint peeling. Lightly sand artificial pumpkins for better paint grip. Avoid painting the stem unless you want a colorful accent. Proper preparation helps paint stick and look smooth.

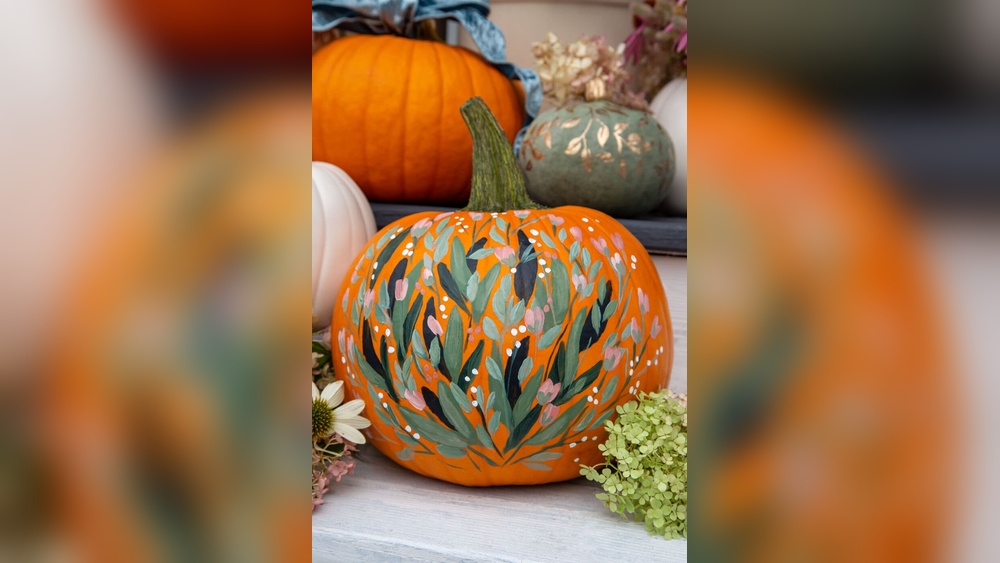
Credit: www.onsuttonplace.com
Painting Materials
Choosing the right painting materials is essential for a successful DIY painted pumpkin project. Good materials make painting easier and ensure your design looks great. This section covers the best paint types, brushes, and extra supplies you need.
Best Paint Types
Acrylic paint works best on pumpkins. It dries quickly and sticks well to the pumpkin’s surface. Acrylic paint comes in many colors and finishes, perfect for any design. You can also use spray paint for a smooth base coat. Avoid watercolors or oils as they do not hold well on pumpkin skin.
Brushes And Tools
Use different brush sizes for detailed and large areas. Small round brushes help with fine lines and patterns. Flat brushes are great for covering bigger spaces. Foam brushes work well for even coats. You can also use sponges to create texture or blend colors. Keep brushes clean to avoid mixing colors.
Additional Supplies
Have a palette or plate to mix paints. Use painter’s tape to create sharp edges or patterns. Paper towels and water cups help clean brushes between colors. Seal your finished pumpkin with a clear acrylic spray to protect your design. A pencil can help sketch your design before painting.
Surface Preparation
Preparing the pumpkin’s surface is key for a smooth and lasting paint job. A clean, dry, and primed pumpkin holds paint better. It also prevents peeling or clumping. Follow these simple steps to get your pumpkin ready for painting.
Cleaning The Pumpkin
Start by wiping the pumpkin with a damp cloth. Use mild soap mixed with water for better cleaning. Avoid soaking the pumpkin as it can soften the skin. Remove dirt, dust, and any sticky residue. Clean surface helps paint stick evenly and look bright.
Drying Techniques
Dry the pumpkin well after cleaning. Use a soft towel to pat it dry gently. Let the pumpkin air dry for at least an hour to remove all moisture. A dry pumpkin prevents paint from bubbling or running. Make sure no damp spots remain before painting.
Priming Tips
Apply a primer to create a smooth base. Use a white or clear acrylic primer for best results. Spray primers work fast and cover evenly. Allow the primer to dry fully before painting. Priming helps paint colors pop and last longer on the pumpkin.
Basic Painting Techniques
Basic painting techniques help create stunning DIY painted pumpkins. These methods make your pumpkins look neat and colorful. Understanding these basics will improve your pumpkin painting skills. Start with the right tools and simple steps for best results.
Using Spray Paint
Spray paint covers pumpkins quickly and evenly. Hold the can about 8 to 12 inches away from the pumpkin. Use smooth, sweeping motions to avoid drips. Spray in thin layers and let each dry before the next. Spray paint works best on clean, dry pumpkins. Avoid spraying the stem to keep it natural.
Brush Painting Tips
Use brushes for detailed designs and patterns. Choose brushes with soft bristles for smooth strokes. Apply paint in light coats to prevent clumps. Clean your brush between colors to keep shades pure. Work from the pumpkin’s top to bottom to avoid smudging.
Layering Colors
Layering colors adds depth and interest to your pumpkin. Start with a base color and let it dry completely. Add lighter or darker shades on top for contrast. Use a dry brush to blend colors softly. Layering creates a professional look with simple tools.
Creative Design Ideas
Creative design ideas make DIY painted pumpkins stand out. They bring fun and color to your autumn decor. Simple techniques create amazing looks. These ideas suit all skill levels and styles. Try these easy and unique designs for festive pumpkins.
Candy Corn Style
Use orange, yellow, and white paint for this classic look. Paint the pumpkin in three horizontal sections. Orange on the bottom, yellow in the middle, and white on top. Let each layer dry before painting the next. Add a twine bow around the stem for a cute touch.
Marbled Effects
Mix different paint colors in a bowl with water. Dip the pumpkin into the water to create a marbled look. Use colors like white, gold, and orange for fall vibes. Let the paint dry completely. This effect gives your pumpkin a smooth, swirling pattern.
Monster Faces
Paint your pumpkin with a solid base color. Draw fun monster eyes, noses, and mouths with black paint. Use bright colors for details like teeth or tongues. Add googly eyes for a playful effect. Perfect for kids or a spooky Halloween theme.
Nail Polish Decorations
Use leftover nail polish to add small dots or stripes. The polish dries fast and shines brightly. Create patterns like polka dots, zigzags, or stripes. Combine different colors for a vibrant look. This method works great for small pumpkins or gourds.

Credit: www.gathered.how
Adding Details
Adding details to your painted pumpkins gives them personality and charm. Small touches make a big difference. You can use simple materials to create unique looks. Details bring your pumpkins to life and fit your style perfectly.
Using Twine And Ribbons
Wrap twine or ribbons around the pumpkin stem for a rustic feel. Tie a neat bow or knot to add texture. Choose colors that match your paint or theme. Twine works well for natural, earthy designs. Ribbons add a soft, festive touch.
Stenciling Patterns
Use stencils to paint clean, sharp patterns on your pumpkins. Tape the stencil firmly in place before painting. Apply paint with a sponge or brush for better control. Stencils help create shapes like leaves, stars, or letters. Patterns add visual interest without much effort.
Glitter And Embellishments
Sprinkle glitter on wet paint for sparkle and shine. Use glue to attach small gems, buttons, or beads. Embellishments catch the light and draw attention. Combine glitter with painted designs for a festive look. Keep decorations balanced to avoid clutter.
Drying And Finishing
Drying and finishing are key steps to make your DIY painted pumpkins look great and last longer. Proper drying helps avoid smudges and uneven paint. Finishing protects your artwork from weather and handling. Follow these tips to achieve the best results.
Drying Times
Let your pumpkin dry fully after painting each layer. Thin coats dry faster, usually within 20 to 30 minutes. Thick layers need several hours or overnight. Avoid rushing to prevent smears and peeling. Place pumpkins in a cool, dry area for better drying. Patience ensures smooth, vibrant colors.
Sealing Your Design
Use a clear sealer to protect your painted pumpkin. Spray sealers work well for an even finish. Choose a matte or glossy finish based on your style. Apply the sealer outdoors or in a well-ventilated space. Let the sealer dry completely before handling the pumpkin. Sealing helps guard against rain and fading.
Displaying Tips
Show off your painted pumpkins in a shaded spot. Direct sunlight can fade colors quickly. Keep pumpkins away from damp surfaces to avoid mold. Use stands or trays to keep them stable. Bring pumpkins indoors during rain or frost. Regularly check your display to keep pumpkins fresh and vibrant.
Troubleshooting
Troubleshooting is key for a smooth pumpkin painting experience. Small mistakes can happen, but most are easy to fix. Knowing how to address common problems saves time and keeps your pumpkin looking great. Below are simple solutions for usual issues with painted pumpkins.
Fixing Paint Smudges
Smudges happen if paint is still wet and touched. Use a damp cloth to gently wipe off the smudge. Let the area dry completely before repainting. For dried smudges, lightly sand the spot with fine sandpaper. Then, apply a fresh layer of paint carefully. Avoid heavy coats to prevent more smudging.
Preventing Peeling
Peeling often occurs when paint does not stick well. Start with a clean, dry pumpkin to improve paint grip. Apply a primer before painting to help paint adhere. Use thin layers of paint and let each dry fully. Seal your pumpkin with a clear acrylic spray to protect the paint. Keep pumpkins indoors or in dry places to reduce peeling.
Handling Weather Effects
Weather can damage painted pumpkins quickly. Rain and humidity soften the pumpkin surface and paint. Place pumpkins in sheltered areas away from rain and wind. If outside, choose weather-resistant paints like acrylic or spray paint. Bring pumpkins indoors during bad weather to keep paint intact. Check pumpkins daily and touch up paint if needed.
Pumpkin Painting Parties
Pumpkin painting parties bring fun and creativity together. They offer a fresh way to enjoy fall and Halloween. These parties are perfect for friends, family, or neighbors. Everyone can share ideas and create unique pumpkin designs. Painting pumpkins is less messy than carving, making it great for groups. It also allows for colorful and diverse decorations. Hosting a pumpkin painting party can be simple and enjoyable with the right setup and tips.
Setting Up
Choose a spacious area with good light. Cover tables with newspaper or plastic sheets. Provide plenty of brushes and paint colors. Have water cups for rinsing brushes and paper towels for spills. Place pumpkins of various sizes for variety. Include aprons or old shirts to protect clothes. Prepare a drying spot for finished pumpkins. Keep wet wipes nearby for quick cleanups.
Kid-friendly Ideas
Use washable, non-toxic paints for safety. Offer simple stencils like stars or smiley faces. Encourage kids to use bright, fun colors. Provide stickers and glitter for extra decoration. Show easy techniques like dotting or stripes. Let children express their creativity freely. Keep designs simple to avoid frustration. Praise all efforts to boost confidence.
Group Activity Tips
Start with a quick demonstration to inspire everyone. Divide guests into small groups for easier sharing. Encourage chatting and idea swapping during painting. Set a timer for each stage to keep pace. Play light music to create a cheerful mood. Plan a group photo with the finished pumpkins. Share materials to reduce waste and clutter. Celebrate each unique pumpkin design as art.
Frequently Asked Questions
What Materials Do I Need For Diy Painted Pumpkins?
You need pumpkins, acrylic paints, brushes, painter’s tape, and sealant. Prepare a clean workspace and use old newspapers to protect surfaces. Optional: stencils and glitter for added decoration.
How Do I Prepare Pumpkins Before Painting?
Wash pumpkins with mild soap and water. Avoid soaking the stem. Dry thoroughly to ensure paint adheres well. Removing dirt prevents paint from peeling.
What Paint Works Best For Pumpkins?
Use acrylic or craft paints for vibrant colors. They dry quickly and stick well to pumpkin surfaces. Avoid oil-based paints as they may not adhere properly.
How Can I Make Painted Pumpkins Last Longer?
Apply a clear sealant or varnish after painting. Keep pumpkins indoors or in a cool, dry place. Avoid direct sunlight and moisture to prevent premature decay.
Conclusion
Painting pumpkins yourself brings fun and creativity to fall decor. Use simple tools and colors to make unique designs. Remember to clean and dry pumpkins before painting for best results. Take your time with each step for a neat finish.
Enjoy the process and share your painted pumpkins with friends or family. This easy craft adds charm to any autumn space. Try different patterns and colors to express your style. Painted pumpkins brighten your home without the mess of carving.
Keep these tips handy for a fun, festive experience every year.


