
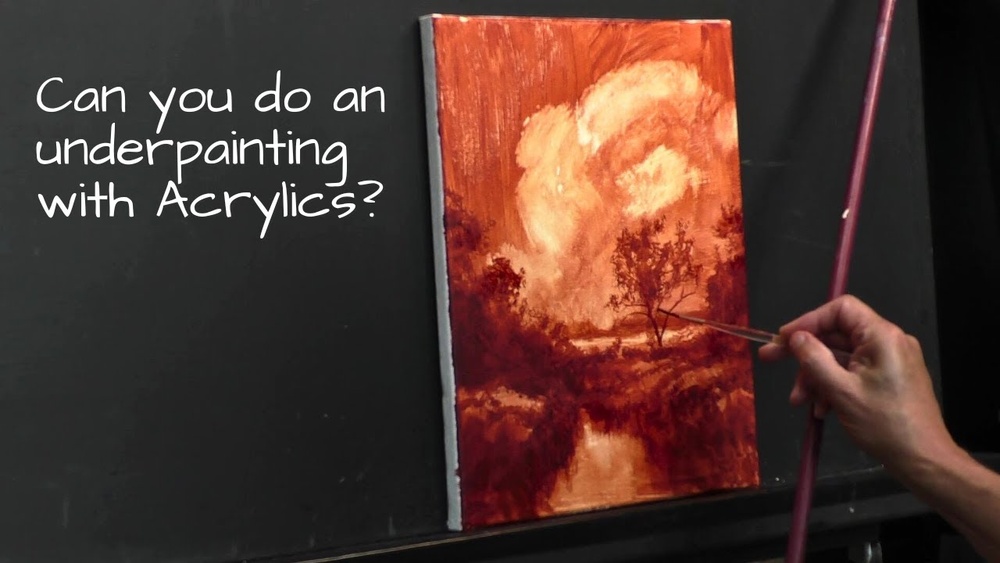
Painting with acrylics is a creative and rewarding process. But if you want to take your artwork to the next level, there’s a traditional technique that can transform your results: underpainting. Many beginners skip this step, but experienced artists know that a well-done underpainting brings depth, harmony, and life to a painting. If you’re wondering how to do underpainting on canvas with acrylics, this guide will walk you through every step, including practical tips, common mistakes, and expert insights you won’t find in most tutorials.
What Is Underpainting And Why Does It Matter?
Underpainting is the first layer of paint you apply to a canvas, usually in a single color or limited palette. It acts as a map or guide for your final painting. Think of it as the foundation of a house—strong underpainting supports everything you add on top.
With acrylics, underpainting dries quickly, making it easier to build up layers without waiting hours.
The main benefits are:
- Establishing values (lights and darks)
- Setting the mood (warm or cool tones)
- Creating harmony in the final colors
Professional artists use underpainting to solve compositional problems early and avoid surprises later. Without it, your painting might look flat or disconnected.
Essential Supplies For Acrylic Underpainting
Before you begin, gather the right tools. Quality supplies make a noticeable difference in the painting process.
- Stretched canvas or canvas board (any size you prefer)
- Acrylic paints (student or artist grade)
- Brushes (flat and round, various sizes)
- Palette (disposable or reusable)
- Water container
- Rags or paper towels
- Palette knife
- Spray bottle (to keep paints moist)
- Graphite pencil or charcoal
- Gesso (if your canvas isn’t pre-primed)
Tip: Always use artist-grade paints for underpainting if possible. Cheap paints can become muddy and affect your finished work.
Choosing The Right Color For Your Underpainting
The color you pick for underpainting influences the mood and harmony of your entire painting. There are several common choices, each with its own effect.
| Underpainting Color | Effect on Final Painting | Best For |
|---|---|---|
| Burnt Sienna | Warmth, natural earth tones | Landscapes, portraits |
| Ultramarine Blue | Cool, moody shadows | Night scenes, dramatic lighting |
| Yellow Ochre | Soft, golden light | Sunlit scenes, still life |
| Neutral Gray | Balanced, true color representation | Realism, accurate colors |
Non-obvious insight: Avoid pure black or white as your main underpainting color. Black can be too strong and kill color vibrancy, while white gives no guidance for values.
Step-by-step Guide: How To Do Underpainting With Acrylics
Creating a successful underpainting involves several clear steps. Here’s how to start:
1. Prepare Your Canvas
Make sure your canvas is primed. Most canvases are pre-primed with gesso. If not, apply two thin coats of acrylic gesso and let each dry. This step is essential, as unprimed canvas absorbs paint and can ruin your work.
2. Plan Your Composition
Use a graphite pencil or charcoal to lightly sketch your main shapes. Keep details minimal; focus on placement and proportion. This sketch acts as your road map.
Practical tip: If you make mistakes, erase with a kneaded eraser or wipe with a damp cloth before painting.
3. Mix Your Underpainting Color
On your palette, mix your chosen color with water to create a thin, wash-like consistency. You want the paint to flow easily but not drip.
Example: Mix burnt sienna with a little ultramarine blue and water for a neutral brown.
4. Apply The Underpainting Layer
Cover the canvas with your diluted color using a large, flat brush. Work quickly so the paint doesn’t dry in patches. Wipe away excess paint with a paper towel if needed.
Non-obvious insight: Let your brushstrokes follow the form of the subject. This helps build structure and movement even in the underpainting.
5. Block In Main Values
While the first layer is still damp, use more paint (less water) to indicate areas of shadow and light. Think in simple shapes—don’t worry about detail yet.
Here’s a simple comparison of value mapping:
| Value Type | How to Paint | Common Mistake |
|---|---|---|
| Shadow | Use more pigment, less water | Making shadows too dark early |
| Midtone | Moderate pigment, even wash | Forgetting midtones entirely |
| Light | Wipe paint away with a rag or use very dilute color | Leaving too much white canvas |
6. Let It Dry Completely
Acrylics dry fast, usually within 10–30 minutes. Wait until the underpainting is bone-dry before adding more layers. If you rush, new paint layers may lift or mix with the underpainting.
7. Start Painting Over The Underpainting
Now, add your main colors, working from thin to thick. The underpainting will show through in places, adding depth and unity to your finished painting.

Credit: www.youtube.com
Different Underpainting Techniques For Acrylics
There are several approaches to underpainting. Each gives a different effect, and you can choose based on your style and subject.
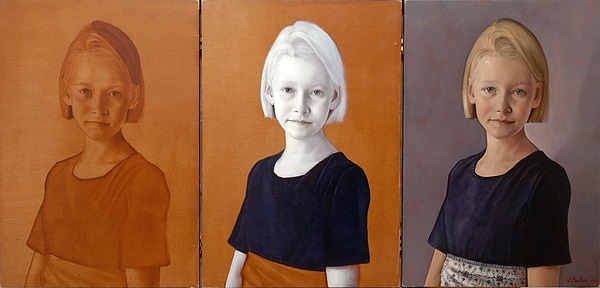
Grisaille
This is a method where the underpainting is done entirely in shades of gray. It helps focus on values and structure. Color is added in transparent layers (glazes) after the grisaille is dry.
Imprimatura
Imprimatura means “first paint layer” in Italian. It’s a thin, even wash of a single color (usually earth tone) applied to the whole canvas. You then build up values and details on top.
Chiaroscuro
This technique uses strong contrasts between light and dark. It’s great for dramatic lighting and three-dimensional effects. Start with a midtone wash, then push darks and lift lights.
Verdaccio
Verdaccio uses a greenish-gray underpainting, often for portraits. It creates lifelike skin tones when warm colors are added on top.
Practical insight: Try each method on a small canvas first. See which style gives you the look you want before using it on a final painting.
Common Underpainting Mistakes (and How To Avoid Them)
Many artists make avoidable errors when learning underpainting. Here’s how to sidestep the most common ones:
- Skipping the underpainting entirely. This leads to flat, disconnected paintings.
- Using underpainting colors too thickly. Thick paint can mix with later layers and cause muddy colors.
- Not letting layers dry. Rushing causes unwanted mixing and lifts the underpainting.
- Poor value mapping. If you don’t block in lights and darks early, the painting can lose structure.
- Choosing the wrong color. A harsh color can dominate the finished painting or clash with your palette.
Tip: Take a photo of your underpainting in black and white. This helps you see if your values are correct before continuing.
How Underpainting Improves Your Acrylic Painting
You might wonder if underpainting is really worth the extra step. Here’s what happens when you use it well:
- Improved depth: Underpainting gives a sense of three-dimensionality, even in simple subjects.
- Better color harmony: The base color unifies your final layers.
- Faster painting: With values mapped out, you spend less time fixing mistakes.
- More confidence: You know where your lights and darks are, so you’re less likely to get lost.
Example: In a landscape, a burnt sienna underpainting adds warmth to the sky and earth, while blues or greens can cool down water or shadows.
Realistic Timeline: How Long Does Underpainting Take?
For a beginner, the full underpainting process can take 30–60 minutes for a small canvas. Experienced artists may work faster, but it’s better to take your time and get the values right.
Here’s an example timeline for an 11×14 inch canvas:
- Sketch: 10 minutes
- Mix underpainting color: 5 minutes
- Apply wash: 10 minutes
- Block in values: 20 minutes
- Drying: 15–30 minutes
Total time: About 1 hour
Practical Tips To Make Your Underpainting Successful
- Use a spray bottle to keep acrylics moist on your palette.
- Work in natural light so you see true colors and values.
- Keep a rag handy to lift out highlights quickly.
- Test colors on scrap canvas before committing.
- Photograph your process for learning and comparison.
Expert tip: If you want a glowing effect, let small areas of the underpainting peek through the final layers. This creates sparkle and energy.
Underpainting For Different Subjects
Some subjects benefit more from underpainting than others. Here’s how to adapt your method:
- Portraits: Use a green or neutral underpainting for realistic skin tones. Block in shadow shapes, not details.
- Landscapes: Burnt sienna or yellow ochre works well. Map out the main land masses and sky.
- Still life: A warm imprimatura brings fruit and objects to life. Focus on the large shapes before adding detail.
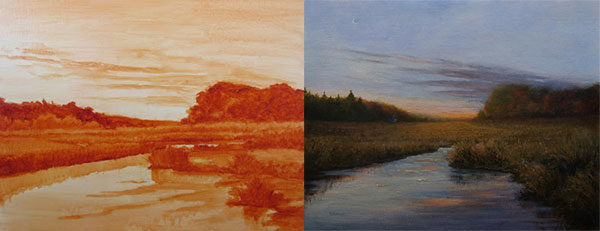
Underpainting Vs. No Underpainting: What’s The Real Difference?
Let’s look at a direct comparison:
| With Underpainting | Without Underpainting |
|---|---|
| Unified colors, clear values, depth | Disjointed color, weak values, flat appearance |
| Fewer mistakes later | More corrections, wasted paint |
| Faster painting process | Slower, less confident painting |
Insight: Even advanced artists sometimes skip underpainting on small studies but always use it for finished works.
When And Why To Skip Underpainting
There are a few cases where you might skip underpainting:
- You want a very fresh, alla prima (all at once) look.
- The painting is meant to be abstract or loose.
- You’re experimenting and want unexpected results.
But for most representational art, underpainting is a foundation that improves your results.
Credit: www.artsmartmanila.com
Recommended Resources For Further Learning
If you want to dive deeper into the history and science behind underpainting, check out Wikipedia’s Underpainting article for more context and examples.
Frequently Asked Questions
What Is The Best Color For Underpainting With Acrylics?
For most subjects, burnt sienna or yellow ochre works well. They create warmth and unify your colors. For cool scenes, use ultramarine blue or a neutral gray. Avoid black or pure white as your base.
Can I Use Any Acrylic Paint For Underpainting?
Yes, but artist-grade acrylics give better results. Student-grade is fine for practice, but cheap paints can become muddy and affect the layers above. Always thin your paint with water for the first layer.
Should I Seal Or Varnish The Underpainting?
No, do not seal or varnish the underpainting. Just let it dry fully before adding more paint. Varnish is only for the finished painting, after all layers are completely dry.
How Do I Fix Mistakes In My Underpainting?
If the paint is still wet, wipe mistakes away with a damp cloth or paper towel. If dry, you can paint over errors with a slightly thicker layer. Acrylics are forgiving, but try to avoid too many corrections, or the surface can become uneven.
Can I Use Underpainting For Abstract Art?
Absolutely! Underpainting isn’t just for realism. It can add energy, unity, or surprise color notes under abstract shapes. Try a bold color wash and let it show through in places for interesting effects.
Underpainting is a simple but powerful technique that can elevate your acrylic paintings from average to outstanding. It helps you plan your composition, unify your colors, and build depth right from the start. With practice, you’ll see how a thoughtful underpainting makes every layer that follows easier and more enjoyable.
Don’t skip this step—experiment with different colors and styles, and watch your art transform.
Credit: www.artsmartmanila.com


