
Looking to add a splash of color and personality to your garden or home? Painting your own clay pots is a simple and fun way to transform plain terracotta into eye-catching decor that reflects your style.
Whether you want bold patterns, soft pastels, or rustic designs, you can create unique pots that make your plants stand out. In this guide, you’ll discover easy DIY painted clay pot ideas and step-by-step tips that anyone can follow. Get ready to unleash your creativity and turn those ordinary pots into beautiful pieces you’ll love showing off!
Materials Needed
Getting ready to paint your clay pots requires the right materials. These supplies help your design look great and last longer. Gather quality paints, brushes, and sealing items before you start. Each plays a key role in your DIY project.
Types Of Paints
Acrylic paints are popular for clay pots. They offer bright colors and dry quickly. Chalk paints create a matte, vintage look. They add texture and work well for rustic styles. Outdoor or waterproof paints are best for pots placed outside. These paints resist weather and keep colors vibrant.
Brushes And Tools
Use a mix of brushes for different effects. Flat brushes cover large areas fast and smoothly. Small round brushes help with details and fine lines. Foam brushes are great for even coats without streaks. You may also need a palette or mixing tray. Clean brushes often to avoid color mixing.
Sealing Supplies
Seal your painted pots to protect the artwork. Clear acrylic sealers guard against water and sun damage. Matte or glossy finishes are available depending on your style. Spray sealers offer an easy, even coat. Brush-on sealers give more control for edges and corners. Sealing extends the life of your painted pots outdoors.

Credit: soapdelinews.com
Preparing Clay Pots
Preparing clay pots is the first and most important step in any DIY painting project. Proper preparation ensures the paint adheres well and lasts longer. This process involves cleaning, priming, and sealing the pots to create a smooth and durable surface. Taking time here will improve the final look and protect the pot from weather and moisture damage.
Cleaning The Surface
Start by removing dirt, dust, and grease from the pot’s surface. Use warm water and mild soap for thorough cleaning. Scrub gently with a soft brush or cloth to avoid scratching. Rinse well and let the pot dry completely. A clean surface helps paint stick evenly and prevents peeling later.
Priming Techniques
Priming creates a base that improves paint adhesion and color brightness. Choose a primer suitable for terracotta or clay materials. Apply a thin, even layer using a brush or spray. Let the primer dry fully before painting. This step also seals tiny pores in the pot, reducing paint absorption and saving paint.
Sealing Terracotta
Terracotta pots are porous and absorb water easily. Sealing prevents moisture from damaging the paint and pot. Use a clear acrylic sealer or a water-based sealant designed for outdoor use. Apply one or two coats, allowing each to dry well. Sealing extends the life of your painted pot and keeps colors vibrant.
Basic Painting Techniques
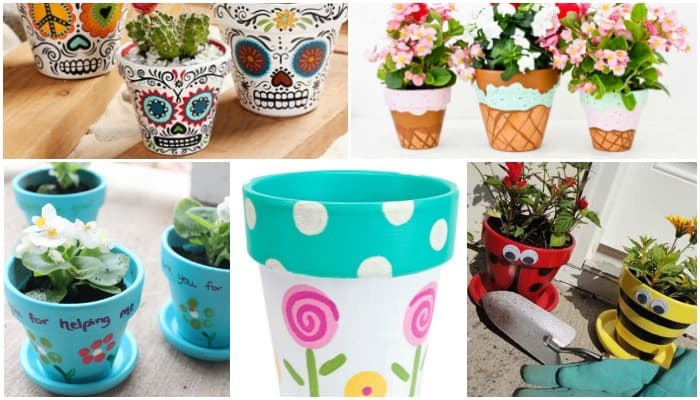
Creative design ideas bring life to plain clay pots. They turn simple pots into charming art pieces. Choosing the right style makes your garden or home unique. Paint colors and patterns can reflect your personality and taste. Experimenting with different designs keeps the process fun and rewarding.
Ombre Effects
Ombre blends colors from light to dark smoothly. Start with a base color and add darker shades gradually. Use a sponge or brush to blend the edges softly. This effect gives pots a modern and stylish look. It works well with blues, pinks, and greens for a fresh feel.
Geometric Patterns
Geometric patterns add a bold, graphic touch to pots. Use painter’s tape to create sharp lines and shapes. Triangles, squares, and stripes are easy to paint and look great. Choose contrasting colors for a striking effect. These patterns suit both indoor and outdoor pots.
Floral And Nature Motifs
Floral designs bring a natural charm to your pots. Paint simple flowers, leaves, or vines using fine brushes. Soft pastel colors enhance the delicate look. Nature motifs connect your pots to the plants inside them. They brighten any space with a touch of springtime.
Distressed And Rustic Looks
Distressed finishes give pots a vintage, worn appearance. Use chalk paint for a matte, textured surface. After painting, gently sand areas to reveal layers underneath. This style pairs well with farmhouse or shabby chic decor. It adds character and warmth to your garden.

Credit: daysinspired.com
Creative Design Ideas
Sealing and finishing painted clay pots is a key step. It protects your artwork and keeps the colors bright. Without sealing, paint can chip or fade quickly. A good finish also adds a professional look. Learn about varnishing, finish types, and weather protection below.
Varnishing For Durability
Varnish strengthens the paint on your clay pots. It forms a clear, hard layer that shields the surface. Use a water-based varnish for easy cleanup and less odor. Apply thin, even coats with a brush. Let each coat dry fully before adding another. Two or three coats improve protection and durability.
Matte Vs Glossy Finishes
Matte finishes offer a soft, natural look. They reduce glare and hide fingerprints well. Glossy finishes shine and highlight colors vividly. Choose glossy for a bold, bright effect. Matte works best for rustic or vintage styles. Pick the finish that suits your pot’s style and location.
Protecting Against Weather
Clay pots often face rain and sun outdoors. Use a weatherproof sealant to guard against moisture. Outdoor sealants prevent cracking and fading from sunlight. Reapply sealant yearly to keep pots in top shape. Cover pots during heavy rain or frost to extend their life.
Advanced Decoration Tips
Painting clay pots is a fun and creative way to brighten your space. Simple steps can transform plain pots into colorful decor. These DIY tutorials guide you through easy painting ideas. They suit beginners and those with some painting experience.
Using the right paints and techniques makes a big difference. Acrylic paints work well for bright, lasting colors. Chalk paint offers a soft, matte finish. You can choose styles that match seasons or fit kids’ activities.
Summer-themed Pots
Create vibrant summer pots with bold colors and fun patterns. Start with a bright base like yellow or turquoise. Add designs like suns, waves, or tropical leaves. Use stencils or freehand simple shapes. Seal the paint with a clear coat for durability outdoors. These pots bring a fresh, sunny look to patios and gardens.
Winter White Designs
Winter pots look beautiful with whites and cool blues. Paint the pot in white or light blue shades. Add snowflakes, pine trees, or simple stripes in silver or gray. Use a fine brush for delicate details. These designs add a calm, cozy feel to your home. Finish with a matte sealant to keep the soft look.
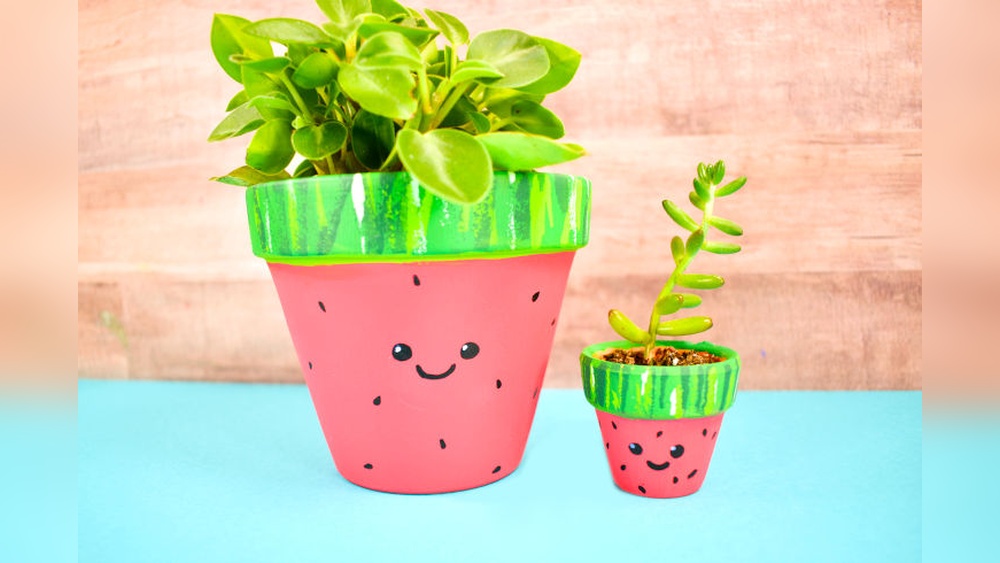
Kids-friendly Painting Ideas
Kids love painting pots with bright colors and easy shapes. Use washable acrylic paints for easy cleanup. Let children paint dots, stripes, or smiley faces. Sponge brushes and stamps work well for simple patterns. Encourage creativity with different colors and designs. These pots make great gifts and fun craft projects for kids.
Credit: www.seemamago.com
Sealing And Finishing
Painting clay pots is a fun and creative project. Sometimes, issues like paint chipping or uneven coverage occur. These problems can spoil the look of your pots. Do not worry. Simple fixes can restore your pots to their best. Here are easy solutions to common painting troubles.
Paint Chipping Solutions
Paint often chips because the pot was not clean or dry before painting. Always wash the pot with soap and water. Let it dry completely before painting. Use acrylic paint for better adhesion. Apply a primer to help paint stick well. Once painted, seal with a clear varnish or sealant. This protects the paint and stops chipping.
Avoiding Uneven Coverage
Uneven paint makes your pot look messy. Thin your paint with a little water to spread it smoothly. Use a foam brush or sponge for even strokes. Paint in thin layers, letting each dry fully before adding more. Avoid thick coats that drip or pool. Rotate the pot as you paint for full, even coverage on all sides.
Fixing Mistakes
Small mistakes happen. Use a damp cloth to wipe wet paint away quickly. For dried paint errors, sand the spot lightly with fine sandpaper. Repaint the area carefully once smooth. If colors mix unintentionally, wait for the paint to dry. Then paint over with the correct color. Patience helps make your pots look perfect.
Frequently Asked Questions
What Kind Of Paint Do You Use On Clay Pots?
Use acrylic paint for vibrant colors and durability on clay pots. Chalk paint works well for a matte, rustic finish. Seal with a clear varnish to protect your design and ensure longevity.
How To Get Acrylic Paint To Stay On Terracotta Pots?
Clean and dry the terracotta pot. Apply a primer or gesso for better paint adhesion. Use acrylic paint in thin, even layers. Allow each layer to dry before adding the next. Finish with a clear sealer or varnish to protect and make the paint last longer.
How To Paint Clay Pottery At Home?
Clean and dry the clay pottery. Apply a primer or base coat. Use acrylic paints to decorate. Let each layer dry fully. Seal with a clear varnish for durability.
What Kind Of Paint Is Best For Pots?
Acrylic paint works best for pots, offering vibrant, long-lasting colors. Chalk paint suits a matte, rustic look. Seal painted pots with a waterproof varnish to protect the finish and ensure durability outdoors.
Conclusion
DIY painted clay pots add color and charm to any space. You can create unique designs with simple paints and brushes. Remember to seal your pots to protect your artwork. Experiment with patterns, colors, and textures for a personal touch.
Enjoy the process and let your creativity shine. Painted clay pots make great gifts and brighten your home. Start small, have fun, and watch your pots come to life. This easy craft suits all skill levels and offers endless ideas.
Happy painting!


