
Are you ready to give your pumpkins a fresh, creative twist this season? Painting pumpkins is an easy and fun way to add color and personality to your home décor without the mess of carving.
Whether you’re a beginner or looking for clever tricks to improve your skills, these DIY painted pumpkin tips will guide you step-by-step to stunning results. From choosing the right paint to mastering simple techniques, you’ll discover how to turn ordinary pumpkins into eye-catching pieces that impress everyone.
Keep reading and unlock the secrets to pumpkin painting that will make your decorations stand out this year!

Credit: www.gathered.how
Choosing Your Pumpkin
Picking the right pumpkin sets the base for your painted masterpiece. This step makes a big difference in how your project turns out. Consider several factors before you start painting.
Think about the pumpkin’s texture, size, and shape. These details affect your painting style and final look. Take your time to find one that fits your creative idea.
Selecting Real Vs Artificial
Real pumpkins offer natural texture and an organic look. They may spoil faster but give a classic vibe. Artificial pumpkins last longer and are easier to handle. They come in many sizes and shapes. Choose artificial if you want a reusable option. Real pumpkins work well for a fresh, seasonal feel.
Picking The Right Size And Shape
Think about the size that matches your design. Small pumpkins work for simple patterns or accents. Large pumpkins give you more space for detailed art. Shapes matter too. Round pumpkins provide a smooth surface. Tall or squat pumpkins add character and style. Select a shape that fits your painting plan well.
Preparing The Pumpkin
Preparing the pumpkin is the first step to a successful DIY painted pumpkin project. A well-prepared pumpkin ensures your paint sticks well and lasts longer. Taking time to clean and decide about the stem can make a big difference in the final look. Follow these simple tips to get your pumpkin ready.
Cleaning And Drying
Start by wiping the pumpkin with a damp cloth to remove dirt. Use mild soap and water for a deeper clean. Avoid soaking the pumpkin, as too much water can cause damage.
After cleaning, dry the pumpkin completely. Use a soft towel to pat it dry. Let it air dry for at least an hour to remove all moisture. A dry surface helps paint stick better and prevents peeling.
Removing The Stem Or Leaving It
Decide if you want to keep the stem or remove it before painting. Keeping the stem adds a natural look and a nice handle for moving the pumpkin.
Removing the stem makes the surface easier to paint and gives more space for designs. Use a sharp knife or garden shears to cut the stem close to the pumpkin. Be careful to avoid damaging the pumpkin skin.
Gathering Materials
Starting your DIY painted pumpkin project means gathering the right materials first. Having everything ready makes the painting process smooth and fun. This section covers the paint types, brushes, and extra supplies you will need for great results.
Recommended Paint Types
Acrylic paint is best for pumpkins. It sticks well and dries fast. Choose bright colors like orange, white, black, or metallic shades for more style. Avoid watercolors because they don’t cover the pumpkin surface well. Spray paint works too but use it outside or in a ventilated area.
Brushes And Tools Needed
Use various brush sizes for details and larger areas. A medium flat brush covers most pumpkin surfaces quickly. Small round brushes help with fine designs. Foam brushes work well for smooth, even coats. Have a palette or plate to mix colors. Paper towels or rags are handy for cleaning brushes and fixing mistakes.
Additional Decorative Supplies
Consider adding glitter, stickers, or stencils for extra flair. Painter’s tape helps create sharp lines or patterns. Markers can add small details once the paint dries. A sealant spray protects your design from weather and fading. Keep a cup of water nearby to rinse brushes while painting.

Credit: www.onsuttonplace.com
Basic Painting Techniques
Basic painting techniques make your DIY painted pumpkins look smooth and vibrant. Understanding these simple steps helps you create a clean, attractive finish. Each step builds on the last, improving the pumpkin’s overall appearance. Use these methods to bring your pumpkin designs to life with ease.
Applying Base Coats
Start with a clean, dry pumpkin. Choose a base coat color that fits your design. Use a wide brush to cover the pumpkin evenly. Paint in thin layers to avoid drips and streaks. Let the base coat dry completely before adding more paint. A solid base coat creates a smooth surface for the next steps.
Using Smooth Brush Strokes
Hold your brush lightly for better control. Paint in long, even strokes along the pumpkin’s curves. Avoid pressing too hard to keep the paint smooth. Brush in one direction to prevent streaks. Smooth strokes make the paint look professional and neat. Take your time to cover each section carefully.
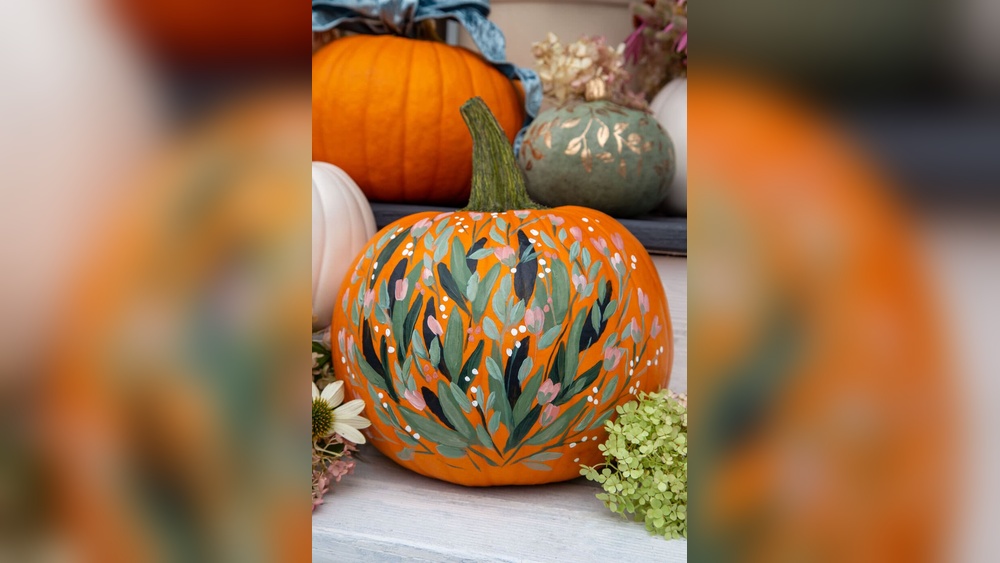
Layering Colors For Depth
Apply multiple layers of paint for richer colors. Wait until each layer dries before adding the next. Use lighter colors first, then add darker shades on top. Blend colors gently with soft brush strokes. Layering adds dimension and interest to your pumpkin art. This technique makes simple designs stand out beautifully.
Creative Design Ideas
Creative design ideas make DIY painted pumpkins fun and unique. You can choose simple or detailed styles. Each approach lets your personality shine on the pumpkin surface.
Try different techniques to create eye-catching pumpkins. Painting is easy and can suit any skill level. Here are some inspiring ideas to start your project.
Simple Patterns And Shapes
Simple patterns like stripes, dots, or zigzags work well on pumpkins. Use bold colors to make these shapes stand out. Circles, triangles, and squares create a playful look. These designs are quick and perfect for beginners.
Use a small brush or sponge to apply paint. Keep shapes neat or let them overlap for a creative touch. Simple designs add charm without needing many supplies.
Painting Faces And Characters
Painting faces turns pumpkins into fun decorations. Draw smiles, funny eyes, or spooky expressions. Characters like witches, ghosts, or animals bring pumpkins to life.
Start with pencil sketches before painting. Use bright colors for eyes and lips to add personality. Faces can be scary or silly depending on your style.
Using Stencils And Tape
Stencils and tape help create clean, sharp designs. Cut shapes or letters from paper or plastic to use as stencils. Tape sections of the pumpkin to paint stripes or geometric patterns.
This method keeps paint inside the lines and makes complex designs easier. It is great for precise shapes and repeating patterns. Remove tape and stencils carefully to reveal crisp edges.

Credit: www.amazon.com
Finishing Touches
Finishing touches bring your painted pumpkin to life. They add charm and help protect your artwork. These small details make a big difference in the final look. Let’s explore easy ways to perfect your pumpkin painting project.
Adding Details With Markers Or Nail Polish
Use fine-tipped markers to draw small designs or patterns. Black or white markers work well for contrast. Nail polish adds a shiny, colorful accent. It dries quickly and gives a smooth finish. Small dots, lines, or shapes enhance your pumpkin’s style. Take your time for neat and clean details.
Sealing Your Artwork
Seal your painted pumpkin to protect it from damage. Use a clear spray sealant made for crafts or outdoor use. Spray in a well-ventilated area and keep the can 6-8 inches away. Apply two light coats for best results. The sealant prevents paint from chipping and fading. It also helps your pumpkin last longer.
Attaching Twine Or Ribbons
Add twine or ribbons for a rustic, festive touch. Wrap twine around the pumpkin stem or tie a bow. Choose colors that match your paint scheme. Secure with glue or tie tightly to avoid slipping. Ribbons can add softness and color contrast. This step completes your pumpkin’s look beautifully.
Tips For Long-lasting Results
Ensuring your DIY painted pumpkins last beyond a few days takes some care. Simple steps help keep colors bright and prevent damage. Protecting pumpkins from weather and storing them properly keeps your artwork fresh. Follow these tips for long-lasting results and enjoy your festive decor longer.
Protecting Against Weather
Painted pumpkins face rain, sun, and wind outdoors. Use a clear spray sealer to shield paint from moisture. Apply two thin coats for better protection. Place pumpkins in a shaded area to avoid sun fading. Avoid leaving pumpkins in standing water or damp spots. Check pumpkins regularly for signs of mold or rot. Remove damaged pumpkins quickly to stop spread.
Storage Recommendations
Storing painted pumpkins properly extends their life. Keep pumpkins in a cool, dry place away from direct sunlight. Avoid storing near heat sources that cause drying and cracking. Use a breathable container or box to allow air circulation. Adding a layer of newspaper or tissue paper helps cushion pumpkins. Handle pumpkins gently to avoid scratches or dents. Check stored pumpkins often and remove any that spoil.
Fun Variations To Try
Trying different styles makes pumpkin painting more exciting. These fun variations give your pumpkins a unique look. Each idea uses simple materials and easy steps. Pick one to brighten up your fall decor.
Candy Corn Painted Pumpkins
Use orange, yellow, and white paint to create candy corn stripes. Paint the pumpkin in three sections from bottom to top. Let each color dry before adding the next. Tie a small twine bow around the stem for a cute finish. This look is colorful and perfect for Halloween.
Distressed And Rustic Looks
Start with a base coat of paint in soft, neutral colors like cream or gray. Lightly sand the pumpkin’s surface once dry to reveal some of the natural skin. This creates a worn, vintage feel. Add a touch of brown or black paint to edges for extra depth. Perfect for rustic or farmhouse styles.
Glitter And Metallic Effects
Paint your pumpkin with metallic colors like gold, silver, or copper. While the paint is still wet, sprinkle fine glitter on top. Shake off the excess glitter after drying. You can also use glitter glue for precise designs. These pumpkins shine and add a glamorous touch to any setting.
Hosting A Painted Pumpkin Party
Hosting a painted pumpkin party is a fun way to celebrate the fall season. It brings friends and family together to share creativity and laughter. The party can be simple or elaborate, depending on your style and space. Everyone enjoys personalizing pumpkins with paint instead of carving. This activity is less messy and more colorful. It also suits all ages and skill levels. Here are some tips to make your painted pumpkin party a hit.
Setting Up A Painting Station
Choose a large table with enough space for all guests. Cover it with a plastic sheet or newspaper to protect surfaces. Provide paint in various colors and brushes of different sizes. Have cups of water for rinsing brushes and paper towels for quick cleanups. Set out aprons or old shirts to protect clothes. Place pumpkins in the center for easy reach. Add a trash bin nearby to keep the area tidy.
Kid-friendly Ideas
Use non-toxic, washable paints for children’s safety. Offer simple designs like smiley faces, polka dots, or stripes. Provide stickers, stamps, and glitter for extra fun. Encourage kids to use sponges for unique textures. Keep brushes and paint small and easy to handle. Set a time limit to keep kids focused and happy. Celebrate every child’s effort with applause or small prizes.
Group Activity Tips
Divide guests into small teams to create themed pumpkins. Assign roles like painter, decorator, and cleaner for smooth teamwork. Encourage sharing ideas and helping each other. Play background music to create a lively atmosphere. Take breaks for snacks and pumpkin-themed refreshments. Display finished pumpkins on a table for everyone to admire. Capture photos to remember the creative fun.
Frequently Asked Questions
What Materials Do I Need For Diy Painted Pumpkins?
You need pumpkins, acrylic paints, brushes, painter’s tape, and sealant. Optional items include stencils and glitter for extra decoration.
How Do I Prepare Pumpkins For Painting?
Clean pumpkins with mild soap and water. Avoid wetting the stem. Dry completely before painting to ensure paint adheres well.
Can I Use Spray Paint On Pumpkins?
Yes, spray paint works well. Spray pumpkins a day before painting for even coverage and better results.
What Are Easy Painting Techniques For Beginners?
Try simple patterns like polka dots, stripes, or faces. Use painter’s tape for sharp lines and stencils for consistent shapes.
Conclusion
Painting pumpkins is a fun and creative way to celebrate fall. Simple steps and the right tools make the process easy. Choose colors that match your style and mood. Take your time to paint carefully and enjoy the process. Painted pumpkins brighten any space without carving mess.
Try different designs to find what you like best. Everyone can create beautiful pumpkins with these helpful tips. Start your DIY pumpkin painting project today and have fun!


