
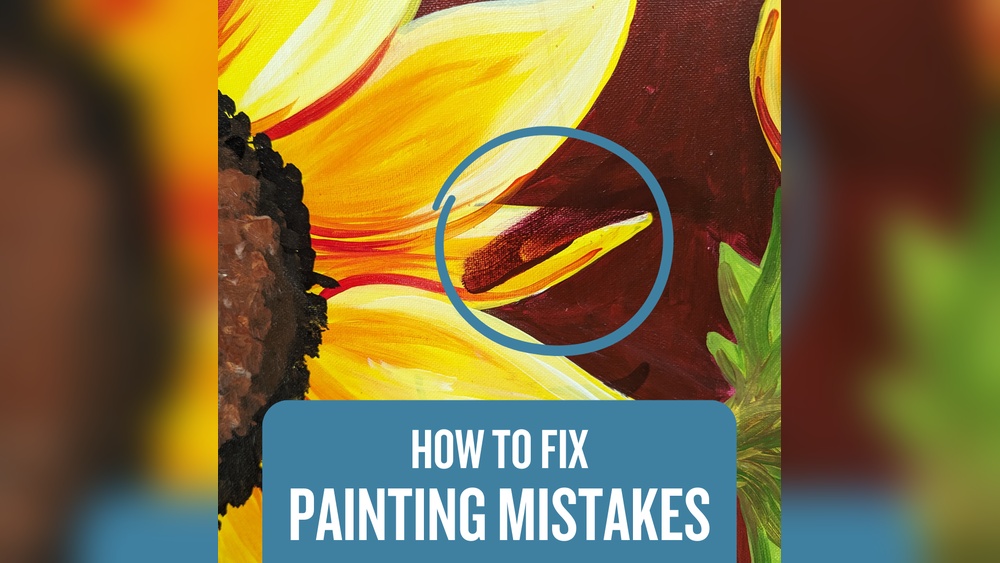
Quick answer: The easiest way to fix dried acrylic paint mistakes is usually to paint over them, because acrylic dries into a stable, water-resistant film. For small errors, cover the area with an opaque layer such as titanium white or gesso and repaint. For raised blobs or texture, sand lightly with fine-grit sandpaper first. For larger problems, prime over the section with gesso and start that area fresh. Isopropyl alcohol can soften small spots of dried acrylic, but test it carefully because it can also lift the layers beneath.
One of the best things about acrylic is that a mistake is rarely permanent. Once a layer dries, it becomes a flexible plastic film that you can paint on top of without disturbing it. That makes fixing dried acrylic paint mistakes much easier than with watercolor, where errors tend to stay visible.
Still, not every fix is obvious. A muddy sky, a ridge of thick paint in the wrong place, a smudged edge or a color that dried darker than expected each call for a slightly different approach. This guide organizes the fixes by problem so you can find the right one quickly.
Why Dried Acrylic Is Easy to Correct
Acrylic paint is pigment held in an acrylic polymer emulsion. While wet, it is water-soluble. As the water evaporates, the polymer particles fuse into a continuous film that no longer dissolves in water. That film has two properties that matter for corrections:
- It accepts new layers. Fresh acrylic bonds well to dried acrylic, so painting over an error is usually a permanent fix.
- It resists gentle solvents. Water will not lift it, so you cannot simply wipe a mistake away once it is dry. Stronger solvents such as isopropyl alcohol can soften it, which is useful but needs care.
The trade-off is that acrylic also darkens slightly as it dries, because the binder turns from milky to clear. Many “mistakes” are actually color-shift issues rather than technique problems.
Before You Fix Anything: Diagnose the Problem
Take a step back, literally. View the painting from several feet away, or take a photo and look at it on your phone. Problems that seem large up close often vanish at viewing distance, and others become obvious. Then identify which type of mistake you have.
| Mistake | Best fix | Difficulty |
|---|---|---|
| Wrong color or value in a small area | Paint over with opaque color | Easy |
| Muddy or overworked patch | Cover with white or gesso, repaint | Easy |
| Raised blob, drip or brush hair | Sand or scrape, then repaint | Moderate |
| Hard, unwanted edge | Glaze or scumble to soften | Moderate |
| Composition problem | Gesso over the area and redesign | Moderate |
| Streaky, patchy coverage | Add more opaque layers or a glaze | Easy |
| Paint on the wrong surface (frame, edge) | Isopropyl alcohol or careful scraping | Moderate |
Fix 1: Paint Over Small Errors
For most color or shape mistakes, painting over is the cleanest fix.
- Make sure the area is completely dry. Thin layers dry in minutes, but thick ones may need hours.
- If you are covering a dark color with a lighter one, first apply a layer of titanium white or another opaque light color. This blocks the dark from showing through.
- Let that layer dry, then apply your correct color.
- Add a second coat if the area still looks patchy.
Opacity varies a lot by pigment. Cadmiums, titanium white and many earth colors cover well. Transparent pigments such as quinacridones and phthalos are lovely for glazing but poor at hiding what is underneath. Higher-quality paints usually cover in fewer coats because they contain more pigment; our guide to the best acrylic paint brands for coverage and color compares how different lines perform.
Fix 2: Cover a Large Section With Gesso
When a whole area has gone wrong, such as a muddy background or a figure in the wrong place, painting over it piece by piece can lead to more mud. Resetting the area works better.
- Brush a thin, even coat of white gesso over the section you want to redo. Feather the edges so there is no hard line.
- Let it dry, then apply a second coat if the old image still shows through.
- Lightly sand with fine-grit paper if the gesso left brush texture.
- Repaint the area, blending it into the surrounding paint.
Gesso is slightly absorbent and has more tooth than dried paint, so the new paint may look a touch matte at first. A final varnish evens out the sheen.
Fix 3: Remove Raised Blobs, Drips and Texture
Painting over a lump does not hide it; the new color just sits on top of the bump. Physical removal comes first.
Scraping
Hold a sharp palette knife or craft blade nearly flat against the surface and gently shave down the raised area. Work slowly, taking off a little at a time. This works well for small ridges and dried drips.
Sanding
Use fine-grit sandpaper, around 220 to 400 grit, wrapped around a small block. Sand lightly in small circles until the area is level. Wipe away dust with a slightly damp cloth, let it dry, then repaint. Be careful on stretched canvas, where too much pressure can stretch or damage the fabric.
Stuck Brush Hairs and Debris
Lift a dried-in bristle or piece of lint with the tip of a craft knife, then fill the small groove with a dab of paint. For dust particles, a light sanding after drying and a fresh thin coat is often enough.
Fix 4: Soften Hard Edges and Harsh Transitions
Acrylic’s fast drying can leave sharp edges where you wanted a soft blend. You cannot re-wet dried acrylic to blend it, but you can create the illusion of softness on top.
- Glazing: Mix a transparent color with glazing medium and brush a thin layer across the edge. Repeat in several layers to build a smooth transition.
- Scumbling: Use a dry brush with a small amount of semi-opaque paint and scrub it lightly across the edge in a circular motion. This creates a soft, broken layer that bridges the two areas.
- Wet-into-wet on top: Paint fresh layers of both colors over the edge and blend them while wet, working quickly or with a slow-drying medium.
Fix 5: Correct Colors That Dried Too Dark
Acrylic dries darker than it looks wet. If a color dried too dark, mix the correction slightly lighter than your target to compensate. Testing a swatch on scrap paper and letting it dry before applying it to the painting is the most reliable way to match.
If a dried color is too intense or bright, a thin glaze of its complement can calm it down. For example, a glaze of a soft green can tone down an overly bright red.
Fix 6: Clean Up Edges, Frames and Unwanted Spots
Paint on the canvas sides, a frame or the wrong area of a painting can sometimes be removed rather than covered.
Isopropyl alcohol (rubbing alcohol) softens dried acrylic. Dab a cotton swab with alcohol and press it onto the spot for a few seconds, then gently rub. The paint should start to soften and lift. Test first in an inconspicuous place, because alcohol does not distinguish between the mistake and the paint you want to keep. On a finished painting, it can easily strip down to the primer.
For non-porous surfaces such as glass palettes or plastic frames, a razor scraper usually removes dried acrylic cleanly.
Fix 7: Even Out Streaky or Patchy Coverage
Streaks usually appear when paint is too thin, the brush is too dry, or a semi-transparent color is applied in one coat. The fix is more layers, not thicker ones.
- Let the streaky layer dry completely.
- Apply a second thin coat with brushstrokes running in a different direction, which fills gaps left by the first pass.
- If the color is naturally transparent, mix in a small amount of an opaque pigment of similar hue, or lay down an opaque base of a lighter value first.
- For a smooth finish on flat areas, use a soft synthetic flat brush and add a few drops of flow-improving medium to reduce brush marks.
Uneven sheen, where some areas look glossy and others dull, is a related problem. It often comes from varying amounts of water or medium across the painting. A final coat of varnish in your chosen finish evens it out.
How to Take Dried Acrylic Paint Off Brushes
Dried paint in a brush is another common mistake, and it can ruin good brushes if left. These steps help rescue them:
- Soak in isopropyl alcohol. Place the bristles (not the whole handle) in a small jar of rubbing alcohol for 10 to 30 minutes. This softens the paint.
- Work the paint out. Gently massage the bristles with your fingers or comb them with an old fine-tooth comb, working from the ferrule toward the tip.
- Wash with soap. Lather with mild dish soap or a brush cleaner and rinse in warm water until the water runs clear.
- Repeat if needed. Heavily caked brushes may need several rounds.
- Reshape and dry. Shape the tip with your fingers and lay the brush flat or hang it upside down to dry, so water does not seep into the ferrule.
Commercial brush restorers and cleaners made for dried acrylic also work, and some are gentler on handles. Avoid soaking wooden handles for long periods, since water and solvents can loosen the ferrule glue and crack the lacquer.
Prevention is easier: keep brushes in water during a session, never let paint dry near the ferrule, and wash them thoroughly as soon as you finish.
When to Let It Go
Not every flaw needs fixing. Some of the most interesting passages in a painting come from accidents: a drip that suggests rain, a rough patch that adds texture, a color that turned out unexpectedly. Before correcting, ask whether the mistake actually harms the painting or just differs from your plan.
It also helps to know when to stop correcting. Repeated layers over the same small area build up thickness and can create a visible patch that looks worse than the original mistake. If you have painted over the same spot three or four times, sanding it back or resetting with gesso may give a cleaner result.
Preventing Dried Acrylic Mistakes
| Habit | Why it helps |
|---|---|
| Make thumbnail sketches first | Catches composition problems before paint goes down |
| Test colors on scrap and let them dry | Shows the true dried color |
| Work from dark to light or thin to thick | Keeps later corrections easier |
| Use a stay-wet palette | Prevents dried bits of paint getting into your strokes |
| Step back often | Spots issues while paint is still wet and easy to fix |
| Keep a damp cloth nearby | Wet mistakes wipe away; dry ones need more work |
Paint quality can also reduce the number of corrections you need. Paints with stronger pigment load cover in fewer coats, which matters when painting over errors. If you are curious about a specific line, our Daler-Rowney acrylic paint review looks at coverage and handling in detail.
Related Reading
FAQs
Can you remove dried acrylic paint from a canvas?
Not easily without damaging what is underneath. It is usually better to paint over the area, sand down raised spots, or cover the section with gesso and repaint. Isopropyl alcohol can lift small spots but may strip surrounding layers.
Can I paint over dried acrylic paint?
Yes. Fresh acrylic bonds well to dried acrylic. For light colors over dark, apply an opaque white layer first so the dark does not show through.
How do I fix muddy acrylic colors?
Let the area dry, cover it with an opaque layer of white or gesso, then repaint with fewer, cleaner mixes. Avoid overblending wet paint, which is the most common cause of mud.
How to take dried acrylic paint off brushes without ruining them?
Soak just the bristles in isopropyl alcohol or a brush restorer, comb or massage the paint out, then wash with soap and warm water. Repeat as needed, and reshape the bristles before drying.
Why does my acrylic paint look different when it dries?
The acrylic binder appears milky when wet and turns clear as it dries, which makes most colors look slightly darker. Test swatches on scrap paper to see the true dried color.
Is it okay to use sandpaper on an acrylic painting?
Yes, gently. Fine-grit sandpaper can level raised paint and smooth gesso layers. Use light pressure, especially on stretched canvas, and wipe away dust before repainting.
Final Thoughts
Dried acrylic mistakes are almost always fixable. Paint over small errors with opaque color, reset larger areas with gesso, scrape or sand raised spots, and use glazes to soften edges you cannot reblend. Save solvents for small spots and brushes, and test them first.
Because so many fixes depend on how well a paint covers, it is worth knowing how your paints compare on opacity and pigment strength. Our roundup of acrylic paints that cover well in fewer coats can help you choose a set that makes corrections faster.





One Comment