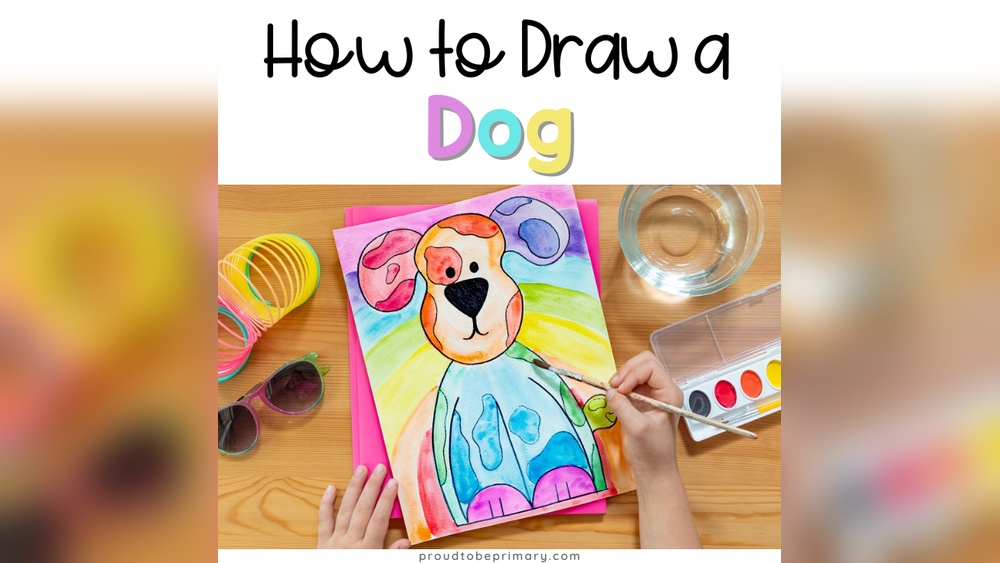
Quick answer: The simplest way to learn how to paint a dog for kids starts with a big rounded head shape, two long floppy ears hanging down the sides, an oval snout in the lower middle and a body behind or below. Paint the head and body in one color, let them dry 10 to 15 minutes, then add darker ears, a big black nose, eyes with white highlights, a tongue and a spot or two. Floppy-eared puppies are much easier than pointy-eared breeds, and the whole project takes 40 to 50 minutes with washable tempera or student acrylic.
Dogs are personal. Kids rarely want to paint “a dog”; they want to paint their dog, Grandma’s dog or the beagle from their favorite cartoon. That attachment is a gift, because a child who cares about the subject will happily sit through drying breaks and fix wobbly lines.
This easy guide shows how to paint a dog for kids by focusing on the face first, since that is what makes a painted dog recognizable and lovable. You will learn a front-facing puppy method, a simple side-view dog, how to adapt the painting to different breeds and how to handle the moments when it does not look right yet.
Start With the Face: Why It Works for Kids
Adults tend to draw a dog body first. For kids, a face-first approach is easier and more satisfying for three reasons:
- The face is the identity. Ears, nose and eyes tell you instantly what animal it is and even what breed it might be.
- It fills the page. A big head-and-shoulders portrait avoids tiny, cramped legs that are hard to paint.
- Expressions are fun. A tongue sticking out, a head tilt or eyebrows raised give a painting personality with just a couple of strokes.
This portrait style is a classic in elementary art rooms, and it pairs well with the other beginner projects collected in the guide to creative painting activities for kids.
Materials for a Kids’ Dog Painting
- Thick paper or a canvas panel, about 9×12 inches, held in portrait (tall) orientation
- Washable tempera or student acrylic in: a main fur color (brown, tan, gray, cream or black), a darker fur shade, black, white, pink or red, and one background color
- A medium flat brush, a small round brush and a cotton swab
- Pencil, eraser, water cup, paper towels and a palette
- Optional: a photo of the dog the child wants to paint
A photo helps older kids notice ear shape and markings, but younger kids do just as well working from imagination.
How to Paint a Dog for Kids: Front-Facing Puppy Step by Step
Step 1: Draw the head shape
In the upper middle of the paper, draw a large rounded shape slightly wider at the top, like an upside-down egg or a rounded U. It should take up about half the paper’s width. Below it, draw a curved line on each side for the shoulders so the head sits on a body rather than floating.
Step 2: Add floppy ears and a snout
On each side of the head near the top, draw a long teardrop shape hanging down, like a sock. These are floppy ears, and they should overlap the head a little. In the lower center of the head, draw a wide oval for the snout or muzzle. The snout oval should cover roughly the bottom third of the face.
Step 3: Paint the background
Choose one cheerful background color, such as sky blue, sunny yellow or mint green, and paint around the dog with the flat brush. A single bold color makes the dog stand out far better than a busy scene. Let it dry for a few minutes while you mix fur colors.
Step 4: Paint the head and body
Fill the head shape and shoulders with the main fur color. Leave the snout oval for now if you want it to be a lighter color; many dogs have a cream or white muzzle. Paint the snout in that lighter color separately.
Step 5: Paint the ears in a darker shade
Mix a darker version of the fur color, or use plain brown or black, and paint the ears. Dark ears against a lighter head is what makes the face read clearly from across the room. Let everything dry for 10 to 15 minutes.
Step 6: The nose and mouth
Paint a big rounded triangle or oval nose in black at the top of the snout. Puppies have large noses compared to their faces, so make it bigger than you think. From the bottom of the nose, paint a short line down, then a curved line to each side, like the letter “w” or an anchor shape.
For a happy panting dog, paint a pink or red tongue hanging from the middle of the mouth. A thin darker line down the center of the tongue adds a nice detail.
Step 7: Eyes with a sparkle
Paint two dark brown or black circles above the snout, spaced about one eye-width apart. Once dry, add a small white dot in the upper corner of each eye, both on the same side. That tiny highlight is what makes painted eyes look wet and alive, and it is a technique kids can use on every animal they paint.
Optional eyebrows: two short curved strokes above the eyes in a lighter or darker color give expression. Tilted inward, they look worried; arched up, they look excited.
Step 8: Markings, collar and fur texture
Add a patch around one eye, spots on the head or a white blaze down the forehead. Paint a collar across the shoulders in red or blue with a yellow circle for the tag. For fur texture, older kids can use the small brush to flick short strokes along the edges of the ears and head, pointing outward like hairs.
Side-View Dog: A Simple Full-Body Option
Some kids want the whole dog, tail wagging. This side-view version uses basic shapes:
- Paint a horizontal oval for the body in the middle of the paper.
- At one end, paint a circle for the head, slightly higher than the body, with a rectangle snout pointing forward.
- Add a floppy teardrop ear on the head.
- Paint four rectangle legs, slightly wider at the bottom for paws.
- Add a curved tail lifted up at the opposite end. A tail pointing up looks happy.
- After drying, add a dot eye, a black nose at the tip of the snout, a collar and a grassy ground line.
This version is a good stepping stone toward painting other four-legged animals, because the same oval-plus-legs structure works for horses, cows and even lions.
Adapting the Painting to Different Dog Breeds
Kids love painting a specific breed. Small shape changes make a big difference:
| Breed type | Ear shape | Snout | Colors and markings |
|---|---|---|---|
| Beagle or basset hound | Long, rounded, hanging low | Medium, white | Tan, black saddle patch, white chest |
| Labrador | Medium, triangular, folded down | Wide and square | Solid yellow, chocolate or black |
| Dalmatian | Medium, folded | Narrow | White with black spots dabbed with a swab |
| Husky or German shepherd | Pointed, standing up (triangles) | Long | Gray or tan with lighter face mask |
| Pug or French bulldog | Small, folded or bat-like | Very short, flat | Fawn body, black face |
| Poodle or doodle | Fluffy rounded shapes | Medium | Dab curly texture with a sponge or swab |
Pointed-ear breeds are slightly harder because standing ears change the head shape. Save those for after the floppy-eared puppy feels easy.
Easy Animal Painting for Kids: Age-by-Age Expectations
Preschoolers (3 to 5)
Expect a circle with ears, a big nose and two dots. That is a perfectly good dog. Help by pre-drawing the head and ears and letting them choose colors. Sponges and chunky brushes are easier than fine brushes.
Early elementary (6 to 8)
Most kids can follow the full front-facing method with occasional help on proportions. Introduce the eye highlight and the idea of darker ears. Encourage markings that match a real dog they know.
Older kids (9 and up)
Challenge them to paint fur direction with short strokes, add shading under the ears and chin with a darker mix and try a three-quarter view where the face turns slightly. A photo reference is helpful at this stage.
Common Problems and How to Fix Them
- The dog looks like a bear. Usually the ears are round and on top. Make them longer and hang them down the sides, or add a longer snout.
- The face looks flat. A lighter snout and darker ears create contrast. Painting the snout a different shade from the head is often the fix.
- The nose is too small. Paint over and make it bigger. Oversized noses look cute on painted puppies.
- Colors smeared together. The base was still wet. Let it dry, repaint the smudged area and wait longer before details next time.
- The eyes look in different directions. Place both white highlight dots on the same side of each pupil; that small consistency makes eyes look aligned.
- The child wants to quit. Take a 10-minute break. Coming back to a dry painting often makes details easier and the mood better.
Easy Things to Paint for Kids Who Love Dogs
Turn one dog painting into a mini series:
- Dog with a bone: Paint a cream bone shape in the dog’s mouth or at its feet.
- Puppy in a box or basket: A brown rectangle at the bottom hides the body, so kids only paint the head and paws peeking over.
- Doghouse scene: A red house with a triangle roof and a dog face peeking out the door.
- Paw print border: Use a fingertip for the pad and four smaller fingertip dots for toes around the edge of the painting.
- Dog on a rock: Paint a sleeping puppy face on a smooth oval stone as a paperweight.
If your child is ready for another animal face, a ladybug is an easy break from fur, with bold shapes and dots. The ladybug painting guide for kids keeps the same “big shapes, then details” rhythm.
Parent Tips for a Calm Painting Session
- Put only the colors needed for the current step on the palette. Fewer choices mean less mixing into brown.
- Keep two water cups: one for rinsing dirty brushes and one for clean water.
- Use a timer for drying breaks so kids know the wait has an end.
- Praise specific choices (“I love how you made the ears so floppy”) rather than general “good job.” It encourages kids to make deliberate decisions.
FAQs
How do you paint an easy dog for kids?
Paint a rounded head, two long floppy ears hanging down the sides and an oval snout. Fill them with color, let them dry, then add a big black nose, two dark eyes with white highlights, a smiling mouth and a pink tongue.
What are easy things to paint for kids who are beginners?
Animal faces built from simple shapes, such as dogs, cats, fish and ladybugs, are great starters. Suns, rainbows and simple trees are also easy because they need only a few colors and basic strokes.
What colors do I need to paint a dog?
A main fur color, a darker shade for ears, black for the nose and eyes, white for highlights, and pink or red for the tongue. Add one background color. Brown, white and black mixed in different amounts can create most dog coat colors.
How can I help my child paint their own pet?
Look at a photo together and name the shapes: Are the ears up or down? Is the snout long or short? What color are the markings? Then follow the face-first method and add those specific features in the detail step.
Should kids use tempera or acrylic for animal paintings?
Washable tempera is easier for young kids and cleans up simply. Student acrylic dries to a more permanent, slightly glossier finish and works better on canvas or rocks, but it needs more careful cleanup and protective clothing.
How long does a kids’ dog painting take?
Plan on 40 to 50 minutes for the front-facing puppy, including two short drying breaks. Younger kids may finish in two shorter sessions, which works well since the paint needs to dry anyway.
Final Thoughts
The secret to an easy dog painting is a confident face: floppy ears, a big nose, bright eyes with a dot of white. Once kids learn those few moves, they can paint any dog they love and recognize the same pattern in other animals.
When your child is ready for the next challenge, browse the full collection of kids painting techniques and fun project ideas to pick another subject, try a new tool or set up a themed art afternoon.