
Painting a ladybug is one of the most joyful art activities for kids. The bright red color, round shape, and fun spots make it a favorite for young artists. Whether you are a parent, teacher, or someone who loves spending creative time with children, learning how to paint a ladybug step by step can be both easy and rewarding.
This guide will help you create a simple, fun painting experience, even if you have little or no art background. Along the way, you’ll discover tips, common mistakes to avoid, and extra ideas to make your ladybug truly special.
Why Painting Ladybugs Is Great For Kids
Art is not just about making pretty pictures. Painting for kids builds important skills. When children paint a ladybug, they practice focus, patience, and hand control. The project is simple enough for beginners but also lets kids use their imagination. Ladybugs are popular in schools, summer camps, and even birthday parties because they:
- Use basic shapes (circle, semicircle, dots)
- Need only a few colors
- Let kids finish a painting in 30–45 minutes
- Look cute and cheerful
Many parents notice that art time helps kids relax and talk more openly. Plus, a finished ladybug painting is something kids can feel proud of and show to friends.
What You Need: Supplies And Preparation
Before starting, gather all the materials. Choosing the right art supplies makes the process smoother and gives better results. Here’s a simple list for painting a ladybug:
- Paper: Thick paper (like 90–140 lb watercolor paper) works best. It doesn’t wrinkle as much as thin printer paper.
- Paints: Washable tempera or watercolor paints are safest for kids. You need mainly red, black, and white.
- Brushes: A medium round brush for big areas and a small round brush for details.
- Pencil and eraser: For sketching the ladybug shape.
- Water cup: For rinsing brushes.
- Paper towel: For drying brushes or cleaning spills.
- Palette: For mixing colors (a paper plate works too).
- Apron or old shirt: To protect clothes.
If you have extra supplies like colored markers or glitter, keep them nearby for decoration at the end.
Setting Up The Workspace
A well-prepared space helps kids focus on painting, not on messes. Cover the table with newspaper or a plastic tablecloth. Place all supplies within easy reach. Remind kids to wear their aprons. If painting with a group, give each child enough room to work comfortably.
Step-by-step: How To Paint A Ladybug For Kids
This method is designed for children ages 4 and up but works for all beginners. Each step builds on the last, so take your time and encourage kids to enjoy each part.
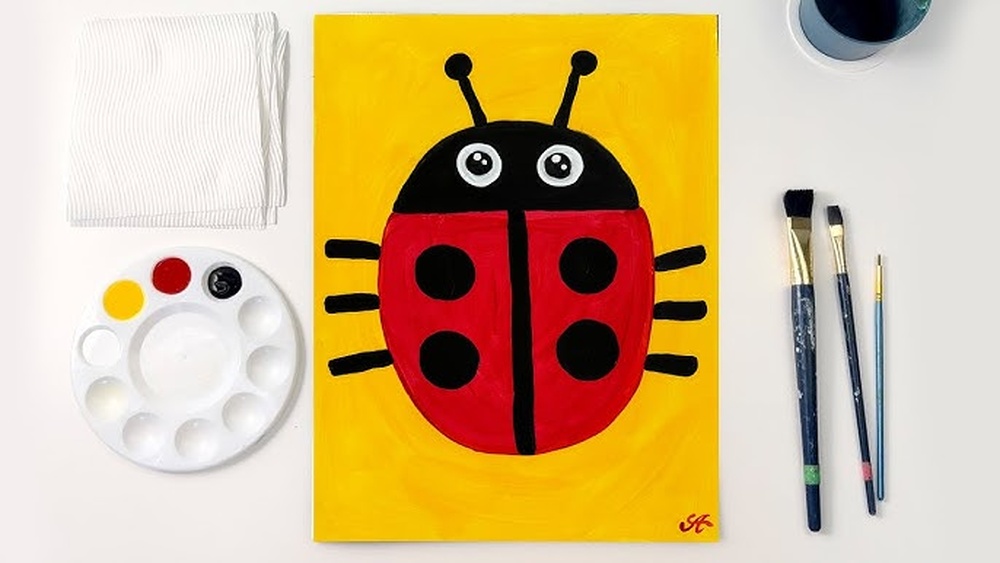
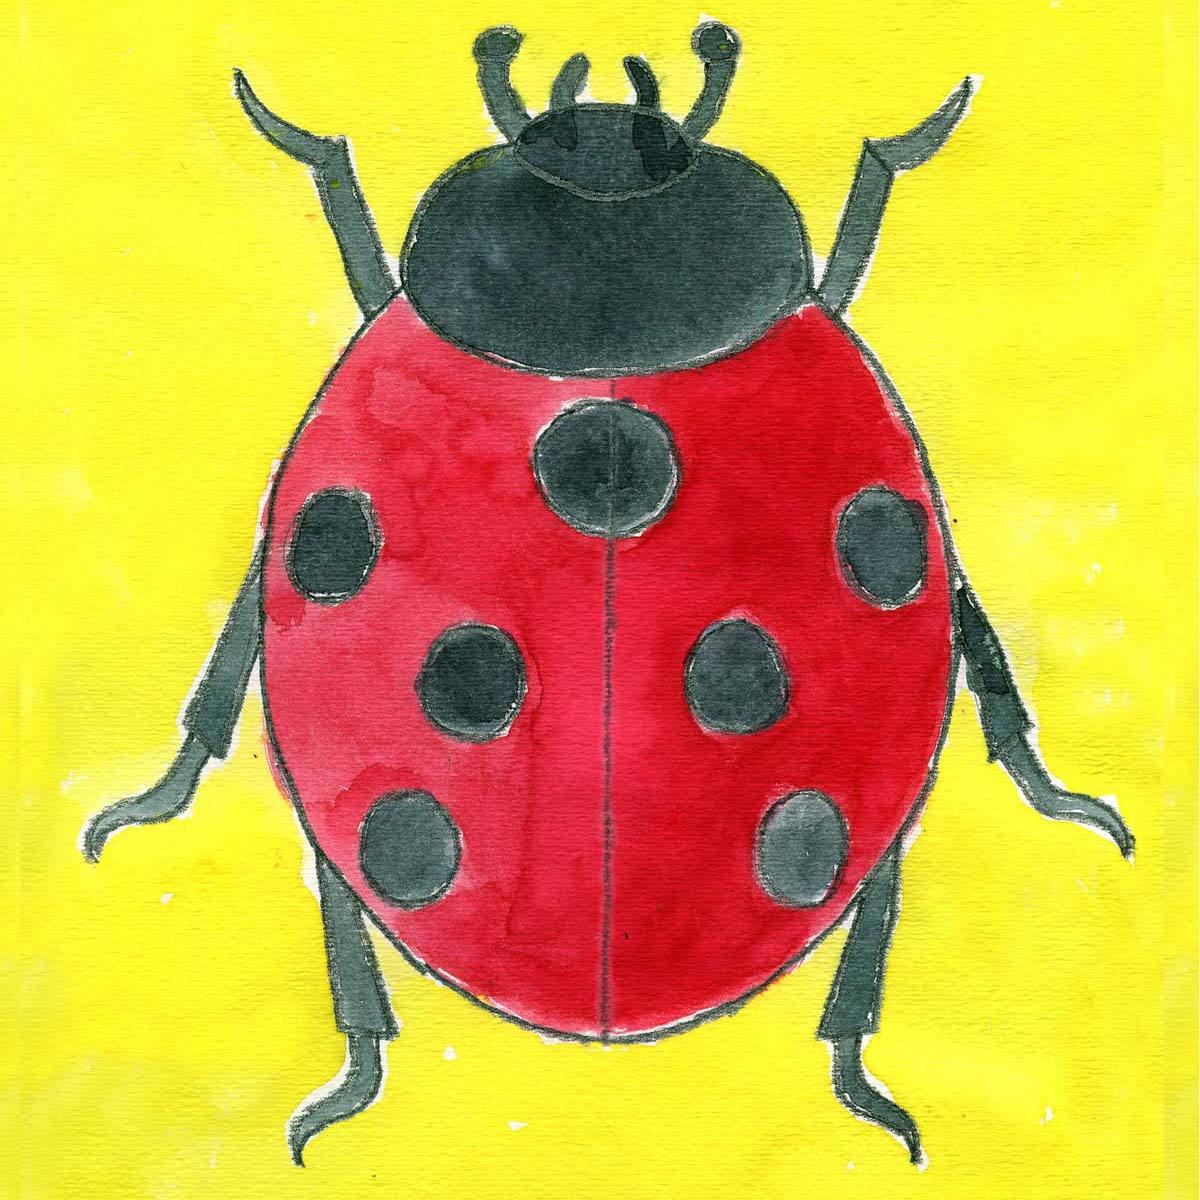
Step 1: Draw The Ladybug’s Body
Start with a simple oval or circle in the center of the paper. This will be the main body. Use a pencil and make the lines light, so they can be erased if needed. For very young kids, parents can draw the shape first.
Tip: If circles are hard, trace around a cup or small bowl.
Step 2: Add The Head
On one end of the oval, draw a small semicircle for the ladybug’s head. It should slightly overlap the body.
Step 3: Draw The Line Down The Back
Ladybugs have two wings. Lightly draw a straight line from the top of the body to the bottom, dividing the oval in half.
Step 4: Sketch The Spots
Draw 3–4 circles on each side of the line. These are the ladybug’s spots. They can be different sizes.
Non-obvious insight: Fewer, larger spots are easier for younger children and look bold. Older kids can add more or make their own patterns.
Step 5: Paint The Body Red
With a medium brush, fill in the big oval with red paint. Go slowly around the spots—they should stay white for now. If paint covers the spots, it’s okay; they can be fixed later.
Let the red paint dry for a few minutes.
Step 6: Paint The Head And Line Black
Use black paint to color the head semicircle. With a small brush, paint the line down the back.
Step 7: Paint The Spots Black
Fill each spot with black paint. Try to keep the edges round, but don’t worry if they are a little uneven—this makes each ladybug unique.
Step 8: Add Eyes And Antennae
With a small brush or the end of a paintbrush, add two white dots for eyes on the head. When dry, add smaller black dots inside for pupils.
For antennae, paint or draw two thin lines from the top of the head, curving out. Add small dots at the ends.
Step 9: Add Legs
Paint or draw three short lines on each side of the body for legs. Ladybugs have six legs, but for kids, simple lines are perfect.
Step 10: Finish And Decorate
Let the painting dry. Kids can add grass, flowers, or a blue sky around the ladybug. For extra fun, use glitter, stickers, or markers for decoration.
Non-obvious insight: Encourage kids to name their ladybug or write a story about it. This adds a literacy element to the art project.
Comparing Painting Techniques For Kids
There are a few ways to paint a ladybug, depending on the child’s age and skills. Here’s a simple comparison to help you pick the best method.
| Technique | Best For | Difficulty | Notes |
|---|---|---|---|
| Brush Painting | Most kids (4+) | Easy | Classic look, good for details |
| Finger Painting | Toddlers (2–4) | Very easy | Messy, great for sensory play |
| Sponge Painting | Young children | Easy | Fun texture, fast to fill large areas |
Practical tip: Let kids try more than one method. For example, paint the body with a brush, then stamp spots with fingers.
Credit: artprojectsforkids.org
Common Mistakes And How To Fix Them
Even simple art projects can have small problems. Here’s how to solve the most common issues when painting a ladybug.
- Paint Bleeds Outside the Lines: Wait for each color to dry before starting the next. If red goes into the black, let it dry, then paint black over it.
- Paper Wrinkles: Use thicker paper. If it curls, place a heavy book on it after it dries.
- Colors Mix and Look Brown: Wash the brush between colors. Keep a clean water cup nearby.
- Spots Look Messy: Use the tip of the brush or a cotton swab for neat circles.
- Ladybug Looks Flat: Add a small white highlight on the back to make it look shiny.
Non-obvious insight: Let kids know that mistakes are okay. Sometimes a ‘mistake’ makes the painting even more special.
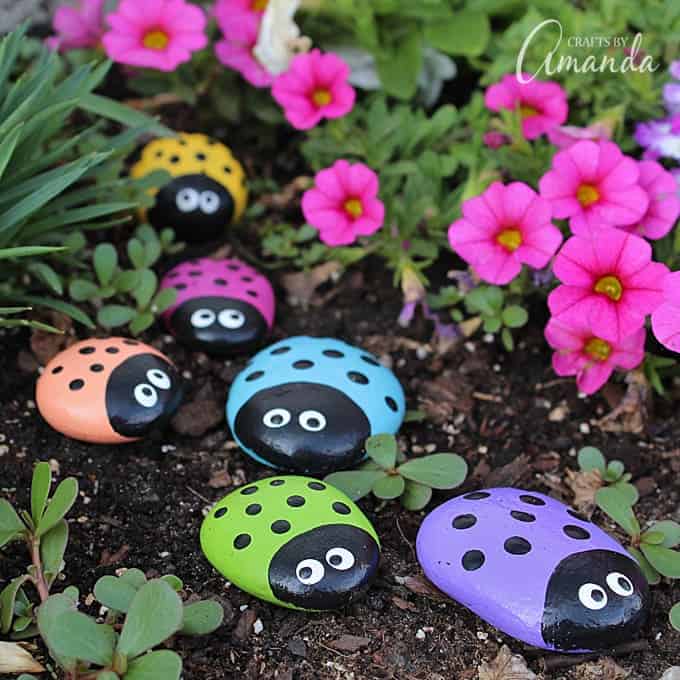
Ways To Make Your Ladybug Painting Unique
Encourage creativity by letting kids add their own ideas. Here are some ways to make each ladybug painting one-of-a-kind:
- Use different colors: Try yellow, orange, or even rainbow ladybugs.
- Add patterns: Stripes, hearts, or stars instead of just dots.
- Paint a whole ladybug family with different sizes.
- Glue on googly eyes or use pipe cleaners for 3D antennae.
- Draw a background scene—maybe a garden or a picnic.
Kids often come up with ideas adults would never think of. Let them try new things, even if it’s not exactly like a real ladybug.

Credit: www.youtube.com
How Ladybug Painting Helps Learning
Painting a ladybug is more than just fun. It supports child development in several ways:
- Fine motor skills: Holding a brush, making circles, and filling small spots build hand control.
- Observation: Kids look at real ladybugs or photos and notice details.
- Color recognition: Red, black, and white are strong, clear colors for early learning.
- Patience and sequence: Kids learn to follow steps and wait for paint to dry.
- Confidence: Completing a project gives a sense of achievement.
Research shows that art activities help children do better in other subjects, too. For more on this, check National Endowment for the Arts.
Cleaning Up After Painting
Art can be messy, but cleanup teaches responsibility. Here are simple steps to finish the activity:
- Put brushes in water right away so paint doesn’t dry on them.
- Wipe tables with a damp cloth.
- Let paintings dry flat before moving.
- Throw away dirty paper towels and cups.
- Wash hands with soap.
Turn cleanup into a game or play music to make it fun.
Ladybug Painting For Groups And Parties
This project works well for classrooms, scouts, or birthday parties. For larger groups:
- Pre-draw the ladybug outlines for younger kids.
- Set up painting stations with all supplies.
- Use name tags so each child gets their own painting.
- Have an art show at the end—kids love seeing everyone’s work.
Non-obvious insight: If time is short, use stickers or colored pencils for details instead of waiting for paint to dry.
Ladybug Painting Project Timeline
Here’s a rough timeline for one ladybug painting session.
| Activity | Time Needed |
|---|---|
| Setup and explanation | 10 minutes |
| Drawing shapes | 5–10 minutes |
| Painting body and head | 10–15 minutes |
| Adding details and decorations | 10–15 minutes |
| Cleanup | 5–10 minutes |
A total of 40–60 minutes works for most kids.
What To Do With Finished Ladybug Paintings
When the paintings are dry, celebrate! Here are ideas for what to do with the artwork:
- Hang it on the wall or fridge.
- Make cards for family or friends.
- Create a class display or mini art gallery.
- Laminate and use as a placemat.
- Take a photo and share with others.
Kids love seeing their work appreciated, and it builds pride in their efforts.
Frequently Asked Questions
How Old Should Kids Be To Paint A Ladybug?
Most children age 4 and up can follow these steps with help. For toddlers, use finger painting and simpler shapes. Adjust the project to the child’s age and skill.
What Kind Of Paint Is Safest For Kids?
Choose washable tempera or watercolor paints. They are non-toxic and easy to clean. Avoid oil or acrylic paints for young children.
Can I Use Crayons Or Markers Instead Of Paint?
Yes! Crayons, colored pencils, or markers work well, especially if you don’t want a mess. The steps are the same, just skip the drying time.
How Do I Fix Mistakes On My Ladybug Painting?
Wait for the paint to dry, then paint over the mistake with the correct color. For small errors, use a cotton swab dipped in water to gently wipe the area.
Where Can I Find More Ladybug Art Ideas?
Look at children’s art books, school websites, or trusted resources like Crayola for more inspiration.
Painting a ladybug is a fun, easy way for kids to create and learn. With just a few supplies and simple steps, children can make cheerful art that teaches skills and builds confidence. Try this project with your child or class, and enjoy the smiles it brings!
Credit: craftsbyamanda.com


