Have you ever wanted to bring the magic of a rainbow to life with your own hands? Painting a rainbow with acrylic paint is easier than you might think, and it’s a fun way to add vibrant colors to your art collection.
Whether you’re a beginner or looking to improve your skills, this guide will walk you through every step. By the end, you’ll have a bright, beautiful rainbow that you can proudly display. Ready to make your canvas shine with color?
Let’s get started!
Materials Needed
Gathering the right materials helps create a bright and smooth rainbow painting. Each item plays a key role in making your artwork look its best. This section covers the basic supplies needed for painting a rainbow with acrylic paint.
Choosing Acrylic Paints
Select vibrant colors for a clear rainbow effect. Buy quality acrylic paints in red, orange, yellow, green, blue, indigo, and violet. Small tubes or a set with these colors works well. Look for paints that dry quickly and have good coverage.
Selecting Brushes
Use a variety of brushes to paint clean lines and smooth curves. Flat brushes help cover large areas. Round brushes are perfect for details and arcs. Choose brushes with synthetic bristles designed for acrylic paint.
Preparing The Canvas
Choose a canvas size that fits your workspace and painting style. Clean the surface to remove dust and dirt. If needed, apply a layer of gesso to create a smooth base. Let it dry fully before starting to paint.
Additional Supplies
Keep water containers for rinsing brushes nearby. Use a palette for mixing colors. Paper towels or cloth help wipe brushes between colors. Have a pencil to sketch the rainbow shape lightly on the canvas.
Credit: stepbysteppainting.net
Setting Up Your Workspace
Setting up your workspace is the first step to painting a beautiful rainbow with acrylic paint. A clean and organized area helps you focus on your art. It also saves time and reduces mess. Preparing the right space makes the painting process smooth and fun.
Organizing Paints And Brushes
Arrange your paints in the order of the rainbow colors: red, orange, yellow, green, blue, indigo, and violet. Keep the brushes nearby, sorted by size and shape. Use small containers to hold water for cleaning brushes. This setup helps you switch colors quickly and keep brushes clean.
Ensuring Good Lighting
Choose a spot with bright, natural light if possible. Place a lamp with daylight bulbs if natural light is not enough. Good lighting shows true paint colors. It also reduces eye strain and helps you see details clearly.
Protecting Your Work Area
Cover your table with old newspapers or a plastic sheet. Use a palette or paper plate to mix your paints. Wear old clothes or an apron to protect yourself. These steps keep your space and clothes clean while painting.
Sketching The Rainbow
Sketching the rainbow is the first step in your acrylic painting project. It helps you create a clear guide before applying paint. A simple sketch makes painting smoother and more fun. Taking time to plan your drawing leads to better results and fewer mistakes.
Start with light pencil marks so you can easily change lines if needed. Keep your hand steady and use soft strokes. This phase is about shaping the rainbow, not about perfect lines.
Drawing Arcs
Begin by drawing the largest arc at the bottom. Use a compass or a round object to help. Draw smaller arcs inside the largest one. Each arc should be evenly spaced and follow the same curve. This creates the classic rainbow shape. Keep arcs light and thin for easy painting later.
Planning Color Placement
Decide the order of the rainbow colors. The usual sequence is red, orange, yellow, green, blue, indigo, and violet. Mark each arc with a small letter or color dot. This helps you remember which color goes where. Planning colors prevents mixing and keeps the rainbow bright. It also saves time while painting.

Credit: www.wetcanvas.com
Mixing Colors
Mixing colors is a key part of painting a beautiful rainbow with acrylics. It lets you create smooth color changes and bright shades. Knowing how to blend colors well makes your rainbow look natural and vibrant. This section covers how to make strong colors and blend them smoothly.
Creating Vibrant Hues
Start with pure primary colors: red, blue, and yellow. Mix these in small amounts to get secondary colors like green, orange, and purple. Use white paint to lighten colors and black to darken them slightly. Avoid adding too much black to keep colors bright. Test your mixes on a piece of paper before painting on your canvas.
Blending Techniques
Use a clean, dry brush to blend two colors on your canvas. Work quickly while the paint is wet for smooth transitions. Apply one color, then gently add the next color next to it. Use soft, back-and-forth strokes to merge the edges. Clean your brush often to avoid muddy colors. Practice blending to create seamless color changes in your rainbow.
Painting The Rainbow
Painting a rainbow with acrylic paint is a fun and creative process. It lets you play with colors and shapes. Each step adds more life to your artwork. Start simple, then build up the details. Watch the colors blend and come alive on your canvas.
Applying Base Colors
Begin with clean brushes and bright acrylic paints. Paint each rainbow color in broad, smooth bands. Use red, orange, yellow, green, blue, indigo, and violet. Keep the edges soft and slightly curved. Let the colors dry before moving on.
Layering For Depth
Apply a second coat of each color to make them rich. Use thinner paint for smooth blending. Overlap colors slightly to create natural transitions. This step adds depth and vibrance to your rainbow. Take your time and be gentle with the brush.
Adding Highlights And Shadows
Mix white with your colors for highlights. Paint these on the top edges of each band. Add shadows with a bit of black or dark blue below the bands. This contrast gives the rainbow a three-dimensional look. It makes your painting feel real and bright.
Detailing And Finishing Touches
Detailing and finishing touches give your rainbow painting a polished look. This stage brings clarity and sharpness to your artwork. Small adjustments can make a big difference. Focus on making edges neat and adding subtle background details. These steps help your rainbow stand out and look complete.
Refining Edges
Use a fine brush to clean up the edges of each color band. Carefully remove any paint that overlaps or looks messy. Smooth, clear lines make the rainbow look more realistic. Avoid thick paint here; thin layers work best. Take your time and work slowly for better results.
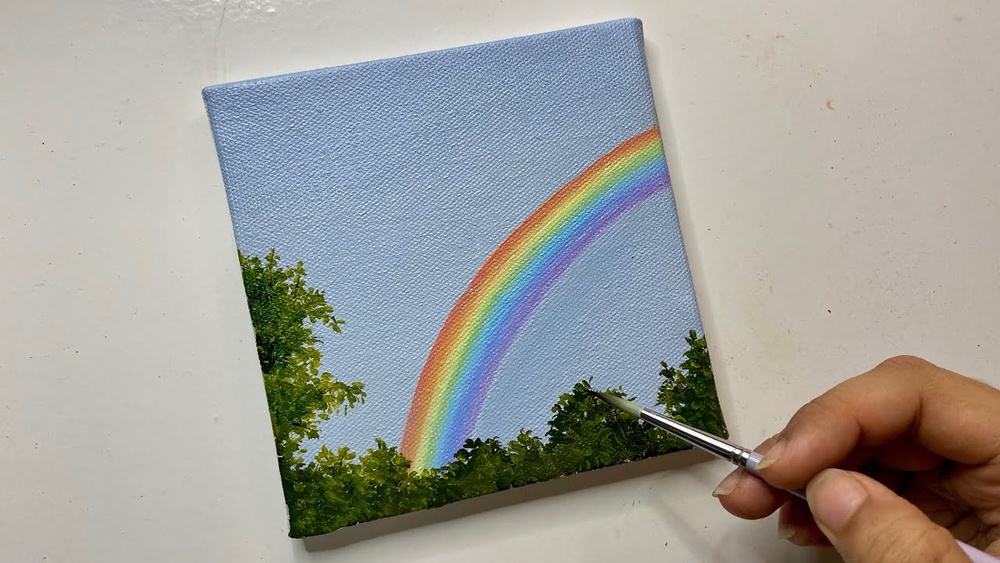
Adding Background Elements
Choose simple shapes or soft colors for the background. Light clouds or a gentle sky can make the rainbow pop. Keep background details soft so they do not take attention away. Use a dry brush to add texture without heavy paint. These small touches add depth and interest to your painting.
Drying And Sealing
After painting your colorful rainbow, drying and sealing are crucial steps. These steps keep your artwork bright and safe. Proper drying ensures the paint sets well. Sealing protects it from dust and damage. Let’s explore the best ways to dry and seal your acrylic rainbow.
Proper Drying Times
Acrylic paint dries fast, but full drying takes longer. Thin layers dry in 10 to 20 minutes. Thick layers need several hours or overnight. Avoid touching the paint too soon. It can smudge or peel off. Keep your painting flat and dust-free during drying. Good airflow helps speed up drying. Do not use heat to rush drying. It may cause cracks or bubbles.
Using Varnish For Protection
Varnish adds a clear, protective layer over your painting. It shields the paint from water and sunlight. Choose a varnish made for acrylic paint. Glossy varnish makes colors shine bright. Matte varnish gives a soft, non-shiny finish. Use a clean brush or spray to apply varnish. Apply thin, even coats for best results. Let each coat dry fully before adding another. Varnish keeps your rainbow looking fresh for years.

Credit: www.youtube.com
Tips For Beginners
Starting with acrylic paint can feel tricky. Painting a rainbow adds extra fun but also needs care. Simple tips help beginners avoid frustration and enjoy the process. This section shares useful advice for your first rainbow painting.
Avoiding Common Mistakes
Choose quality brushes for smooth color lines. Thin brushes work best for details. Use clean water to rinse brushes. Dirty water makes colors muddy. Paint thin layers to prevent cracking. Let each color dry before adding the next. Avoid overmixing colors to keep the rainbow bright. Paint on a primed canvas for better results.
Experimenting With Styles
Try different brush strokes for unique effects. Soft, curved strokes suit rainbows well. Use sponges for textured looks. Mix colors gently to create blends. Play with color order or add extra shades. Explore abstract shapes instead of perfect arcs. Experimenting helps find your style and makes painting fun.
Frequently Asked Questions
What Materials Are Needed To Paint A Rainbow With Acrylics?
You need acrylic paints in rainbow colors, brushes, a palette, water, and canvas or paper. Use round brushes for smooth curves. Prepare your workspace with paper towels and a mixing palette for blending colors effectively.
How Do You Blend Acrylic Paint For Smooth Rainbow Transitions?
Blend colors while the paint is wet using a clean, damp brush. Gently stroke between color edges to create seamless gradients. Work quickly as acrylics dry fast, and use a slow-drying medium if needed for longer blending time.
What Is The Best Brush Type For Painting A Rainbow?
Round or filbert brushes work best for painting rainbow arcs. They allow smooth, curved strokes and precise control. Use different sizes for larger or smaller arcs to achieve clean, even color bands.
How Can Beginners Avoid Muddy Colors When Mixing Acrylics?
Use clean brushes for each color to prevent contamination. Mix colors on the palette, not on the canvas. Avoid overmixing to keep colors vibrant and clear. Clean brushes between colors with water and dry thoroughly.
Conclusion
Painting a rainbow with acrylic paint is fun and simple. Use bright colors and clean brush strokes. Take your time to blend each color softly. Practice helps you get better with every try. Enjoy the process and express your creativity freely.
Soon, you will create beautiful rainbows with ease. Keep experimenting and have fun with your art!