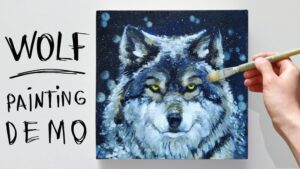
Have you ever wanted to capture the wild spirit of a wolf on canvas? Painting a wolf with acrylics might seem challenging at first, but with the right guidance, you can create a striking piece that brings this majestic animal to life.
In this guide, you’ll discover simple steps and practical tips to help you paint a wolf that’s full of character and detail. Whether you’re a beginner or looking to sharpen your skills, you’re about to unlock techniques that make the process enjoyable and rewarding.
Ready to transform your blank canvas into a stunning wolf portrait? Let’s dive in and make your artistic vision a reality!
Materials Needed
Gathering the right materials is key before starting to paint a wolf with acrylics. Proper supplies help you create smooth strokes and vibrant colors. Having everything ready saves time and keeps your focus on the painting process.
Selecting Acrylic Paints
Choose high-quality acrylic paints for rich colors and easy blending. Basic colors include white, black, brown, gray, and a few earth tones. These shades help capture the wolf’s natural fur and surroundings. Consider getting a set designed for beginners to keep it simple.
Choosing Brushes
Pick brushes with different shapes and sizes. Flat brushes work well for larger areas and background. Round brushes help with details like eyes and fur texture. A small liner brush is perfect for fine lines. Synthetic bristles are ideal for acrylic paint because they hold paint well and last longer.
Preparing Canvas And Palette
Start with a primed canvas to ensure paint sticks properly. A medium-sized canvas gives enough space for details. Use a palette to mix colors before applying them. A plastic or wooden palette is easy to clean and reuse. Keep a cup of water nearby to rinse brushes between colors.

Credit: stepbysteppainting.net
Sketching The Wolf
Sketching the wolf is the first step in creating your acrylic painting. A good sketch sets the base for your artwork. It helps to capture the wolf’s shape and personality. Take your time to draw lightly so you can adjust as needed.
Start with simple shapes and lines. This method breaks down the complex figure into easier parts. It guides the placement of the wolf’s body and features. Keep your pencil strokes soft and loose for flexibility.
Basic Shapes And Proportions
Begin by drawing basic shapes like circles, ovals, and triangles. Use a large oval for the wolf’s body. Add a smaller circle for the head. Connect them with a curved line for the neck. Sketch a triangle for the snout and pointy ears.
Check proportions carefully. The head should be smaller than the body but well balanced. The legs start as simple lines or cylinders. Mark the tail with a long curved shape. These shapes help keep your drawing accurate.
Outlining Key Features
Next, outline the wolf’s main features over your basic shapes. Draw the eyes, nose, and mouth with simple lines. Place the eyes slightly above the snout. Shape the ears as pointed triangles on top of the head.
Sketch the fur direction with short, light strokes. This adds texture and life to your drawing. Define the paws with small ovals and toes. Refine the tail by adding fur details. Keep your lines gentle to avoid heavy marks.
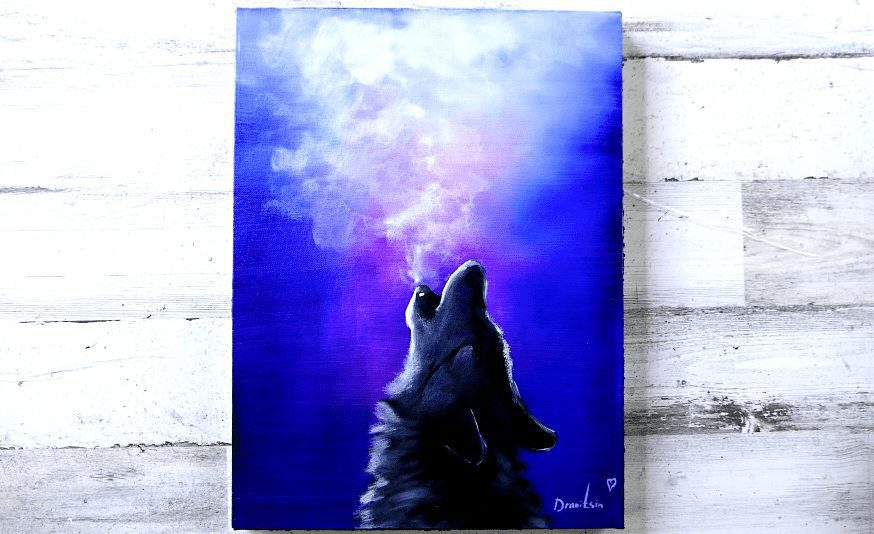
Setting The Background
Setting the background is a key step in painting a wolf with acrylic paint. It creates the mood and context for your artwork. A well-chosen background makes the wolf stand out and adds depth to the painting.
Take your time to prepare the background carefully. This helps your final painting look balanced and vibrant. Start by thinking about the atmosphere you want to create. The background colors and layers should support your main subject without overpowering it.
Choosing Colors
Select colors that match the scene you imagine for your wolf. Earth tones like browns, greens, and grays often work well for forest or mountain settings. Soft blues and purples can give a cold, twilight effect. Use colors that contrast with the wolf’s fur to highlight the animal.
Consider the lighting in your painting. Warm colors suggest sunlight or sunset, while cool colors hint at moonlight or shade. Simple color choices help keep the focus on the wolf and make your painting easier to complete.
Applying Base Layers
Start by painting a smooth base layer with a large brush. Use diluted acrylic paint for even coverage. This layer sets the tone for the whole background and helps later layers stick better.
Block in the main shapes and colors without details. Keep brush strokes loose and broad. Let the base dry before adding more layers. Build depth by layering different shades of your chosen colors.
Base layers create texture and interest behind the wolf. They prevent the background from looking flat. Take your time and apply paint evenly for best results.
Blocking In Base Colors
Blocking in base colors lays the foundation for your wolf painting. This step defines the main shapes and tones. Focus on covering the canvas with the essential colors of the wolf’s fur and background. Use broad, confident strokes to fill large areas quickly. Avoid adding details at this stage. Keep your colors simple and flat. This approach helps build a strong structure before adding depth.
Painting The Fur Base
Start with a medium-sized brush for smooth coverage. Mix neutral tones like gray, brown, and white to match the wolf’s fur. Apply these colors in large patches where the fur changes color. Paint the main sections such as the face, neck, and body separately. Let the paint dry slightly before moving to the next area. This prevents colors from blending unintentionally. Use vertical and diagonal strokes to mimic fur direction. Keep the colors light and even at this stage.
Adding Shadows And Highlights
Identify where the light hits and where shadows fall on the wolf. Mix darker shades for shadow areas using deep grays or browns. Apply these shadows along the edges of the fur patches and under the wolf’s chin. For highlights, use lighter colors like off-white or pale gray. Add these to areas that catch the most light, such as the forehead, nose bridge, and ears. Use a smaller brush to carefully place shadows and highlights. This step adds volume and form to your painting. Blend edges softly to avoid harsh lines.
Detailing The Face
Detailing the face brings the wolf painting to life. The face shows character and mood. Focus on key features to capture the wolf’s true spirit. Use small brush strokes and careful color choices.
Work slowly and build layers for depth. Each part of the face needs attention. The eyes, nose, mouth, ears, and fur all tell a story.
Eyes And Expression
The eyes reveal the wolf’s soul. Start with a dark base for the pupils. Add white highlights for a shiny, wet look. Use shades of brown, yellow, or gray for the iris.
Shape the eyes with soft edges for a natural look. Paint the eyelids to show mood—alert, calm, or fierce. Small brush strokes create fine details around the eyes. This gives expression and life to the face.
Nose And Mouth
The nose defines the wolf’s snout. Use black and dark gray tones. Add subtle pink or brown for texture and warmth. Paint the nostrils carefully with small brushes.
The mouth shows emotion and character. Paint the lips with soft, curved lines. Add shadows inside the mouth for depth. Use light colors for teeth and tongue if visible. Keep the edges neat to avoid harsh lines.
Ears And Fur Texture
Paint the ears with a mix of dark and light colors. Use thin brush strokes to mimic fur. Add highlights where light hits the edges.
Create fur texture by layering short strokes. Use a dry brush technique for soft fur effects. Focus on direction and flow of fur to add realism. Small details around the ears help frame the face well.
Enhancing Fur Texture
Enhancing fur texture is key to making your wolf painting look real. Fur gives the wolf character and depth. Acrylic paint works well to build layers and tiny details. Focus on small brush strokes and color changes to show the fur’s softness and direction.
Brush Techniques For Fur
Use a fine, pointed brush for thin, sharp fur strands. Short, quick strokes mimic hair growth. Change brush angles to follow the wolf’s fur pattern. Dry brushing helps create soft, fluffy areas. Lightly drag the brush to add texture without covering the base layer. A fan brush can blend colors softly for undercoat effects.
Layering Colors
Start with a dark base color to add depth. Layer lighter shades on top for highlights. Use thin paint layers to avoid hiding details. Mix colors on a palette to get natural fur tones. Build color gradually to show light and shadow. Add white or cream sparingly for bright highlights on tips of fur.
Adding Final Touches
Adding the final touches to your acrylic wolf painting brings it to life. This stage focuses on enhancing details and balancing the overall look. Small changes here can make a big difference. Concentrate on refining the wolf’s features and improving contrast to add depth. Take your time and observe your painting closely.
Refining Details
Use a fine brush to sharpen the wolf’s eyes and nose. Add tiny strokes to the fur for texture. Highlight areas where light naturally hits, like the forehead and cheeks. Darken shadows under the jaw and ears to create shape. Pay attention to whiskers and small fur patterns. These details give your wolf character and realism.
Adjusting Contrast And Depth
Contrast helps your painting stand out. Deepen shadows with darker tones to add depth. Lighten areas that catch light to create highlights. Blend softly between light and dark to avoid harsh lines. Step back and check your work from a distance. Adjust colors until the wolf looks vibrant and three-dimensional.

Credit: www.youtube.com
Sealing Your Painting
Sealing your acrylic wolf painting protects your hard work. It keeps colors bright and safe from dust, moisture, and fading. A good seal also gives your painting a finished look. Choosing the right varnish and applying it carefully helps your artwork last longer.
Choosing A Varnish
Select a varnish based on the finish you want. Gloss varnish makes colors shiny and vibrant. Matte varnish gives a soft, non-shiny look. Satin varnish falls between gloss and matte for a balanced shine. Look for acrylic-compatible varnishes to avoid damage. Spray varnishes offer easy, even coats. Brush-on varnishes allow more control but need careful application.
Application Tips
Apply varnish in a clean, dust-free space. Use light, even strokes if brushing on varnish. Avoid thick layers to prevent drips and streaks. Hold spray varnish about 12 inches from the painting for even coverage. Let the first coat dry fully before adding more. Apply 2-3 thin coats for the best protection. Always follow the varnish label instructions for drying time and safety.
Credit: urartstudio.com
Frequently Asked Questions
What Materials Are Needed To Paint A Wolf With Acrylics?
You need acrylic paints, brushes, a canvas, palette, water, and paper towels. High-quality brushes help with details. Use reference images of wolves for accuracy.
How Do I Start Painting A Wolf With Acrylic Paint?
Begin with a light pencil sketch of the wolf on your canvas. Block in basic shapes with a base color. Build layers gradually for depth.
What Techniques Help Create Realistic Wolf Fur Texture?
Use dry brushing and layering techniques to mimic fur. Apply short, quick strokes with varied colors. Blend softly for natural transitions.
How To Choose Colors For Painting A Wolf Realistically?
Use a mix of grays, browns, whites, and blacks. Observe your reference for exact shades. Add hints of blues or warm tones for dimension.
Conclusion
Painting a wolf with acrylics is fun and rewarding. Start with simple shapes and build details slowly. Use light and dark colors to create depth. Practice brush control for fur texture. Don’t rush; take your time with each step. Enjoy the process and learn from mistakes.
Your skills will improve with every painting. Keep experimenting and trust your creativity. Painting wolves can become a relaxing hobby. Try different techniques to find what works best. Most importantly, have fun bringing your wolf to life.