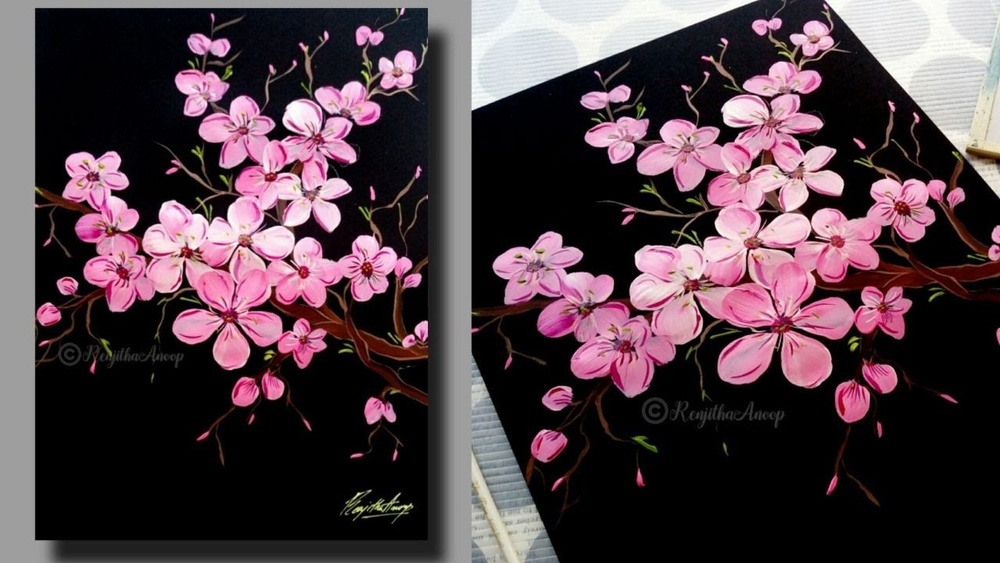
Imagine bringing the delicate beauty of cherry blossoms right onto your canvas with vibrant acrylics. You don’t need to be a professional artist to capture those soft pink petals and graceful branches that make cherry blossom trees so enchanting.
In this guide, you’ll discover simple, step-by-step techniques that help you paint cherry blossoms with ease and confidence. From mixing the perfect shades of pink to using everyday tools like cotton swabs and sponges, you’ll learn how to create stunning depth and texture that make your artwork come alive.
Ready to transform your acrylic painting skills and create your own springtime masterpiece? Keep reading and let’s get started!

Credit: fineartamerica.com
Materials Needed
Gathering the right materials is key to painting beautiful cherry blossoms with acrylics. Each item helps create the soft, delicate look of the flowers. Using the correct paints, brushes, and tools makes the painting process easier and more enjoyable.
Start by preparing your workspace and selecting quality supplies. The right colors and brushes allow you to capture the details of cherry blossoms. Extra tools add texture and depth to your artwork.
Paint Colors
Choose titanium white for highlights and petal details. Use bright red or magenta to mix various pink shades. Brown paint works well for branches and trunk. Mixing your own colors with blue, yellow, and red offers more options. Select paints with good opacity and smooth coverage for best results.
Brush Types
A small round brush is perfect for painting thin branches and fine details. Use a stiff flat brush or filbert brush to dab petals. These brushes help create soft edges and natural shapes. Choose brushes with firm bristles that hold paint well. Keep sizes small to medium for better control.
Additional Tools
Q-tips bundled together create textured clusters of blossoms. A sea sponge adds random, natural patterns to the flower areas. Use a skewer or stylus for fine dots and delicate petal touches. These tools help build layers and depth in your painting. They are easy to handle and improve the overall effect.
Preparing The Canvas
Preparing the canvas is the first step in painting cherry blossoms with acrylics. A well-prepared canvas sets the stage for your artwork. It helps colors stand out and gives your painting a professional finish. Taking time to prepare ensures better results and a smoother painting process.
Choosing Background Colors
Pick background colors that complement cherry blossoms. Soft blues, light greens, or gentle beige tones work well. These colors help the pinks and whites of the blossoms pop. Avoid dark or harsh colors that can overshadow delicate flowers. Apply the background evenly using a large brush or roller. Let it dry fully before adding details. A smooth background lets your blossoms shine clearly.
Setting The Light Source
Decide the direction of light early on. Light affects where shadows fall and how colors appear. Choose if light comes from the left, right, above, or below. This choice adds depth and realism to the painting. Mark the light source on the canvas lightly with a pencil. Keep this consistent while painting branches and petals. Shadows and highlights follow the light source, enhancing the 3D look of blossoms.
Painting The Branches
Painting the branches of cherry blossoms with acrylics sets the foundation for your artwork. The branches carry the blossoms, giving structure and flow. A natural look requires careful color mixing and brush control. Focus on shapes and shades to bring the branches to life. Follow these steps to create realistic, beautiful branches.
Mixing Brown Shades
Start by mixing your browns. Use basic colors like red, yellow, and blue to create a rich brown. Try different ratios to get warm or cool tones. Warmer browns have more red or yellow. Cooler browns have more blue. Mixing your own brown gives better control over the branch color. Avoid flat, single-tone browns. Layer several brown shades for more interest.
Creating Branch Shapes
Paint the main branches first with a medium brown. Use a small round brush for thin, flowing lines. Branches should look natural and a little uneven. Start thick near the trunk and thin out toward the tips. Add smaller offshoots to create a Y-shaped or spreading pattern. Leave space for the blossoms to sit. Keep the lines soft and organic. Avoid stiff or straight lines.
Adding Shading And Depth
Add darker brown or a touch of black under the branches. This creates shadows and makes the branch look round. Use a fine brush to add thin shadow lines on one side. Highlight the top of the branches with a lighter brown or beige. This shows light hitting the branch. Blend the edges slightly for a smooth transition. Shading makes the branches appear three-dimensional and real.
Mixing Pink Tones
Mixing the right pink tones is essential for painting cherry blossoms with acrylics. Pink shades bring life and softness to the petals. Different pinks create depth and interest in your painting. Use simple color mixes to get natural pink tones. Adjust the balance of red and white carefully. This section explains how to create light and medium pinks. It also shows how to use white for highlights on petals.
Creating Light And Medium Pinks
Start by using bright red or magenta as your base color. Mix red with titanium white to create light pinks. Add more white gradually to avoid losing color vibrancy. For medium pink, use less white and more red. You can add a tiny amount of brown or blue to soften the tone. Test your pinks on a palette before applying to the canvas. These shades help form the layers of cherry blossom petals.
Using White For Highlights
Titanium white is perfect for adding highlights to petals. Use white to paint the edges or tips of blossoms. Highlights create a sense of sunlight on the petals. Blend white gently into the pink tones while the paint is still wet. This technique creates smooth transitions and natural depth. Avoid using pure white over large areas to keep softness. Small dabs of white make petals appear fresh and delicate.
Dabbing The Blossoms
Dabbing the blossoms is a key step in painting cherry blossoms with acrylics. This technique helps create the soft, delicate petals that make cherry blossoms so beautiful. The dabbing motion adds texture and depth to your painting. It also helps layer colors naturally, giving your blossoms a realistic look.
You can use different tools for dabbing, such as Q-tips, sponges, or small brushes. Each tool creates a unique effect on the petals. The goal is to build up clusters of blossoms with varied shades of pink and white. This method brings your cherry blossom painting to life.
Using Q-tips And Sponges
Q-tips are perfect for creating small, rounded petals. Dab them lightly to apply paint in soft spots. Bundling several Q-tips can create a fuller, textured effect. Sea sponges work well for larger areas. They produce a natural, uneven pattern that mimics real blossoms. Both tools are easy to control and great for beginners.
Layering Colors For Texture
Start with a medium pink base. Dab this color onto the canvas to form the first blossom layer. Add lighter pinks and white on top to create depth. Layering colors this way gives petals a soft, three-dimensional look. Let each layer dry slightly before adding the next. This prevents colors from mixing too much and keeps petals distinct.
Building Blossom Clusters
Cherry blossoms rarely appear alone. Dab petals close together to form clusters. Vary the pressure and amount of paint to avoid uniform shapes. Use darker pinks near the branches for shadows. Apply lighter tones at the edges for highlights. Clusters should look dense but natural, with some petals standing out. This technique captures the fullness of cherry blossom trees.
Adding Details
Adding details is the key to making your cherry blossom painting come alive. It transforms simple shapes into delicate flowers full of life. Details give depth and realism to your acrylic artwork.
Focus on painting each flower with care. Use highlights to show light on petals. Enhance branch shadows to create contrast and dimension. These small touches make your painting stand out.
Painting Individual Flowers
Start by using a small round brush to paint single blossoms. Paint “V” shapes or tiny dots to mimic petals. Keep flowers uneven in size for a natural look. Use soft pinks and whites to differentiate petals. Avoid overloading paint; thin layers work best.
Highlighting With White And Light Pink
Use white or very light pink to add highlights on petals. Dab gently with a small brush or cotton swab. Focus on edges and the top of petals where light hits. Highlights create a soft glow and add volume. Blend edges slightly to keep petals smooth.
Enhancing Branch Shadows
Darken the underside of branches with brown or dark gray. Use a fine brush to add thin shadow lines along branches. Shadows add depth and separate branches from flowers. Make shadows softer near blossoms for a natural effect. This contrast makes the flowers pop.
Tips For Realism
Creating realistic cherry blossoms with acrylic paint involves more than just color choices. It demands attention to texture, light, and background. These elements work together to bring your painting to life. Focus on small details that mimic nature’s softness and light play. The following tips help achieve a natural, vivid look.
Texture Techniques
Use dabbing methods to build petal texture. Cotton swabs or small sponges work well for soft, rounded petals. Layer different shades of pink and white to add depth. Let each layer dry slightly before adding the next. This prevents colors from blending too much. Add tiny dots and strokes with a fine brush for delicate flower details. Texture creates the illusion of real cherry blossoms clustered on branches.
Lighting Effects
Choose a clear light source in your painting. Paint highlights on petals facing the light using white or very light pink. Add subtle shadows with darker pink or soft gray under petals and branches. This contrast gives petals volume and shape. Avoid harsh shadows; keep them soft for a gentle, natural feel. Light effects enhance the three-dimensional quality of your blossoms.
Background Color Choices
Pick background colors that make the blossoms stand out. Soft blues or pale greens suggest sky or distant foliage. Avoid dark or overly bright backgrounds that compete with the flowers. A blurred, smooth background helps focus attention on the detailed blossoms. Use gradient tones to add depth behind the branches. Background colors set the mood and support the overall realism of your painting.
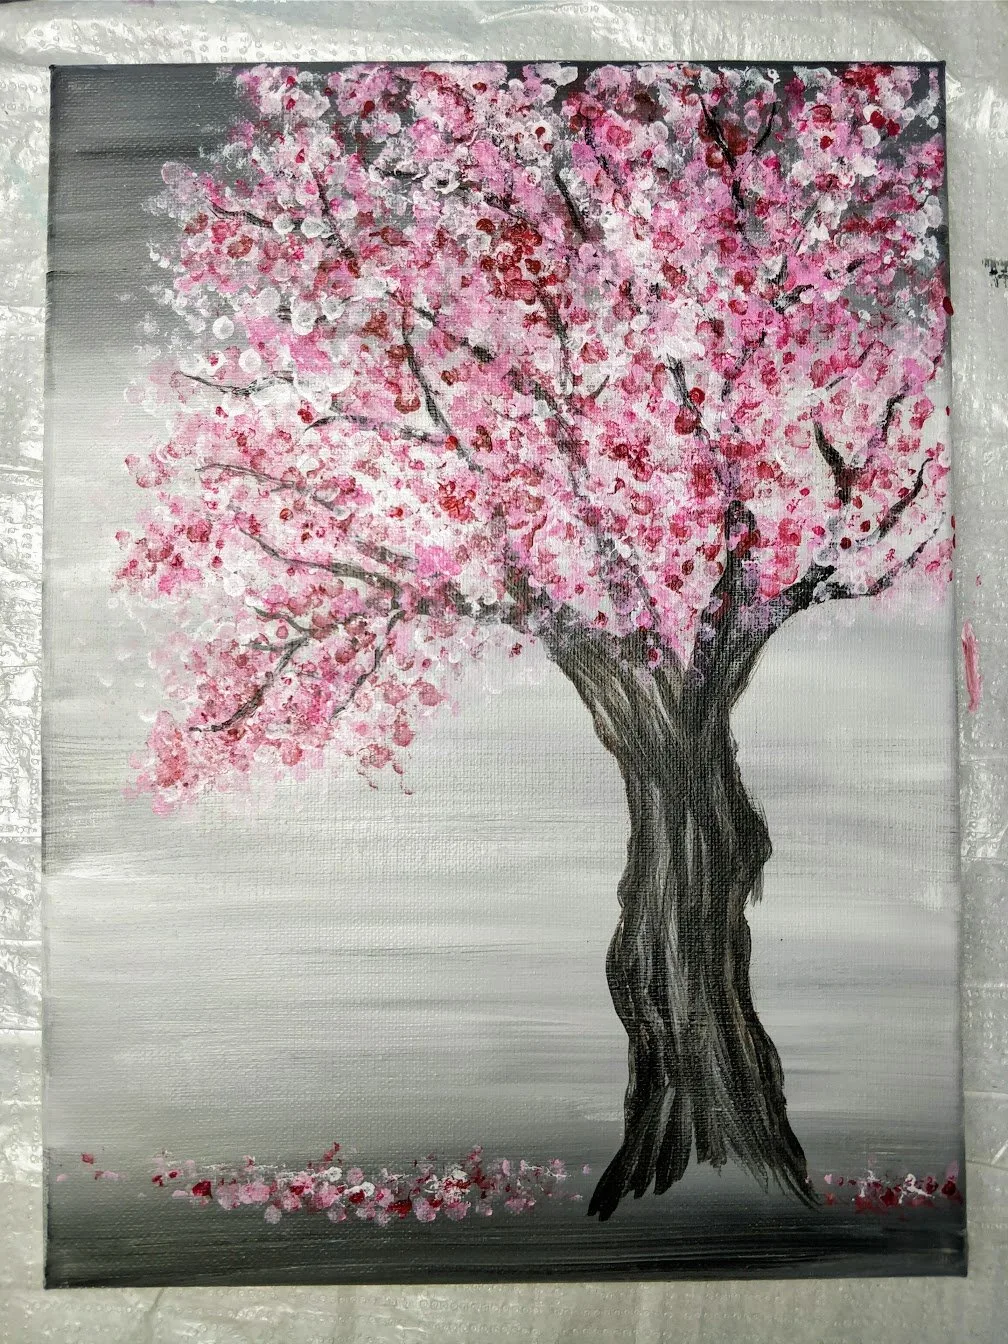
Credit: feelingnifty.com

Credit: www.youtube.com
Frequently Asked Questions
What Acrylic Colors Are Best For Cherry Blossoms?
Use titanium white, bright red or magenta, and brown for branches. You can mix blue, yellow, and red to create brown. These colors help capture the soft pinks and natural tones of cherry blossoms effectively.
How Do I Paint Realistic Cherry Blossom Petals?
Layer pink, white, and red paints using dabbing tools like Q-tips, sea sponges, or small brushes. Start with darker pinks for depth and add lighter tones and white highlights on top for realism.
What Brush Types Work Best For Cherry Blossom Painting?
Use a small round brush for branches and a stiff flat or filbert brush for dabbing blossoms. Q-tips or sea sponges are also great for creating textured petal clusters.
How Can I Add Depth To Cherry Blossom Paintings?
Begin with medium to dark pinks for base petals, then add lighter pink and white dabs for highlights. Shade branches with darker browns or black to create dimension and contrast.
Conclusion
Painting cherry blossoms with acrylics brings joy and calmness to your art. Use soft pinks layered carefully for a natural look. Small tools like Q-tips help create delicate petals. Remember to add highlights for depth and brightness. Keep practicing your brush strokes and color mixing.
Enjoy each step and watch your painting bloom beautifully. This simple process makes painting cherry blossoms fun and rewarding.