
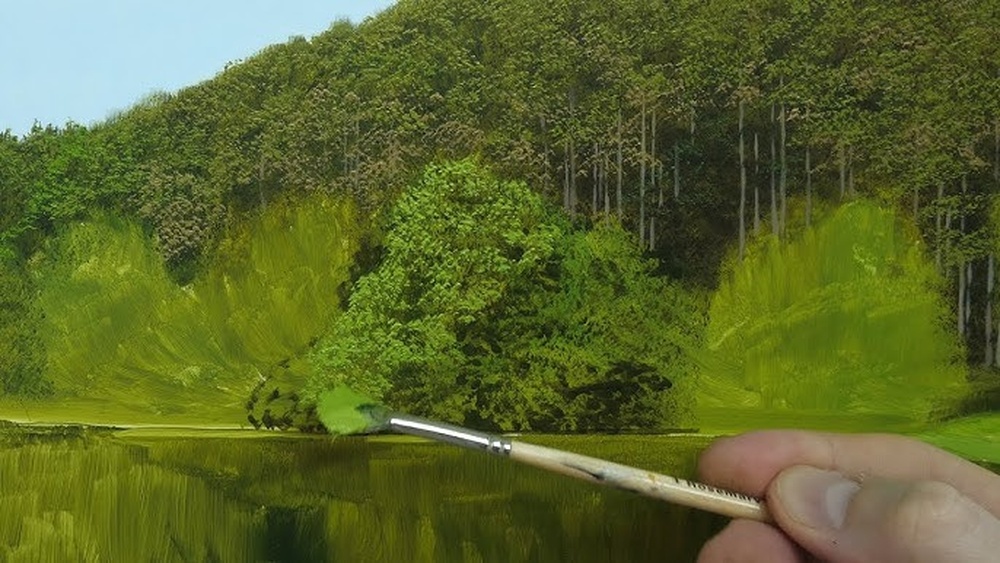
Quick answer: To paint trees in oils as a beginner, start with the tree’s overall silhouette as one dark mass, then add a lighter side where the sun hits, a few sky holes to break up the shape, and finally the trunk and a handful of visible branches. Use a large brush for the masses and a small round or rigger only at the end. Trees look real when you paint clumps of foliage with light and shadow, not individual leaves.
Most beginners paint trees the way they drew them as kids: a brown stick with a green lollipop on top. It is a natural instinct, and it is the main thing standing between you and convincing landscape trees. Real trees are big, irregular masses of foliage with light on one side, shadow on the other, gaps where sky shows through, and branches that only appear here and there.
This beginner guide shows how to paint trees in oils step by step. You will learn the few supplies that matter, how to mix tree greens, a simple sequence that works for most trees, how to adapt it for different species and seasons, and how to fix the common problems.
See the Tree as Shapes First
Before you pick up a brush, look at a tree and squint until the leaves disappear. What remains is a big, simple shape, usually darker than the sky, with a lighter side facing the sun and a darker side away from it. Inside that shape there are a few large clumps of foliage, each with its own light top and shadow underside.
Keep these three ideas in mind for every tree:
- Silhouette: the outer shape. Irregular, with bumps and gaps, never a smooth ball or perfect triangle.
- Clumps: foliage groups into masses. Painting 5 to 10 clumps reads far better than painting 500 leaves.
- Sky holes: gaps where sky shows through. They make a tree look airy and alive.
Supplies You Need
You can paint trees with a small beginner set. If you are still choosing paints, our guide to the best oil paints for beginners compares affordable sets and individual colors that mix well.
- Paints: titanium white, cadmium yellow light (or hue), yellow ochre, ultramarine blue, burnt sienna and alizarin crimson or a red. Optional: sap green.
- Brushes: a medium and large bristle filbert (sizes 6 and 10), a small round (size 2), and a rigger or liner brush for branches.
- Surface: a canvas board or panel, 8 by 10 or 9 by 12 inches.
- Odorless mineral spirits for cleaning and thinning the first layer.
- Linseed oil or a painting medium for smoother strokes in later layers and for thin branch lines.
- Palette, palette knife and paper towels.
How to Use Oil Paints for Beginners: Quick Essentials
If trees are among your first oil subjects, these basics will save frustration. Our article on how to start oil painting as a beginner covers setup and safety in more detail.
- Thin first, thicker later. Thin the first layer with mineral spirits; use more paint and a little oil medium as you go. This follows the fat-over-lean rule and reduces the risk of cracking.
- Oils stay wet. You can blend and adjust for hours, but painting light over wet dark paint may mix them. Load your brush fully and place light strokes with one touch.
- Wipe your brush often. Keep paper towels handy and wipe the brush between colors to avoid muddy greens.
- Ventilate. Use solvents in a ventilated room and keep jars closed when not in use.
Mixing Greens for Trees
Mixing greens from blue and yellow gives you more natural variety than tube green alone. Here are four starting mixes that cover most trees.
| Tree area | Mix | Tip |
|---|---|---|
| Deep shadow foliage | Ultramarine + burnt sienna + touch of yellow | Should look almost black-green on the palette |
| Middle green | Ultramarine + cadmium yellow light | Add a speck of red if it looks too bright |
| Sunlit foliage | Cadmium yellow light + small amount of ultramarine + white | Warm and light; use thicker paint |
| Distant trees | Middle green + white + a little blue | Cooler and grayer to push them back |
For trunks, avoid plain brown. Try burnt sienna plus ultramarine for a dark, cool bark color, and add white and a touch of ochre for the sunlit side.
How to Paint Trees in Oil: Step by Step
This sequence paints a single deciduous tree, like an oak or maple, in summer.
- Paint the sky first. Cover the background with your sky colors. Having the sky in place lets you paint the tree’s edges against it and later add sky holes in matching color.
- Sketch the silhouette. With thinned ultramarine or burnt sienna and a small brush, lightly sketch the outer shape of the tree, the trunk’s position and the ground line. Make the outline bumpy and asymmetrical.
- Block in the dark mass. With a large filbert and your deep shadow mix, fill the whole foliage shape. Dab and twist the brush around the edges to create an irregular, leafy outline. Leave a few gaps where sky will show.
- Add middle green clumps. With a medium filbert and the middle green, dab clumps on top of the dark mass, mostly on the side facing the light and on the upper parts of each clump. Leave the dark showing underneath and on the shadow side.
- Add sunlit highlights. With a lighter, warmer green and thicker paint, touch the tops of the clumps on the sunny side. Use small dabbing strokes. Cover less area than the middle green; a little goes a long way.
- Refine the sky holes. Using the sky color, paint a few gaps within the foliage, especially near the edges. Keep them irregular in size. Holes near the center should be smaller and slightly darker than those at the edge.
- Paint the trunk. With the dark bark mix and a small filbert or round, paint the trunk, wider at the base and tapering upward. Let foliage overlap it so it disappears into the canopy in places. Add a lighter stripe on the sunny side.
- Add a few branches. With a rigger and paint thinned with a little medium, paint a few branches visible through the sky holes and at the edges. Branches should taper and fork, getting thinner each time they split.
- Add the cast shadow. Paint a shadow on the ground opposite the light, using a cool, dark green or blue-green. It anchors the tree.
- Final touches. Soften edges where the tree meets distant trees, add a few light flicks of foliage around the silhouette, and adjust any area that looks too uniform.
How to Paint Different Types of Trees
Pine and fir trees
Conifers have a vertical, triangular silhouette made of layered branch shelves. Paint a thin vertical trunk line, then use the side of a filbert or a fan brush to stroke short, downward-angled branches from the trunk outward, wider at the bottom. Add lighter green on the tops of a few shelves on the sunny side. Leave gaps between shelves.
Birch trees
Birches have pale trunks with dark horizontal marks. Paint the trunk with a light gray-white (white plus a little ultramarine and ochre), shade the shadow side cooler, then add short dark marks with the edge of a palette knife or small brush. Foliage is light and airy, so keep clumps small with many sky holes.
Palm trees
Paint a slightly curved, segmented trunk, then pull long, arching fronds out from the top with a rigger or small round. Add shorter strokes along each frond for leaflets.
Distant tree lines
Far trees are simpler, lighter and cooler. Paint them as a soft-edged band of grayish blue-green, adding only slight variation in the silhouette. No trunks, no highlights.
Light Direction and Time of Day
The same tree can look completely different depending on where the light comes from. Decide this before you mix a single green, and keep it consistent across every tree in the painting.
- Side light (morning or late afternoon): the most useful for beginners. One side of the tree is clearly lit and warm, the other is in cool shadow, and the cast shadow stretches long across the ground.
- Midday overhead light: the tops of clumps are lit and the undersides are dark, while the cast shadow is short and sits right under the tree.
- Backlight (sun behind the tree): the tree becomes mostly a dark silhouette with a glowing rim of light around its edges and bright sky holes. This is dramatic but harder to paint well.
- Overcast light: contrast drops, shadows soften and greens look more even. Rely on subtle value changes between clumps rather than strong highlights.
Painting Trees Through the Seasons
| Season | Foliage colors | Notes |
|---|---|---|
| Spring | Light yellow-greens, white or pink blossoms | Sparse foliage with more visible branches |
| Summer | Full range of greens, deep shadows | Dense masses; strongest contrast between clumps |
| Autumn | Yellow ochre, cadmium orange, burnt sienna, alizarin, some remaining green | Use dark reds and siennas for shadow instead of dark green |
| Winter | Bare branches; evergreens with snow | Branch structure becomes the subject; paint finer twigs with a rigger |
How to Paint a Tree for Beginners: Common Mistakes
Lollipop trees
A round green ball on a straight brown stick looks cartoonish. Make the silhouette irregular, let foliage overlap the trunk, and add sky holes.
Painting individual leaves
Painting leaves one by one makes trees look busy and flat. Paint clumps with light and shadow sides instead.
One flat green
A single green from edge to edge removes all form. Use at least three values: dark, middle and light.
Branches that do not taper
Branches that are the same thickness throughout look like pipes. Press harder at the base and lift as you pull the stroke outward.
Trunk that floats
Without grass overlapping the base and a cast shadow, the trunk looks pasted onto the ground. Add both.
Muddy foliage
Repeatedly brushing light green into wet dark green mixes them. Load your brush, place strokes once and move on. If needed, let the dark layer become tacky before adding highlights.
Practice Exercises for Beginners
- Silhouette studies: paint five tree silhouettes in one dark color on a single canvas, each a different shape.
- Three-value tree: paint one tree using only dark, middle and light green, no details.
- Branch practice: on scrap canvas, pull 20 tapering branches with a rigger, varying angles.
- Seasonal series: paint the same tree in spring, summer, autumn and winter.
- Tree by water: add a reflection below the tree, using techniques from our guide on painting water in oil for beginners.
Related Reading
FAQs
How do you paint trees in oil paint easily?
Block in the overall shape with a dark green, add middle green clumps on the light side, then a few light highlights and sky holes. Paint the trunk and a few branches last. Working from big shapes to small details keeps it simple.
What brush is best for painting trees in oils?
A medium or large bristle filbert works well for foliage clumps, and a rigger or liner brush is best for thin branches. Some painters use a fan brush for pine needles.
What colors do I need to paint trees in oil?
Titanium white, cadmium yellow light, yellow ochre, ultramarine blue and burnt sienna can mix almost any tree color. Adding a red helps neutralize greens and mix autumn colors.
Should I paint the sky or the tree first?
Paint the sky first in most cases. It is easier to paint the tree’s edges against the sky and then add sky holes in the matching color.
How do I make my trees look less flat?
Use at least three values of green, keep the shadow side darker and cooler, add highlights only on the sunny side, and include sky holes. A cast shadow on the ground helps too.
How long should I wait before painting branches over foliage?
You can paint branches wet-on-wet if you use a rigger with slightly thinned paint and a light touch. For very crisp branches, wait until the foliage layer is tacky or dry.
Next Step
Trees become much easier once you paint shapes instead of leaves: silhouette, clumps, light, sky holes and a few branches. Practice the exercises above, and within a few paintings your trees will look like part of the landscape instead of props stuck on top.
Having paints that mix clean, natural greens makes a real difference. Check out our picks for the top beginner oil paint sets for vibrant landscapes to find colors that suit your budget and practice routine.





One Comment