Painting water in oil can feel like magic—one moment you’re staring at a blank canvas, the next, you see shimmering lakes, crashing waves, or gentle ripples coming to life under your brush. For beginners, though, water can seem tricky and mysterious.
How do you capture the reflective surface, the movement, and the depth? The good news is, with the right approach and some practice, anyone can paint realistic water in oil. This guide will walk you through everything you need to know, from tools and color mixing to step-by-step techniques and common mistakes.
Let’s unlock the secrets of painting water, so you can add life and atmosphere to your oil paintings.
Why Painting Water Is Unique
Painting water is different from painting land or sky. Water moves, changes color, and reflects the world around it. When you look at a river or a lake, you see reflections, shadows, and sometimes what’s beneath the surface. Understanding these qualities is the first step toward convincing water scenes.
Beginners often think water is just blue, but in reality, it can appear green, gray, brown, or even orange at sunset. Light and surroundings affect its color. Mastering this variety makes your water paintings much more believable.
Essential Materials For Painting Water In Oil
Before you start, gather the right materials. Having good tools helps you focus on learning technique, not fighting with your supplies.
- Oil paints: Choose a basic set with at least one blue (ultramarine or phthalo blue), one green (viridian or sap green), a red, a yellow, white, and brown (burnt umber or raw sienna).
- Brushes: Use a mix of flat, round, and fan brushes. Flats are great for broad strokes, rounds for detail, and fans for blending reflections.
- Canvas or panel: A small or medium-sized canvas (8×10 or 9×12 inches) is easy to handle.
- Mediums: Linseed oil or a ready-made painting medium helps thin your paint and creates smoother blends.
- Palette and palette knife: For mixing colors.
- Rags or paper towels: For cleaning brushes and correcting mistakes.
- Easel and good lighting: Essential for seeing true colors and working comfortably.
Pro tip: If you can, use artist-grade paints. They have more pigment and make color mixing much easier.
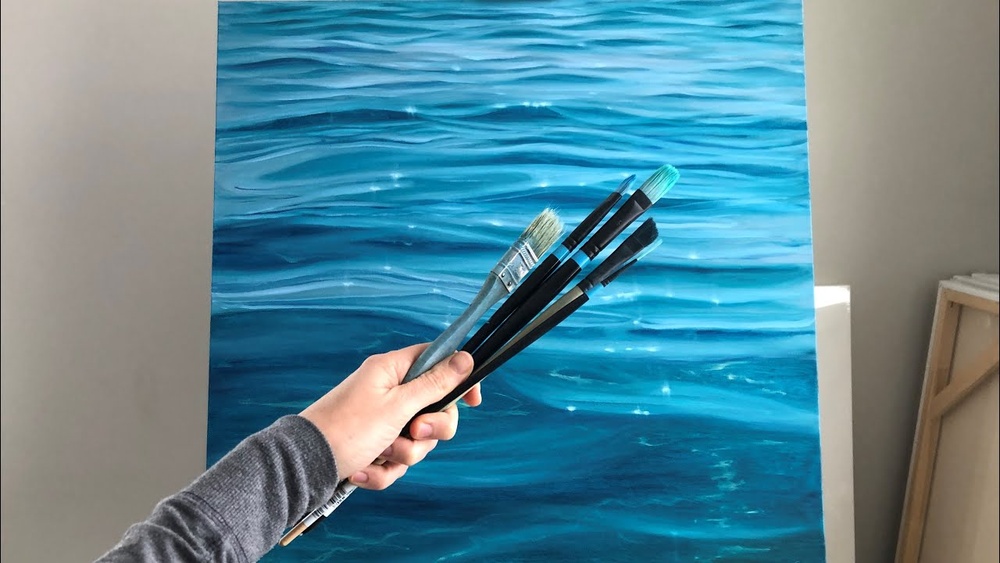
Credit: samuelearp.com
Understanding Water: Key Concepts
Before you dip your brush in paint, let’s look at what makes water special in a painting.
- Reflection: Water acts like a mirror, reflecting the sky, trees, and anything nearby. Reflections are often softer and darker than the real object.
- Transparency: In shallow or clear water, you can see rocks, sand, or plants below the surface. This adds depth.
- Movement: Calm water looks smooth, while moving water (like rivers or waves) has ripples and highlights.
- Color changes: Water’s color depends on depth, light, and what’s underneath.
Insight: Beginners often forget to paint what’s under the water. Even a hint of sand or pebbles makes your water look more real.
Choosing The Right Colors For Water
You might wonder which colors to use for painting water. There’s no single “water blue”—you’ll need to mix several shades.
Here are some useful color mixes for different water scenes:
| Scene | Main Colors | Mixing Tips |
|---|---|---|
| Clear Sky Reflection | Ultramarine Blue + White | Add a touch of green for lakes, more white for highlights. |
| Shallow Water | Viridian + Yellow Ochre | Add a hint of brown for sand or rocks underneath. |
| Stormy Water | Payne’s Grey + Phthalo Blue | Mix with a little white for foam or waves. |
| Sunset Water | Alizarin Crimson + Yellow + Blue | Use more warm colors for reflections of the sky. |
Non-obvious insight: Use the colors of the sky and surroundings in your water. For example, green trees make the water look greener, and orange sunsets add warmth to the reflections.

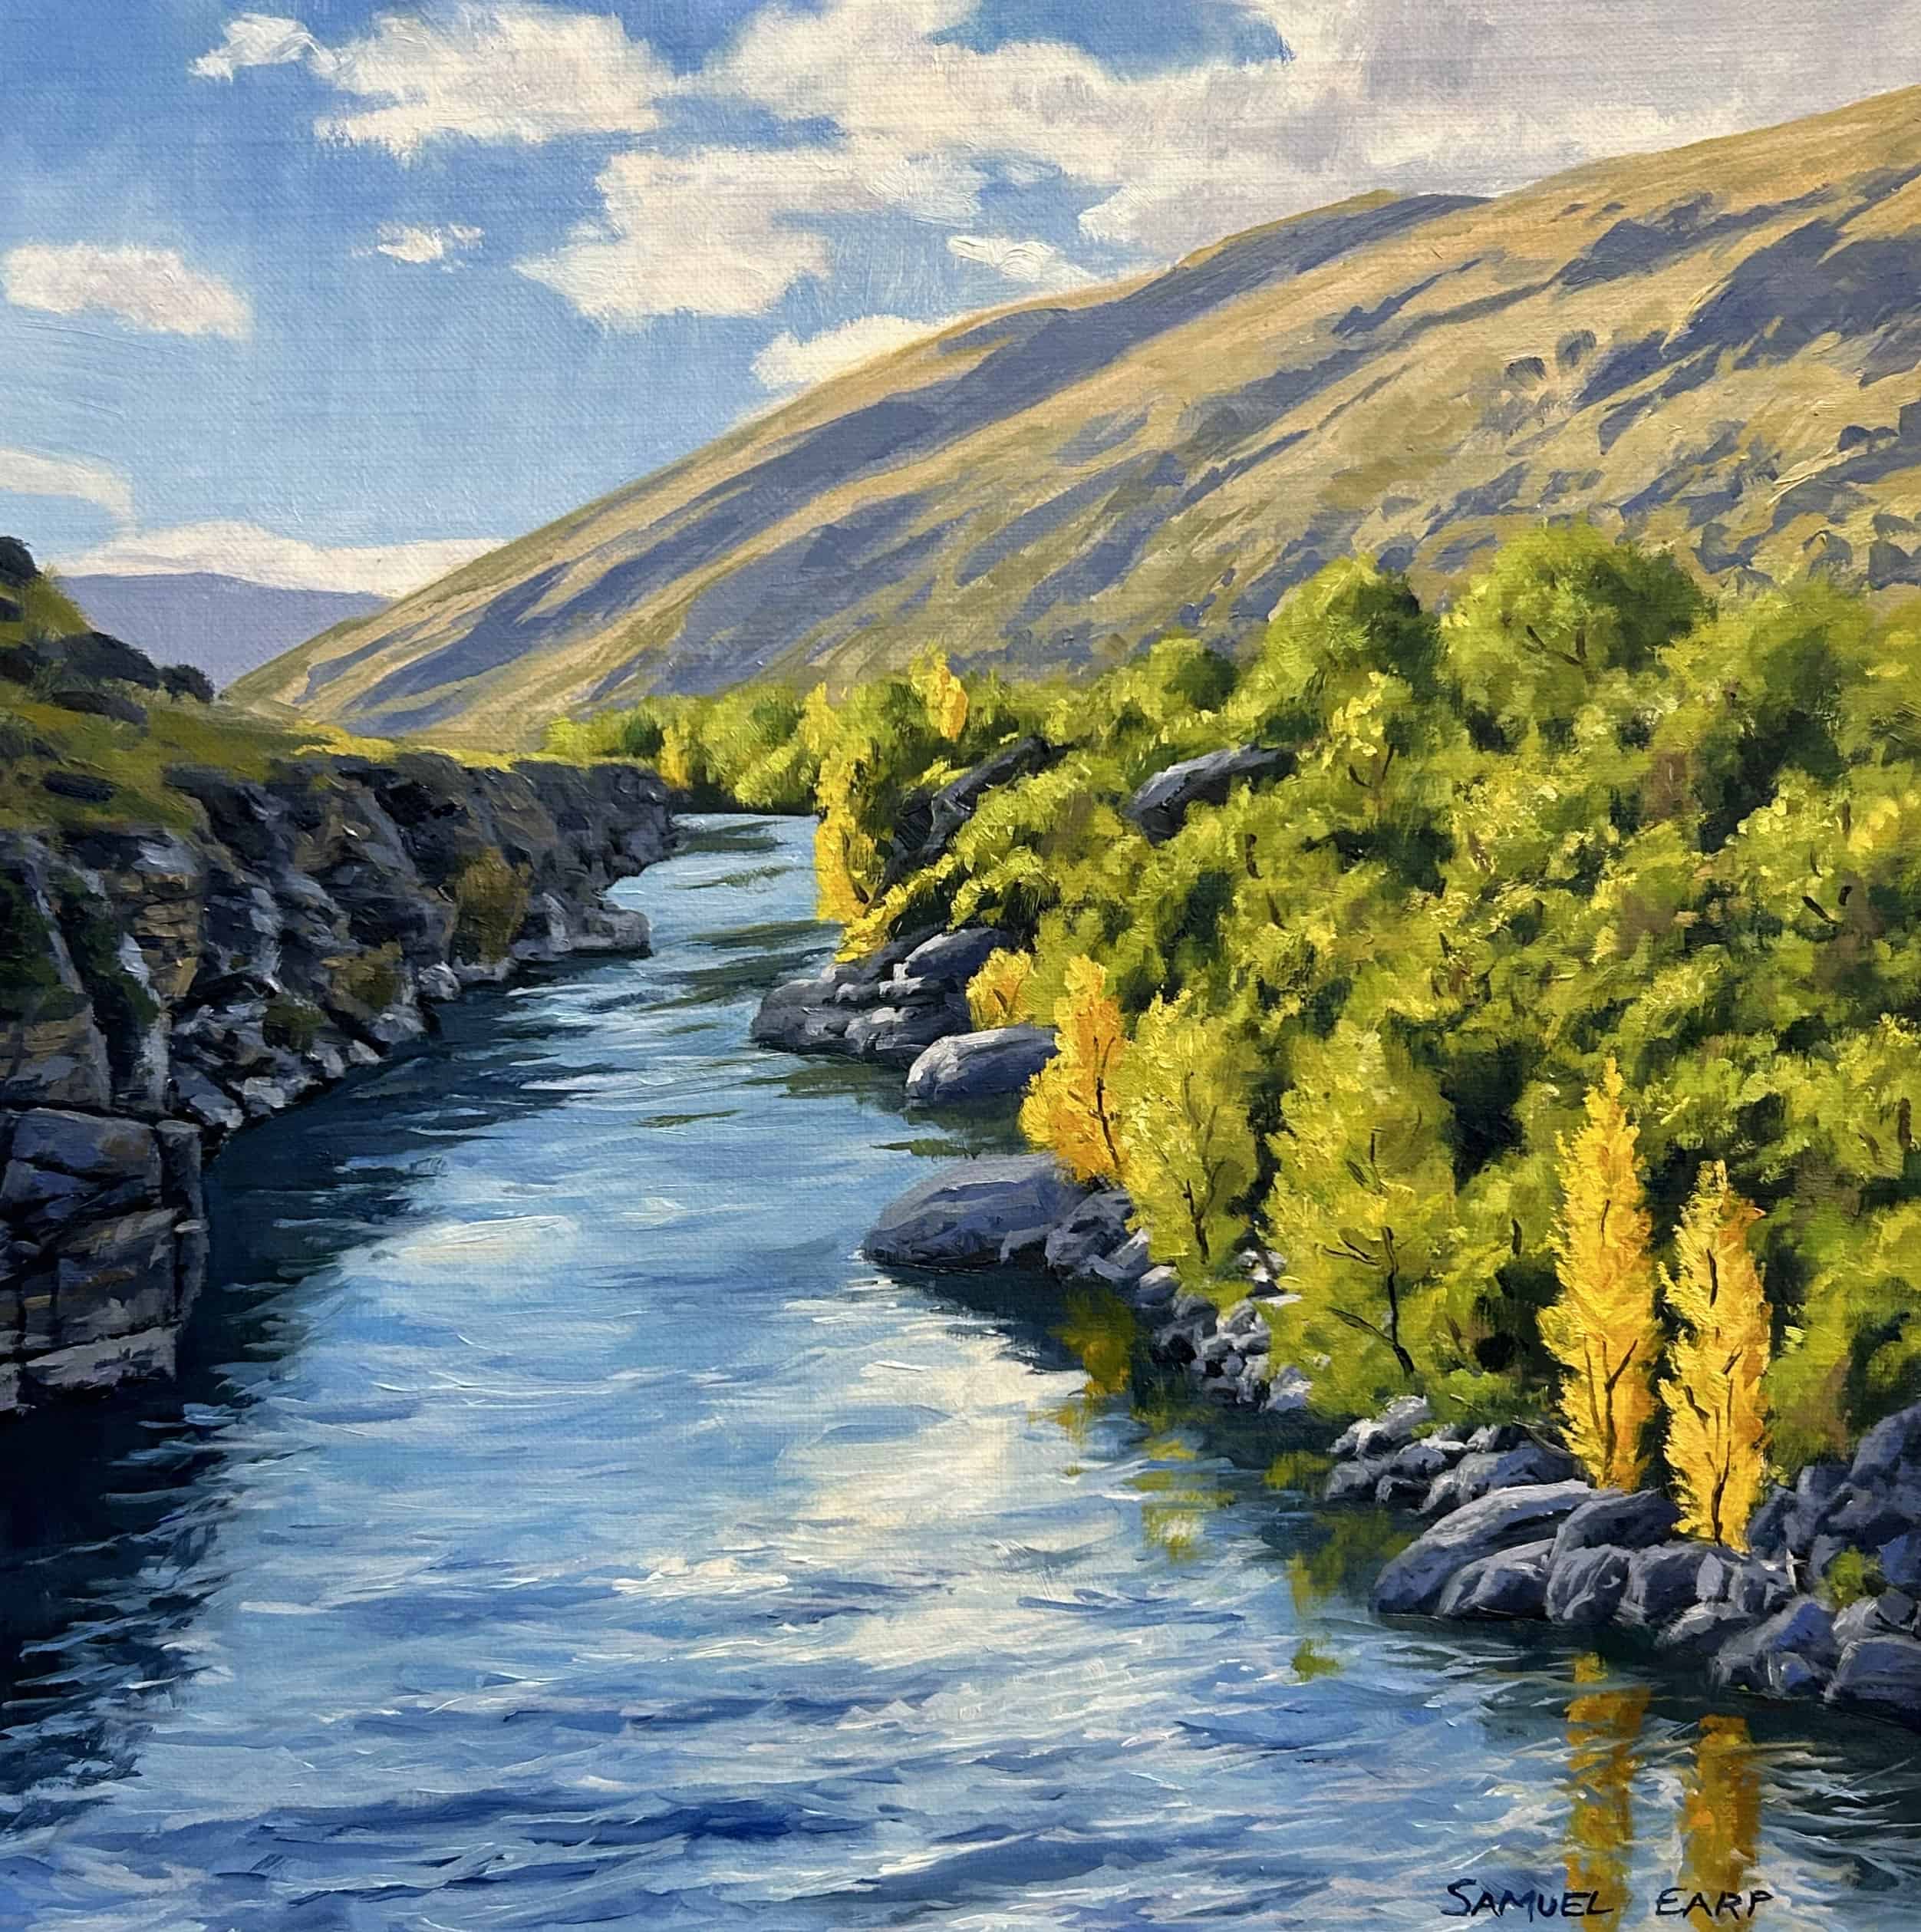
Credit: samuelearp.com
Step-by-step: How To Paint Water In Oil
Now, let’s break down the process into clear steps. This method works for lakes, rivers, or ocean scenes.
1. Sketch The Basic Shapes
Use a pencil or a thin brush with diluted paint to sketch the main elements: shorelines, horizon, and large reflections. Don’t worry about detail yet; just block in the big shapes.
2. Block In The Main Colors
Start painting the water with large, flat brushes. Use thin layers and broad strokes. Begin with the mid-tones (not too light or dark), and cover the whole water area.
- For a blue lake, mix ultramarine blue and white.
- For greenish water, add a little yellow or green.
Keep your brushstrokes horizontal—this mimics the flat surface of water.
3. Add Reflections
Look at your reference photo or scene. Paint the reflected shapes of trees, boats, or sky using slightly darker and softer colors than the object itself.
- Reflections are usually vertical, following the shape of the object above the water.
- Soften the edges with a clean, dry brush or a fan brush.
Practical tip: Don’t make reflections too bright. If you do, the water will look like a mirror, not a natural surface.
4. Suggest Depth And Transparency
If you’re painting shallow water, add hints of the bottom—maybe some rocks, sand, or weeds. Use earth colors (brown, yellow ochre, green) and blend them softly into the water color.
- For deeper water, keep the color cooler and darker.
- Near the shore, use warmer and lighter tones to show shallowness.
5. Show Movement And Highlights
For calm water, keep the paint smooth. For moving water, add ripples and highlights:
- Use a small brush and pure white or very light blue for the brightest areas.
- Paint short, horizontal strokes where the light catches the water.
On ocean waves, use a dry brush to drag some white paint across the surface for foam and sparkle.
Beginner mistake: Adding too many highlights or making them too bright. Less is more—just a few well-placed strokes create the effect.
6. Blend And Adjust
Step back and look at your painting as a whole. Use a soft brush to blend any hard edges and make the water look natural.
- Reflections should be softer than the objects themselves.
- Add more darks or lights if needed to balance the scene.
7. Final Touches
Let your painting dry a little, then add final details: sharper highlights, a ripple here and there, or a little more color in the reflections. Don’t overwork it—stop when it feels right.
Secret insight: Sometimes, imperfections (like a wobbly line or uneven color) make the water look more real. Water is always moving and changing.
Comparing Water Painting Techniques
Different approaches can change how your water looks. Here’s a comparison of three common techniques:
| Technique | How It Works | Best For | Difficulty |
|---|---|---|---|
| Alla Prima (Wet-on-Wet) | Paint all at once, blending colors on the canvas. | Soft reflections, fast-moving water | Beginner-friendly |
| Layering (Glazing) | Build up thin, transparent layers over dry paint. | Deep, luminous water; realistic effects | Intermediate |
| Dry Brush | Use a nearly dry brush to add texture on top of dry paint. | Foam, sparkles, fine ripples | Easy to moderate |
If you’re new, try alla prima for your first few paintings. It’s forgiving, and you can adjust mistakes as you go.
Practice Exercises For Beginners
To build your skills, start with simple practice exercises:
- Paint just the water: Forget the landscape. Fill your canvas with only water reflections—try different colors and brushstrokes.
- Reflection study: Set a glass of water on a table, shine a light, and paint the reflections you see.
- Copy a master: Look up famous water paintings (like Monet’s or Turner’s) and try to copy a small section. This helps you see how great artists use color and brushwork.
Advanced tip: Try painting water at different times of day—morning, noon, and sunset—to understand how light changes everything.
Common Mistakes And How To Avoid Them
Painting water in oil is challenging, but most problems come from a few common mistakes:
- Flat color: Beginners often use just one blue. Real water has many colors, so always mix and layer.
- Hard edges: Reflections need soft, blended edges. If your reflections look “stuck on,” blend with a soft brush.
- Wrong perspective: Water is flat, so reflections should go straight down, not sideways.
- Over-highlighting: Too many white lines ruin the illusion. Limit highlights to where the sun hits the water.
Quick fix: If you make a mistake, scrape the paint gently with a palette knife or cover it with a new layer. Oil paint is very forgiving.
Real-world Examples
Let’s look at how these steps work in real paintings:
- Lake at Noon: Start with a base of ultramarine blue and white. Add green where trees reflect. Near the shore, use yellow ochre to show shallow water. Add vertical reflections, blend the edges, and a few white sparkles for sunlight.
- River in Forest: Use a mix of green, brown, and blue for the water. Paint reflections of trees in vertical strokes. Add hints of rocks or fallen branches under the water near the shore.
- Seascape: Begin with deep blues and greens. Use white and a dry brush to create the look of breaking waves. Add touches of warm color for sunset highlights.
Studying real scenes and photos helps you understand how water works in nature. Don’t just copy—observe and interpret.
Helpful Resources For Further Learning
If you want to dive deeper, check out online tutorials, oil painting books, and museum collections. The Tate Museum’s guide to oil painting is a great starting point.
Joining painting groups or classes can also speed up your learning. Sharing your work and getting feedback is a powerful way to improve.

Credit: www.youtube.com
Frequently Asked Questions
How Do I Make Water Look Realistic In Oil Paintings?
Focus on reflections, color variation, and soft blending. Use colors from the sky and surroundings in your water. Soften the edges of reflections, and avoid using just one shade of blue. Observing real water helps you paint it convincingly.
What Brushes Are Best For Painting Water?
A mix of flat, round, and fan brushes works well. Flats cover large areas and make smooth strokes. Rounds help with details. Fan brushes are great for blending reflections and creating ripples.
How Do I Paint Moving Water Or Waves?
Use short, horizontal strokes for ripples and a dry brush with white paint for highlights. For waves, paint the shadow shapes first, then add bright highlights where the light hits the crest. Study photos or real water to see how movement changes the color and shape.
Can I Use Only Blue To Paint Water?
No, water reflects the sky, trees, and objects around it. Mix blues with greens, browns, and even reds or oranges for sunset scenes. Using multiple colors makes your water look natural and interesting.
How Do I Fix Mistakes When Painting Water In Oil?
Oil paint is forgiving. Wipe off mistakes with a rag while wet, or scrape gently with a palette knife. Once dry, you can paint over errors with a new layer. If your painting becomes muddy, let it dry and start fresh in that area.
Painting water in oil is a rewarding skill that opens new doors for your art. With patience, observation, and practice, you’ll soon create water scenes that feel alive and full of atmosphere. Remember, every artist started as a beginner—keep experimenting, and enjoy the process.