
Have you ever admired a painting where the water looks so real, you can almost hear the gentle ripples and see the shimmering reflections? Painting water reflections in oil can transform your artwork from ordinary to breathtaking.
But capturing that perfect mirror-like effect might feel tricky at first. Don’t worry—this guide will walk you through simple, effective techniques that anyone can follow. By the end, you’ll know how to bring your water scenes to life with vibrant, realistic reflections that grab attention and hold it.
Ready to master this skill and make your oil paintings truly stand out? Let’s dive in!
Materials And Tools
Starting your oil painting project on water reflections requires the right materials and tools. These help capture the shimmering, fluid look of water. Choosing quality supplies ensures smoother brushwork and better color blending. Prepare your workspace with these essentials to create vivid, lifelike reflections.
Choosing Oil Paints
Select oil paints with rich pigments and smooth consistency. Look for colors that mix well to create natural water tones. Blues, greens, and earth tones are key for reflections. Use both transparent and opaque paints for depth. Invest in artist-grade paints for better coverage and durability.
Essential Brushes
Use a variety of brushes for different effects. Flat brushes help create broad strokes and calm water surfaces. Round brushes work well for details and ripples. Fan brushes add texture and soft blending. Choose synthetic or natural bristles that hold paint well and clean easily.
Additional Supplies
Prepare a palette for mixing colors smoothly. Use a palette knife to blend paints and scrape off mistakes. Have clean rags or paper towels for wiping brushes. Use a medium like linseed oil to thin paints and increase flow. A sturdy easel helps keep your canvas steady while painting.

Credit: hagermanart.com
Basic Water Reflection Rules
Painting water reflections in oil requires understanding a few simple rules. These basics help create a realistic and vibrant image. Water reflections differ from direct views, so capturing their unique qualities is key. Follow these fundamental principles to improve your oil paintings of water reflections.
Light And Dark Contrast
Water reflections show opposite light and dark values. Dark objects reflect as lighter shapes on water. Light objects reflect as darker shapes. Water itself often looks darker than the sky above it. This contrast gives reflections depth and realism. Keep values clear and balanced for strong effects.
Reflection Orientation
Reflections appear upside down compared to the original object. The bottom of the object reflects closest to the water’s edge. The top reflects farther away on the surface. Reflections follow the shape and position of the object. Avoid mirroring details exactly; reflections are softer and less sharp.
Water Surface Characteristics
Water surface changes how reflections look. Calm water shows clear, smooth reflections. Ripples and waves distort and blur reflections. Moving water breaks reflections into fragments or lines. Paint these effects with varied brush strokes. Capture the water’s movement to enhance realism.
Preparing Your Canvas
Preparing your canvas is the first step to paint water reflections in oil. A well-prepared canvas sets the stage for capturing light and shadow. It helps you create depth and realism in reflections. Take time to organize your materials and plan the composition before applying paint. This process guides your brushwork and color choices.
Sketching The Scene
Start by lightly sketching the main elements with a pencil or thin brush. Outline the horizon, waterline, and key objects. Focus on shapes and placement rather than details. Keep lines soft to avoid showing through the paint later. Sketching helps you visualize how reflections will align with objects above water.
Blocking In Middle Tones
Apply a thin layer of middle tones to cover the canvas. Use a diluted mix of paint to create a neutral base. This step balances light and dark areas early in the process. Blocking in tones defines the general mood and sets the value structure. It makes adding highlights and shadows easier and more precise.

Credit: hagermanart.com
Brushwork Techniques
Brushwork techniques shape the look of water reflections in oil paintings. Each stroke can mimic the movement and texture of water. Using the right brushwork helps blend colors smoothly. It also adds depth and realism to reflections. Practice these methods to improve your oil painting skills.
Side-to-side Strokes
Use side-to-side strokes to capture the horizontal flow of water. This technique works well for calm water surfaces. Keep your brush light and move it evenly across the canvas. These strokes help create the illusion of gentle ripples. They also soften the edges of reflections.
Dragging Paint For Blending
Drag paint gently to blend colors in reflections. Start with darker tones and drag them into lighter areas. Clean your brush often to avoid muddy colors. Then drag lighter paint back into the dark parts. This back-and-forth motion creates smooth transitions. It mimics how reflections fade and shift in water.
Wet-on-wet Method
The wet-on-wet method lets you blend colors directly on the canvas. Apply wet paint over still-wet layers. Use a soft brush to merge colors quickly. This technique helps achieve soft, blurry reflections. It works best for capturing water’s fluid movement. Wet-on-wet also saves time and keeps the paint fresh.
Building Reflection Layers
Building reflection layers in oil painting creates depth and realism. Start with a base layer that captures the main shapes and tones of the reflection. Each new layer adds detail and refines the look of water. Work slowly and let the paint dry between layers. This process helps mimic the complexity of real water reflections.
Focus on the contrast between light and dark areas. Use thin paint and gentle brush strokes to build up the surface effects. This layering technique makes reflections appear vibrant and natural.
Glazing Dark Areas
Glazing dark areas adds depth to the reflection. Mix a small amount of dark paint with a glazing medium. Apply thin, transparent layers over the base color. This dark glaze mimics shadows and enhances contrast.
Let each glaze dry before adding the next. Layering glazes creates a rich, deep effect in the water. Avoid thick paint, as it can hide underlying details.
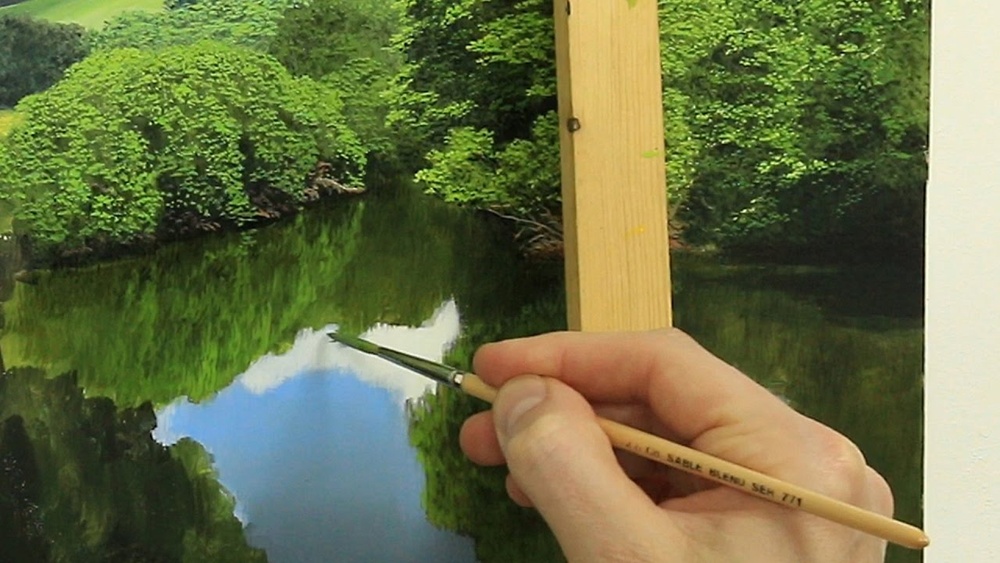
Adding Light Highlights
Light highlights bring sparkle and movement to water. Use a fine brush and lighter paint colors. Apply small strokes or dots where light hits the water surface. These highlights catch the viewer’s eye.
Keep highlights subtle and varied in size. Bright spots should contrast with dark areas. This balance makes the reflection more lively and realistic.
Creating Ripples And Distortions
Ripples and distortions show water’s natural movement. Use a thin brush to paint gentle curves and waves. Blend edges softly to avoid harsh lines.
Distort reflected shapes slightly to mimic water flow. Vary the ripple size and direction for realism. This adds energy and life to the painting.
Capturing Details
Capturing details in water reflections adds life to your oil painting. Small elements create realism and depth. Focus on fine parts that nature shows. These details bring water to life and hold the viewer’s eye. Use careful observation and gentle brushwork to paint these delicate features.
Leaves And Reeds
Leaves and reeds near water edges make strong shapes in reflections. Paint their shapes softly to mimic water’s movement. Use thin, quick strokes to show their thin forms. Avoid hard lines; water blurs these details. Show some leaves darker, some lighter, as water changes their look.
Subtle Color Variations
Water reflections often change colors slightly. Mix colors carefully to show this effect. Use softer, muted tones than the objects above water. Add hints of blues, greens, and grays to mimic water’s surface. These small color shifts make reflections believable and rich.
Using Fan And Rigger Brushes
Fan brushes spread paint gently for soft reflections. They create blurred edges and ripples. Rigger brushes draw thin lines like stems or fine details. Use them to add small strokes for reeds or light streaks. Both brushes help capture water’s texture with precision and softness.
Tips For Realism
Capturing realistic water reflections in oil painting requires careful attention and technique. The key lies in how you handle brushwork, light, and references. Each stroke should bring life to the water’s surface. Depth and movement come from balancing colors and values. Using proper methods helps create a believable scene that feels alive.
Here are some practical tips to enhance realism in your water reflections.
Working Quickly And Energetically
Use fast, confident brush strokes to mimic water movement. Wet-on-wet technique works well for soft blending. Avoid overworking the paint to keep reflections lively. Moving your brush side to side captures the natural flow of water. Work in layers but keep the first layers loose. Speed helps maintain freshness and energy in the painting.
Balancing Light And Shadow
Light and shadow create depth in reflections. Dark areas in water often reflect lighter parts of objects. Bright highlights need softer edges to look natural. Observe where the light hits and where shadows fall. Avoid making reflections too sharp or too dull. Proper contrast between light and dark enhances realism greatly.
Reference Photo Techniques
Use clear photos as a guide for shapes and colors. Study how reflections distort and soften in water. Zoom in on details but paint with broad shapes first. Notice color shifts between reflected objects and actual objects. Photos help check accuracy but avoid copying every detail. Adapt what you see to fit your style and composition.

Credit: www.reddit.com
Common Mistakes To Avoid
Painting water reflections in oil requires careful attention. Avoiding common mistakes helps your artwork look natural and vibrant. These errors often disrupt the flow and realism of reflections. Watch out for these pitfalls to improve your painting skills and create stunning water scenes.
Overworking Reflections
Overworking reflections can ruin the smooth look of water. Too many brushstrokes make the reflection appear messy and unclear. Keep your strokes light and confident. Use fewer layers to maintain a soft, natural effect. Let the paint blend gently on the canvas for better results.
Ignoring Water Movement
Water is rarely still. Ignoring its movement makes reflections look flat and lifeless. Capture the ripples, waves, or flow in your painting. Use short, horizontal strokes to show subtle shifts. Show how water distorts the reflected image for realism. This adds energy and depth to your work.
Incorrect Color Values
Color values are key to believable reflections. Reflections usually appear darker than the actual object. Avoid using the same brightness for both. Adjust colors to match lighting and water conditions. Use cooler tones for shadows and warmer tones for highlights. Correct values create a balanced, realistic effect.
Advanced Techniques
Advanced techniques take your oil painting of water reflections beyond basic shapes and colors. These methods add realism and vibrancy. They help capture the movement and depth of water surfaces. Practice these techniques to create stunning reflections that look alive and natural.
Using Glazes For Depth
Glazing means applying thin, transparent layers of paint. It builds depth without covering previous layers. Use a soft brush and thin your paint with medium. Apply glaze over dry paint to enrich colors. This technique makes reflections appear deeper and more fluid. It also enhances light effects on the water.
Incorporating Highlights With Thick Paint
Use thick paint, or impasto, to add highlights on water. Apply it with a palette knife or stiff brush. This creates texture and shines where light hits the water surface. Thick paint makes reflections pop and feel three-dimensional. Use white or light colors sparingly for best results. This technique adds energy and realism to your painting.
Mixing Colors For Natural Effects
Mix colors carefully to mimic water’s natural tones. Combine blues, greens, and browns with small touches of red or yellow. Avoid pure colors; nature rarely uses them alone. Blend softly for smooth transitions between reflection and water. This makes reflections appear more believable. Adjust color temperature to show light changes during the day.
Practice Exercises
Practice exercises build confidence in painting water reflections. They help you see shapes, colors, and light on water. Practice improves brush control and mixing skills. Try different exercises to understand how reflections behave on various water surfaces.
Simple Reflection Studies
Start with basic shapes like trees or buildings reflected in still water. Paint simple vertical reflections using soft, blurred edges. Focus on matching colors and values between the object and its reflection. Keep strokes smooth and vertical to mimic calm water.
Water Surface Variations
Practice painting reflections on rippled or wavy water. Use short, broken brush strokes to show movement. Change color tones slightly to reflect light shifts on the water surface. Experiment with darker shadows and lighter highlights to add depth.
Combining Techniques
Mix smooth and textured brush strokes for realistic effects. Blend vertical strokes with horizontal ripples to capture water’s complexity. Add small details like light spots or floating debris. This helps create lively, believable water reflections in your oil paintings.
Frequently Asked Questions
How To Paint Water Reflections With Oil?
Use quick, side-to-side brush strokes with thin paint. Drag dark reflections into light areas, then light back into dark. Blend gently for realistic water reflections in oil painting.
What Is The 80/20 Rule In Painting?
The 80/20 rule in painting means focusing 80% of effort on 20% of key elements to maximize impact and efficiency.
What Are The Rules For Water Reflection?
Water reflects objects darker or lighter depending on their tone. Water appears darker than the sky. Reflections show an object’s underside, not its reverse. Ripples distort reflections. Use smooth, horizontal strokes to depict water reflections realistically.
How To Paint Reflections For Beginners?
Start with a simple sketch and middle tones. Use quick, side-to-side brush strokes. Blend dark reflections into lighter areas gently. Add details with a fine brush. Keep reflections slightly blurred for realism.
Conclusion
Painting water reflections in oil requires patience and practice. Start with simple shapes and observe real reflections closely. Use smooth, horizontal strokes to mimic water’s surface. Balance light and dark tones to create depth and realism. Keep your brushwork loose but controlled for natural effects.
Remember, each painting improves your skills. Enjoy the process and watch your water scenes come alive on canvas.


