
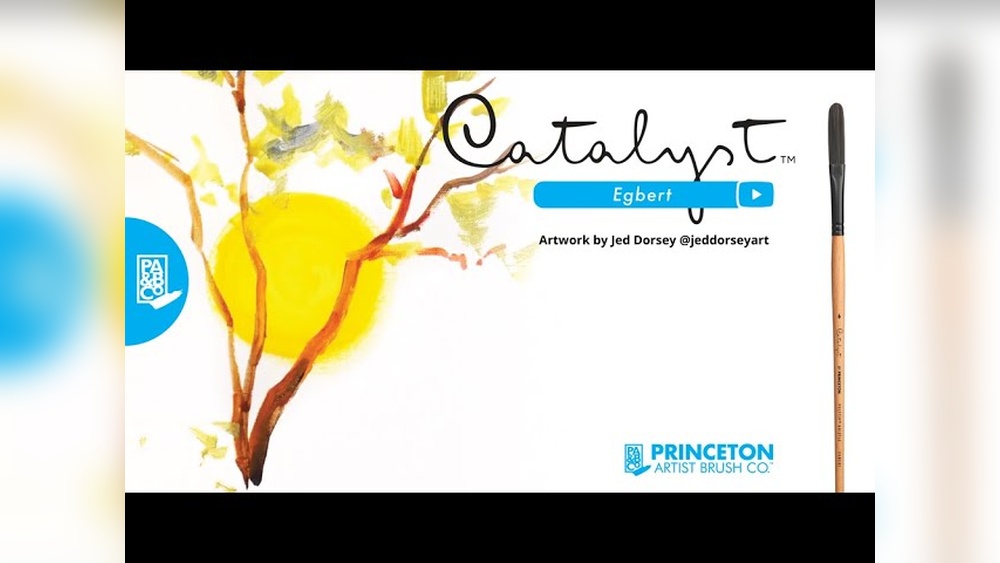
Quick answer: Learning how to use an Egbert brush, which is an extra-long filbert, comes down to holding the handle far back, loading generous paint into the long bristles and letting their flex do the work. Use the broad flat side for soft blends and sweeping strokes, the rounded tip for tapered marks and petals, and the thin edge for lines. Keep pressure light: the long hairs exaggerate every movement, so a gentle touch gives smooth, expressive strokes while heavy pressure causes splaying and streaks.
The Egbert is one of the least understood shapes in a brush jar. It looks like a filbert that kept growing, and many painters buy one, try a few strokes, find it floppy and put it away for good.
That flexibility is the reason the brush exists. Used with the right paint consistency and a loose grip, an Egbert produces long, flowing strokes and soft transitions that a short brush struggles to match. This guide explains how to use an Egbert brush, what it is best at, how it compares with other shapes and how to avoid the problems that make it feel uncontrollable.
What Is an Egbert Brush?
An Egbert is a filbert-shaped brush with extra-long bristles. A filbert has a flat ferrule and bristles that come to a rounded, oval tip. An Egbert keeps that oval profile but extends the hair length considerably, often to roughly twice the length of a standard filbert of the same width, though proportions vary between brands.
Most Egberts are made with natural hog bristle for oil painting, which gives enough spring to move thick paint. Synthetic versions exist for acrylic and are easier to clean after water-based media. Egberts are traditionally used for oils, but many acrylic painters use them too, especially with slower-drying or fluid acrylics.
Bristle quality matters more with this shape than with short brushes. Because the hairs are so long, a poorly made Egbert loses its oval tip quickly and splits into clumps. Look for bristles that are firmly set in the ferrule and that spring back to shape when wet, which is one of the points we cover when comparing quality brushes for oil and acrylic.
How the long bristles change the way it paints
- More paint capacity: Longer hair holds more color, so you can make longer strokes before reloading.
- More flex: The bristles bend easily, which softens marks and makes blending smoother.
- Less precision: The trade-off is less control for tight detail. The tip can wander if your pressure is uneven.
- Varied marks: Turning the brush between its flat side, edge and tip gives a wide range of strokes from one tool.
Egbert Brush vs Other Shapes
| Shape | Hair length | Strengths | Limitations |
|---|---|---|---|
| Egbert | Extra long | Soft blending, long flowing strokes, expressive marks | Less control for tight detail; needs a light touch |
| Filbert | Medium | Versatile; blends and shapes well; good control | Shorter strokes than an Egbert |
| Flat | Medium to long | Crisp edges, broad coverage, blocky strokes | Harder edges; less soft blending |
| Bright | Short | Control with thick paint, short decisive strokes | Less flow and capacity |
| Round | Medium | Lines, detail, varied strokes | Smaller coverage area |
Egbert vs a flat tip paint brush
A flat brush leaves a square-ended mark with sharp corners. An Egbert leaves a rounded, softer mark with no corners. If you want architecture and crisp planes, use a flat. If you want clouds, foliage, drapery, hair or a soft background, the Egbert is usually the better choice. Many painters use both in the same painting: flats for structure and Egberts for transitions.
What Is an Egbert Brush Good For?
- Soft blending: Merging two colors or values into a gradual transition, such as skies or skin tones.
- Long expressive strokes: Grasses, flowing hair, water reflections and sweeping drapery folds.
- Organic shapes: Leaves, petals, clouds and rounded forms that benefit from a curved tip.
- Loose, painterly backgrounds: Covering large areas with soft, varied strokes.
- Scumbling: Dragging light paint over a darker dry layer for broken, atmospheric effects.
Egberts are less suited to tight lines and small details, where a liner, rigger or small round works better. Treat it as a companion to those detail shapes rather than a replacement.
How to Use an Egbert Brush: Step by Step
1. Adjust the paint consistency
Long hairs struggle with very stiff paint. For oils, soften tube paint with a little painting medium until it spreads smoothly, roughly like soft butter or thick cream. For acrylics, use soft body or fluid paint, or add a small amount of medium to heavy body paint. You want paint that flows from the long bristles without dragging.
2. Load the brush generously but evenly
Press the brush into the paint and work it in from both flat sides. The aim is to fill more of the bristle length than you would with a short brush, so you get longer strokes. Then wipe each side lightly on the palette to remove clumps and reshape the oval tip.
3. Hold the handle further back
Gripping the handle near the end gives looser, more fluid strokes and reduces the chance of pressing too hard. Choke up toward the ferrule only when you need extra control for smaller marks.
4. Use light pressure
Let the tip and flat side glide across the surface. The long bristles amplify pressure, so a little extra force causes the hairs to splay and the stroke to streak. Practice controlling pressure from very light (barely touching) to moderate (bristles flexing).
5. Choose the right part of the brush
- Flat side: Broad, soft strokes for coverage and blending.
- Rounded tip: Tapered marks, petals, leaves, rounded edges.
- Thin edge: Lines and narrow strokes, such as grass blades or branch edges.
- Corner of the curve: Small accents and soft dots.
6. Move with your arm, not just your wrist
For long strokes, move from the shoulder or elbow. Wrist-only movements make short, choppy marks that waste the brush’s potential. Standing at an easel helps.
7. Blend with clean, light passes
To blend two colors, lay them side by side, wipe the brush clean, then sweep lightly back and forth across the boundary. Wipe again frequently. Too many passes or a dirty brush can create mud.
Egbert Brush Techniques to Practice
Sweeping strokes
Load the brush and make a long, continuous stroke from shoulder movement, varying pressure from light to medium and back. Try straight lines, gentle S-curves and arcs. These are the foundation for hair, grass and water.
Tapered leaf and petal strokes
Press the flat side down, then lift as you pull, so the stroke narrows to the rounded tip. Twist slightly to give the leaf or petal a natural curve.
Soft cloud edges
Paint a cloud shape with a light value, then use a clean, almost dry Egbert to gently feather one edge into the sky color, leaving other edges more defined for contrast.
Scumbled atmosphere
Wipe most of the paint off the brush and drag it lightly over a dry underlayer. The paint catches on the texture and creates a hazy, broken effect for mist, distant hills or light.
Dry-brush grass
Use the thin edge with little paint and flick upward from the base. Vary angle and length.
A 20-Minute Egbert Practice Session
Short, focused practice builds the light touch this brush needs faster than jumping straight into a finished painting. Use a sheet of canvas paper or an old primed board and one medium Egbert.
- Minutes 1 to 5: Fill the sheet with long horizontal strokes, changing only pressure. Notice the width at which the bristles start to splay. That is your upper limit for smooth strokes.
- Minutes 6 to 10: Paint a row of leaves using the press-and-lift stroke, rotating the handle a quarter turn on every second leaf.
- Minutes 11 to 15: Lay a dark and a light value side by side and blend them with the fewest passes you can, wiping the brush after every pass.
- Minutes 16 to 20: Scumble a light color over a dry dark patch from an earlier session, using almost no paint.
Repeat the session a few times and the brush starts to feel predictable rather than floppy.
Egbert Brush Sizes
Like other brushes, sizes vary by brand. A rough guide:
| Size range | Typical use |
|---|---|
| Small (around 2 to 4) | Petals, leaves, hair strands, smaller blends |
| Medium (around 6 to 8) | General blending, foliage, clouds, portraits |
| Large (around 10 and up) | Backgrounds, skies, large soft transitions |
If you are trying the shape for the first time, a medium Egbert is the most versatile place to start.
Common Egbert Brush Problems and Fixes
| Problem | Cause | Fix |
|---|---|---|
| Brush feels floppy and uncontrollable | Heavy pressure or grip too close to the ferrule on long strokes | Hold further back, lighten pressure, use arm movement |
| Streaky strokes | Paint too stiff or brush underloaded | Soften paint with medium and load more paint |
| Muddy blends | Too many passes or a dirty brush | Wipe the brush often and blend with fewer, lighter strokes |
| Bristles splay permanently | Paint dried near the ferrule or brush stored on its tip | Clean thoroughly and store flat or hairs-up |
| Loss of detail | Using the Egbert for small marks | Switch to a round or liner for tight detail |
Egbert Brushes in Oil vs Acrylic
In oil, the slow drying time lets you take full advantage of the Egbert’s blending ability. Wet-into-wet transitions can be refined over time.
In acrylic, paint dries quickly, which can make blends harder. Use soft body paint, a retarder medium or a stay-wet palette to extend working time. Work in smaller sections and keep the brush wet. Synthetic Egberts are easier to clean after acrylic.
Tips for Using Egbert Brushes Well
- Practice large, loose strokes on scrap canvas paper before using the brush on a painting.
- Keep a separate brush for lights and darks to keep colors clean.
- Use the Egbert in combination with other shapes, not as your only brush.
- Stand back from the painting regularly; Egbert strokes often look best from a distance.
- Rotate the brush in your fingers mid-stroke to vary the mark.
Paint Brushes with a Small Tip vs Egberts: When to Switch
An Egbert’s rounded tip can make fairly delicate marks, but it is not a detail brush. When you reach eyes, small highlights, fine lines or lettering, switch to a small round, a detail brush or a liner. Using the right tool for small marks keeps the Egbert’s strokes loose and prevents overworking areas.
Cleaning and Caring for Egbert Brushes
Long bristles hold more paint near the ferrule, so cleaning needs to be thorough.
- Wipe excess paint off on a rag.
- For oil, swish in solvent or a solvent-free cleaner, then wipe again.
- Wash with mild soap and lukewarm water, working the lather from the ferrule toward the tip.
- Rinse until clear, reshape the oval tip and dry flat.
- Store upright with bristles up, or flat, never resting on the bristles.
Related Reading
FAQs
What is an Egbert brush used for?
An Egbert is used for soft blending, long expressive strokes and rounded organic shapes, such as skies, clouds, foliage, hair and drapery. Its long bristles carry more paint and flex more than a standard filbert.
Is an Egbert brush the same as a filbert?
It is a type of filbert with much longer bristles. The longer hair gives more flex and paint capacity but less precision than a standard filbert.
Can you use an Egbert brush with acrylic paint?
Yes. Synthetic Egberts suit acrylic best. Because acrylic dries fast, use soft body paint or a retarder medium to keep blends workable.
Why does my Egbert brush feel hard to control?
The long bristles exaggerate pressure and wrist movement. Hold the handle further back, use lighter pressure and move from your arm for smoother strokes.
What size Egbert brush should I buy first?
A medium size is the most versatile first choice. It handles blending, foliage and clouds on typical canvas sizes, and you can add smaller or larger sizes later.
Are detail paint brushes with a fine tip better than an Egbert for small areas?
Yes. For small details, a round or detail brush with a fine tip gives more control. The Egbert is best for blending and broader expressive strokes.
Final Thoughts
An Egbert brush stops feeling floppy once you change how you hold it. Loosen your grip, soften your paint and let the long bristles carry the stroke. Used that way, it becomes one of the most expressive tools in the jar, especially for skies, foliage and soft transitions.
If your current brushes splay, shed or will not hold their shape, technique can only do so much. Compare long filberts, flats and rounds in our roundup of artist brushes worth adding to your kit, and look at how different brands handle long-hair shapes in our Raphael paint brush set review.





One Comment