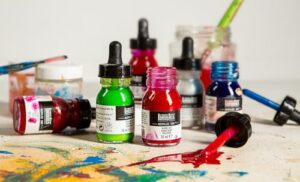
Quick answer: When learning how to use gloss pouring medium, mix it with acrylic paint at about 1:1 for fluid paint or up to 1:3 for heavy-body paint, keeping water to a minimum because water lowers the final shine. Pour onto a smooth, primed surface, let the paint self-level, and dry it flat under a dust cover in a still room. For the highest gloss, use enough medium to offset matte paints, avoid matte additives, and finish with a gloss varnish or resin once fully cured.
A gloss finish changes how a pour reads. Darks deepen, colors look wet and saturated, and cells appear to sit under a pane of glass. That effect depends on more than just buying a bottle labeled “gloss.” The paint you mix it with, the surface, the drying environment, and even dust in the air all affect how shiny the final surface turns out.
This guide focuses on how to use gloss pouring medium to get a clear, high-shine finish: mixing ratios that protect gloss, surface preparation, drying practices, varnishing, and fixes for dull, cloudy, or uneven results.
What Gloss Pouring Medium Is
Gloss pouring medium is an acrylic polymer medium formulated to thin paint for pouring and dry to a shiny, reflective film. Like other pouring mediums, it adds binder rather than just diluting the paint, so the dried layer stays flexible and durable.
Gloss mediums dry clear and smooth because the polymer forms a continuous film with few surface irregularities. Light reflects in a uniform direction off that smooth surface, which our eyes see as shine. Matte mediums contain matting agents that roughen the surface microscopically and scatter light.
Different brands vary in viscosity, leveling, and crazing resistance. Our comparison of Golden and Liquitex pouring mediums looks at two widely used professional gloss options and how their handling differs.
Why Choose Gloss Over Satin or Matte?
| Finish | Look | Effect on colors | Considerations |
|---|---|---|---|
| Gloss | Shiny, glass-like | Deepens darks, increases saturation | Shows dust, fingerprints, and surface flaws; glare under direct light |
| Satin | Soft sheen | Moderate depth | Less glare; hides minor flaws |
| Matte | Flat, non-reflective | Colors can look lighter and softer | No glare; may appear cloudy in thick layers |
Gloss is the most common choice for fluid art because it shows cells, lacing, and color transitions vividly. It is also the easiest base for later finishing, since a gloss surface accepts gloss varnish or resin smoothly.
Many beginner sets already pair pre-mixed colors with a gloss medium. If you are still choosing supplies, our roundup of the best pouring paint kits notes which ones include gloss medium and how much each set contains.
How to Use Gloss Pouring Medium Step by Step
Step 1: Prepare a smooth surface
Gloss finishes exaggerate surface texture. Apply one or two thin coats of gesso, sanding lightly with fine sandpaper between coats if you want a very smooth base. Wood panels and primed hardboard tend to produce flatter, glossier results than textured canvas. Support stretched canvas from behind so it does not sag.
Step 2: Set up a dust-controlled space
Dust and lint settle into wet gloss paint and remain visible as tiny bumps. Wipe your table, use a lint-free cloth, keep pets away, and prepare a box or plastic tub to cover the painting while it dries.
Step 3: Mix paint and gloss medium
Use these starting ratios by volume:
| Paint type | Paint : gloss medium | Gloss impact |
|---|---|---|
| Craft acrylic (matte finish) | 1 : 1 to 1 : 1.5 | More medium increases gloss |
| Student acrylic | 1 : 1.5 | Moderate to high gloss |
| Fluid artist acrylic | 1 : 1 to 1 : 2 | High gloss |
| Heavy-body acrylic | 1 : 2 to 1 : 3 | High gloss with more medium |
Mix slowly to avoid bubbles. Aim for a consistency like warm honey that levels within about two seconds.
Step 4: Minimize water
Water does not add binder or gloss. As water evaporates, it can leave the surface slightly less shiny and more prone to cracking. If you need to thin further, add more gloss medium first, and keep water under about 10 percent of the mix when gloss matters.
Step 5: Rest the mixture
Let each cup sit for 10 to 15 minutes so bubbles rise and pop. Bubbles that burst while drying leave craters that interrupt the gloss.
Step 6: Pour and tilt gently
Use your chosen technique, such as a flip cup or dirty pour, and tilt the canvas slowly to spread the paint. Gentle tilting keeps the layer thick enough to level into a smooth, glossy surface.
Step 7: Dry flat and covered
Place the painting on a level surface, cover it to keep dust off, and leave it alone. Most pours are touch-dry in 24 to 72 hours. Avoid heaters, fans, and direct sun, which can dry the surface too fast and cause cracks or wrinkles.
Step 8: Varnish after curing
Once the paint is fully cured, which can take several weeks for thick pours, apply a gloss varnish or epoxy resin for maximum shine and protection.
What Affects the Final Gloss Level
The paint’s own finish
Many craft acrylics dry matte. When mixed with gloss medium, the final finish falls somewhere between the two. Using more medium relative to paint increases gloss, though too much medium can weaken color in low-pigment paints.
Pigment load
Highly pigmented colors, especially earth tones and some whites, can dry less glossy than transparent colors because pigment particles near the surface roughen it slightly. A thin glaze of gloss medium or a gloss varnish evens this out.
Layer thickness
Thicker layers generally level better and look glossier, but very thick layers risk cracking. A moderate, even layer is the goal.
Drying environment
Rapid drying can create a slightly wrinkled or uneven surface that looks less glossy. Humidity around 40 to 60 percent and moderate temperatures help paint level before it sets.
Additives
Silicone oil can leave a hazy residue, and matte additives obviously reduce shine. If you use silicone, clean the cured surface before varnishing.
Using Gloss Medium With Silicone and Cells
Silicone helps cells form but can interfere with gloss and varnish adhesion. If you want both cells and high gloss:
- Use only 1 to 2 drops of silicone per cup.
- Torch lightly to bring silicone to the surface.
- After curing, wipe the surface gently with warm water and mild dish soap, rinse with a damp cloth, and let it dry.
- Apply gloss varnish or resin after cleaning.
Varnishing a Gloss Pour
| Finish option | Gloss level | Notes |
|---|---|---|
| Gloss acrylic varnish (brush-on) | High | Apply thin coats; brush in one direction. |
| Gloss spray varnish | High | Use light, even passes in a ventilated area. |
| Epoxy resin | Very high, glass-like | Thick, durable layer; follow safety and mixing instructions carefully. |
| Satin varnish | Medium | Reduces glare while keeping depth. |
Wait until the pour is fully cured before varnishing, since trapped moisture under varnish can cause cloudiness.
Troubleshooting Gloss Pours
| Problem | Likely cause | Fix |
|---|---|---|
| Dull patches | Matte paint, heavy pigment, or too much water | Use more gloss medium; varnish with gloss. |
| Cloudy or milky areas | Medium not fully dry or high humidity | Allow longer drying; improve airflow without direct fans. |
| Dust specks | Uncovered drying | Cover the pour; sand lightly and varnish if needed. |
| Craters | Air bubbles or silicone | Rest mixes; torch lightly; reduce silicone. |
| Crazing | Thick paint drying fast | Dry in a cool, still room; use more medium. |
| Fingerprints | Handling before cure | Wait longer before touching; varnish after curing. |
| Tacky surface | Thick paint not fully cured | Allow more time; avoid stacking. |
Getting a Glass-Like Finish Without Resin
Epoxy resin gives the deepest gloss, but it involves mixing two parts, managing fumes or sensitivities, and working within a limited time. Some painters prefer to build gloss with acrylic products alone. One approach is a clear flood coat of gloss pouring medium on its own.
- Wait until the painted pour is fully cured, typically at least two weeks for a moderate layer.
- Clean off any silicone residue and dust, and let the surface dry.
- Pour a thin layer of unmixed gloss pouring medium onto the center of the painting.
- Spread it with a silicone spatula or gloved hand, then tilt so it levels to the edges.
- Pop bubbles with a light pass of a torch or heat gun, or by gently breathing on them through a straw.
- Cover and dry flat. The medium will look milky at first and clear as it dries.
A clear flood coat adds depth and an even shine without changing colors. Keep each coat thin, since thick clear layers can stay cloudy for days or craze. Two thin coats, dried fully between, tend to work better than one heavy layer. Finish with a gloss varnish that offers UV protection if the piece will hang near windows.
Gloss Medium on Different Surfaces
| Surface | Prep for gloss | Notes |
|---|---|---|
| Stretched canvas | Extra gesso, back support | Weave texture can show through thin pours. |
| Wood panel | Seal, gesso, sand smooth | Produces some of the flattest, glossiest results. |
| Ceramic tile | Clean with alcohol; scuff or prime | Popular for coasters; seal well and add felt backing. |
| Canvas board | Light sanding, gesso | Inexpensive and stays flat. |
| Vinyl records or plastic | Scuff and prime | Adhesion varies; test first. |
For functional pieces like coasters, gloss acrylic alone may soften under hot mugs or moisture. A resin topcoat or a durable, water-resistant varnish is often used for those items, and they should not be used as food-contact surfaces.
Mixing Gloss and Matte Mediums for Custom Sheen
If full gloss is too reflective for your space, mix gloss and matte mediums before adding paint. A 3:1 gloss-to-matte mix gives a high satin, while 1:1 gives a softer satin. Always mix the mediums together first so every color has the same finish.
Gloss Tips by Experience Level
If you are new to pouring
- Practice on small wood panels, which stay flat and show gloss clearly.
- Use the same gloss medium and ratio for every color in a pour.
- Skip silicone until you are happy with your basic gloss results.
If you have a few pours behind you
- Compare one pour mixed with craft paint and one with fluid artist paint to see how the paint’s finish affects shine.
- Try a clear flood coat of medium on a cured piece before experimenting with resin.
- Track humidity and drying times to learn what conditions give your smoothest surfaces.
Caring for Gloss Pour Paintings
- Handle by the edges to avoid fingerprints.
- Dust with a soft, dry cloth.
- Avoid stacking paintings face to face until fully cured and varnished.
- Hang away from direct sunlight to reduce fading and glare.
- If needed, clean varnished surfaces with a slightly damp cloth.
FAQs
Does gloss pouring medium make paint shiny?
Yes. Gloss pouring medium dries to a shiny film and increases the sheen of the paint. The final level depends on the paint’s own finish, pigment load, and how much water you add.
How much gloss pouring medium should I use?
Start with 1 part paint to 1 part medium for fluid or craft paint, and 1 part paint to 2 or 3 parts medium for heavy-body paint. Adjust for consistency.
Can I add water to gloss pouring medium?
Small amounts are fine, but water can reduce shine and weaken the film. Keep water under about 10 percent when maximum gloss matters.
Why is my gloss pour not shiny?
Common causes include matte paint, too much water, heavy pigments, dust, or silicone residue. Increase the medium ratio, avoid water, keep dust away, and finish with gloss varnish.
Do I need to varnish a gloss pour?
Varnish is not required, but it evens out shine, protects against dust and UV, and can make colors look richer. Clean silicone residue before varnishing.
Is gloss pouring medium the same as varnish?
No. Pouring medium is mixed into paint to make it flow. Varnish is a separate protective topcoat applied after the paint has cured.
Next Step
Gloss pouring medium gives fluid art its glassy depth, but the final shine depends on smooth surfaces, minimal water, dust control, and patient drying. Once those habits are in place, a gloss varnish or resin can take the finish even further. To start with matched paints and gloss medium in one set, browse our guide to the top pouring paint kits for glossy fluid art and pick one that includes enough medium for several pours.