
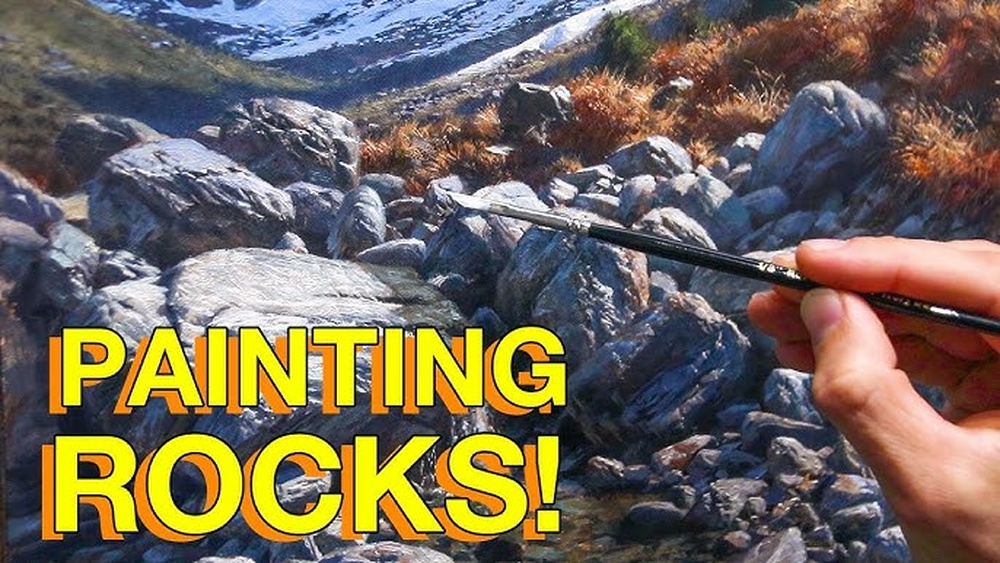
Painting rocks in oil is a rewarding challenge for many artists. Rocks may look simple at first, but when you try to paint them, you quickly notice their complexity. They have rough textures, shifting colors, and unique shapes. Getting them right can add a lot of realism and interest to your landscape paintings. But many painters struggle. Their rocks look flat, cartoonish, or don’t fit naturally into the scene. If you want to master painting rocks in oil, you need more than just basic brush skills. You need to observe, plan, and use some smart techniques. This guide will show you everything you need to know to make rocks come alive in your oil paintings, even if you are still a beginner.
Why Paint Rocks In Oil?
Rocks play an important role in art, especially in landscapes. They create structure, lead the viewer’s eye, and add a sense of place. Oil paints are perfect for rocks because they blend smoothly, dry slowly, and allow for rich textures. You can layer colors, work wet-on-wet, or use palette knives for rough effects. Unlike acrylics or watercolors, oils let you adjust your work for hours or even days.
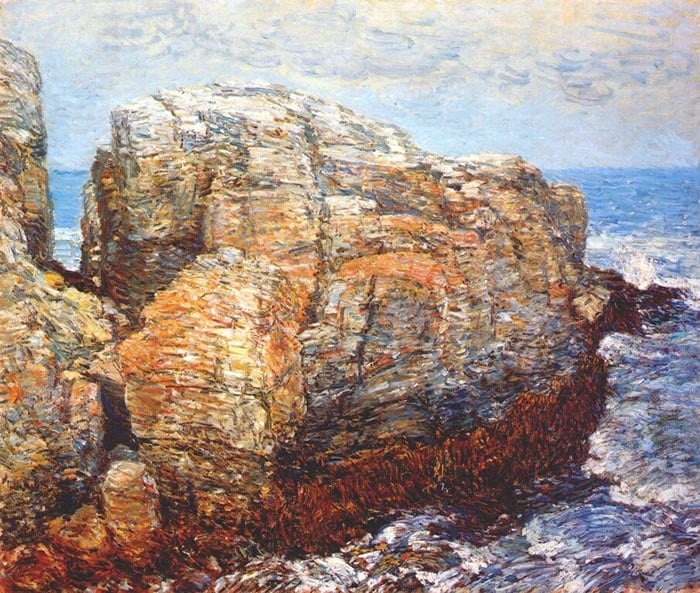
Many famous artists, like Albert Bierstadt and Ivan Shishkin, used oils to paint rocks that feel real and solid. Oil painting gives you time to build up the subtle color changes and details that make rocks look convincing.
Getting Started: Materials And Setup
Before you start painting, you need to have the right tools. Working with the proper materials will help you get better results and avoid frustration.
| Item | Purpose | Tip |
|---|---|---|
| Oil paints | Layering, blending, and rich color depth | Start with a basic set: white, black, ochres, umbers, blue, red, yellow |
| Bristle brushes | Applying thick paint and creating texture | Have several sizes: flat, round, and fan |
| Palette knives | Scraping, mixing, and rough texture | Try different shapes for different effects |
| Canvas or panel | Painting surface | Use medium-grain canvas for best texture |
| Mediums (linseed oil, turpentine) | Adjust paint flow and drying time | Use sparingly for best results |
| Rags or paper towels | Cleaning brushes, wiping mistakes | Keep several nearby |
If you are just starting, don’t worry about buying everything at once. The most important things are a few basic oil colors, a couple of good brushes, and a strong surface to paint on.
Credit: drawpaintacademy.com
Observation: Understanding Real Rocks
The first step to painting realistic rocks is careful observation. Many beginners paint rocks as gray blobs. But real rocks are full of life.
What To Look For
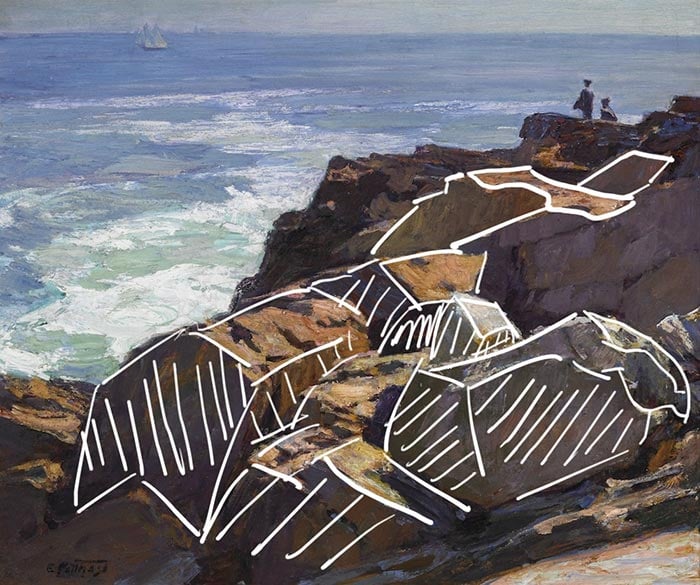
- Shape and Form: Rocks are rarely perfect ovals or rectangles. Look for jagged edges, cracks, and layers.
- Texture: Some rocks are smooth, others are rough or pitted. Notice these details.
- Color Variations: Rocks are not just gray. They can be brown, red, blue, green, or even purple, depending on light and minerals.
- Light and Shadow: The way light hits a rock creates form. Pay attention to highlights, mid-tones, and deep shadows.
- Context: Rocks don’t float. Notice how they sit in the ground, overlap, or interact with plants and water.
A non-obvious insight: many rocks have subtle color changes caused by reflected light from the ground or sky. Even a gray rock might have hints of blue from the sky or green from nearby grass.
Planning Your Rock Painting
Don’t jump in with paint right away. Good planning makes the process easier and your rocks more believable.
Sketch First
Make a simple sketch of your rocks on the canvas. Focus on the main shapes, not details. This helps you place them correctly and avoid awkward compositions.
Choose A Light Source
Decide where your light comes from. This will guide your shadows and highlights. Consistent lighting makes your rocks look solid and three-dimensional.
Block In Large Shapes
Before adding details, block in the main colors and shadows of your rocks. Use a big brush and thin paint at first. This step sets the foundation for all your later work.
Mixing Rock Colors
Getting the right color for rocks is trickier than it seems. Beginners often use straight black, gray, or brown, which looks flat and lifeless.
| Rock Type | Base Colors | Common Additives |
|---|---|---|
| Granite | White, black, cool blue | Tiny touches of pink or green |
| Sandstone | Yellow ochre, burnt sienna | Light red, white |
| Limestone | Titanium white, yellow ochre | Raw umber, light blue |
| Basalt | Ivory black, ultramarine blue | Payne’s gray, burnt umber |
Pro tip: Mix at least three values for each rock—a light, a mid-tone, and a shadow color. This helps you build depth.
A beginner’s mistake is using pure black for shadows. Real shadows are rarely pure black. Try mixing ultramarine blue or burnt umber with your colors for deeper, richer shadows.
Painting Process: Step-by-step
Let’s break down the process into clear, manageable steps.
1. Start With An Underpainting
Thinly paint your sketch using a neutral color like burnt sienna. This is your map for the rest of the painting. Let it dry for a few minutes.
2. Block In Main Colors
With a large brush, paint the basic colors of the rocks and their surroundings. Don’t worry about detail yet. Focus on getting the big shapes and values right.
3. Add Shadows And Highlights
Decide where your light is coming from. Use a slightly darker mix for the shadow side and a lighter mix for the highlight. Blend edges gently for rounded rocks, but keep them sharp for jagged rocks.
4. Develop Texture
Use a dry brush or palette knife to add rough texture. Tap or drag paint to suggest cracks, pits, or lichen. Vary your brush direction for a natural look.
5. Refine Edges
Some rock edges should be sharp, others soft. Sharp edges attract attention, while soft edges help rocks blend into the landscape. Adjust as needed to guide the viewer’s eye.
6. Add Color Variation
Drop in hints of green, purple, or blue to suggest moss, shadows, or mineral streaks. These touches make your rocks look more interesting and less artificial.
7. Final Details
Add small cracks, pebbles, or bits of grass at the base of rocks. These details help tie the rocks to their environment.

Credit: www.amazon.com
Creating Realistic Texture
Texture is what makes rocks look solid and rough. With oils, you have many ways to create texture.
- Impasto: Apply paint thickly with a palette knife. This creates physical ridges like real rock.
- Dry Brush: Use a dry, stiff brush to drag color over dry paint. This picks up the raised areas and leaves the valleys dark.
- Stippling: Tap the brush for a speckled look, good for pebbles or lichen.
- Scratching: Use the end of your brush or a toothpick to scratch lines into wet paint for cracks.
A non-obvious tip: Sometimes, less is more. If you overwork the texture, your rocks can look too busy or fake. Step back often to see if your texture looks natural.
Common Mistakes And How To Avoid Them
Painting rocks is full of traps for beginners. Here are some common problems and how to fix them:
- Too Symmetrical: Real rocks are random. Avoid making them the same size or shape.
- Flat Colors: Mix colors on your palette and directly on the canvas. This creates rich, interesting surfaces.
- Hard Edges Everywhere: Use soft edges for distant rocks or areas in shadow.
- Floating Rocks: Add grass, dirt, or overlapping rocks to anchor them in the scene.
- Ignoring Environment: Rocks reflect the colors of nearby objects. Add hints of green, blue, or brown as needed.
- No Value Range: Without strong lights and darks, rocks look dull. Push the contrast, especially in the foreground.
Credit: drawpaintacademy.com
Using Reference Photos And Studies
Don’t try to paint rocks from memory. Use good reference photos or, even better, go outside and sketch rocks. This helps you see real colors, shapes, and textures.
If you can, do small studies of rocks before starting a big painting. These practice pieces let you experiment with colors and techniques without pressure.
Integrating Rocks Into Your Landscape
It’s not enough for rocks to look good by themselves. They need to fit into your landscape.
- Overlap: Place rocks in front of each other for depth.
- Atmospheric Perspective: Distant rocks should be lighter, bluer, and less detailed.
- Cast Shadows: Make sure your rocks cast shadows on the ground or each other.
- Surroundings: Add touches of grass, dirt, or water at the base to make rocks look natural.
A quick comparison of rocks in foreground vs background:
| Feature | Foreground Rock | Background Rock |
|---|---|---|
| Detail | High | Low |
| Edge Sharpness | Sharp | Soft |
| Color Intensity | Strong | Muted |
| Value Contrast | High | Low |
Advanced Tips For Expressive Rock Painting
Once you are comfortable with basics, try these advanced ideas:
- Use Complementary Colors: Add a touch of the opposite color to your shadows for vibrancy.
- Glazing: After your paint dries, glaze thin layers of transparent color over rocks for depth.
- Lost and Found Edges: Let some edges disappear into the background. This adds mystery and realism.
- Palette Knife Painting: Paint entire rocks with a palette knife for bold, textured effects.
- Experiment with Light: Try painting rocks at sunset, in fog, or under moonlight to challenge your observation skills.
Caring For Your Oil Painting
After your painting is finished, let it dry in a dust-free place. Oils take weeks to fully cure. You can varnish your painting after a few months to protect it and bring out the colors.
Store your work in a dry place, away from direct sunlight. Handle with clean hands to avoid damaging the surface.
For more on oil painting safety and care, you can visit Tate’s guide to oil painting.
Frequently Asked Questions
How Do I Make Rocks Look Three-dimensional In Oil Painting?
Use strong light and shadow. Paint the highlight side lighter and the shadow side darker. Blend edges where rocks are rounded, but keep them sharp for flat faces. Add reflected light under the shadow to suggest bounce from the ground.
What Colors Should I Use For Realistic Rocks?
Mix earth tones like ochres, umbers, and sienna with blues, greens, or reds. Avoid plain black and white. Study real rocks or photos for color inspiration. Adjust your mix to fit the landscape’s lighting and mood.
Should I Use A Brush Or Palette Knife For Painting Rocks?
Both tools have their place. Use brushes for smooth blending and fine detail. Try a palette knife for thick, rough texture and bold marks. Many artists use both in the same painting for variety.
How Do I Paint Moss Or Lichen On Rocks?
Let your rock colors dry a bit. Then use a small, stiff brush to lightly tap on green, yellow, or pale blue paint. Stippling gives a speckled look. Keep it subtle—moss and lichen are usually small accents, not the main focus.
What Is The Biggest Mistake To Avoid When Painting Rocks?
The most common error is painting all rocks the same—same color, same shape, same size. Nature is full of variety. Change your colors, edges, and textures to make rocks look natural and interesting.
Oil painting rocks takes patience, observation, and practice. Each painting teaches you something new. With these tips, your rocks will become a strong, convincing part of your art—grounding your landscapes and drawing viewers in. Keep experimenting and enjoy the process!


