
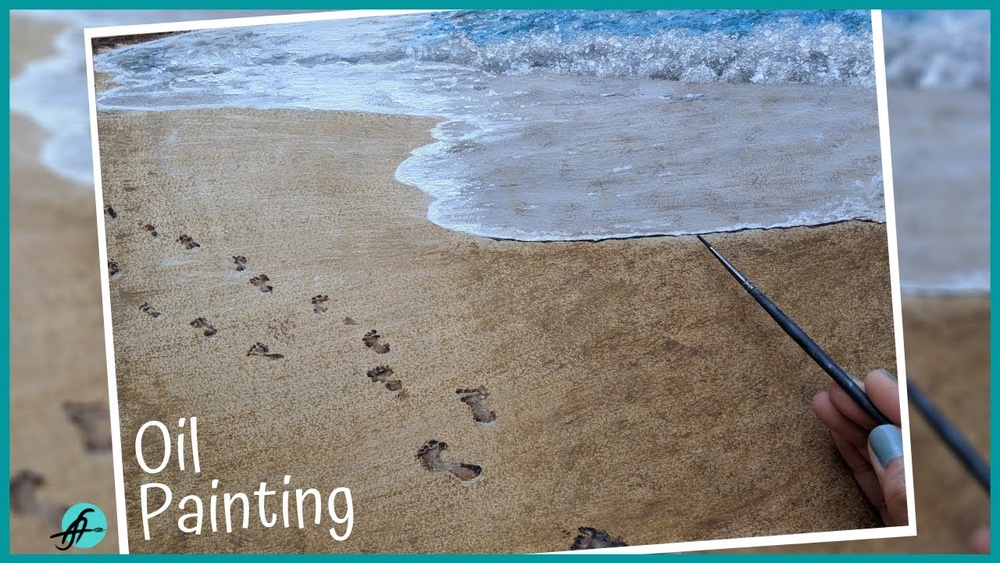
Quick answer: To paint sand and a beach in oil, mix sand colors from white, yellow ochre, raw sienna and a touch of the sky’s blue or violet rather than using a single beige. Paint dry sand lighter and warmer, wet sand darker and reflective, and use atmospheric perspective so the beach becomes lighter and cooler in the distance. Add texture with broken strokes, scumbling or a stippled brush in the foreground only, and give the sand form with soft shadows from dunes, footprints and ripples.
Sand looks simple until you try to paint it. Many beach paintings end up with a flat, uniform strip of beige that reads more like a tabletop than a shoreline. Real beaches shift in color, value and texture constantly: warm and pale where the sun dries them, dark and glassy where waves retreat, cool and violet in shadow.
This guide shows how to paint sand and beach scenes in oil: understanding what makes sand look real, palette and mixing, dry versus wet sand, texture techniques, dunes, footprints and shoreline transitions. For more oil subjects and techniques, browse our collection of oil painting guides.
What Makes Sand Look Real
- Color variation: sand contains countless tiny grains of different minerals, so it is never one flat color. It varies from creamy white to gold, pink, gray or almost black depending on the beach.
- Value changes: dry sand is light; wet sand near the water is darker and reflects the sky.
- Temperature: sunlit sand appears warm; shadows on sand are cool, often blue or violet, reflecting the sky.
- Texture scale: texture is visible only in the foreground. In the distance, sand becomes a smooth band of color.
- Form: dunes, ripples, footprints and wind patterns give the beach shape.
Palette for Painting Sand in Oil
| Color | Role |
|---|---|
| Titanium white | Base for light sand, highlights |
| Yellow ochre | Warm golden sand |
| Raw sienna | Richer warm sand, wet sand undertones |
| Burnt sienna | Warm accents and darker sand |
| Raw umber | Neutral darks, muted sand |
| Ultramarine blue | Cool shadows, wet sand reflections |
| Alizarin crimson or a permanent alternative | Violet shadows (with ultramarine) |
| Cadmium yellow light or naples yellow | Bright sunlit sand |
| Cerulean or phthalo blue | Sea and sky; reflections on wet sand |
Sand color mixes
| Sand type | Mix |
|---|---|
| Sunlit dry sand | White + yellow ochre + touch of cadmium yellow light or naples yellow |
| Muted dry sand | White + yellow ochre + touch of raw umber |
| Pinkish sand | White + yellow ochre + tiny touch of alizarin or burnt sienna |
| Wet sand | Raw sienna + raw umber + touch of ultramarine, darker and slightly cooler |
| Shadows on sand | White + ultramarine + alizarin + a little ochre, cool violet-gray |
| Distant sand | Sunlit sand mix + more white + touch of sky blue |
Always mix sand colors in relation to your sky. A warm sunset sky makes sand glow orange and pink; an overcast sky makes it grayer.
Materials
- Canvas or panel, toned with a warm mid-value
- Oil paints from the palette above
- Odorless mineral spirits and a painting medium
- Brushes: large flats for broad areas, filberts for dunes, a worn bristle brush for texture, small rounds and a liner for details
- Palette knife for highlights and texture
- Toothbrush or stiff brush for spatter
- Rags and reference photos or sketches from the beach
How to Paint Sand and Beach in Oil: Step-by-Step
Step 1: Plan the composition
Make a quick thumbnail. Decide where the horizon sits, where the shoreline curves and where your focal point is, such as a wave, a figure, a lifeguard tower or a piece of driftwood. Curving shorelines lead the eye into the painting.
Step 2: Tone the canvas
A thin wash of burnt sienna or raw sienna, wiped back to a mid-light value, gives warmth that shines through and unifies the beach colors.
Step 3: Paint the sky first
The sky sets the light and color temperature for the entire scene. Paint it with confident strokes and keep it lighter near the horizon.
Step 4: Paint the sea
Block in the ocean from the horizon downward, darker and more saturated in the distance near the horizon, lighter and greener or more turquoise in shallow water near the shore. Leave the wave and foam areas for later.
Step 5: Block in the sand in big zones
Divide the beach into zones and paint each with its own mix:
- Dry upper beach: lightest and warmest.
- Damp middle: slightly darker and more neutral.
- Wet sand at the water’s edge: darkest, cooler, reflecting the sky.
- Distant beach: lighter, cooler and smoother.
Blend these zones softly where they meet, wet-in-wet.
Step 6: Add form with shadows
Paint cool violet-gray shadows on the sides of dunes facing away from the sun, under driftwood and rocks, and in footprints and ripples. Shadows on sand are rarely brown; they reflect the sky’s blue.
Step 7: Paint wet sand reflections
Wet sand acts like a dull mirror. Paint vertical reflections of the sky, figures and objects into the wet zone, slightly darker and softer than the objects themselves. Add a thin line of lighter reflected sky right where the water’s edge thins out.
Step 8: Add foam and the water’s edge
Paint the lacy edge of retreating waves with broken white and pale blue-gray strokes. Foam has shadow too, so its shadow side is cooler and grayer. A thin dark line under the foam’s edge gives it lift.
Step 9: Build texture in the foreground
Only the foreground needs visible grain. Techniques include:
- Scumbling: drag a light, slightly dry mix over a darker dried layer so it catches unevenly.
- Stippling: dab with a worn bristle brush for a grainy surface.
- Spattering: flick a toothbrush loaded with thinned darker and lighter paint for speckles. Mask the sky first.
- Palette knife: drag thick light paint for sunlit ridges and crisp edges.
Step 10: Details and accents
Add footprints, shells, pebbles, seaweed lines, beach grass and small sparkles of light on wet sand. Keep details concentrated in the foreground and near the focal point.
Painting Dunes
- Shape: dunes have a gentle windward slope and a steeper leeward slope with a crisp crest.
- Light: the sunlit side is warm and pale; the shadow side is cool and violet.
- Crest edge: keep it sharp where light meets shadow, softer elsewhere.
- Wind ripples: paint small parallel curved lines on the windward side, lighter on the crests and darker in the troughs.
- Grass: paint dune grass with quick upward strokes using a liner, varying heights and angles. Our guide on painting grass in oil covers stroke techniques that work well here.
Painting Footprints and Ripples
Footprints are small depressions. Paint the shadow on the side facing the light source (the inner wall) and a light edge on the opposite rim where light catches it. Make them smaller and closer together as they recede.
Ripples left by water or wind are a series of small ridges. Alternate light crests and cool shadow troughs, curving with the shoreline or wind direction.
Different Kinds of Sand
Not every beach is golden. Matching the local sand color makes a coastal painting feel specific to a place:
- White coral or quartz sand: very pale and reflective. Use mostly white with tiny amounts of yellow ochre and a cool shadow mix. Beware of painting it too white; keep the brightest white for highlights.
- Golden sand: yellow ochre and raw sienna dominate, warmed with a touch of cadmium yellow in the sun.
- Pink sand: a hint of alizarin crimson or light red in the light mix. Keep it subtle, as overdone pink looks artificial.
- Gray and pebbly beaches: mix grays from ultramarine, burnt umber and white, and add scattered pebble shapes with light tops and dark undersides.
- Black volcanic sand: deep mixes of ultramarine, burnt umber and a touch of white for highlights. Wet black sand reflects the sky strongly, so the reflections become the main source of color.
Painting Rocks, Driftwood and Shells on the Beach
Objects resting on sand anchor the scene and give it scale. A few tips:
- Contact shadows: paint a thin, dark, sharp shadow right where an object meets the sand, then a softer cast shadow extending away from the light. Without the contact shadow, objects look like they float.
- Partial burial: let sand overlap the bottom edge of shells and driftwood, so they sit in the beach rather than on top of it.
- Reflected light: the shadow sides of pale rocks and driftwood often pick up warm reflected light from the sunlit sand around them.
- Driftwood texture: use long, dry-brushed strokes of warm gray and silver along the grain, with dark cracks painted in with a liner.
Beach Lighting Conditions
Midday sun
High-key, bright sand with short, strong shadows. Colors can look bleached; keep some warmth in the sand and saturated color in the sea.
Golden hour
Warm orange and pink light on sand, long violet shadows, and glowing highlights on wave crests. One of the most attractive times to paint.
Overcast
Soft, diffused light, low contrast and grayer sand. Focus on subtle value shifts and color temperature.
Sunset and twilight
Wet sand reflects vivid sky colors; dry sand darkens and cools. Silhouettes of figures and structures stand out.
Common Mistakes
- Flat beige sand: lacks variation. Mix multiple sand tones.
- Brown shadows: look dirty. Use cool violet-gray shadows.
- Texture everywhere: confuses depth. Keep texture in the foreground.
- Ignoring wet sand: the reflective strip adds realism and connects sea and beach.
- Straight shorelines: look rigid. Curve and vary them.
- Overly bright white foam everywhere: foam needs shadows and value variation.
Fat Over Lean in Beach Paintings
Beach paintings often combine thin washes in the sky and sea with thick textured paint in the foreground sand. That is a natural fit for the fat-over-lean rule: keep early layers thin and lean with solvent, and save the thicker, oil-richer paint for the final textured foreground and highlights. Applying thin, solvent-heavy layers on top of thick paint can lead to cracking as the painting dries.
Practice Exercises
- Sand swatches: mix and paint ten sand colors side by side under different skies.
- Wet-to-dry gradient: paint a small strip from dry sand to wet sand to shallow water.
- Dune study: paint a single dune with light and shadow sides and grass.
- Footprint trail: practice footprints receding into the distance.
Beach scenes often feature shells as focal points. Our guide on painting a seashell in oil shows how to render their curves and pearly highlights.
FAQs
What colors do you mix to paint sand in oil?
Start with titanium white and yellow ochre, then adjust with raw sienna, raw umber, a touch of cadmium yellow light for sunlit areas, and small amounts of blue or violet for shadows and wet sand.
How do you paint wet sand?
Wet sand is darker and slightly cooler than dry sand and reflects the sky and objects above it. Paint it with a deeper sand mix and add soft vertical reflections and lighter sky reflections near the water’s edge.
How do you add texture to sand in a painting?
Use scumbling, stippling with a worn brush, palette knife drags and toothbrush spatter in the foreground. Keep the distance smooth for depth.
What color are shadows on sand?
Shadows on sand are usually cool, often blue-gray or violet, because they reflect the sky. Avoid brown or black shadows.
How do you make a beach painting look deep?
Use atmospheric perspective: make distant sand lighter, cooler and smoother, shrink details and footprints as they recede, and curve the shoreline into the distance.
Should I paint the sky or sand first?
Paint the sky first. It sets the light and color temperature for the whole painting, including the sand and the reflections in wet sand.
Final Thoughts
Painting sand and beach scenes in oil is about variation: warm and cool, light and dark, textured and smooth. Mix several sand tones, separate dry from wet sand, paint cool shadows and save texture for the foreground. Those principles turn a flat strip of beige into a beach you can almost feel underfoot.
Looking for your next subject? Explore more oil painting techniques and scene guides to keep improving your coastal paintings and beyond.





2 Comments