Scratch art painting crafts are a delightful way to create colorful designs using simple tools and techniques. Whether you’re a beginner or an experienced artist, this craft is both accessible and rewarding. With a few materials and some creativity, anyone can produce stunning, eye-catching artwork that pops with vibrant color and intricate patterns.
Scratch art is especially popular with children, but adults can enjoy it too. It’s a relaxing and satisfying process, and the results often surprise even the artist. The best part is that you don’t need expensive supplies or advanced skills to get started.
This article will guide you step by step on how to do scratch art painting crafts, covering everything from materials to techniques, creative ideas, and troubleshooting common mistakes. By the end, you’ll feel confident to create your own scratch masterpieces.
What Is Scratch Art?
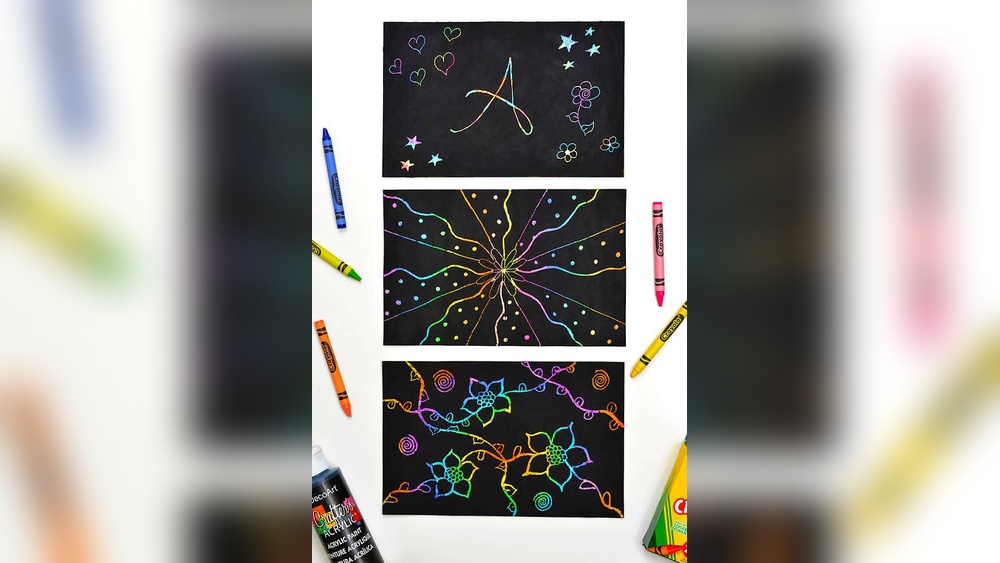
Scratch art is a creative technique where you scratch through a dark top layer to reveal bright colors underneath. The top layer is usually black, while the bottom layer can be a rainbow, metallic, or any color you choose. By using a pointed tool, you can draw lines, shapes, or even complex pictures, making every artwork unique.
This craft first became popular in schools as a children’s activity, but it’s now found in art classes, therapy sessions, and even professional studios. Scratch art is loved for its dramatic contrast and the element of surprise as the hidden colors appear.
Materials You Need For Scratch Art Painting Crafts
To start scratch art, you need only a few basic supplies. Here’s what you’ll need for a classic, homemade scratch art project:
- Thick paper or cardstock (notebook paper is too thin)
- Crayons (preferably waxy and bright)
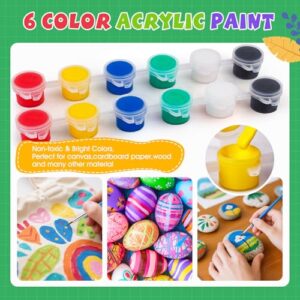
- Acrylic paint or black tempera paint
- Liquid dish soap
- Paintbrush
- Scratch tool (toothpicks, wooden stylus, or even a paperclip)
You can buy premade scratch art sheets, but making your own allows more color control and creativity. If you want to experiment, try using metallic markers, oil pastels, or even gel pens for the bottom layer.
Some people use commercial scratch tools, but household items work just as well. For example, the blunt end of a skewer or an old credit card edge can create interesting effects.

Credit: www.agirlandagluegun.com
Step-by-step Guide: How To Make Your Own Scratch Art
Step 1: Prepare The Base Layer
Start with a piece of thick paper or cardstock. Using bright crayons, color the entire surface. Press hard so the color is rich and waxy. You can use one color, stripes, shapes, or a full rainbow. The more pressure you use, the better the results, as the waxy surface helps the top layer scratch off cleanly.
A common mistake beginners make is not coloring heavily enough. Gaps or light areas won’t look as vibrant when scratched.
Step 2: Mix And Apply The Top Layer
Mix one part dish soap with two parts black acrylic paint in a small bowl. The dish soap helps the paint stick to the waxy crayon layer. Using a wide brush, paint a thick, even layer over your crayon-colored paper. Make sure the entire surface is covered. Allow it to dry completely—this can take 1-2 hours.
You can use other dark colors for the top layer, but black creates the strongest contrast. If you want a metallic look, try gold or silver acrylic paint.
Step 3: Start Scratching Your Design
Once the top layer is dry, use your scratching tool to gently draw on the surface. As you scratch, the black paint will come off, revealing the bright crayon colors underneath. You can draw anything: simple lines, geometric shapes, or detailed pictures.
Don’t press too hard. Light pressure works best and avoids damaging the paper. If you want thin lines, use a toothpick. For wider lines, try the edge of a coin or a popsicle stick.
Step 4: Add Details And Finishing Touches
After your main design appears, you can add more details or clean up rough edges. If you make a mistake, it’s hard to repaint, so work slowly and carefully. For tiny corrections, a black marker can help cover small errors.
When your artwork is finished, you can display it as is, or use it as part of a greeting card, bookmark, or decoration.
Creative Ideas For Scratch Art Painting
Scratch art isn’t just about drawing simple shapes. Here are some ideas to inspire you:
- Silhouettes: Draw city skylines, animal shapes, or tree branches.
- Patterns: Try spirals, zigzags, or repeating dots for a modern look.
- Hidden Messages: Write a secret note or quote that only appears when scratched.
- Seasonal Art: Create holiday cards, Halloween pumpkins, or winter snowflakes.
- Layered Effects: Scratch lightly for gray lines, or harder for bold color.
Some artists use stencils or tape to create clean shapes. You can also combine scratch art with collage, cutting out shapes and gluing them onto other art projects.
Common Mistakes And How To Avoid Them
Even though scratch art is simple, a few common mistakes can ruin the effect. Here’s how to avoid them:
- Not coloring the base layer fully: Always use heavy crayon pressure so the colors are bright and waxy.
- Applying paint too thin or thick: Too thin, and the black scratches off by itself. Too thick, and it cracks or peels.
- Rushing the drying time: Paint must dry completely, or it will smear when scratched.
- Scratching too hard: You may tear the paper or leave deep grooves.
- Using the wrong paper: Thin paper tears easily. Always use cardstock or art paper.
If you notice the black paint won’t scratch off smoothly, it’s often because the base layer wasn’t waxy enough or the paint dried too fast. Try again with more crayon and a slightly thicker paint layer.
Comparing Homemade Vs. Store-bought Scratch Art Kits
Many people wonder if they should buy commercial kits or make their own scratch art. Here’s a quick comparison:
| Feature | Homemade Scratch Art | Store-Bought Kits |
|---|---|---|
| Cost | Very low | Higher |
| Color Options | Fully customizable | Preset colors |
| Convenience | Needs preparation | Ready to use |
| Educational Value | Teaches process | Quick results |
| Results | Unique, personal | Consistent quality |
Homemade scratch art is perfect for classrooms and creative play, while store-bought kits are great for gifts or quick activities. Both can lead to beautiful results.
Advanced Techniques For Scratch Art
If you want to go beyond the basics, try these advanced tips:
- Multi-layer scratch art: Create two or three colored layers, each covered with a different paint color. Scratch through in stages for complex images.
- Textured backgrounds: Before painting, rub a coin under the paper to create textured crayon layers.
- Mixed media: Combine scratch art with watercolor, ink, or collage for a unique effect.
- Reverse scratch: Paint the paper first, then color over it with crayons, and scratch off the crayon to reveal the paint.
- Use of stencils: Lay a stencil on your painted surface and scratch around it for sharp edges.
Experimenting with different tools gives interesting results. For example, wire brushes create fine hair-like lines, while a fork makes parallel grooves.
Scratch Art Painting For Kids Vs. Adults
Scratch art is often seen as a children’s craft, but adults enjoy it just as much. Here’s a comparison of how different age groups use scratch art:
| Aspect | Kids | Adults |
|---|---|---|
| Focus | Fun and discovery | Relaxation, technique |
| Designs | Simple shapes, animals | Detailed scenes, patterns |
| Purpose | Learning, play | Art, stress relief |
| Time Spent | Short sessions | Longer, focused work |
| Tools | Basic (toothpick, stick) | Varied (stylus, brushes) |
Kids benefit from the sensory and visual surprise, while adults find the repetitive scratching soothing. Both age groups can learn and grow from this craft.
Practical Tips For Better Scratch Art Results
To get the best results with scratch art painting crafts, keep these practical tips in mind:
- Choose high-quality crayons for a bright base layer.
- Let the paint dry fully—touch gently to check.
- Use a variety of tools to create different line thicknesses.
- Practice on a small piece before starting your main project.
- If the paint cracks, try adding a bit more dish soap next time.
- For classroom use, pre-cut paper to size and prepare paint mixtures ahead.
- Store finished art flat to prevent smudging.
A non-obvious tip: Try using colored pencils on top of the black paint after scratching. They can add highlights or colored shadows for more depth.
Creative Uses For Finished Scratch Art
Once you finish a scratch art piece, you can use it in many ways:
- Frame it as wall art
- Cut into bookmarks or greeting cards
- Use as a cover for handmade notebooks
- Make ornaments for holidays
- Create a series and display them together
Scratch art makes excellent personalized gifts, especially when you tailor the colors and design to the recipient.

Credit: www.amazon.com
Why Scratch Art Is Great For All Ages
Scratch art is more than just a fun activity—it’s a way to boost creativity and confidence. The process teaches patience, encourages experimentation, and provides instant feedback. For children, it supports fine motor skills and color recognition. For adults, it can reduce stress and offer a break from screens.
Unlike some crafts, scratch art requires minimal cleanup and very little space. It’s portable, inexpensive, and suitable for solo or group projects. No matter your age or skill level, you can enjoy making something beautiful.
If you want to explore more about the history and science of scratch art, the Wikipedia page on scratchboard gives a deeper look at its artistic roots.
Frequently Asked Questions
What Can I Use As A Scratch Tool If I Don’t Have A Stylus?
You can use household items like toothpicks, bamboo skewers, the edge of a paperclip, or even the tip of a ballpoint pen (without ink). Just make sure the tool isn’t too sharp, so you don’t tear the paper.
Why Is My Black Paint Flaking Off In Big Pieces?
This usually happens if the paint layer is too thick or if the dish soap wasn’t mixed in well. Try using a thinner coat of paint and mixing the soap thoroughly. Letting the paint dry slowly also helps prevent cracking.
Can I Use Oil Pastels Instead Of Crayons For The Base Layer?
Yes, oil pastels work well and can give even brighter colors. Just make sure to cover the paper completely, as oil pastels are softer and blend easily. They can sometimes make the top paint layer harder to stick, so adjust the paint-to-soap ratio if needed.
How Do I Fix Mistakes In My Scratch Art?
Small mistakes can be covered using a black permanent marker. For larger areas, carefully repaint with your black paint mixture. Let it dry, then scratch again. Practice on scrap pieces to perfect your technique.
Is Scratch Art Safe For Young Kids?
Yes, scratch art is generally safe. However, supervise young children to ensure they don’t use sharp tools or put small items in their mouths. Use non-toxic paints and crayons for peace of mind.
Scratch art painting crafts offer a world of color, creativity, and surprise. With just a few supplies and a bit of imagination, you can make art that’s as bold and joyful as you are. Try your first project today, and watch the colors come alive under your fingertips.

Credit: www.amazon.com