Painting your own cherry blossom wall art is more than just a craft project—it’s a way to add gentle beauty and a personal touch to your space. Cherry blossoms are admired worldwide, especially in Japan, where they symbolize new beginnings and the fleeting nature of life. Their delicate pink and white flowers look stunning, and painting them can be enjoyable even if you’re not an experienced artist.
You don’t need a degree in fine arts to create a cherry blossom mural that impresses your family and friends. With the right tools, some planning, and simple techniques, anyone can transform a plain wall into a blooming masterpiece. This guide breaks down the entire process, with clear steps, practical tips, and expert insights that beginners often overlook.
Whether you want a bold feature wall or a subtle accent, you’ll find all the advice you need here.
Choosing Your Wall And Design
The first decision is where to paint. Not every wall works equally well for cherry blossom art. Picking the right spot will make your mural stand out.
Finding The Right Wall
- Visibility: Pick a wall that people will see often, like in a living room, bedroom, or hallway.
- Space: Make sure the wall is large enough for your design. Smaller walls suit simple branches, while bigger walls allow for a full tree.
- Light: Good lighting helps colors pop. Avoid walls in very dark areas.
- Surface: Smooth, clean walls are best. Bumpy or textured walls make painting details harder.
Planning Your Design
Before you start, decide if you want a realistic cherry blossom tree, a stylized branch, or scattered blossoms. Search for reference images online or sketch your own ideas. You can paint a single branch curving over your bed, or fill an entire wall with blossoms blowing in the wind.
One non-obvious tip: Place your design so it works with your furniture. For example, a branch above a sofa can frame your seating area beautifully.
Gathering Materials And Tools
Having the right materials makes painting much easier and more enjoyable. Here’s what you’ll need for most cherry blossom wall murals:
| Material | Purpose | Tips |
|---|---|---|
| Wall Paint (Acrylic/Latex) | Background and branches | Matte finish works best |
| Artist Acrylics or Craft Paint | Blossoms and details | Pick pinks, whites, reds |
| Brushes (variety) | Different shapes and sizes | Include fine and round brushes |
| Sponge or Cotton Swabs | Texturing blossoms | Helps create natural petal shapes |
| Pencil and Eraser | Sketching outlines | Use light lines that erase easily |
| Painter’s Tape | Protects edges | For sharp design borders |
| Drop Cloth | Protects floor | Essential for messy projects |
| Palette/Disposable Plate | Mixing colors | Helps create soft color variations |
Don’t forget water and paper towels for cleaning brushes. If you want to try a spray effect for extra texture, buy a small spray bottle too.
Preparing The Wall
Many beginners skip preparation, but it’s a key step for a clean, lasting mural.
Cleaning And Priming
Wipe down the wall with a damp cloth to remove dust and grease. If the wall is very glossy, lightly sand it so the paint sticks better. For dark or uneven walls, apply a coat of white or light-colored primer.
This makes your cherry blossom colors brighter and more accurate.
Marking Your Design
Use a pencil to lightly sketch your branches and main areas for blossoms. Don’t worry about being perfect—nature is never exactly symmetrical! Painter’s tape can help mark borders or protect baseboards.
A helpful trick: Step back often while sketching. This helps you see the big picture and avoid lopsided designs.
Creating The Background
The background sets the mood for your cherry blossom mural. You can keep it simple or add depth with color blending.
Simple Background
Paint the wall a single, solid color—soft blue, pale gray, or creamy white are popular choices. Use a roller for large areas and a brush for edges.
Blended Or Ombre Effect
For a more artistic background, blend two or three colors together. For example, fade from pale blue at the top to white at the bottom to mimic a sky. Blend colors while the paint is still wet, using a wide brush or a sponge.
A non-obvious insight: An ombre background makes your branches and flowers look more three-dimensional without extra effort.
Let the background dry completely before adding details.

Credit: feelingnifty.com
Painting The Branches
Branches are the backbone of your artwork. They should look natural, not stiff.
Choosing Colors
Mix different shades of brown—add touches of black, gray, or even blue for realism. Avoid using just one flat color.
Technique For Branches
- Start with the largest branch using a medium brush.
- Branches should start thick near the trunk and become thinner toward the ends.
- Add smaller side branches, letting them curve and split naturally.
For fine twigs, switch to a small round brush. Use your wrist, not your whole arm, for smooth, flowing lines.
| Technique | Result | When to Use |
|---|---|---|
| Wet-on-wet | Softer, blended lines | Background branches |
| Wet-on-dry | Sharper, crisp edges | Foreground branches |
| Dry brush | Textured bark effect | Adding realism |
Let the branches dry before moving to the blossoms.
Painting Cherry Blossoms
This is the most fun and rewarding part. Cherry blossoms are small but have a big impact.
Blossom Colors
Mix shades of pink, white, and a little red. Real cherry blossoms often have darker centers and lighter edges.
Petal Techniques
- Round Brush: Use the tip to dab five small petals in a circle.
- Sponge or Cotton Swab: Press gently to create soft, irregular petals.
- Layering: Add white highlights on top of pink for depth.
Don’t paint every blossom the same. Vary the size, shape, and direction for a natural look. Some petals can even “fall” off the branch for movement.
Placement Tips
- Clusters of 3–5 blossoms look more realistic than single flowers.
- Space them unevenly—nature is random.
- Add a few small buds for extra detail.
If you want a looser style, flick paint off a loaded brush for a petal scatter effect (cover the floor before trying this! ).
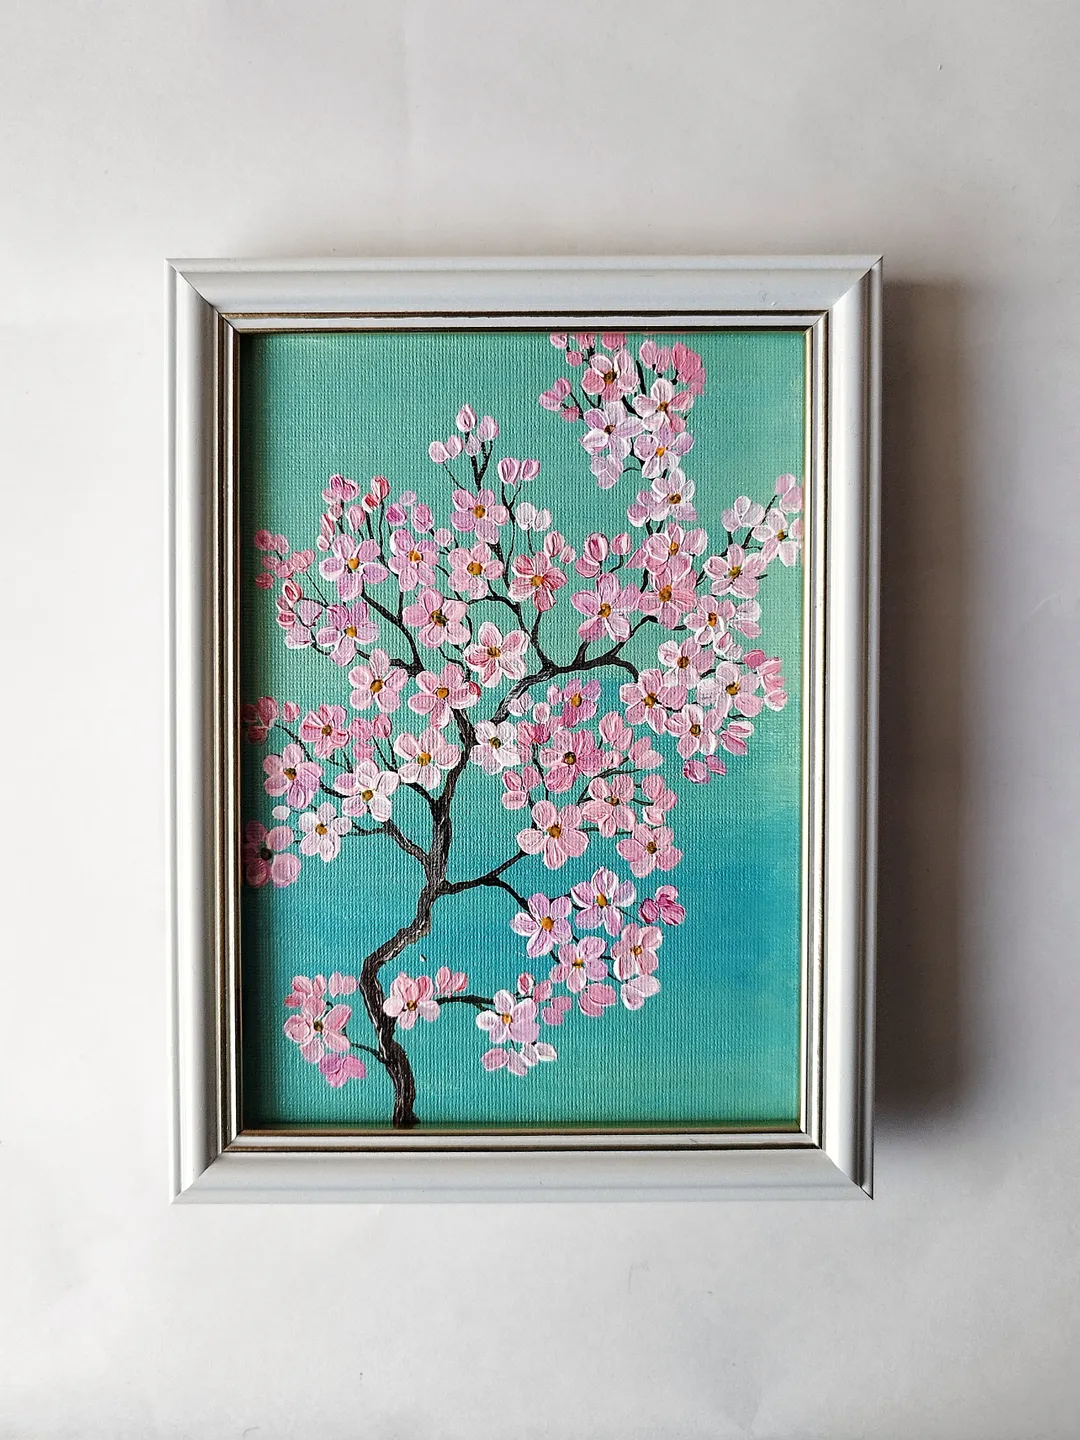
Credit: ballwool.com
Adding Details And Finishing Touches
The final details make your mural look professional.
Shadows And Highlights
Use a very light touch to add gray or pale blue shadows under branches and blossoms. This creates depth and helps your art “pop. ”
Add white or pale yellow dots to some blossom centers for extra sparkle.
Optional Elements
Some people add birds, butterflies, or even a moon. If you do, sketch them lightly first and use soft colors so they don’t steal attention from the blossoms.
Cleaning Up
Remove painter’s tape before the paint fully dries to avoid peeling. Touch up any stray marks with a small brush.
Step back and view your mural from a distance. Make small adjustments as needed.
Maintenance And Longevity
To keep your cherry blossom wall art looking fresh:
- Dust gently with a dry, soft cloth.
- Avoid harsh cleaners—use a damp cloth for spot cleaning.
- If the wall gets chipped, patch it with a small brush and matching paint.
A little care helps your art last for years.

Credit: www.joannaperrymurals.co.uk
Common Mistakes And How To Avoid Them
Even careful artists can make mistakes. Here’s what to watch for:
- Skipping prep: Not cleaning or priming the wall can cause peeling paint.
- Using only one color: Flat colors look fake—mix shades for realism.
- Perfect symmetry: Real branches and blossoms are random. Avoid making everything even.
- Rushing: Let each layer dry before adding more, or colors may smudge.
- Ignoring the room’s style: Make sure your mural matches your furniture and decor.
If you make a mistake, let it dry and paint over it. Most errors can be fixed easily.
Creative Variations And Advanced Ideas
Once you master the basics, try these ideas:
- Metallic accents: Add gold or silver highlights for a modern touch.
- Textured petals: Use modeling paste for 3D blossoms.
- Seasonal backgrounds: Try a sunset, misty gray, or even soft green for a spring effect.
- Glow-in-the-dark paint: For a magical night look.
For more advanced tips, explore resources from art communities like WikiHow.
Frequently Asked Questions
What Kind Of Paint Is Best For Cherry Blossom Wall Art?
Acrylic or latex wall paint is ideal for backgrounds and branches. For blossoms and small details, artist-quality acrylic paints give the best color and coverage. These paints dry quickly and are easy to clean up with water.
How Long Does It Take To Finish A Cherry Blossom Wall Mural?
Most murals take 1–2 days from start to finish, depending on the size and complexity. Allow a few hours for background drying, then another few hours for branches and blossoms. Add more time for detailed designs or drying between layers.
Can I Paint Cherry Blossoms On A Textured Wall?
Yes, but it’s more challenging. Details may look uneven or blurry on rough surfaces. Use thicker paint and larger blossoms for better results, or consider smoothing the wall first for a cleaner look.
How Do I Fix Mistakes In My Mural?
Let the mistake dry completely, then paint over it with background color. Once dry, add the correct details on top. Most errors disappear with a little patience and layering.
Do I Need To Seal My Wall Mural?
Sealing is optional for indoor murals. If your wall art is in a high-traffic area or a humid room (like a bathroom), use a clear, matte acrylic sealer for extra protection. Test the sealer first to make sure it doesn’t change the paint color.
Painting a cherry blossom wall art isn’t just about following steps—it’s about capturing a feeling and making your space special. With patience and creativity, anyone can turn a blank wall into a work of art that brightens every day. If you take your time and enjoy the process, you’ll be amazed at what you can create.