Cherry blossom paintings have a reputation for being delicate and difficult, but the classic look is built from just two elements: a dark, twisting branch and clusters of soft pink five-petal flowers. Get the contrast between those two right and the rest falls into place.
This tutorial shows how to paint cherry blossom wall art in acrylic, including three blossom techniques (brushwork, cotton swab, and sponge), branch structure, color mixes for natural pinks, and layout ideas for single canvases and sets.
Quick answer: To paint cherry blossom wall art, paint a pale background, then add a dark brown or near-black branch that tapers and forks as it moves across the canvas. Dab clusters of blossoms along the branches using several pinks, from deep rose to almost white, placing darker pinks first and lighter ones on top. Finish with tiny dark-pink or yellow centers and a few falling petals.
The Design Logic of Cherry Blossom Art
Cherry blossom imagery draws heavily on East Asian painting traditions, especially Japanese sakura motifs, where empty space is part of the composition rather than something to fill. A well-composed piece usually has a branch entering from one side or corner, flowers concentrated along part of the branch, and a large open area of background.
The visual interest comes from contrast. Dark, angular branches set off soft, rounded blossoms. Clusters vary in density, with some areas packed and others showing only a few buds. If you treat every inch of branch the same, the painting loses its rhythm.
Materials for Cherry Blossom Painting
- Canvas: A primed canvas around 12 x 24 inches (horizontal) or 16 x 20 inches. Long horizontal canvases suit sweeping branches.
- Acrylic paints: Titanium white, quinacridone magenta or a cool pink, cadmium red or a warm red, burnt umber, mars black or Payne’s gray, ultramarine blue, and a yellow for flower centers.
- Brushes: 1-inch flat for background, size 4 round and size 0 liner for branches, a size 6 filbert or round for petals.
- Blossom tools: Cotton swabs bundled with a rubber band, a small makeup sponge, or a stiff stencil brush.
- Extras: Palette, water, paper towels, spray bottle, pencil or chalk, and varnish.
Pinks are one of the hardest colors to mix with weak paint, because adding white to low-pigment red quickly turns it chalky. For guidance on paints that hold rich, clean pinks on canvas, see our overview of the best acrylic and craft paints for wall art.
Background Options
| Background | Effect | Mix |
|---|---|---|
| Soft blue sky | Spring daylight, fresh | White + small amount of ultramarine, gradated lighter toward the bottom |
| Warm cream | Traditional, scroll-like | White + a touch of yellow ochre |
| Pale gray | Modern, minimal | White + a speck of black and blue |
| Sunset gradient | Dramatic, romantic | Peach at bottom, pink in middle, lavender at top |
| Deep navy or black | Bold, nighttime | Ultramarine + burnt umber, or black + blue |
Dark backgrounds make blossoms glow but require more opaque pinks or a white undercoat beneath each flower.
How to Paint a Cherry Blossom Wall Art: Step by Step
- Paint the background. Apply your background color in two coats. For a gradient, start with the lightest color at one end and the darker at the other, then blend where they meet while both are wet, spritzing with water to extend working time. Let it dry completely, about 30 to 60 minutes.
- Plan the branch. Use chalk or a light pencil to draw the main branch entering from a corner or side, sweeping across about two-thirds of the canvas. Draw it thicker where it enters and thinner as it extends.
- Add secondary branches. From the main branch, draw smaller branches that fork off at angles. Each fork should be thinner than the branch it grows from. Think of the letter Y repeating at smaller scales.
- Paint the branches. Mix burnt umber with a little black or Payne’s gray. Using the size 4 round, paint the main branch with varied pressure: press harder at the thick end and lift as you go. Switch to the liner for thin twigs. Allow wobbles and small bumps, which look natural.
- Add bark texture. While the branch is still damp, drag a slightly lighter brown (umber plus white) along one side to suggest light, and add a few small horizontal marks, which mimic the lenticels typical of cherry bark.
- Mix your pinks. Prepare at least three values: a deep pink (magenta plus a little red), a mid pink (deep pink plus white), and a pale pink (mostly white with a touch of mid pink). Keep pure white nearby too.
- Place the darkest blossoms. Using a bundle of cotton swabs, a sponge, or the tip of a round brush, dab the deep pink in clusters along the branches. Concentrate clusters near forks and along the upper edges of branches.
- Layer mid and light pinks. Before the deep pink fully dries, dab mid pink over and around it, then pale pink on top of that. Leave some deep pink showing for depth. Add a few pure white dabs on the side facing the light.
- Paint a few defined flowers. In foreground clusters, paint three to five clearly shaped blossoms with five rounded petals using the filbert. Each petal can have a tiny notch at its tip, which is typical of cherry blossoms.
- Add centers and stamens. With the liner brush, add a dark pink or red dot in the middle of defined flowers and a few thin lines radiating out, tipped with tiny yellow dots.
- Add buds and falling petals. Place small closed buds at twig ends in deep pink. Scatter four to eight single petals drifting below the branch, angled as if falling.
- Varnish. Let the piece cure at least 24 hours, then apply a satin or matte acrylic varnish.
Three Ways to Paint the Blossoms
Cotton Swab Method
Bundle five to seven cotton swabs with a rubber band. Dip the ends in paint and press onto the canvas to make a flower-like cluster in one stamp. This method is fast, consistent, and ideal for beginners or kids. Use a separate bundle for each pink to keep colors clean.
Sponge Method
Tear a makeup sponge into an irregular shape and dab lightly. Sponges create soft, cloudy clusters that read as dense blossoms from a distance. This works well for large canvases where you need to cover lots of area quickly.
Brushwork Method
Paint each petal individually with a filbert or round brush, pressing down then lifting to form a teardrop. This method takes the longest but gives the most refined result. Most finished pieces combine all three: sponge or swab for distant masses and brushwork for a few focal flowers.
Composition Tips for a Balanced Piece
- Use the rule of thirds. Place the densest blossom cluster near one of the intersections that divide the canvas into thirds.
- Vary cluster size. Mix large clusters, small clusters, and isolated buds. Odd numbers of clusters often feel more natural.
- Let branches exit the canvas. A branch that runs off the edge suggests a bigger tree beyond the frame.
- Keep negative space. Leave at least a third of the canvas open, especially on the side opposite the branch entry.
- Overlap. Let some blossoms overlap the branch and others sit behind it. Overlap is one of the simplest ways to create depth.
Color Mixing for Natural Pink Blossoms
Real cherry blossoms range from almost white with a hint of pink to deep rose, depending on variety and age. Somei-yoshino blossoms, common in many US cherry tree plantings, are generally very pale pink, while some ornamental varieties are much deeper.
For realistic petals, lean cool: magenta-based pinks look more like natural blossoms than orange-red-based pinks, which can drift toward salmon. Adding a tiny touch of the background blue to the shadow pink helps petals sit naturally in the scene. Keep the lightest pinks warm and the shadow pinks cooler for a subtle sense of sunlight.
Wall Art Layout Ideas
| Format | Size Idea | Design Approach |
|---|---|---|
| Single horizontal | 12 x 36 in | One long branch across the full width, blossoms concentrated on one side |
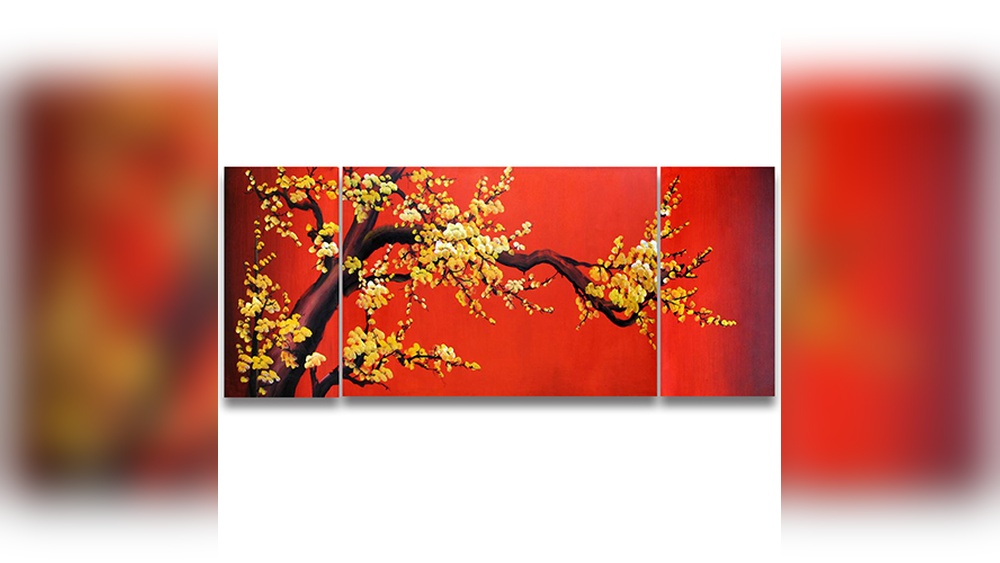
| Triptych | Three 12 x 16 in | One branch continuing across all three panels with small gaps |
| Square pair | Two 12 x 12 in | Mirror-image branches entering from opposite corners |
| Tall vertical | 16 x 40 in | Branch hanging down from the top edge, like a weeping cherry |
For a triptych, paint all three canvases side by side on a table so the branch lines connect accurately. Mark the branch path across all three in pencil before painting anything.
Common Mistakes and How to Avoid Them
Branch looks like a straight stick. Real branches zigzag. Change direction slightly at each fork and vary thickness along the length.
Blossoms in a single flat pink. One color makes clusters look like blobs. Always use at least three values plus white.
Blossoms evenly spread. Uniform spacing looks artificial. Cluster tightly in some areas and leave bare branch in others.
Muddy pinks. Layering wet pink into wet brown branch paint mixes them. Let the branch dry before adding blossoms that overlap it.
Too many falling petals. A handful suggests a breeze; dozens look like confetti. Keep them few and varied in angle.
Tips by Skill Level
New painters: Use a pale solid background and the cotton swab method only. Paint one main branch with two or three forks, and aim for five to seven blossom clusters. Your goal is a confident branch and layered pinks, not individual petals.
Intermediate painters: Add a soft gradient sky and combine sponge clusters with a handful of brushwork flowers in the foreground. Try pushing some background clusters back by mixing a little of the sky color into their pinks, which makes them recede.
Experienced painters: Experiment with a loose, ink-wash style branch using thinned acrylic or fluid acrylic, letting the paint pool and dry with natural texture. Paint blossoms in transparent glazes so overlapping petals create deeper pinks, similar to the layered look of watercolor.
Pairing Cherry Blossoms With Other Decor
Cherry blossom pieces suit bedrooms, entryways, and Asian-inspired or Japandi interiors. Light-wood frames or frameless gallery-wrapped canvases with painted edges keep the look airy. For a nature-themed grouping, soft textural subjects like the pampas grass wall art project complement blossoms without competing for attention.
FAQs
What is the easiest way to paint cherry blossoms?
The cotton swab method is easiest. Bundle several swabs, dip them in pink, and stamp clusters along the branch. Layer darker pinks first and lighter pinks on top for instant depth.
What colors do I need for cherry blossom painting?
Titanium white, a magenta or cool pink, a red, burnt umber, and black or Payne’s gray handle blossoms and branches. Add a blue for the sky and a yellow for flower centers.
How do I paint a realistic cherry blossom branch?
Start thick where the branch enters the canvas and taper as it extends, forking into progressively thinner twigs. Change direction slightly at each fork, add a lighter edge for light, and place small horizontal bark marks.
Can I paint cherry blossoms on a dark background?
Yes. Dark navy or black backgrounds make blossoms vivid. Underpaint each cluster with white first so the pinks stay bright, and use opaque paint rather than transparent pinks.
How many petals does a cherry blossom have?
Most common cherry blossoms have five petals, often with a small notch at the tip. Some ornamental varieties are double-flowered with many more petals, which look fuller and rounder.
How long does a cherry blossom painting take?
A medium canvas usually takes two to three hours of painting, plus drying time for the background and branches. Detailed brushwork blossoms or triptychs can take longer.
Final Thoughts
Cherry blossom wall art is about rhythm: dark against light, dense against sparse, angular against soft. Paint a confident branch, build blossoms in layers of pink, and protect the open space around them. Once you have the method down, you can adapt it to any size or color scheme.
Good pigment makes the difference between fresh pink petals and chalky ones. Before starting your next canvas, look through our recommendations for paints that keep colors rich on decor canvases and choose a set that matches your project size.