
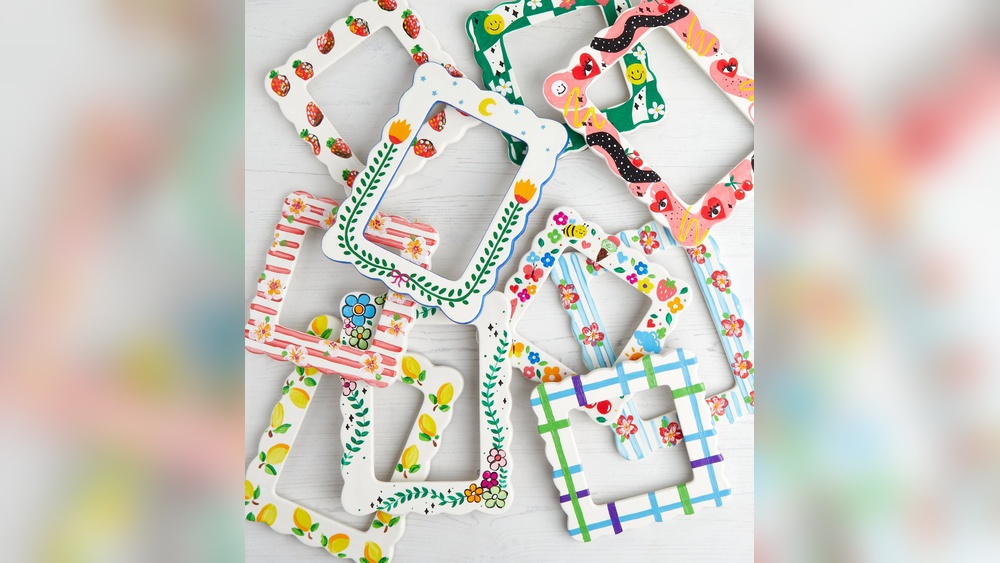
Quick answer: To paint a picture frame, remove the glass and backing, clean the frame, lightly sand any glossy finish, and apply a primer suited to the material. Paint with two thin coats of acrylic or chalk-style paint using a small brush for the moldings, let it dry fully, then seal with a clear coat. Spray paint works well for ornate frames, and simple accents like gilded edges or distressing give a custom look.
Thrift-store frames are some of the cheapest blank canvases you can buy, and a coat of paint can turn a dated gold plastic frame into something that looks custom-made. The tricky part is that frames come in wood, plastic, metal and composite, often with carved detail, so a few material-specific tips make a big difference.
Here is how to paint a picture frame from start to finish, with ideas for decorative finishes, tips for kids’ projects, and advice on framing and displaying canvas paintings. If you are turning frame painting into a family craft session, our picks of beginner-friendly paint kits for children include sets with the small brushes these projects need.
What You Need
- Picture frame (wood, MDF, plastic, resin or metal)
- Screwdriver or pliers to remove backing clips
- Mild soap, water and a soft cloth; rubbing alcohol for plastic and metal
- Sanding sponge (180 to 220 grit)
- Primer: water-based primer or acrylic gesso for wood, bonding primer for plastic and metal
- Paint: acrylic craft paint, chalk-style paint, or spray paint
- Brushes: 1/2-inch flat, small round, a stiff stencil brush for crevices
- Painter’s tape
- Clear sealer (matte, satin or gloss)
- Optional: metallic paint, gilding wax, stencils, paint pens
How to Paint a Picture Frame: Step-by-Step
Step 1: Take the frame apart
Remove the backing board, any mat and the glass or acrylic glazing. Set the glass aside somewhere safe. Painting with glass in place almost always results in paint on the glass edge and a frame that cannot be reassembled cleanly.
Step 2: Clean the surface
Wipe the frame with a damp, soapy cloth to remove dust and grime, then let it dry. Plastic and metal frames benefit from a final wipe with rubbing alcohol to remove the release agents and oils that cause paint to peel.
Step 3: Scuff glossy finishes
Lightly sand shiny surfaces with a fine sanding sponge, which bends into curved moldings better than flat paper. You only need to dull the sheen. Wipe off the dust with a damp cloth or tack cloth.
Step 4: Prime
Primer is the step that most often decides whether paint lasts. Use acrylic gesso or a water-based primer on raw wood and MDF. Use a bonding primer on plastic, resin and metal. For dark frames you plan to paint light colors, a white primer cuts the number of top coats you need.
Spray primer is the easiest option for ornate frames because it reaches into carvings without pooling. Use it outdoors or in a ventilated area.
Step 5: Paint thin coats
Lay the frame flat on a few cups or blocks so the edges do not stick to your work surface. Paint the inner edge first, then the outer edge, then the face. This sequence lets you catch drips that roll onto the front.
Use a small round brush to work paint into recesses, then smooth the flat areas with a flat brush in the direction of the molding. Two thin coats with about an hour between them usually give even coverage.
Step 6: Add a decorative finish
Once the base coat is dry, add any accents: metallic highlights, distressing, dry brushing or stenciled patterns. Ideas are in the next section.
Step 7: Seal
A clear coat protects the finish from fingerprints and scuffs during handling. Two light coats of spray sealer give the smoothest result. Let the sealer cure for 24 hours before reassembling, otherwise the backing or glass can stick to slightly soft paint.
Step 8: Reassemble
Clean the glass, replace the mat and artwork, and refit the backing. If the clips are worn, framing points or turn buttons are inexpensive replacements.
Picture Frame Painting Ideas and Finishes
Solid modern color
Matte black, white, navy or sage green frames look clean and gallery-like. Use spray paint for a flawless finish, especially on ornate frames, and seal with a matte clear coat.
Dry-brushed texture
Paint the frame a dark base color. Dip a dry, stiff brush in a lighter color, wipe almost all of it off on a paper towel, and lightly sweep it across the raised details. The highlights pick out carving and make cheap resin frames look like aged wood.
Gilded edges
Rub gilding wax or metallic paint along only the outer lip or the inner edge. A little gold on a black or deep green frame looks elegant without being flashy.
Vintage gesso picture frame look
Antique frames were often built up with layers of gesso, carved or molded, then gilded. You can imitate the worn effect: paint the frame with a warm red-brown or ochre base (mimicking traditional bole), apply gold paint on top, let it dry, then gently sand the high points so the base shows through. A wash of thinned brown paint wiped into the recesses ages the piece further.
Distressed farmhouse
Use chalk-style paint over a dark base or bare wood, then sand the corners and edges to reveal what lies beneath. Finish with clear wax.
Patterned and painted designs
Stripes, polka dots, florals and geometric shapes are great for kids’ rooms and playful decor. Dot patterns in particular are easy and forgiving; for technique, see our DIY dot painting guide.
Ombre frame
Blend from a dark color at the bottom to a light one at the top. Work while the paint is wet and use a damp brush to soften transitions.
Material-Specific Tips
| Frame material | Prep | Primer | Watch out for |
|---|---|---|---|
| Raw wood | Light sand with the grain | Water-based primer or gesso | Grain raising; sand lightly after primer |
| Finished wood | Scuff sand, clean | Bonding primer if glossy | Old wax or polish causing fisheyes |
| MDF | Seal edges lightly | Water-based primer | Edges swelling if paint is too wet |
| Plastic or resin | Alcohol wipe, scuff | Plastic bonding primer | Paint scratching off without primer |
| Metal | Degrease, remove rust | Metal primer | Flaking on slick aluminum |
Painting a Picture Frame With Kids
Unfinished wooden frames from craft stores are ideal for children. They are already raw wood, so no sanding is needed and paint soaks in nicely. A few tips:
- Pre-prime frames with white gesso so colors pop and kids get faster results.
- Offer paint pens and foam stamps alongside brushes for younger children.
- Let kids decorate with simple shapes, names, handprints or patterns.
- Add glued-on embellishments such as buttons or pressed flowers after the paint dries.
- Seal the finished frame yourself with a spray clear coat outdoors.
Painted frames pair well with other small craft projects. If the kids enjoy this, a painted string art project is another good weekend activity.
How to Frame a Canvas Painting DIY
Once you have painted a frame, you may want to use it for your own artwork. Stretched canvases need a different approach than paper prints because they are thick and have no glass.
Frame a canvas painting tips
- Measure the canvas edges exactly, including depth. Standard canvases are often 3/4 inch or 1 1/2 inches deep.
- Choose a frame with a deep rabbet (the recessed lip on the back) or use a floater frame, which leaves a small gap around the canvas so it appears to float.
- Use offset clips to hold the canvas in a regular frame when the canvas is deeper than the rabbet.
- Skip the glass for acrylic and oil paintings on canvas; they need air and are usually varnished instead.
- Let paintings dry fully before framing. Oil paintings in particular can take weeks or months to be touch-dry throughout.
Simple DIY floater frame
Cut four strips of 1×2 or similar lumber to fit around the canvas with about a 1/4-inch gap on each side. Join them into a rectangle with wood glue and brad nails, paint the frame, then attach the canvas from behind using small screws through spacer blocks. The painted frame and gap give the painting a polished, gallery look.
Displaying Frames: Easels and Easel Backs
Not every frame needs to hang on the wall. Small frames look great on shelves and desks with a stand.
Easel back for picture frame
Many tabletop frames come with a fold-out easel back. If yours does not, you can buy adhesive or screw-on easel backs from craft and frame shops. Make sure the size matches the frame so it does not tip forward.
Picture frame display easel
Small decorative easels in wood or metal can hold painted frames on a mantel or bookshelf. Choose an easel that is about two-thirds the height of the frame for good balance. For larger frames, a sturdier display easel keeps things stable.
Painting on a Glass Frame Tips
Some people paint on the frame glass itself for a faux stained-glass or lettered effect. A few tips if you try this:
- Clean the glass with rubbing alcohol first.
- Use glass paint or paint pens made for glass.
- Paint on the back side of the glass so the design faces outward under protection.
- Remember that designs painted on the back read in reverse, so letters must be painted mirror-image.
- Follow the paint’s curing instructions before reassembling.
Building a Gallery Wall of Painted Frames
Painted thrift frames are an affordable way to build a cohesive gallery wall from mismatched pieces. Painting unifies frames that differ in shape, size and style.
- Pick one unifying color such as all black or all white, and let the frame shapes provide variety.
- Or choose a limited palette of three related colors, such as navy, brass and cream, and spread them evenly across the arrangement.
- Plan on the floor first. Lay out the frames on paper, trace each one, and tape the paper templates to the wall to test spacing before drilling.
- Keep spacing consistent. Gaps of about 2 to 3 inches between frames look intentional.
- Anchor with a large piece. Place the biggest frame slightly off-center and build around it.
For kids’ artwork, painted frames with swappable backs let you rotate new pieces in without repainting.
Common Mistakes
- Painting with the glass still in the frame.
- Skipping primer on plastic frames, then watching the paint scratch off.
- Letting thick paint pool in carved recesses, which hides the detail you want to show.
- Reassembling before the paint and sealer are cured, causing sticking.
- Painting the back rabbet heavily so the artwork no longer fits.
FAQs
What kind of paint do you use on picture frames?
Acrylic craft paint, chalk-style paint and spray paint all work. Acrylic and chalk paint are easy for detailed hand-painted designs, while spray paint gives the smoothest coverage on ornate frames. Use a primer suited to the frame material first.
Can you paint a plastic picture frame?
Yes. Clean it with rubbing alcohol, scuff lightly, and use a primer made for plastic. Without primer, paint tends to chip and peel quickly.
Do I need to sand a frame before painting?
Raw wood frames need little or no sanding. Glossy finished wood, plastic and metal frames should be scuffed lightly so primer and paint can grip.
How do you make a cheap frame look expensive?
Choose a rich matte color, add a thin gilded edge, or use a dry-brushed or aged gesso finish that picks out the details. A wider mat inside the frame also makes art look more professional.
How long should a painted frame dry before using it?
Most acrylic paint is dry to the touch within an hour, but allow about 24 hours after the final sealer coat before reassembling so nothing sticks.
How do you frame a canvas painting without glass?
Use a deep-rabbet frame with offset clips or a floater frame. Canvas paintings are typically varnished rather than glazed, so glass is not needed.
Next Step
Painting a picture frame is quick, cheap and forgiving once you remove the glass, prime correctly for the material and keep coats thin. Accents like dry brushing, gilding or a vintage gesso effect take a basic frame to something that looks bespoke.
If you are planning a frame-painting session with children, the right supplies make it far more enjoyable. Browse our guide to the best DIY paint kits for kids for sets with bright colors and brushes suited to small frames.




