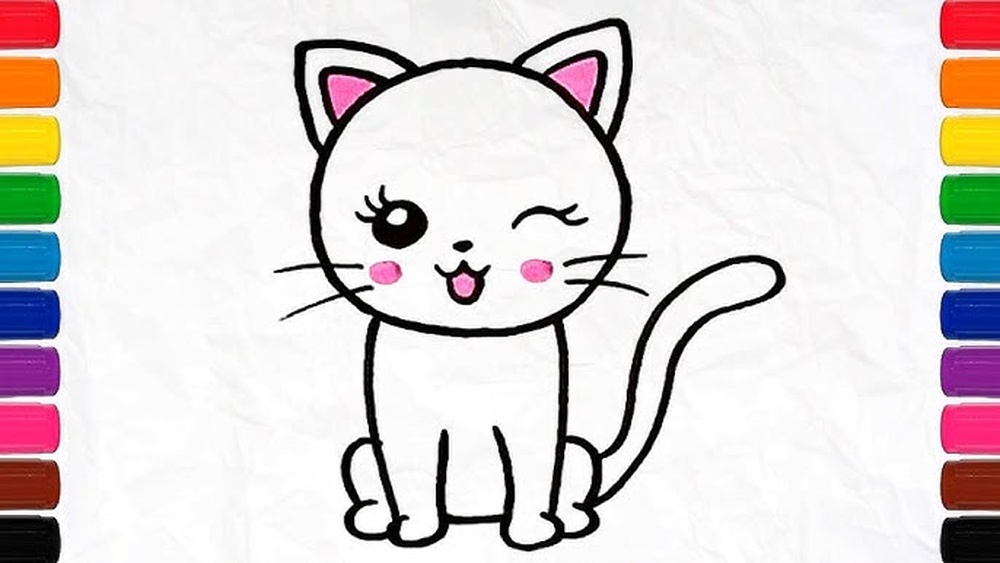
Quick answer: Here is how to paint a cat for kids the easy way: build the whole animal from shapes: a big oval body, a circle head sitting on top, two triangle ears, and a long curved tail. Paint those shapes in one flat color, let them dry for about 10 to 15 minutes, then add eyes, a triangle nose, whiskers and stripes with a small brush or a cotton swab. Washable tempera or student acrylic on thick paper or a small canvas panel works best, and the whole project fits into a 45-minute session for most kids aged 4 and up.
A cat is one of the friendliest first animals a child can paint. Nearly every kid has seen one, the basic outline is just a few shapes stacked together, and even a wobbly version still reads as a cat once the ears and whiskers go on. That instant payoff is what keeps young painters going.
This guide shows how to paint a cat for kids easy enough for a preschooler to follow with help, yet open-ended enough that an 8-year-old can add patterns, a background and a personality. You will find a supply list, a shape-by-shape method, three cat styles to choose from, age-specific tips and fixes for the problems that usually come up halfway through.
Why a Cat Is One of the Easy Things to Paint for Kids
Kids can paint almost anything, but some subjects set them up to win. A cat has three qualities that make it a strong starter.
- It breaks into simple shapes. Circles, ovals and triangles are shapes most children can already draw by age 4 or 5. Stack them in the right order and a cat appears.
- Any color works. Real cats come in orange, gray, black, white, cream and calico patches. A purple cat is also completely acceptable. There is no “wrong” color to fret over.
- The face does most of the work. Two eyes, a nose and six whiskers carry the identity of the animal. If the body is lopsided, the face still tells everyone what it is.
If your child enjoys this project, the same shape-first approach powers most beginner animal paintings. The broader guide to fun painting techniques and projects for kids covers how to keep that momentum going with new subjects, tools and textures.
What You Need Before You Start
Set everything out before the brush gets wet. Young kids lose interest quickly if they have to wait while an adult hunts for a paper towel.
| Item | Why it matters | Easy swap |
|---|---|---|
| Thick paper (heavy drawing or mixed-media paper) or a small canvas panel, about 8×10 inches | Thin printer paper buckles and tears when wet | Cut a cereal box panel and paint the plain gray side |
| Washable tempera or student-grade acrylic | Bright, opaque color that covers in one coat | Poster paint |
| One medium flat brush (about 1/2 inch) | Fills the body and background quickly | A foam brush |
| One small round brush | Eyes, nose, whiskers and stripes | Cotton swabs for dots, a toothpick for whiskers |
| Pencil and eraser | Light sketch of shapes first | Chalk on dark paper |
| Water cup, paper towels, paper plate palette | Clean brushes and mix colors | An egg carton palette |
| Smock or old shirt, covered table | Protects clothes and furniture | A trash bag with arm holes |
Pick a body color plus black, white and pink. That four-color palette covers almost every cat. Add a background color if your child wants one, such as light blue, yellow or green.
How to Paint a Cat for Kids Easy: Step-by-Step
The steps below follow the order that keeps colors from smearing into each other. Each step lists roughly how long it takes so you can plan breaks.
Step 1: Sketch the shapes lightly (5 minutes)
Have your child draw a large oval near the bottom half of the paper. This is the body. Then draw a circle on top of it, overlapping the oval slightly. The circle should be a bit more than half the width of the oval. Point out that a big head makes a cat look cute and cartoon-like.
Add two triangles on top of the circle for ears, one near each side. Finish with a long, curving line from the side of the oval for the tail. Remind kids to press lightly; heavy pencil lines can show through light paint.
Step 2: Paint the background first (5 to 8 minutes)
If your child wants a background, paint it now and paint carefully around the cat, or paint right over the pencil lines and let it dry completely before moving on. Painting the background first avoids the common problem of a blue sky bleeding into an orange cat.
For younger kids, a simpler option is to skip the background entirely and let the white paper act as the scene. You can always add a floor line or a sun later.
Step 3: Fill in the body, head, ears and tail (8 to 10 minutes)
Load the flat brush with the main cat color and fill the oval first, then the circle, then the ears and tail. Encourage smooth strokes that follow the shape, around and around like tracing a racetrack. Small kids often scrub with the brush; show them how to lay the paint down gently instead.
Thin, streaky spots are fine. If the paint looks see-through, wait a few minutes and add a second coat.
Step 4: Let it dry (10 to 15 minutes)
This is the step that makes or breaks the face. Tempera and student acrylic usually feel dry to the touch in 10 to 20 minutes, depending on thickness and room humidity. A hair dryer on a cool or low setting held about a foot away speeds this up. Use the wait to talk about what kind of cat it will be: sleepy, grumpy, surprised, silly.
Step 5: Add inner ears and the nose (3 minutes)
Paint a smaller pink triangle inside each ear. Then paint a small upside-down pink triangle in the center of the face, slightly below the middle of the circle. That position leaves room for the eyes above it.
Step 6: Paint the eyes (5 minutes)
Two approaches work well, depending on age:
- Dot eyes (ages 3 to 5): Dip a cotton swab or the back end of a brush handle in black and press two dots above the nose. Fast and nearly impossible to mess up.
- Big round eyes (ages 6 and up): Paint two white or green circles, let them dry for a few minutes, then add a black oval or vertical slit in the center. Finish with a tiny white dot in each pupil. That small white highlight makes the eyes look shiny and alive.
Step 7: Mouth and whiskers (3 minutes)
Under the nose, paint a short line straight down, then a curved “w” shape on either side, like a tiny smile. For whiskers, use the small round brush or a toothpick dipped in black or white paint. Pull three lines out from each cheek, flicking the brush outward so the lines get thinner at the ends.
On a dark cat, white whiskers stand out better than black ones.
Step 8: Stripes, patches and paws (5 minutes)
Use a darker shade of the body color, or just black, to add a few curved stripes on the forehead, back and tail. Keep stripes short and curved so they follow the body. Two or three small ovals at the bottom of the body make simple paws. A calico cat gets random patches of orange, black and white instead.
Step 9: Optional finishing touches
Add a ball of yarn, a fish, a pillow, a windowsill or a moon. Older kids might outline the cat in black with a fine brush or a paint marker once everything is dry. That outline instantly makes the painting look crisp, much like a cartoon.
Three Cat Styles to Choose From
Not every child wants the same cat. Offering a choice keeps the project fresh, especially if siblings are painting side by side.
| Style | Best age | Main shapes | Time | Skill it builds |
|---|---|---|---|---|
| Sitting cat (front view) | 4 to 7 | Oval body, circle head, triangle ears | 35 to 45 min | Stacking shapes, painting faces |
| Sleeping curled cat | 5 to 8 | One large circle, tail wrapped around, closed curved eyes | 30 to 40 min | Curved strokes, simple expressions |
| Black cat silhouette at night | 7 to 10 | Side-view cat, crescent moon, starry sky | 45 to 60 min | Background blending, contrast |
The sleeping curled cat
Paint one big circle, then wrap a thick tail around the bottom edge so its tip lands near the face. Add two triangle ears at the top. Instead of open eyes, paint two small upside-down “u” curves. It looks peaceful and is a great choice for kids who find faces frustrating.
The black cat silhouette
Paint the whole paper in bands of color: dark blue at the top, purple in the middle, orange near the bottom. Let it dry fully. Then paint a solid black cat sitting in side view on a black ground line, plus a crescent moon in pale yellow. Flick white dots across the sky with the end of a brush for stars. The bold contrast looks impressive with very little detail, which makes it a favorite for fall bulletin boards.
Easy Animal Painting for Kids: Tips by Age
The same cat can be painted very differently depending on the child’s fine motor skills and attention span. These adjustments help each age group finish with something they feel proud of.
Ages 3 to 4
- Draw the shapes for them in pencil or marker so they can focus on filling them in.
- Offer chunky brushes and sponge pieces; small brushes are hard to control at this age.
- Use only two or three colors to reduce mud.
- Plan for 15 to 20 minutes of active painting, then finish the face together after it dries.
Ages 5 to 7
- Let them sketch the shapes with guidance: “big egg, ball on top, two pointy hats.”
- Introduce the idea of waiting for paint to dry before adding details on top.
- Encourage them to give the cat a name and a mood. This helps them decide on eye and mouth shapes.
Ages 8 to 10
- Challenge them to try a side view or a stretching cat.
- Show them how to mix a darker shade of the body color by adding a tiny bit of black or the complementary color, then use it for stripes and shadows under the chin.
- Introduce simple highlights: a lighter stroke along the top of the head and back where light would hit.
Common Mistakes and Quick Fixes
Most problems in a kids’ cat painting come from rushing or from too much water. Here is how to rescue the painting rather than starting over.
| Problem | Why it happens | Fix |
|---|---|---|
| Face details smear into the body color | Base layer was still wet | Wait until dry, paint the area over in the body color, then redo the face |
| Colors turned muddy brown | Brush not rinsed between colors, or too much mixing on paper | Let dry, paint over with opaque color, and rinse plus blot the brush every color change |
| Paper is wrinkled and wavy | Too much water on thin paper | Use thicker paper next time; flatten the dry painting under heavy books overnight |
| Head is much smaller than planned | Child drew the body first and ran out of room | Turn it into a “big cat, tiny head” funny style, or add a large hat or bow |
| Whiskers look thick and blobby | Too much paint on the brush | Use a toothpick or wipe most of the paint off before pulling the line |
| Eyes look uneven | Normal for young painters | Make it a winking cat by painting one eye as a curved line |
Easy Canvas Painting Ideas for Kids Step by Step: Taking the Cat Further
Once the basic cat feels comfortable, small changes turn it into a new project rather than a repeat. Here are a few variations that keep the same core steps.
- Cat in a window: Paint a square window frame first, a sky inside it, then the cat sitting on the sill. This introduces the idea of foreground and background.
- Rainbow cat: Paint the body in stripes of red, orange, yellow, green, blue and purple. Great for practicing clean color changes.
- Pattern cat: Fill the cat shape with dots, zigzags and spirals in different colors, similar to folk-art designs.
- Two cats: One big, one small, side by side. Kids practice repeating shapes at different sizes.
- Fingerprint kittens: Press fingertips in paint to make small oval bodies, then add ears and whiskers with a fine marker once dry. Wonderful for the youngest artists.
If your child loves animals, try the same shape-stacking method with a mane of loose brushstrokes in the easy lion painting tutorial for kids. It builds on the circle head they just practiced.
Easy Rock Painting Ideas for Kids: A Cat on a Stone
Smooth, oval river rocks are naturally shaped like a curled-up cat, which makes them a fun change from paper. Wash and dry the rock first. Paint the whole rock one color and let it dry. Then add two triangle ears at the top edge, a face near one end and a tail curling along the bottom.
Rock paintings usually need two coats for bright coverage. For pieces that will sit outside or get handled often, an adult can seal them with a clear, water-based sealer once the paint has dried fully, following the label instructions.
Cleanup and Drying Tips for Parents
- Rinse brushes in warm, soapy water right after painting. Acrylic left to dry in the bristles can ruin a brush, while tempera washes out more easily.
- Lay paintings flat to dry. Standing them up while wet can cause drips to run down the cat’s face.
- Washable tempera usually comes out of clothing with cold water and soap if treated soon. Acrylic is much harder to remove once dry, so smocks matter more with acrylic.
- Write the child’s name and the date on the back. These first animal paintings are worth keeping.
FAQs
What is the easiest way to paint a cat for kids?
Start with simple shapes: an oval body, a circle head and two triangle ears. Fill the shapes with one color, let them dry, then add dot eyes, a triangle nose and line whiskers. This method works even for preschoolers with a little help sketching.
What paint is best for kids painting a cat?
Washable tempera is the easiest choice for young children because it is bright, covers well and cleans up with soap and water. Student-grade acrylic gives a more durable finish on canvas or rocks but stains clothing, so it suits older kids with closer supervision.
What are some easy things to paint for kids besides animals?
Rainbows, suns, flowers, trees, simple landscapes, planets and abstract dot patterns are all easy starting points. Like a cat, each one is built from basic shapes and can be finished in a single session.
How long does it take for kids to paint a cat?
Most children finish a basic cat in 30 to 45 minutes, including about 10 to 15 minutes of drying time before adding the face. A detailed night-scene silhouette may take closer to an hour.
What are easy things to paint for beginners kids who get frustrated quickly?
Choose subjects with forgiving shapes and few details, such as a sleeping cat, a sun, a fish or an abstract pattern. Keep the palette to two or three colors and break the project into short steps with drying breaks in between.
Can kids paint a cat on canvas instead of paper?
Yes. A small canvas panel around 8×10 inches is a good size. Canvas absorbs paint differently than paper, so the first coat may look patchy; a second coat after drying usually evens it out.
Final Thoughts
A cat painting teaches kids the most useful habit in beginner art: see the big shapes first, fill them in, wait, then add details. Once that sequence clicks, they can apply it to dogs, owls, fish and nearly any animal they love.
For more ways to build on this project, from paint types to messy-play techniques and seasonal ideas, explore the full painting for kids guide with creative techniques and pick the next subject together.