Quick answer: To paint a bird with kids, start with two simple shapes: a large oval for the body and a smaller circle for the head, overlapping at one end. Paint the body in one bright color, add a teardrop-shaped wing in a darker shade, then a triangle beak, a dot eye, a fan-shaped tail and stick legs on a branch. Painting the background first and letting each layer dry before adding details keeps colors clean.
Birds are one of the best first animals for young painters. Every bird, from a robin to a parrot, can be built from the same few shapes, and the bright colors give children a reason to experiment. Once kids learn the basic bird, they can change the colors and details to paint almost any species they see outside the window.
This guide explains how to paint a bird for kids step by step, with a simple shape method, color ideas for six common birds, tips by skill level and easy fixes for wobbly shapes and muddy colors. For more beginner-friendly subjects and techniques, see our main guide to painting for kids.
Supplies
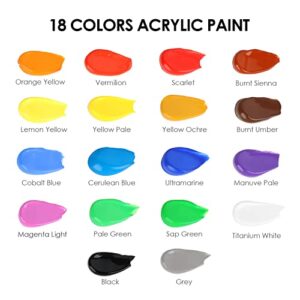
- Paint: washable tempera or student acrylic in red, yellow, blue, black and white (kids can mix greens, oranges and browns). Watercolor works for a softer look.
- Brushes: one large flat brush (about 1 inch) for backgrounds, one medium round brush for the body, one small round brush for details.
- Surface: heavy paper, watercolor paper or a small canvas panel (8 x 10 inches is a manageable size).
- Pencil for a light sketch.
- Water cup, paper towels and a palette (a paper plate works).
- Optional: cotton swabs for eyes and dots, a black paint pen or marker for outlines.
The Basic Bird Shapes
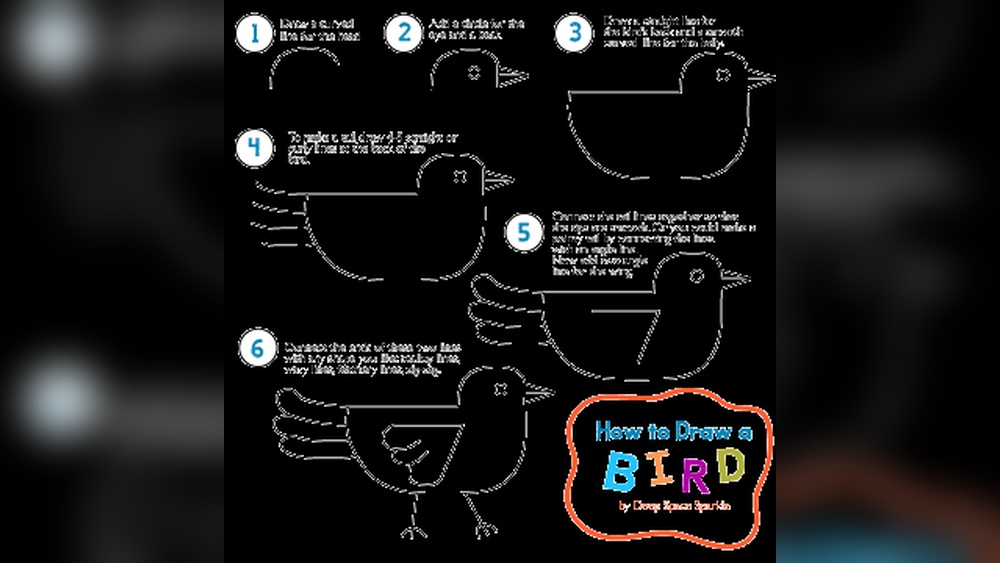
Before painting, show children that a bird is built from shapes they already know:
| Bird part | Shape | Tip |
|---|---|---|
| Body | Large oval or egg, tilted slightly | Fatter at the chest, narrower toward the tail |
| Head | Circle about half the body’s width | Overlaps the top front of the body |
| Wing | Teardrop or leaf shape | Sits on the middle of the body, pointed end toward the tail |
| Tail | Fan, rectangle or long triangle | Attached to the narrow end of the body |
| Beak | Small triangle | Pointing forward from the head |
| Eye | Dot | Upper half of the head, not too close to the beak |
| Legs | Two thin lines with three-toed feet | Gripping a branch |
How to Paint a Bird for Kids: Step by Step
- Sketch lightly. Draw a branch across the lower third of the paper. Draw an oval body resting on the branch, a circle head overlapping the top front of the oval, then the wing, tail and beak. Keep pencil lines light so they do not show through.
- Paint the background. Use the large brush to paint the sky around the bird. A light blue, a sunset of yellow fading to orange, or a pale green all work. It is fine to paint loosely over the edges of the bird a little; the body color will cover it.
- Let the background dry. About 10 to 20 minutes for thin tempera. Painting the bird on a wet background makes colors run together.
- Paint the body and head. Using the medium brush, fill the oval and circle with the bird’s main color. Follow the curve of the body with your brush strokes.
- Add the belly. Many birds have a lighter chest. Mix a little white into the body color, or use a contrasting color, and paint a curved patch on the front of the body.
- Paint the wing. Once the body is dry to the touch, paint the teardrop wing in a darker shade. Mix a little black or the complementary color into the body color, or choose a different color entirely.
- Paint the tail. Use the same color as the wing for a unified look.
- Add the branch. Paint the branch brown. Add a few green leaves with the tip of a round brush pressed down and lifted.
- Add details. With the small brush: a yellow or orange triangle beak, a black dot eye (a cotton swab makes a perfect circle), thin legs and feet wrapping around the branch.
- Finish. A tiny white dot in the eye gives life. Older kids can add feather lines on the wing with a fine brush or paint pen.
Easy Bird Color Guides
Once kids know the shapes, changing colors turns one bird into many. Here are six easy, recognizable birds.
| Bird | Body | Belly | Wing and tail | Beak | Special detail |
|---|---|---|---|---|---|
| Cardinal | Bright red | Red | Darker red | Orange-red | Pointed crest on head; black mask around beak |
| Blue jay | Blue | White or pale gray | Blue with black and white bars | Black | Crest; black collar line |
| American robin | Gray-brown | Orange-red | Dark gray-brown | Yellow | White ring around eye |
| Goldfinch | Bright yellow | Yellow | Black with white bars | Orange | Black cap on forehead |
| Owl | Brown | Tan with V-marks | Dark brown | Yellow | Large round eyes facing forward |
| Parrot | Green or red | Same as body | Blue, yellow, red bands | Curved, gray or black | Long, colorful tail |
Mixing Bird Colors From Five Basic Paints
Kids do not need a big set of paints to paint colorful birds. With red, yellow, blue, black and white, they can mix nearly every bird color. Mixing also teaches them how colors work.
| Color needed | Mix | Used for |
|---|---|---|
| Orange | Yellow plus a little red | Robin belly, beaks, feet |
| Green | Yellow plus a little blue | Parrots, leaves |
| Brown | Red plus green, or red, yellow and a touch of blue | Branches, owls, sparrows |
| Gray | White plus a tiny amount of black | Robins, pigeons, shadows |
| Light blue | White plus a little blue | Sky, bluebird belly |
| Dark red | Red plus a tiny touch of blue or black | Cardinal wings |
Teach kids to add the darker color to the lighter one in small amounts. It takes a lot of white to lighten blue, but only a speck of black to darken it.
Fingerprint and Handprint Birds for Little Ones
Children under five may find brush painting a full bird frustrating. These hand-based versions give a satisfying result with less control needed:
- Fingerprint birds: Press a thumb into paint and onto paper for the body. Add a smaller fingerprint for the head, then draw the beak, eye and legs with a marker once dry. A row of fingerprint birds on a painted wire makes a cute scene.
- Handprint bird: Paint the palm and fingers in bright colors (one color per finger for a parrot), press with fingers spread sideways for tail feathers, and add an eye and beak to the thumb as the head.
- Sponge birds: Cut a kitchen sponge into an oval, dip it in paint and stamp the body. Add wings and beaks with a brush.
Easy Animal Painting for Kids: Turning Birds Into Scenes
A single bird looks lovely on its own, but adding a simple scene makes the painting feel finished:
- Bird on a branch with blossoms: dot pink flowers with a cotton swab along the branch.
- Bird in snow: a red cardinal on a white branch against a gray-blue sky, with white dots for snowflakes.
- Bird at sunset: a black bird silhouette against an orange and pink sky. Kids only paint the shape in black, which is very forgiving.
- Bird in a nest: brown crisscross lines for the nest, a bird peeking over the edge and blue eggs.
- Flying birds: simple “M” shapes painted in black across a sunset sky.
How to paint a sunset easy for kids (bird silhouette version)
- Paint horizontal bands across the paper: yellow at the bottom, orange above, then pink, then purple at the top.
- Blend where bands meet by brushing back and forth while the paint is wet.
- Let it dry completely.
- Paint a black branch from one side and a bird silhouette sitting on it, using the same oval-and-circle shapes, filled solid black.
- Add a few small black “M” shapes in the sky for distant birds.
Watercolor Painting Tips for Kids Painting Birds
Watercolor gives birds a soft, feathery look. A few tips make it easier for children:
- Use watercolor paper. It handles water without buckling as much.
- Work light to dark. Paint the pale belly and body first, then add the darker wing once dry.
- Leave white paper for highlights. Instead of white paint, leave a small spot unpainted in the eye.
- Try wet-on-wet for soft feathers. Brush clean water on the body shape, then touch in color and let it spread.
- Outline after drying. A black fine-tip marker over dry watercolor adds definition.
Tips by Skill Level
Ages 3 to 5
- Pre-draw the bird outline in thick marker for them.
- Offer just three colors.
- Use stick-on googly eyes and paper triangle beaks.
- Try a handprint bird: fingers become feathers, thumb the head.
Ages 6 to 8
- Let them sketch the shapes themselves with guidance.
- Introduce mixing a darker shade for the wing.
- Choose a real bird to copy from the color guide.
Ages 9 and up
- Use reference photos of local birds.
- Add feather texture with short, layered strokes.
- Try shading the body: darker underneath, lighter on top.
- Paint more than one bird or a bird in flight.
Common Mistakes and Fixes
| Problem | Why it happens | Fix |
|---|---|---|
| Bird looks flat | Same color everywhere | Add a lighter belly and darker wing |
| Colors run together | Painting details on wet paint | Let each layer dry before the next |
| Head looks detached | Circle placed apart from the oval | Overlap the head onto the body |
| Bird seems to float | No legs or branch contact | Paint feet wrapping around the branch |
| Muddy colors | Dirty brush or overmixing | Rinse between colors; mix on the palette, not the paper |
| Eye looks odd | Too low or too close to the beak | Place it in the upper half of the head, a little back from the beak |
Painting Birds From Real Life
A backyard feeder or a window view turns bird painting into an observation exercise. Ask children to watch one bird for a minute and notice three things: its main color, the color of its wing, and the shape of its beak. Short, thick beaks belong to seed-eaters like cardinals and finches, while thin, pointed beaks are common on insect-eaters like warblers. Kids can then paint from memory or from a photo taken through the window, comparing their painting to the real bird afterward.
Easy Things to Paint for Kids After the Bird
Once children can paint a bird from shapes, the same approach unlocks other animals. A ladybug for kids uses circles and dots. Fish use an oval body and triangle tail. Owls are a bird with a rounder body and front-facing eyes. Building from shapes is the skill that carries over, and each new animal reinforces it.
FAQs
What is the easiest bird for kids to paint?
A cardinal or a simple bluebird is easiest because it uses one main color. Bird silhouettes against a sunset are even simpler since the bird is painted solid black.
What shapes do you use to paint a bird?
An oval for the body, a circle for the head, a teardrop for the wing, a fan or triangle for the tail, a small triangle for the beak and a dot for the eye.
What paint is best for kids painting birds?
Washable tempera is easy for young children. Student acrylics give brighter, permanent results on canvas for older kids, and watercolor gives a soft, feathery look.
How do I help my child paint a bird that doesn’t look flat?
Use three tones: a lighter belly, the main body color and a darker wing and tail. Adding a white highlight in the eye also brings the bird to life.
How long should paint dry between steps?
Thin washable tempera usually dries in 10 to 20 minutes. Wait until each layer is dry to the touch before adding details on top.
What age can kids paint a bird?
Children from about three can paint a pre-drawn bird or a handprint bird. From six or so, most can sketch and paint the shapes themselves with some guidance.
Final Thoughts
Painting a bird teaches kids one of the most useful skills in beginner art: seeing a subject as simple shapes. Sketch the oval, circle, wing and tail, paint the background first, then build up body, wing and details as each layer dries. When your child is ready for more, explore our full guide to fun painting techniques for young artists for new subjects and projects.