Straw painting is a simple and exciting art activity for children. It turns ordinary paint and a straw into a world of creative designs. Instead of using a brush, kids blow through a straw to move paint across the paper.
The results are always unique—sometimes wild, sometimes gentle, but always colorful. Straw painting is not just fun; it helps children develop fine motor skills, explore color mixing, and express themselves freely. If you want to introduce a fresh, mess-friendly art project at home or in the classroom, straw painting is a great choice.
This guide will show you how to do straw painting with kids, step by step. You’ll find tips for success, safety advice, and creative ideas to spark every child’s imagination. Even if you’ve never tried this before, you’ll feel confident after reading.
Let’s dive in and discover how to make straw painting easy, enjoyable, and safe for everyone.
What Is Straw Painting?
Straw painting is a creative process where children use straws to blow and spread liquid paint on paper. Instead of brushes, kids use their breath to move paint drops around, creating abstract shapes and patterns. The technique is popular in both homes and schools because it’s affordable, easy to set up, and suitable for a wide range of ages.
Kids love straw painting because every design is different. There are no “right” or “wrong” results. This freedom encourages creativity, reduces pressure, and helps children relax. The activity also supports important skills like hand-eye coordination and breath control. For teachers and parents, straw painting is a low-cost way to introduce art concepts and color theory.
Materials You Need For Straw Painting
Before you begin, gather all the materials to keep the activity smooth and stress-free. Here’s what you’ll need:
| Material | Purpose | Alternatives |
|---|---|---|
| Paper | Surface for painting | Cardstock, watercolor paper |
| Paint | Main medium | Tempera, watercolor, diluted acrylic |
| Straws | Spreading paint | Plastic, paper, or reusable silicone straws |
| Water | Thinning paint | Spray bottle or dropper |
| Dropper or Spoon | Dropping paint onto paper | Brush, pipette |
| Protective Covering | Keeping surfaces clean | Newspaper, plastic tablecloth |
| Aprons/Old Clothes | Protecting kids’ clothes | Oversized shirts |
| Paper Towels | Quick clean-ups | Rags |
Non-obvious tip: Choose paper that is thick enough to handle wet paint. Thin paper can tear or wrinkle, which frustrates kids.
How To Set Up For Straw Painting
A good setup makes straw painting easy and fun for everyone. Here’s how to prepare your space:
- Cover the table with a plastic cloth or newspaper. Straw painting can get messy, especially with young children.
- Set out all materials within easy reach. Kids should see and access the paint, straws, and paper without stretching or bumping things over.
- Pour small amounts of paint into cups or trays. Use a dropper or spoon to help kids place paint drops onto their paper.
- Prepare water for thinning paint. Paint that is too thick is hard to blow; add water until it’s slightly runny but still colorful.
- Hand out aprons or old shirts. This helps kids relax and focus on creating, not worrying about stains.
If you work with a group, give each child their own straw and paper. Labeling straws can prevent mix-ups and promote hygiene.
Step-by-step Instructions For Straw Painting
Follow these clear steps to guide kids through straw painting:
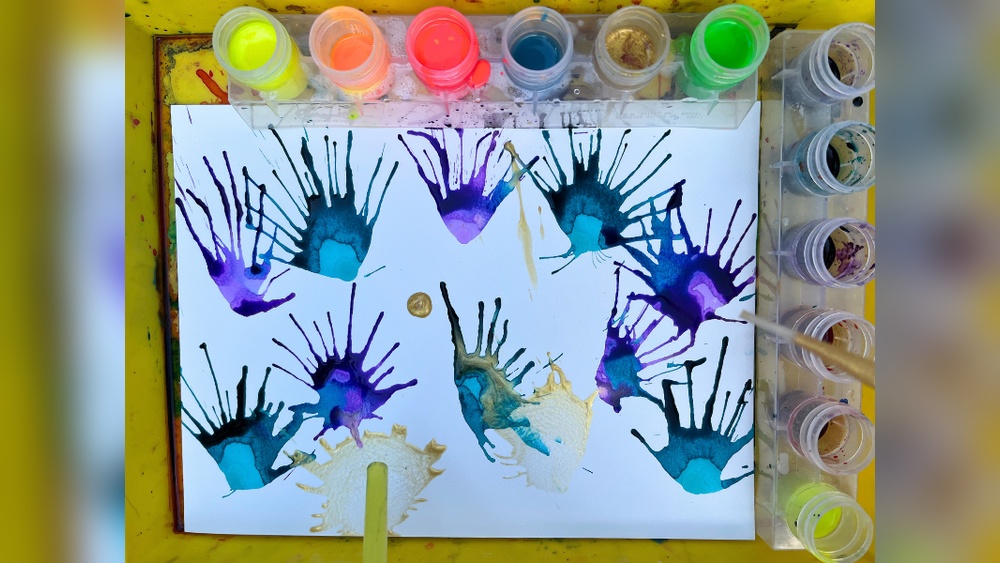
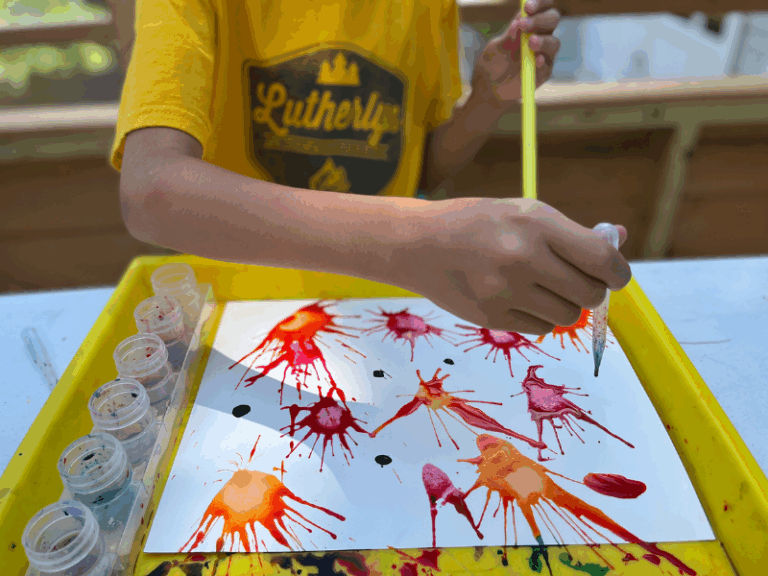
- Drop small blobs of paint on the paper. Use a dropper, spoon, or even a paintbrush for this step.
- Hold the straw near the paint drop. The tip should be about an inch above the paper, not touching the paint.
- Blow gently through the straw. The paint will spread in fun, unpredictable directions. Try blowing from different angles to see what happens.
- Repeat with new colors. Add more drops and blow again. Mixing colors creates exciting effects.
- Let paintings dry flat. Wet paint can drip if moved. Wait at least 30 minutes before handling.
Practical tip: Encourage kids to experiment by blowing harder or softer. Gentle breaths make short trails; strong puffs spread paint farther.
Credit: artfulparent.com
Tips For Successful Straw Painting With Kids
Straw painting is simple, but these tips will make it even better:
- Use washable paint. Kids make mistakes. Washable paint makes cleaning easier.
- Test the paint’s thickness. If paint is too thick, it won’t move. If it’s too thin, colors look pale. Adjust with water as needed.
- Teach blowing, not sucking. Show kids how to blow through the straw and remind them not to suck in.
- Limit paint drops. Too much paint can soak paper and make muddy colors. A few drops go a long way.
- Try different straw sizes. Wide straws spread paint quickly; thin ones give more control.
- Rotate the paper. Kids can turn their paper to create different effects.
- Let kids choose colors. This encourages independence and creativity.
- Add salt or glitter. Sprinkling salt on wet paint creates textures. A little glitter adds sparkle.
- Display finished art. Hang paintings to celebrate creativity and boost confidence.
Creative Straw Painting Ideas
Looking for ways to keep straw painting fresh? Try these creative twists:
- Blow Paint Monsters: Add eyes, mouths, or arms with markers after the paint dries. Kids can invent stories about their creations.
- Straw Painted Flowers: Blow paint out from a center point. After it dries, draw stems and leaves with colored pencils.
- Rainbow Trails: Place drops of different colors in a row and blow them together for a rainbow effect.
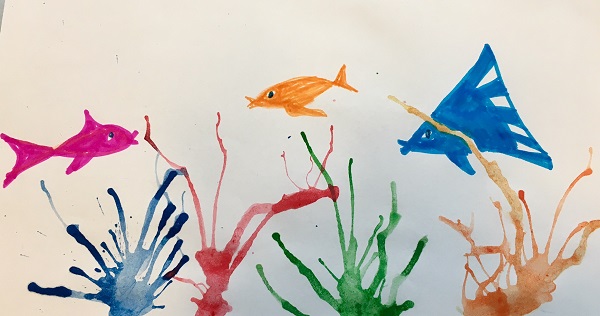
- Underwater Scenes: Use blue and green paint for water, then add fish or plants with markers.
- Abstract Patterns: Encourage kids to layer colors and create wild, abstract art.
- Holiday Cards: Use straw painting as a background for homemade cards.
Non-obvious insight: Let children work in pairs. One can drop paint, the other blows. This builds teamwork and communication skills.
Common Mistakes And How To Avoid Them
Mistakes are part of learning, but some can be frustrating. Here’s how to avoid common straw painting problems:
- Paint won’t move: It’s probably too thick. Add a bit more water.
- Paper tears: The paper is too thin or too wet. Use thicker paper and less paint.
- Colors mix into brown: Use fewer colors at once, and blow paint gently to keep colors separate.
- Kids suck paint up: Remind them to always blow, not suck. Demonstrate first. For young kids, cut a hole near the top of the straw so they can’t accidentally inhale paint.
- Mess gets out of control: Limit the number of paint colors and supervise closely, especially with groups.
Straw Painting Safety For Kids
Safety is important, especially with young children. Here’s how to keep straw painting safe and worry-free:
- Use non-toxic, child-safe paints. Check labels for safety information.
- Supervise at all times. Never leave young kids alone with paint or straws.
- Teach proper blowing technique. Demonstrate and watch closely, especially with kids under 5.
- Avoid using sharp or broken straws. Check straws before starting.
- Clean up spills immediately. Wet paint can be slippery.
You can find more safety tips and product recommendations at National Association for the Education of Young Children.
Cleaning Up After Straw Painting
After the fun, it’s time to clean up. Make it part of the process:
- Have wipes or wet towels ready. Clean hands and surfaces before paint dries.
- Soak straws in soapy water. Wash and dry reusable straws for next time.
- Throw away disposable table covers. Or, wash reusable covers.
- Dry paintings flat. Lay them on a shelf or rack so paint doesn’t drip.
Pro tip: Involve children in cleanup. It teaches responsibility and makes the process faster.
Comparing Straw Painting With Other Kids’ Art Activities
Straw painting is just one of many creative art activities. Here’s how it compares to other popular options:
| Activity | Mess Level | Motor Skills Used | Cost |
|---|---|---|---|
| Straw Painting | Medium | Breath control, hand-eye coordination | Low |
| Finger Painting | High | Fine motor, tactile | Low |
| Stamp Art | Low | Grip, pattern recognition | Medium |
| Brush Painting | Medium | Wrist movement, precision | Low |
Insight: Straw painting is ideal when you want a balance between messiness and creativity. It’s less messy than finger painting, but more exciting than stamping.
Credit: www.kidsburgh.org
How Straw Painting Supports Child Development
Straw painting offers more than just fun. It supports important areas of child development:
- Fine motor skills: Holding a straw and blowing directs movement, strengthening hand and mouth muscles.
- Creativity: There are no limits or “right” ways, so kids feel free to experiment.
- Color recognition: Mixing paint helps kids learn about colors and how they combine.
- Problem-solving: Children discover how to make paint move and how to fix mistakes.
- Social skills: Group projects encourage sharing and teamwork.
Research shows that open-ended art activities like straw painting can boost children’s confidence and communication skills. These benefits last well beyond the art table.
Frequently Asked Questions
What Age Is Best For Straw Painting?
Straw painting is suitable for ages 3 and up. Younger children need close supervision to prevent sucking paint through the straw. Older kids enjoy the freedom to experiment with color and patterns. Always use non-toxic paint and demonstrate safe blowing techniques.
What Kind Of Paint Works Best?
Washable tempera paint is the most popular choice. You can also use liquid watercolors or thin acrylic paint. The key is to dilute the paint with water so it moves easily when blown. Avoid oil paints or thick poster paints.
How Do I Prevent Kids From Sucking Paint By Accident?
Teach kids to blow, not suck before starting. Demonstrate how to blow through the straw. For extra safety, cut a small hole near the top of each straw. This way, if a child tries to suck, they won’t get paint in their mouth. Supervise closely, especially with kids under 5.
How Do I Keep The Mess Under Control?
Use protective coverings on tables and have wet wipes or towels nearby. Limit the number of colors at one time. Dress kids in aprons or old shirts. Remind children to keep paint on their paper and clean up spills right away.
Can I Use Straw Painting In A Classroom Setting?
Yes, straw painting is great for classrooms. Prepare by setting up stations with all materials. Use washable, non-toxic paint, and assign each student their own straw and paper. Discuss safety rules and supervise the activity. Group projects, like making a mural, work especially well with straw painting.
Straw painting is a joyful, open-ended activity that brings color, excitement, and learning to any setting. With the right setup, clear safety rules, and a spirit of fun, kids will create art they’re proud of—and memories that last. Try straw painting today and watch creativity take flight!

Credit: www.pbsutah.org