Making your own wall art with acrylic paint is not only fun, but also a great way to add a personal touch to your living space. You don’t need to be a professional artist or spend a lot of money. With a few materials and some creativity, you can create impressive pieces that truly reflect your style. In this guide, you’ll learn everything you need to know to make DIY wall art with acrylic—from choosing the right supplies to hanging your finished work. Whether you’re a beginner or just looking for fresh ideas, this article will help you get started with confidence.
Why Choose Acrylic For Diy Wall Art?
Acrylic paint is one of the most popular choices for home art projects, and for good reasons. It dries quickly, works on many surfaces, and is easy to clean up with water. Unlike oil paint, acrylics don’t need special chemicals or long drying times.
This means you can finish a project in an afternoon.
Another advantage: acrylic paint is affordable and widely available. You can find basic sets at most craft stores, and there’s a huge range of colors to choose from. Acrylics also let you create many effects, from bold blocks of color to soft blends and even textured finishes. For beginners, this flexibility makes acrylics a stress-free way to try new techniques.
Essential Materials For Acrylic Wall Art
Before you start, gather all the supplies you’ll need. Having the right tools makes the process smoother and helps you get better results.
| Material | Purpose | Beginner Tip |
|---|---|---|
| Canvas or Wood Panel | Main painting surface | Stretched canvas is easiest for starters |
| Acrylic Paint | Color and texture | Start with a basic color set |
| Brushes (various sizes) | Apply and blend paint | Flat and round brushes cover most needs |
| Palette | Mixing colors | Disposable palettes are handy |
| Painter’s Tape | Clean lines and masking | Prevents paint bleed for geometric art |
| Cup of Water | Cleaning brushes | Change water often |
| Paper Towels or Rags | Wipe brushes and spills | Keep within reach |
| Apron or Old Shirt | Protect clothing | Acrylic can stain fabric |
You may also want to add items like sponges, palette knives, or stencils if you want to experiment with texture or shapes. Many beginners forget how helpful painter’s tape can be for getting clean lines—don’t skip it if you want crisp geometric patterns.
Choosing Your Wall Art Style
The style of your DIY wall art will set the mood for your space. Acrylic paint works for many styles, from minimalist to abstract to nature-inspired. Here are a few popular options:
- Abstract Art: Use broad brushstrokes, swirls, or splatters. This style is forgiving and perfect for beginners.
- Geometric Patterns: Create triangles, stripes, or grids. Painter’s tape helps keep lines sharp.
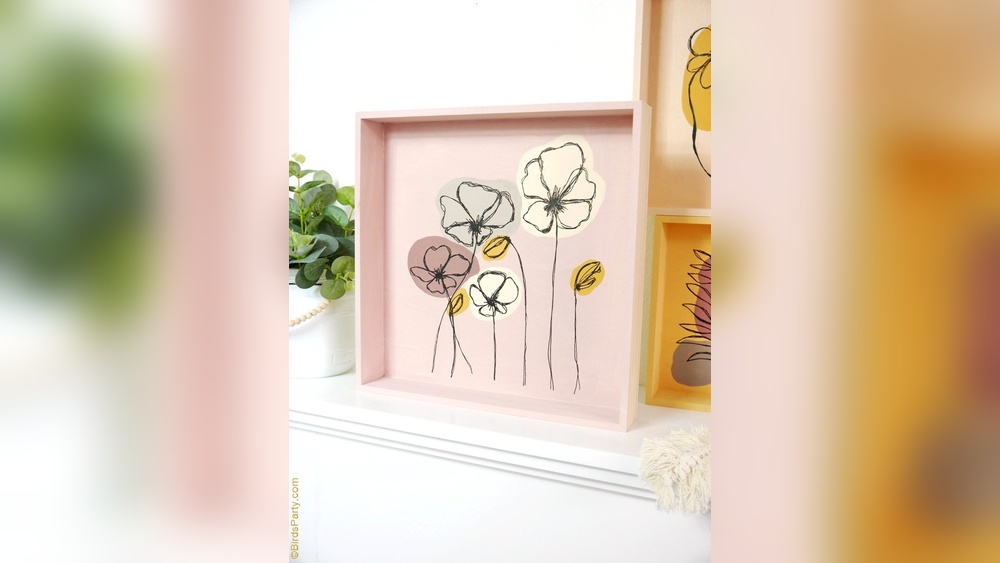
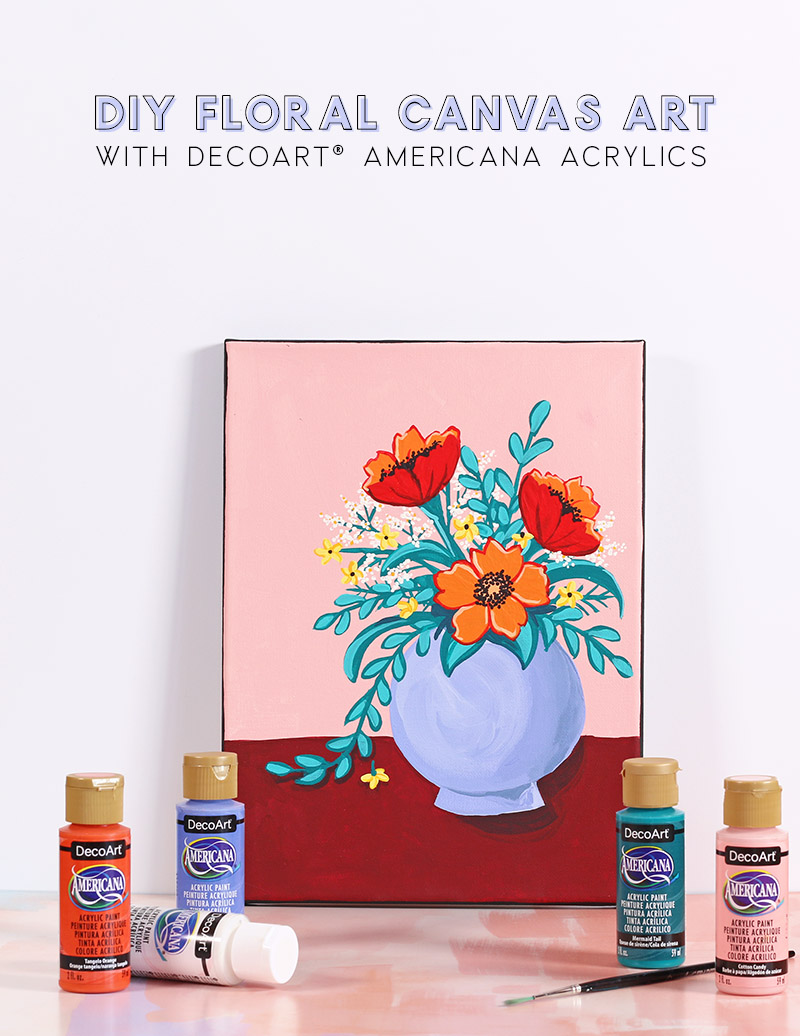
- Botanical or Nature Art: Paint leaves, flowers, or mountains for a calm, organic look.
- Textured Art: Add modeling paste under the paint, or use palette knives to create raised effects.
- Typography: Add favorite words or quotes with bold letters.
If you’re not sure what style fits your space, look at your room’s colors and furniture. Matching your art to these elements creates a harmonious look.
Preparing Your Canvas Or Surface
Getting your surface ready is a key step that many beginners overlook. A well-prepared base helps your paint look smooth and last longer.
- Check if your canvas is primed. Most store-bought canvases are pre-primed (labeled “triple-primed gesso”), so you can paint right away. If using a wood panel or unprimed surface, brush on a layer of acrylic gesso and let it dry.
- Tighten loose canvas. If your canvas feels slack, spray the back lightly with water and let it dry. The fibers will tighten up.
- Sketch your design (optional). Use a soft pencil to lightly outline your main shapes. For geometric art, measure and mark lines with a ruler.
- Tape areas for clean edges. If you want sharp lines, lay down painter’s tape and press the edges well.
Pro tip: Always let gesso or any undercoat dry completely before painting. Rushing this step can cause your paint to peel or crack later.

Credit: www.blog.birdsparty.com
Planning Your Design And Colors
The most successful DIY art projects start with a bit of planning. Think about:
- Size: Measure the wall where the art will hang. Larger canvases make a bold statement, but small pieces can be grouped for impact.
- Color Palette: Pick 2–4 main colors. Use a color wheel or online palette generator if you’re unsure. Limiting your palette keeps things harmonious and avoids muddy results.
- Composition: Decide where your shapes or focus points will be. Odd numbers (3, 5, 7) often look more balanced in design.
A simple sketch or even a digital mock-up can help you see the final effect before you start painting. Many beginners make the mistake of skipping this step and end up unhappy with the layout.
Basic Acrylic Painting Techniques For Wall Art
Learning a few basic techniques will help you get the look you want, even if you’re new to painting.
Blending Colors
Acrylics dry fast, so blend quickly. Use a damp brush to soften edges between two colors. Try “wet-on-wet” for smooth gradients, or “dry brushing” for rougher texture.
Layering
Acrylics are great for layering because they dry opaque. Wait until each layer is dry before adding the next. This method is good for creating depth or correcting mistakes.
Stippling
Tap the brush to create dots or a speckled look. This works well for abstract or nature-inspired art (like leaves or petals).
Using Painter’s Tape
Apply tape for crisp lines, paint over it, then remove the tape before the paint dries completely. This prevents peeling and messy edges.
Adding Texture
Mix acrylic with modeling paste or use a palette knife to spread thick, textured paint. This gives your wall art a 3D effect that looks more professional.
| Technique | Effect | Best For |
|---|---|---|
| Blending | Soft gradients, smooth transitions | Skies, backgrounds |
| Layering | Depth, color correction | Abstract, botanical |
| Stippling | Dotted, organic texture | Leaves, flowers |
| Texturing | 3D effects | Modern, statement art |
Step-by-step: Making Your Diy Acrylic Wall Art
Let’s walk through a simple project: a geometric abstract painting.
- Gather your supplies. Make sure you have your canvas, acrylics, brushes, palette, tape, and paper towels ready.
- Prepare your workspace. Cover your table and wear old clothes or an apron. Set up good lighting.
- Plan your design. Lightly sketch geometric shapes on your canvas with a pencil. Use a ruler for straight lines.
- Apply painter’s tape. Place tape along your pencil lines where you want hard edges.
- Mix your colors. Squeeze out small amounts of paint on your palette and mix colors as needed.
- Start painting. Fill in each section with a different color. Use a clean brush for each color to avoid muddying.
- Let layers dry. If you want to add shapes or change colors, wait until paint is dry before taping over new areas.
- Remove tape. Do this slowly while the paint is slightly wet for cleaner lines.
- Touch up edges. Use a small brush to fix any leaks or uneven spots.
- Sign and date your work. This makes your art feel finished and personal.
Non-obvious tip: Before removing tape, run a sharp blade gently along the paint edge. This stops peeling and keeps lines crisp—a trick many pros use but beginners miss.
Ideas For Creative Acrylic Wall Art
If you’re looking for inspiration, try these:
- Color block panels: Paint several small canvases in solid colors and hang them in a grid.
- Drip art: Thin your acrylic paint with water and let it run down the canvas for a modern look.
- Metallic accents: Add gold or silver acrylic for a bit of shine.
- Layered silhouettes: Paint a bold shape (like a leaf or city skyline) over a blended background.
- Mixed media: Glue on fabric, paper, or textured items, then paint over them for dimension.
Experimenting with different ideas is part of the fun. Don’t worry about perfection—the best DIY art often has a handmade touch.

Credit: www.youtube.com
Drying, Sealing, And Hanging Your Art
Acrylic paint usually dries to the touch in 20–30 minutes, but thick areas may take longer. Once your piece is fully dry, you may want to seal it for extra protection.
- Use an acrylic varnish (matte or glossy) to protect against dust and fading. Spray varnish is easy for beginners and prevents brush marks.
- Let the varnish cure as directed (usually 24 hours) before hanging.
When it’s time to hang your art, use the right hardware for your wall type. For large canvases, two hooks give better support. Avoid placing art in direct sunlight to prevent fading.
| Hanging Method | Best For | Tip |
|---|---|---|
| Sawtooth hanger | Small/medium canvases | Easy to install |
| Wire and hooks | Large canvases | Distributes weight evenly |
| Command strips | Lightweight art | No wall damage |
Common Mistakes And How To Avoid Them
Even experienced DIYers run into trouble sometimes. Here are a few pitfalls to watch for:
- Using too much water: This can thin acrylic paint so much that it loses color and doesn’t stick well. Use water for blending, but not for every layer.
- Skipping surface prep: Painting on a greasy or dusty surface leads to peeling.
- Not letting layers dry: Painting over wet layers can cause colors to mix unintentionally or lift off the canvas.
- Overworking the paint: Too many brushstrokes can make colors muddy. Work quickly and let your brushstrokes show—this adds character.
Insider tip: Test your colors and techniques on a small scrap canvas before starting your final piece. This helps you avoid surprises and build confidence.
Display And Care Tips For Acrylic Wall Art
To keep your wall art looking fresh:
- Dust gently with a soft, dry cloth.
- Avoid using glass or plastic covers, as acrylic paint needs to breathe.
- If storing art, keep it in a cool, dry place away from direct sunlight and moisture.
For more info on caring for acrylic art, check out this guide from Tate.
Frequently Asked Questions
What Surfaces Can I Use For Diy Acrylic Wall Art?
Acrylic paint works on many surfaces—canvas, wood panels, thick paper, and even fabric. Just be sure the surface is clean and, if needed, primed with gesso.
How Long Does Acrylic Paint Take To Dry?
Most acrylics are touch-dry in 20–30 minutes. Thick layers or cold, humid environments will slow drying. Wait at least 24 hours before applying varnish or hanging.
Can I Mix My Own Colors With Acrylic Paint?
Yes! Acrylics mix easily. Use a palette or plate to blend custom shades. Start with small amounts and keep a record of your mixes if you want to recreate them.
How Do I Fix Mistakes In My Painting?
Let the paint dry, then paint over the mistake with a new color. Acrylics are very forgiving—just be sure each layer is dry first to avoid smudging.
What Is The Best Way To Hang Acrylic Wall Art?
Use sawtooth hangers for small canvases and wire with two hooks for larger pieces. Command strips work for lightweight art and rented spaces. Always check that your wall can support the weight.
Creating DIY wall art with acrylic paint is a rewarding project that lets you express yourself while adding beauty to your home. With some basic supplies and the tips above, you’ll be ready to design art you’ll be proud to display.
The most important step? Just start—your creativity will grow with each piece you make.
Credit: persialou.com