
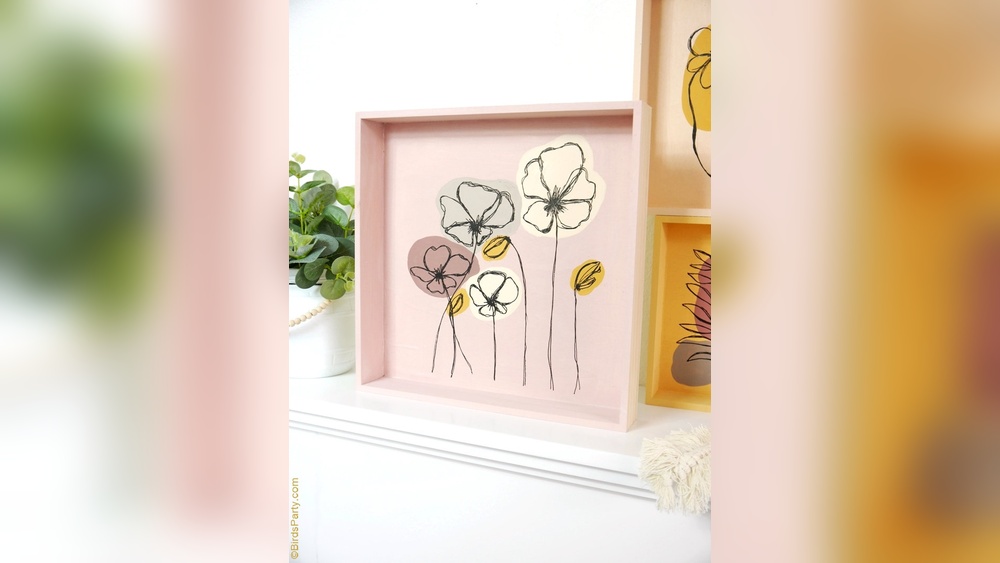
A blank wall above a sofa or bed is one of the easiest places to put your own painting, and acrylic is the friendliest medium for it. It dries fast, cleans up with water, sticks to canvas, wood and paper, and forgives beginners because you can paint right over a mistake. This guide shows how to make DIY wall art with acrylic from planning the size to hanging the finished piece, with five beginner projects you can actually finish in a weekend.
Quick answer: To make DIY wall art with acrylic, choose a canvas sized to your wall (roughly two-thirds the width of the furniture below it), prime it with gesso if needed, sketch a simple design, and paint in layers from background to details. Let it dry fully, paint the edges or frame it, then seal it with a varnish made for acrylics before hanging the center at about 57 to 60 inches from the floor. Simple abstract, textured, botanical and pour designs are the easiest wins for beginners.
Plan the Piece Before You Paint
Most DIY wall art that disappoints does so because of scale or color, not technique. Five minutes of planning fixes both.
Pick the right size
A painting that’s too small for its wall looks lost. A useful rule of thumb is to make the art about two-thirds to three-quarters the width of the furniture it hangs above. Over a 7-foot sofa, that’s roughly 56 to 63 inches of art, either one large canvas or a group of two or three.
| Location | Suggested canvas size | Notes |
|---|---|---|
| Above a standard sofa | 36×48 in, or a pair of 24×36 in | Hang 8–10 in above the sofa back |
| Above a queen or king bed | 30×40 to 40×60 in | Horizontal formats suit headboards |
| Entryway or narrow wall | 16×20 to 24×36 in, vertical | Vertical formats make narrow walls feel taller |
| Bathroom or shelf styling | 8×10 to 12×16 in | Seal well against humidity |
| Gallery wall | Mix of 8×10, 11×14 and 16×20 in | Keep 2–3 in between frames |
Test the size by taping painter’s tape or kraft paper to the wall in the exact dimensions. Leave it up for a day before buying a canvas.
Pull a palette from the room
Choose three to five colors already in the space, such as a rug, pillow or throw. Use one as the dominant color, one or two as supporting colors, and one as a small accent. Mixing these from a limited set of tubes keeps everything harmonious. Remember that acrylic dries slightly darker than it looks wet, so test swatches before committing.
Art Supplies for DIY Acrylic Wall Art
You don’t need a big kit. A focused set does the job and keeps costs down.
- Surface: stretched canvas (gallery-wrapped with 1.5 in deep sides looks finished without a frame), cradled wood panel, or canvas board for smaller pieces.
- Gesso if your surface isn’t pre-primed, or for an extra smooth coat.
- Acrylic paints: a basic set plus a large tube of white, since big canvases use a lot. Our guide to the best paints for wall art projects compares options by coverage and finish.
- Brushes: a 2 in flat or a foam brush for backgrounds, a 1/2 in flat, a medium round and a small detail brush.
- Palette knife for texture and mixing.
- Painter’s tape for crisp lines and geometric designs.
- Acrylic mediums (optional): gloss medium for glazes, gel medium or modeling paste for texture, pouring medium for fluid art.
- Varnish for acrylics, gloss, satin or matte.
- Drop cloth, cups, paper towels and a spray bottle.
- Hanging hardware: sawtooth hanger or D-rings and wire.
How to Make DIY Wall Art With Acrylic: Step by Step
- Prep the surface. Wipe the canvas with a dry cloth. If it’s raw or feels rough, brush on one or two thin coats of gesso, sanding lightly between coats with fine sandpaper for a smoother finish.
- Tone or base-coat it. Cover the canvas with a background color using a wide brush or foam roller. For a professional look, paint the sides of the canvas too, either the same color or a contrasting neutral.
- Sketch the design. Use a light pencil, chalk, or thinned paint. For symmetric designs, mark the center lines lightly.
- Block in big shapes. Paint the largest areas first with your largest brush. Keep paint the consistency of soft butter, thinning with a little water if it drags.
- Build layers. Let each layer dry to the touch, usually 10 to 30 minutes for thin coats, then add midtones and secondary shapes.
- Add details and accents. Use smaller brushes for line work, highlights and texture. Step back often; wall art is viewed from 6 to 10 feet away.
- Clean up edges. Touch up the sides and remove any tape while the final layer is still slightly soft so it doesn’t peel.
- Dry and cure. Let the painting dry fully. Thin paint is ready to varnish in about 24 to 72 hours; heavy texture may need a week or more.
- Varnish. Apply a thin, even coat of acrylic varnish with a soft wide brush. It protects from dust, UV and fingerprints and evens out the sheen.
- Hang it. Attach hardware to the back and hang the center of the piece around 57 to 60 inches from the floor, a common gallery standard.
Five Easy Acrylic Wall Art Projects for Beginners
1. How to paint abstract art with acrylics: color-field canvas
Divide the canvas into two to four large, soft-edged color blocks inspired by your room’s palette. Blend edges with a dry brush while the paint is still wet, or leave them crisp for a modern look. Add one or two thin lines of an accent color, like metallic gold or charcoal, for contrast. This style scales well to large canvases because it relies on color and proportion, not detail.
2. Textured palette-knife art
Mix acrylic with modeling paste or heavy gel medium, roughly 1 part paint to 1 part paste, and spread it with a palette knife in sweeping strokes, ridges or crosshatched patterns. Neutral tones, white, cream, taupe and soft gray, give a plaster-like look that suits minimalist rooms. Let thick texture dry slowly, away from heat, to reduce cracking.
3. Botanical silhouettes and line art
On a light background, paint simple leaf, branch or flower shapes in one dark color, or use a fine liner brush for single-line drawings. Feathers and grasses work beautifully here; our step-by-step guides on painting a feather for wall art and pampas grass wall art break those motifs down stroke by stroke.
4. Geometric tape art
Paint a base color and let it dry completely. Lay painter’s tape in triangles, stripes or a grid, pressing the edges firmly. Brush a thin layer of the base color over the tape edges first to seal them, then fill each section with new colors. Peel the tape while the final coat is still slightly damp for clean lines.
5. Acrylic pouring art
Pouring creates organic, marbled designs with almost no brushwork. It’s messy but great fun and especially striking on large canvases.
How to Make Acrylic Pouring Paint for Wall Art
Pouring needs paint thin enough to flow but not so watery that colors muddy. A common starting point:
- Mix about 1 part acrylic paint with 1 to 2 parts pouring medium in a cup.
- Add water a few drops at a time until the mix runs off a stir stick like warm honey.
- Prepare three to five colors, including a white and one dark, in separate cups.
- Layer the colors into one cup (a “dirty pour”) and flip it onto the canvas, or pour them directly in stripes.
- Tilt the canvas slowly to spread the paint over the surface and edges.
- Let it dry level for at least 24 to 72 hours; thick pours can take longer.
Raise the canvas on cups over a covered surface, since paint will drip off the edges. Large pours use a surprising amount of paint, often a few ounces per square foot, so mix more than you think you need.
How to Thin Acrylic Paint for Art Without Weakening It
For brushwork, a little water is fine, roughly up to a quarter or a third by volume on primed canvas. Beyond that, the binder gets too dilute and paint can look chalky or rub off. When you need very thin, transparent layers, use an acrylic medium such as gloss or glazing medium. It thins the paint while keeping the film strong, which matters on large pieces that will hang for years.
Acrylic Mediums for Art: Which Ones Matter for Wall Pieces
| Medium | What it does | Best for |
|---|---|---|
| Gloss / matte medium | Thins and extends paint, controls sheen | Glazes, transparent layers |
| Gel medium | Thickens, adds body and texture | Impasto, visible brush strokes |
| Modeling paste | Builds stiff, sculptural texture | Plaster-look textured art |
| Pouring medium | Improves flow and reduces cracking | Fluid and pour art |
| Retarder | Slows drying | Blending large backgrounds |
Painting a Pair or Triptych
Two or three coordinated canvases can fill a wide wall more affordably than one huge piece. Paint them side by side at the same time, using the same mixed colors so they match exactly. For an abstract set, let shapes or lines continue across the gaps between canvases, which ties them together visually. Hang them with equal spacing, usually 2 to 3 inches apart, and treat the whole group as one piece when measuring against the furniture below.
Finishing Touches That Make DIY Art Look Professional
- Paint the edges. Unpainted staples and white sides are the giveaway of a quick project.
- Use a float frame for canvases, which leaves a small gap around the edge and looks gallery-ready.
- Sign it small in a lower corner with a fine brush or paint marker.
- Varnish evenly. Gloss boosts color depth; matte reduces glare in bright rooms; satin sits between.
- Hang with two points (two D-rings or two nails) on wide canvases so they stay level.
Common Mistakes With DIY Acrylic Wall Art
- Going too small. A modest canvas on a big wall looks like an afterthought.
- Using too many colors. Five or fewer reads as intentional.
- Not mixing enough paint. Remixing an exact background color mid-project is hard; mix extra and store it in an airtight container.
- Overworking drying paint. Acrylic drags and lifts as it sets. Finish an area, let it dry, then go back.
- Skipping varnish. Unvarnished acrylic collects dust and can look uneven in sheen.
- Varnishing too early. Trapped moisture can cloud varnish; wait until the paint is fully dry.
Acrylic Art for Beginners: Practical Tips
Start with a medium canvas, around 16×20 inches, before committing to a large one. Practice your design on paper first, then scale it up. Keep a spray bottle handy to mist your palette, and squeeze out small amounts of paint at a time so it doesn’t skin over. If you want a flat, even background on a big canvas, a small foam roller gives smoother results than a brush.
To clean acrylic art brushes, rinse them in water before paint dries in the bristles, then wash with mild soap and reshape the tips. Dried acrylic in the ferrule is the most common way brushes get ruined.
Related Reading
FAQs
What kind of acrylic paint is best for wall art?
Any good-quality artist or craft acrylic works on canvas. For large pieces, paints with high pigment load cover in fewer coats. Use a sealing varnish afterward to protect the finish.
Do I need to prime canvas before painting wall art?
Most store-bought canvases come pre-primed with gesso, so you can paint straight away. An extra coat of gesso gives a smoother surface. Raw canvas, wood or MDF should always be primed.
How long should acrylic wall art dry before varnishing?
Thin layers are usually ready in 24 to 72 hours. Thick, textured or poured pieces may need a week or longer. If the surface still feels cool or soft, wait.
Can I paint DIY wall art directly on the wall with acrylic?
Artist acrylic can be used for murals on primed interior walls, though for large areas many people use interior latex wall paint for the base and artist acrylic for details. Seal mural areas in high-traffic spots.
Is acrylic pouring art good for beginners?
Yes. It needs little drawing skill and produces striking results, though it uses more paint and is messier than brush painting. Start on a small canvas to learn the right consistency.
How do I hang canvas wall art without a frame?
Attach a sawtooth hanger or two D-rings with picture wire to the back of the stretcher bars. Gallery-wrapped canvases with painted edges look finished without any frame.
Final Thoughts
Good DIY acrylic wall art is mostly planning: the right size for the wall, a palette pulled from the room, and a design simple enough to paint confidently. Layers, clean edges and a coat of varnish do the rest.
The paint you choose affects coverage, color depth and how the piece ages on the wall. Before you start your next canvas, compare options in our guide to the best paints and supplies for DIY wall art.





8 Comments