
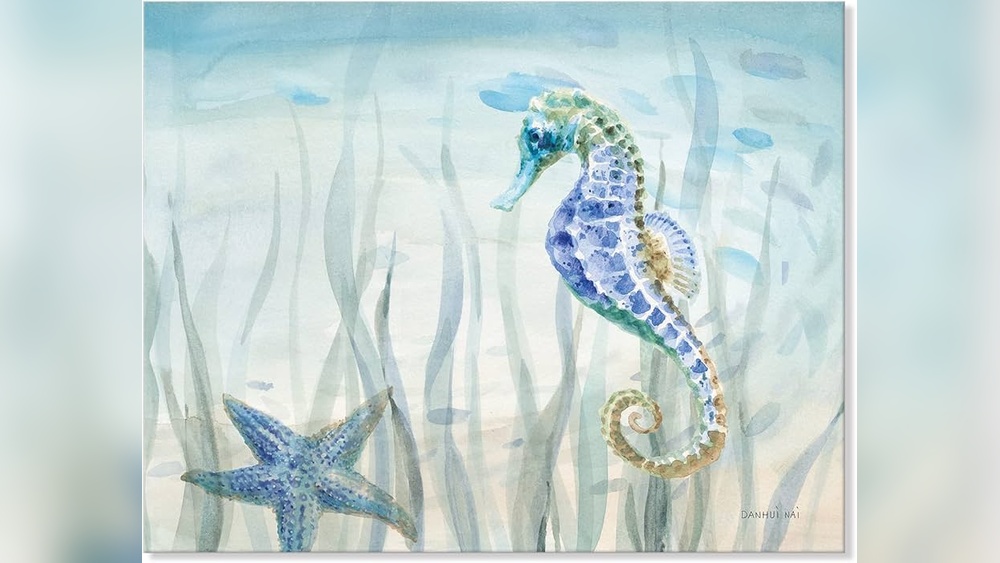
Quick answer: To paint a seahorse for wall art, sketch an S-shaped body with a horse-like head, a long tubular snout, a curved belly and a tail that curls forward into a spiral. Paint an ocean-toned background first, then block in the seahorse with a mid-tone color, add a darker value along the back and between ridges, and highlight the belly and the ridged rings. Finish with a small fan-shaped dorsal fin, an eye highlight and optional seaweed or bubbles. Acrylics on an 11×14 or 16×20 inch vertical canvas suit this coastal décor project.
Seahorses are a favorite in coastal, beach house and nautical décor. Their elegant S-curve and curling tail make a graceful silhouette, and their textured, ringed bodies offer interesting detail without being complicated. They are also forgiving: seahorses come in many colors and patterns in nature, so you have creative freedom with your palette.
This easy DIY guide explains how to paint a seahorse for wall art step by step, with notes on anatomy, background options, color schemes and stylized versions for kids’ rooms and bathrooms.
Seahorse Anatomy Made Simple
The seahorse’s body can be broken into a few simple shapes:
- Head: Horse-like, angled down from the body, with a small crown (coronet) on top.
- Snout: A long tube extending forward from the head.
- Neck and chest: A curve connecting head to body.
- Belly: Rounded and pushed forward, especially in males, which carry eggs in a brood pouch.
- Tail: Long, segmented and curled forward into a spiral at the end.
- Dorsal fin: A small, fan-shaped fin on the back, near the base of the body.
- Rings: Bony plates form ridged rings along the body and tail.
Seahorses swim upright, so the overall shape is a tall S: head at the top, belly in the middle and tail curling at the bottom.
Supplies
| Item | Recommendation |
|---|---|
| Canvas | 11×14 or 16×20 inches, vertical |
| Paints | Titanium white, phthalo blue, ultramarine, turquoise or teal, cadmium yellow, yellow ochre, cadmium orange, coral or pink, burnt sienna, payne’s gray |
| Brushes | 1 inch flat, size 6 round, size 2 round, liner, small filbert |
| Texture tools | Sponge for background, toothbrush for bubbles |
| Other | Chalk or watercolor pencil, palette, water, paper towels |
Bright, saturated corals, oranges and turquoise give seahorse art its tropical glow, and they only look that vivid with strongly pigmented paint. Our guide to the best paints for wall art covers paint types that stay bright in coastal palettes.
Background Options
- Underwater gradient: Light aqua at the top fading to deep blue at the bottom, with light rays from above.
- Deep sea: Dark navy or black for a dramatic, glowing seahorse in bright colors.
- Soft coastal neutral: Sand, cream or pale gray-blue for a calm, beach house look.
- Watercolor style: White background with loose splashes of blue and green around the seahorse.
How to Paint a Seahorse for Wall Art: Step-by-Step
Step 1: Paint the Background
For an underwater gradient, paint the top third with white and turquoise, the middle with turquoise and phthalo blue, and the bottom with ultramarine and a little payne’s gray. Blend wet with horizontal strokes. For light rays, dry-brush diagonal streaks of pale aqua from the top once the base is dry. Let everything dry completely.
Step 2: Sketch the Seahorse
Draw a gentle S-curve as a centerline. At the top, draw the head angled downward with the snout pointing forward. Below it, draw the curved chest and a rounded belly. Narrow the body into the tail and curl it forward into a spiral at the bottom. Add the dorsal fin on the back near the base of the body and the small crown on top of the head.
Draw light horizontal lines across the body and tail to mark ring segments. Space them closer together toward the tail tip.
Step 3: Block In the Body
Choose your main color. Yellow, orange, coral and teal are popular. Paint the entire seahorse in a mid-tone version of that color with a size 6 round. Keep the edges clean against the background.
Step 4: Add Shadows
Mix a darker version of the body color by adding burnt sienna (for warm colors) or ultramarine (for cool colors). Paint a shadow along the back of the seahorse, under the head and along the inner curve of the tail. Darken the spaces between rings to create ridges.
Step 5: Add Highlights
Mix a lighter, brighter version with white or yellow. Paint highlights on the belly, the front of the chest, the top of each ring and the top of the snout. A curved highlight across each ring makes the body look rounded and segmented.
Step 6: Paint the Fin, Eye and Crown
Paint the dorsal fin as a small, fan-shaped area with thin, translucent paint and fine lines radiating from its base. Add the eye as a dark circle with a tiny white highlight. Paint small bumps or spikes on the crown and along the back, depending on how stylized you want it.
Step 7: Patterns and Spots
Many seahorses have speckles, stripes or spots. Use a liner or toothpick to dot small spots of a contrasting color along the body. White spots on orange or dark spots on yellow look striking.
Step 8: Add Surroundings
Paint seaweed with long, wavy strokes of dark green rising from the bottom of the canvas. Seahorses often wrap their tails around seagrass, so you can paint the tail curling around a stem. Add bubbles by painting small circles with a thin white outline and a highlight, or spatter tiny white dots with a toothbrush.
Color Schemes for Seahorse Art
| Scheme | Seahorse | Background | Suits |
|---|---|---|---|
| Tropical | Orange and yellow with white spots | Turquoise gradient | Kids’ rooms, bathrooms |
| Coastal neutral | Sand and soft coral | Cream or pale blue | Beach houses, living rooms |
| Deep sea glow | Bright teal and magenta | Navy or black | Modern spaces, bedrooms |
| Monochrome blue | Light and dark blues | White | Nautical décor |
| Metallic | Gold or copper with teal accents | Dark navy | Glam coastal |
Stylized Seahorse Ideas
- Silhouette: A dark seahorse shape against a sunset or ocean gradient.
- Mandala or zentangle: Fill a seahorse outline with patterns of dots, lines and swirls using paint markers.
- Watercolor-style: Loose, translucent color with soft edges and a few crisp details.
- Pair of seahorses: Two seahorses facing each other, tails nearly touching, forming a heart shape between them.
- Kids’ cartoon style: Big eyes, bold outlines and bright flat colors.
Many coastal pieces look great together in a set. The soft, flowing strokes in our tutorial on feather wall art echo seaweed and fin textures if you want a varied coastal gallery.
Composition Tips
A seahorse is tall and narrow, so placement matters. Position the body slightly off-center, facing into the larger open space of the canvas, so the snout has room to “look” somewhere. Leave more space above the head than below the tail. If you add seagrass, let a few blades lean in the opposite direction from the seahorse’s curve to create gentle movement. For a pair, angle the two bodies toward each other and overlap their tails or seagrass slightly so they read as a single group rather than two separate paintings.
Tips for Painting Seahorse Texture
The ringed body is what makes a seahorse look real. A few techniques help:
- Paint the rings as slightly curved lines that follow the body’s roundness, not straight horizontal stripes.
- Highlight the top edge of each ring and shadow the bottom edge.
- Make rings smaller and closer together toward the tail tip.
- Add a few tiny bumps along the back and the edges of the rings with dots of highlight.
Common Mistakes
- Straight body. Seahorses need a clear S-curve.
- Short snout. The snout should be long and tubular.
- Tail curling backward. Seahorse tails curl forward, toward the belly.
- Flat color. Without shadows and highlights, the body looks like a cutout.
- Straight rings. Curve them to follow the body.
- Busy background. Keep it soft so the seahorse stands out.
Troubleshooting
| Problem | Cause | Fix |
|---|---|---|
| Seahorse looks like a dragon or snake | Head too small, snout too short | Enlarge the horse-like head and extend the tubular snout |
| Body looks stiff | S-curve too shallow | Push the belly forward and tilt the head down more |
| Bright colors look dull on blue background | Warm colors mixed with background blue | Let the background dry before painting the body; use opaque paint |
| Rings look like stripes | Straight lines, no shading | Curve the lines and add highlight above and shadow below each ring |
| Bubbles look like spots | Filled circles | Paint thin outlines with a small highlight and leave the center transparent |
Tips by Skill Level
Beginner
Paint a silhouette or a single-color seahorse with simple shadows. Focus on the S-shape and forward-curling tail. A few white bubble dots finish the piece.
Intermediate
Add ringed texture with highlights and shadows, a translucent dorsal fin and seagrass with the tail wrapped around it.
Advanced
Paint a realistic species from a photo reference, with detailed spots, skin filaments and caustic light patterns rippling across the body and background. Caustics are the bright, net-like light patterns made by sunlight passing through moving water; paint them as thin, wavy, interlocking lines of pale aqua.
Painting Seahorses on Other Surfaces
Seahorse designs work beyond canvas. Paint them on driftwood for rustic coastal décor, on smooth beach stones as small accents, or on wooden plaques for bathroom walls. Prime wood with gesso first and seal with a clear varnish. For pieces that will hang in humid bathrooms, a durable varnish helps protect the paint.
Session Plan and Drying Times
| Stage | Time on an 11×14 | Drying before next step |
|---|---|---|
| Underwater background | 20 to 30 minutes | 30 minutes |
| Sketch | 10 to 15 minutes | None |
| Body block-in | 15 minutes | 15 minutes |
| Shadows, highlights and rings | 30 to 45 minutes | 15 minutes |
| Fin, eye, spots and seaweed | 30 minutes | 24 hours before varnish |
Finishing and Display
Let the painting dry for at least 24 hours and varnish it for protection. Gloss varnish enhances the wet, underwater look; satin is better under bright lights. Seahorse art suits bathrooms, coastal living rooms, kids’ rooms and entryways in beach homes. A whitewashed wood frame or rope-wrapped frame adds to the nautical theme. In bathrooms, hang the piece away from the shower spray and make sure the room is ventilated, since constant steam can affect canvas tension and varnish over time.
FAQs
How do you draw a seahorse shape for painting?
Start with an S-shaped centerline. Add a horse-like head angled down at the top with a long snout, a rounded belly in the middle and a tail curling forward into a spiral at the bottom. Mark rings across the body and tail.
What colors are seahorses?
Real seahorses come in many colors, including yellow, orange, brown, gray, red and pink, often with spots or stripes. For wall art, you can choose any palette that suits your room.
What is the easiest way to paint a seahorse for beginners?
Paint a simple gradient background, sketch the S-shape, fill it with one mid-tone color, then add a darker shadow along the back and lighter highlights on the belly and rings. Add an eye highlight and a few bubbles.
What background goes with seahorse wall art?
An underwater turquoise-to-blue gradient is classic. Navy or black backgrounds make bright seahorses glow, while cream or sand backgrounds suit calm coastal décor.
Can I paint a seahorse on wood or stone?
Yes. Prime wood with gesso, and clean and dry stones before painting. Seal with varnish, choosing a durable product for humid bathrooms or outdoor displays.
How do you make a painted seahorse look 3D?
Use shadows along the back and inner curves, highlights on the belly and the top of each ring, and curved ring lines that follow the body’s form.
Next Step
Seahorses are a fun, flexible subject that can be realistic, stylized or playful. Start with a single seahorse on an underwater background, then try a pair or a pattern-filled version. For bright, lasting coastal colors, see our recommendations for acrylic and craft paints for vivid beach décor.





2 Comments