Have you ever wanted to bring the delicate beauty of a butterfly to life with your own hands? Painting a butterfly with acrylic paint is easier than you might think, and it’s a great way to express your creativity.
Whether you’re a beginner or looking to improve your skills, this guide will walk you through every step. By the end, you’ll have a vibrant butterfly painting that you’ll be proud to display. Ready to add some color and magic to your art?
Let’s dive in!
Materials Needed
Starting a butterfly painting with acrylics needs the right materials. Choosing proper supplies helps create vibrant, detailed artwork. Prepare all tools before painting to work smoothly and enjoy the process.
Acrylic Paints
Select bright colors like yellow, orange, blue, and black. These shades bring a butterfly’s wings to life. Use good-quality acrylic paints for smooth application and strong color. Small tubes are enough for a beginner project.
Brush Types
Use round brushes for fine lines and details. Flat brushes help fill larger areas quickly. A small fan brush can add texture to the wings. Keep brushes clean for better results.
Canvas And Paper
Choose a smooth canvas or thick acrylic paper. Both hold paint well and show colors clearly. Canvas boards are easier to handle for beginners. Paper pads designed for acrylics work well too.
Additional Supplies
Have a palette to mix colors evenly. Use a cup of water to rinse brushes between colors. Keep paper towels or cloth nearby to wipe brushes. A pencil helps sketch the butterfly outline first.
Preparing Your Workspace
Preparing your workspace is the first step to a smooth painting session. A well-arranged area helps you focus and enjoy the process. It also keeps your materials safe and clean. Let’s explore how to get your space ready for painting a butterfly with acrylic paint.
Setting Up Canvas
Choose a clean, flat surface for your canvas. Place it on an easel or a sturdy table. Secure the canvas to prevent slipping. Make sure it is at a comfortable height for painting. This setup helps you paint details clearly and avoid strain.
Organizing Paints And Brushes
Arrange your acrylic paints by color near your workspace. Keep brushes in a cup with water or brush cleaner. Use a palette to mix your colors easily. Group brushes by size and type for quick access. This organization saves time and keeps your work neat.
Lighting And Ventilation
Good lighting reveals true colors and fine details. Use natural light or bright white lamps. Avoid harsh shadows on your canvas. Open windows or use a fan for fresh air. Proper ventilation reduces paint fumes and keeps you comfortable.
Sketching The Butterfly
Sketching the butterfly is the first step in painting with acrylics. It sets the foundation for your artwork. A good sketch helps you plan the shapes and details.
This stage requires patience and focus. Use light lines that you can erase or paint over later. The sketch guides your brush and colors.
Choosing A Reference Image
Select a clear, simple image of a butterfly. Photos with good lighting show details better. Pick one that matches your skill level. A basic shape is easier to sketch.
Study the wings and body shape. Notice the patterns and symmetry. Keep the image close to guide your drawing.
Basic Outline Techniques
Start with light pencil strokes. Draw the butterfly’s body in the center first. Add the wings on each side, matching size and shape.
Keep lines soft and simple. Use basic shapes like ovals and triangles. This helps create the overall structure without stress.
Adding Details
After the outline, add wing patterns gently. Sketch spots, lines, and curves lightly. Focus on symmetry and balance between wings.
Don’t press hard with your pencil. Keep details light for easy changes. This step makes your butterfly look realistic and lively.
Mixing Colors
Mixing colors is a key step in painting a butterfly with acrylic paint. It helps create vibrant and natural shades. Proper color mixing brings your butterfly to life. Understanding how to blend colors makes your artwork look smooth and realistic.
Primary Colors Basics
Start with primary colors: red, blue, and yellow. These are the base for all other colors. Mix red and yellow to get orange. Mix blue and yellow to make green. Combine red and blue for purple. Use white to lighten colors and black to darken them.
Creating Gradient Effects
Gradients show smooth changes from one color to another. Begin with one color on your brush. Slowly add a second color. Blend the two colors on your palette or canvas. Work quickly before the paint dries. This creates a soft, flowing look on butterfly wings.
Color Blending Tips
Use a clean brush for blending colors. Work with small amounts of paint. Mix colors on a palette before applying. Paint in thin layers to build colors gradually. Keep your brush strokes gentle and even. These tips help achieve smooth color transitions.
Painting The Base Layer
Painting the base layer is a key step in creating a beautiful butterfly with acrylic paint. This stage sets the tone for your whole artwork. It helps define the main shapes and colors before you add details. Take your time to make sure the base is smooth and even. A good base makes the next layers easier and more vibrant.
Applying Background Colors
Start by choosing soft, light colors for the background. Use a large brush to cover the canvas evenly. Paint around the area where the butterfly will go. Keep the strokes smooth and gentle. Let the paint dry completely before moving on. This helps avoid mixing unwanted colors later.
Blocking In Butterfly Shapes
Use a medium brush to sketch the butterfly’s main shapes. Focus on the wings and body first. Don’t worry about details yet. Use basic colors that match the butterfly’s natural tones. Paint inside the lines with steady, clear strokes. This step helps you see the composition clearly.
Ensuring Even Coverage
Check for any thin spots or gaps in the paint. Apply a second layer if needed to make colors solid. Use light, even strokes to avoid streaks. Let each layer dry before adding another. A smooth, even base layer makes your butterfly look clean and bright.
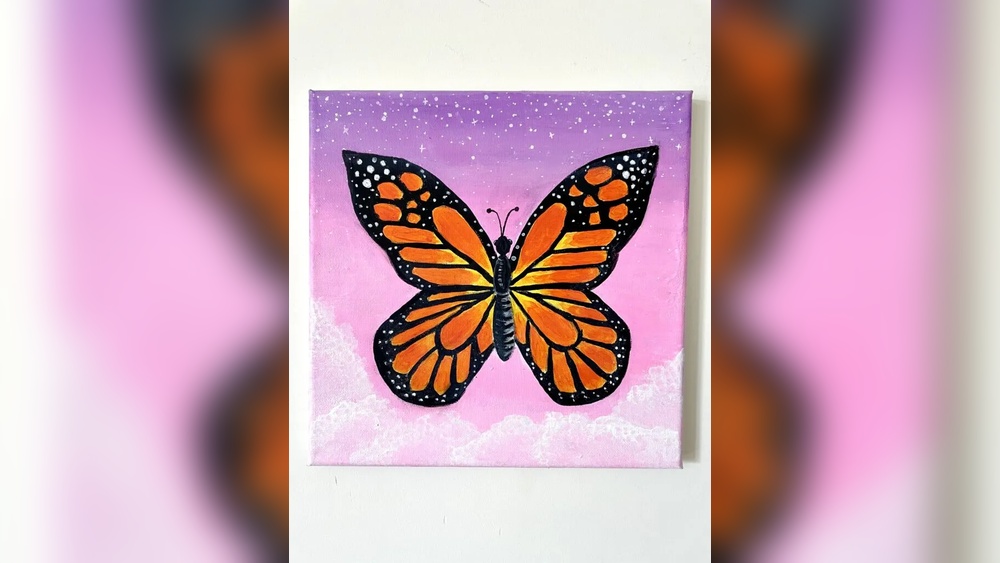
Credit: paintingbynumbersshop.com
Adding Details And Patterns
Adding details and patterns brings your butterfly painting to life. These small touches make wings look real and full of character. Focus on shapes, colors, and textures that butterflies naturally have. This step adds depth and beauty to your artwork.
Painting Wings Patterns
Start by observing real butterfly wings or photos. Notice spots, lines, and shapes on each wing. Use light strokes to sketch these patterns with a pencil. Choose colors that match or contrast with your base paint. Paint patterns carefully, layer by layer. Let each layer dry before adding the next.
Highlighting And Shadows
Highlights and shadows create a 3D effect on wings. Pick a lighter color to paint highlights on raised areas. Use a darker shade in places that curve inward. Blend edges softly for a natural look. This contrast gives the wings depth and realism.
Using Fine Brushes
Fine brushes help paint small details accurately. Choose brushes with thin, pointed tips for precision. Keep your hand steady while painting tiny patterns. Clean your brush often to avoid color mixing. Small details with fine brushes improve the overall finish.
Finishing Touches
Finishing touches bring your butterfly painting to life. They add depth and polish to your work. These steps make your artwork look complete and professional. Focus on small details to enhance the overall effect.
Refining Edges
Sharp edges make your butterfly stand out. Use a fine brush to clean up the wing outlines. Remove any stray paint outside the lines. Smooth edges help define the shape clearly. Take your time to perfect the borders.
Adding Texture
Texture adds realism to your butterfly. Dab the brush lightly to create small patterns on the wings. Use different brush strokes for variety. Layer paint to build a three-dimensional feel. Texture makes your painting more interesting to see.
Sealing The Painting
Sealing protects your work from dust and damage. Choose a clear acrylic varnish for a smooth finish. Apply thin layers with a soft brush. Let each layer dry before adding another. Sealing keeps colors bright and preserves your painting longer.

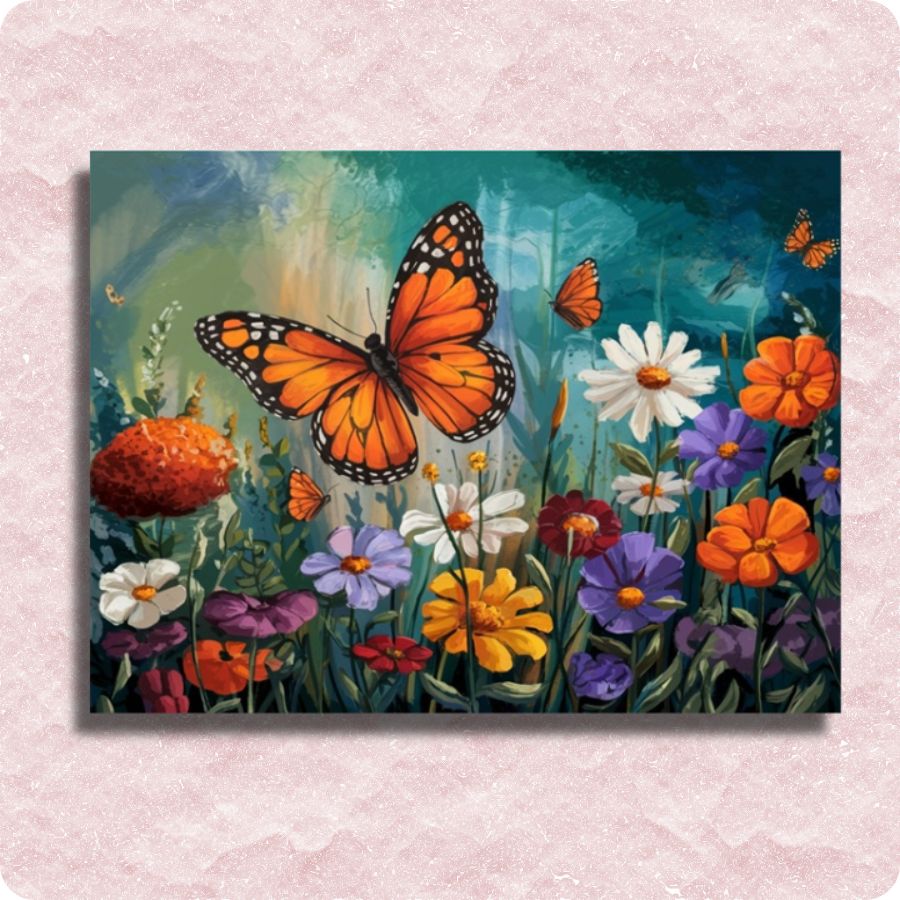
Credit: grupoavanti.cl
Common Mistakes To Avoid
Painting a butterfly with acrylic paint can be fun and rewarding. Avoiding common mistakes helps your artwork look better. These mistakes often cause frustration and affect the final result. Here are some key errors to watch out for.
Overloading Brush
Too much paint on the brush makes your strokes messy. It causes blotches and uneven colors. Always load a small amount of paint first. You can add more if needed. This keeps your painting neat and controlled.
Ignoring Drying Times
Acrylic paint dries fast but still needs time. Painting over wet layers can smudge colors and ruin details. Wait a few minutes before adding new layers. This helps each color stay clear and vibrant.
Skipping Sketching
Starting without a sketch can lead to mistakes in shapes and sizes. A light pencil sketch guides your painting. It helps place butterfly wings and patterns correctly. This step saves time and improves accuracy.
Tips For Beginners
Starting to paint butterflies with acrylics can feel tricky. Beginners often worry about details and colors. Simple tips can help you enjoy the process and create beautiful art. Follow these easy steps to build your skills and confidence.
Practice Techniques
Try different brush strokes and shapes on paper first. Practice painting simple lines and curves. This helps control the brush and understand paint flow. Experiment with blending colors gently. Small practice sessions improve your hand steady.
Choosing Simple Designs
Pick butterfly designs with clear, basic shapes. Avoid complex patterns at the start. Use pictures or sketches with fewer details. Simple designs make it easier to focus on color and form. You can add details later as you improve.
Patience And Creativity
Take your time with each step. Let paint dry before adding more layers. Mistakes are part of learning, not failure. Use your imagination to try new colors and styles. Enjoy the process, not just the final painting.

Credit: www.youtube.com
Frequently Asked Questions
How Do I Start Painting A Butterfly With Acrylics?
Begin by sketching a simple butterfly outline on your canvas. Use light pencil strokes. Then, apply a base coat with acrylic paint. This sets the foundation for adding details and vibrant colors later.
What Brushes Work Best For Butterfly Details?
Use fine-tipped brushes for intricate patterns and small details. Flat brushes help cover larger areas smoothly. Choose brushes with synthetic bristles for acrylic paint, as they hold paint well and last longer.
How To Blend Colors Smoothly On Butterfly Wings?
Work quickly while the acrylic paint is still wet. Use a clean, damp brush to blend edges softly. Layer colors gradually for a natural gradient effect on the butterfly wings.
What Colors Make Realistic Butterfly Wings?
Use vibrant hues like orange, yellow, black, and white. Study real butterfly photos for accurate color patterns. Mix colors carefully to replicate natural shading and highlights on the wings.
Conclusion
Painting a butterfly with acrylic paint is fun and rewarding. You can create bright colors and smooth shapes easily. Start with simple steps and add details slowly. Practice helps you improve your skills every time. Enjoy the process and express your creativity freely.
This guide gives you the basics to begin painting butterflies today. Keep trying, and soon your art will look beautiful and unique. Painting is a great way to relax and have fun. Why not pick up your brushes and start now?