
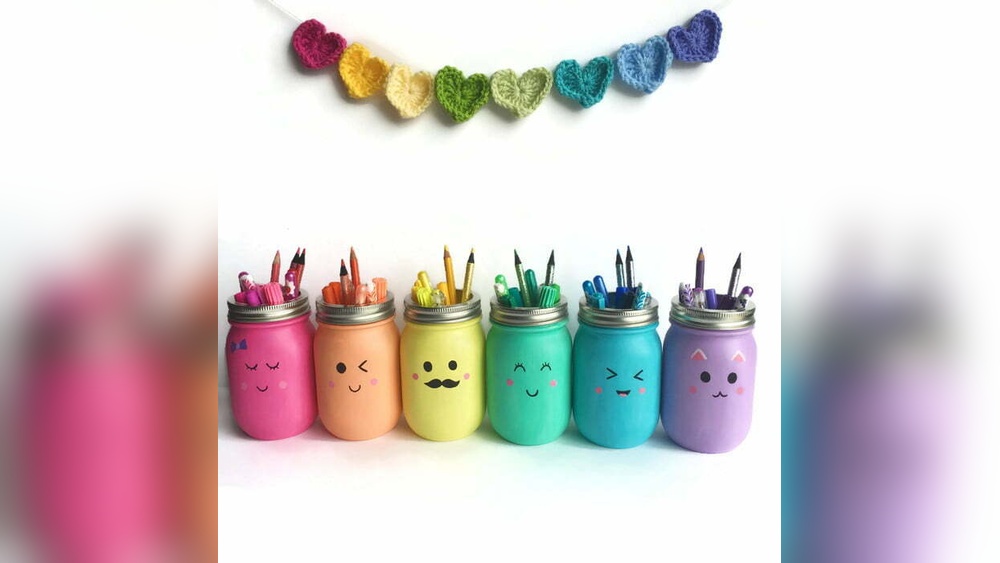
Empty pasta-sauce jars and old mason jars are some of the cheapest blank surfaces in any house. Paint them and they become vases, pencil cups, candle holders and gift containers. Glass is also one of the slickest surfaces you can paint, which is why a jar that looks perfect on Sunday can have paint peeling off in strips by Friday.
Quick answer: Yes, you can use acrylic paint on glass jars, but standard acrylic has no “tooth” to grip on smooth glass, so it scratches and peels easily unless you prepare the surface and seal it. Clean the jar with soap, then rubbing alcohol, apply thin coats (ideally of a glass or multi-surface acrylic, or regular acrylic mixed with a glass medium), cure fully, then seal. Treat the jar as decorative and hand-wash only, and keep paint off any surface that touches food or lips.
This guide covers why glass is difficult, how to prep it, step-by-step methods for painting the outside and the inside of jars, several craft techniques, how to seal and cure the paint, and how standard acrylic compares to purpose-made glass paint. If you would rather start with a formula designed for slick surfaces, see our comparison of acrylic paints made to stick to glass.
Can You Use Acrylic Paint on Glass?
You can, and plenty of crafters do. The issue is adhesion. Acrylic paint grips by sinking into tiny pores and irregularities. Canvas, paper and wood are full of them. Glass is not porous and is extremely smooth, so ordinary acrylic mostly rests on top, held by a weak surface bond.
That bond is good enough for decorative pieces that are handled gently. It is not good enough for anything that will be scrubbed, soaked or run through a dishwasher. The steps in this guide are all about improving that bond: removing anything that blocks it, using paint or additives that help, and protecting the result.
Regular Acrylic vs Glass-Specific Paint
| Feature | Standard craft/artist acrylic | Glass or enamel acrylic | Multi-surface acrylic |
|---|---|---|---|
| Adhesion on glass | Weak without help | Designed for glass | Moderate to good |
| Curing | Air dry only | Air cure or oven cure (per label) | Air dry; some can be baked |
| Wash resistance | Low; hand wash gently | Higher; some labeled top-rack dishwasher safe after curing | Moderate |
| Transparency options | Mostly opaque | Transparent and opaque versions | Mostly opaque |
| Best for | Decorative jars, low handling | Frequently handled or washed pieces | General crafts on several materials |
Glass Paint vs Acrylic Paint: Which Should You Use?
For a centerpiece or a shelf display, regular acrylic with good prep and a sealer is enough. For drinking glasses, kitchen canisters or anything that will be washed often, a glass-specific paint with a cure step is the stronger choice. Transparent glass paints also let you mimic stained glass, which ordinary opaque acrylic cannot do.
Supplies for Painting Glass Jars
- Clean glass jars with labels and glue removed
- Dish soap, warm water and a lint-free cloth
- Isopropyl (rubbing) alcohol and cotton pads
- Acrylic paint (craft, artist, multi-surface or glass/enamel)
- Optional glass medium or surface conditioner
- Soft synthetic brushes and foam brushes
- Makeup sponges or a dabbing sponge for an even coat
- Painter’s tape or vinyl for masking
- Clear sealer (spray or brush-on acrylic)
- Optional: fine sandpaper (220–400 grit) or a spray primer for matte, opaque looks
How to Prep Glass Jars So Paint Sticks
- Remove the label. Soak the jar in hot, soapy water for 20 to 30 minutes. Peel the label and rub off leftover glue with a little cooking oil or a citrus-based adhesive remover.
- Wash thoroughly. Use dish soap to cut through any oil residue, then rinse.
- Dry completely. Let the jar air dry or wipe with a lint-free cloth.
- Degrease with alcohol. Wipe every area you plan to paint with rubbing alcohol. Fingerprint oils are invisible but are one of the most common causes of peeling.
- Handle by the inside or the rim from now on, or wear gloves.
- Optional roughening. For fully opaque, matte designs, lightly scuffing the glass with fine sandpaper or applying a spray primer formulated for glass gives the paint more to hold onto. Skip this for transparent effects.
- Optional conditioner. Apply a glass surface conditioner, or plan to mix a glass medium into your paint, following the product label.
How to Paint Glass Jars: Step-by-Step (Outside)
Painting the outside of the jar is the classic approach and gives you the most control over designs.
- Plan your design. Sketch on paper, or tape a printed template inside the jar so you can trace it through the glass.
- Mask clean lines. Use painter’s tape for stripes, bands or geometric shapes. Press edges down firmly.
- Load a sponge or soft brush lightly. Brush strokes show clearly on glass. A dabbing sponge produces a smoother, more even coat.
- Apply a very thin first coat. It will look streaky and translucent. That is normal. Thick first coats slide, sag and peel.
- Let it dry for about an hour, or until completely dry to the touch.
- Repeat with thin coats until you reach the coverage you want. Two to four coats is typical.
- Remove tape while the last coat is slightly damp for crisp edges.
- Add details such as dots, florals or lettering with a small round brush or paint marker.
- Cure. Let the paint dry for at least 24 hours; longer is better before sealing. Some glass paints specify an air cure of several weeks or an oven cure; follow the label exactly.
- Seal. See the section on varnish below.
Painting the Inside of Glass Jars
Coating the inside gives a glossy, colored-glass look, because you see the paint through the glass. It also protects the paint from scratches. The trade-off is that the jar should not hold anything wet, and it is not suitable for food.
- Clean and degrease the inside thoroughly.
- Thin the paint slightly with a few drops of water or a pouring medium so it flows.
- Pour a small amount into the jar.
- Rotate and tilt the jar slowly until the inside is coated.
- Turn it upside down on a rack over paper to drain excess paint.
- Let it dry upright for several days; the interior dries slowly because air circulation is limited.
For a softer, frosted pastel look, use a little white mixed into each color. For a sea-glass effect, use thinned translucent colors and a light frosted spray on the outside.
How to Paint Glass Jars for Crafts: Six Techniques
1. Chalky Farmhouse Finish
Mix a small amount of baking soda into acrylic paint (start with about a teaspoon per quarter cup of paint) for a matte, gritty, chalky texture. Paint two coats, let dry, then sand the raised edges of embossed mason jars lightly to reveal glass for a distressed look.
2. Dot Mandalas
Use the handle end of a brush, a pencil eraser or dotting tools to build circular dot patterns. Glass makes dots appear crisp and raised.
3. Tape-Resist Geometric Bands
Wrap tape around the jar at angles, paint over it, and peel to reveal clean glass lines. Metallic paint looks especially sharp here.
4. Faux Stained Glass
Outline shapes with a dimensional liner or black paint marker, then fill the sections with transparent glass paint. Regular acrylic will look opaque rather than luminous.
5. Ombré Fade
Sponge the darkest color at the base and gradually lighter mixes toward the top, blending while wet.
6. Candle Holder Silhouettes
Mask a shape such as a tree or star with vinyl, paint the whole outside, then peel the vinyl. When a candle is lit inside, light glows through the unpainted silhouette. Keep flames well away from painted surfaces and never leave candles unattended.
Can You Use Acrylic Paint Markers on Glass?
Yes. Acrylic paint markers are a convenient way to add lettering, outlines and fine details to glass. They lay down a thin coat that dries quickly. Apply them on a clean, degreased surface, let them cure fully, and seal the design. Larger-tip acrylic markers are useful for filling bands of color, while fine tips suit text and detail. Like brushed acrylic, marker paint can scratch off unsealed glass, so treat marker designs as decorative.
Glass Medium for Acrylic Paint
A glass and tile medium is an additive designed to improve the adhesion of standard acrylics to non-porous surfaces. Depending on the brand, you either brush it onto the glass as a base coat or mix it into the paint. Some formulas also recommend curing time before use. It will not turn regular acrylic into a fully dishwasher-safe paint, but it noticeably improves scratch and peel resistance compared with paint alone.
Varnish for Acrylic Painting on Glass
A sealer protects the painted surface from moisture, scratches and handling. Common options include:
| Sealer type | Finish options | Pros | Cons |
|---|---|---|---|
| Clear acrylic spray sealer | Matte, satin, gloss | Even coat, no brush marks | Needs ventilation; overspray |
| Brush-on water-based varnish | Matte, satin, gloss | Low odor, easy cleanup | Brush marks if applied thickly |
| Glass paint gloss medium (from glass paint lines) | Gloss | Designed for the system | Brand-specific |
| Decoupage-style sealer | Matte, gloss | Easy, familiar | Some remain slightly tacky in humidity |
Apply two or three light coats, allowing each to dry as the label directs. Spray sealers work best held about 10 to 12 inches away in sweeping passes. Allow the sealer to cure fully before handling the jar regularly.
Baking Painted Glass: What to Know
Some glass and enamel acrylic paints are designed to be oven-cured for extra durability. The usual process is to place the dry, painted item in a cold oven, bring it up to the temperature on the label, hold it there for the stated time, then turn off the oven and let the glass cool inside. Starting cold and cooling slowly helps reduce the risk of thermal shock cracking the glass.
Only bake paints that are labeled for oven curing. Standard craft acrylics are not designed for baking and may discolor or bubble. Recycled food jars are not engineered for heat the way bakeware is, so some crafters prefer air curing them instead.
Food Safety and Practical Use
- Keep painted areas on the outside of jars that will hold dry goods, and leave a band of bare glass below the rim, roughly three-quarters of an inch, where lips or utensils may touch.
- Do not paint the inside of jars meant for food or drink.
- Hand wash painted jars gently with a soft cloth; do not soak them.
- Do not put regular acrylic-painted jars in the dishwasher.
- Use battery LED candles in painted holders if you are concerned about heat.
Troubleshooting
| Problem | Cause | Solution |
|---|---|---|
| Paint peels in sheets | Oil or residue on the glass | Strip, wash, degrease with alcohol, repaint |
| Visible brush strokes | Paint too thick; stiff brush | Use a sponge or soft brush and thinner coats |
| Streaky coverage | Normal for first coats | Add more thin coats; don’t overload |
| Paint scratches with a fingernail | Not cured or not sealed | Wait longer; add sealer; use glass medium next time |
| Cloudy sealer | Applied in humid conditions or too thick | Seal in a dry room, light coats only |
| Tape pulled paint off | Removed after paint fully dried | Peel while slightly damp; score edges with a craft knife |
FAQs
How to use acrylic paint on glass so it doesn’t peel?
Wash with soap, wipe with rubbing alcohol, apply thin coats, add a glass medium or use glass-specific paint, cure the paint fully and finish with a clear sealer. Most peeling comes from skipped degreasing or thick coats.
Is acrylic paint on glass waterproof?
Dried acrylic is water-resistant, but on glass the bond is weak, so prolonged soaking can loosen it. Sealing helps. For items that will be washed often, use a glass paint designed for that purpose.
Can you put painted glass jars in the dishwasher?
Not if they are painted with regular acrylic. Some glass paints are labeled top-rack dishwasher safe after a specified cure, but hand washing will still extend their life.
Do you need primer to paint glass jars?
Primer is optional. It helps for solid, opaque, matte designs and makes the paint grip better. It is not used for transparent or stained-glass looks.
How long does acrylic paint take to dry on glass?
Thin coats usually feel dry within about an hour. Allow at least 24 hours before sealing, and follow any longer cure time listed on glass-specific paints, which can be several days or more.
What is the best way to remove acrylic paint from glass?
Wet paint wipes off with water. Dried paint can often be softened with warm soapy water and scraped off with a plastic scraper or razor blade held at a low angle. Rubbing alcohol helps loosen stubborn spots.
Final Thoughts
Painting glass jars with acrylics is easy to start and rewarding, as long as you respect the surface. Clean and degrease, use thin coats, cure patiently and seal. Regular acrylic is fine for decorative pieces, while glass-specific paint is the right move for anything that will be handled or washed frequently.
The paint you choose sets the ceiling on durability. For formulas built to bond with non-porous surfaces, including transparent and oven-curable options, check our guide to the top acrylic paints for glass crafts.


8 Comments