
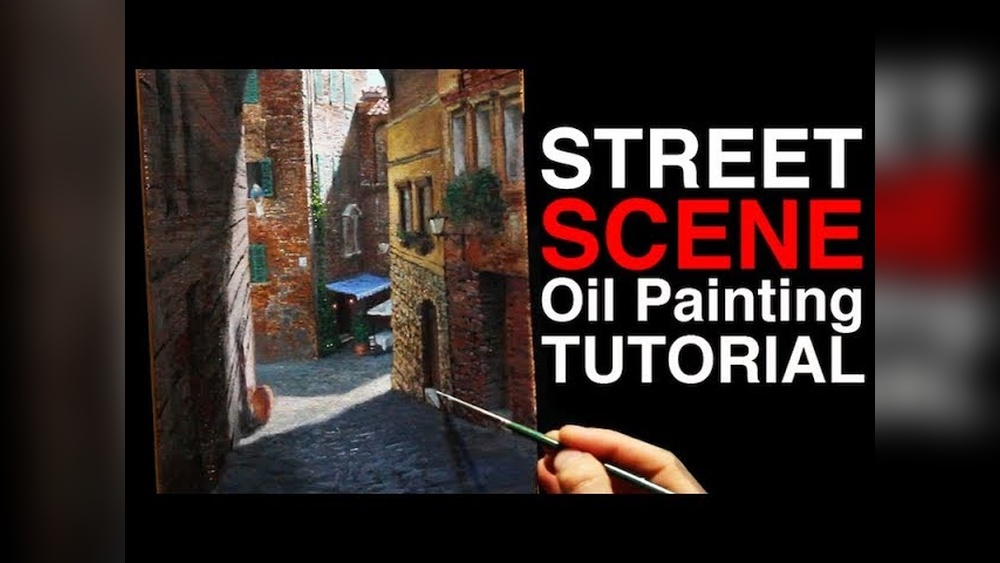
Quick answer: To paint cobblestones in oil painting, first paint the street as one overall color and value, with the correct perspective and light, before adding any stones. Then darken the gaps between stones with a thin, dark mix, and paint the tops of a few stones lighter where they catch the light, making them larger and more detailed in the foreground and smaller, flatter and closer together as they recede. Leave most distant stones as suggested texture rather than individual shapes.
Cobblestone streets add instant charm to townscapes and village scenes, but they can easily take over a painting. Paint every stone with equal care and the street turns into a mosaic that fights for attention with the buildings. Paint it as a flat gray strip and it loses its character. The solution is to treat the street as a single surface first and the stones as a texture that follows perspective and light.
This guide explains how to paint cobblestones in oil painting step by step, including perspective, color mixes, techniques for wet and dry stones, and the mistakes that make cobbled streets look busy or flat. For broader background on oil methods and styles, the overview of oil painting styles and techniques is a useful companion.
Understand the Cobblestone Surface
Before painting, consider what a cobbled street actually looks like.
- Stones are rounded or rectangular blocks set closely together, with gaps between them filled with dirt, sand or mortar.
- Each stone has a top plane and sides. The top catches light from the sky; the sides and gaps are in shadow.
- The street as a whole has its own value. Whether it reads as light or dark depends on the light, the stone color and whether it is wet.
- Patterns vary. Some streets use rows of rectangular setts; others use irregular rounded cobbles; some use fan or arc patterns.
Seen from a standing height, the stones nearest your feet are clearly visible as individual shapes. A few yards away, they compress into rows. Farther still, they become a textured surface with only hints of individual stones.
Materials for Painting Cobblestones
| Item | Suggestion |
|---|---|
| Brushes | A 3/4 inch flat for the street base, size 4 to 8 filberts for stones, a size 2 round and a rigger for gaps |
| Palette knife | Small trowel-shaped knife for textured stone tops |
| Colors | Titanium white, yellow ochre, burnt sienna, burnt umber, raw umber, ultramarine blue, alizarin crimson, cadmium yellow light |
| Medium | Mineral spirits for the base; a little medium for glazes and wet-street effects |
Ultramarine blue and burnt sienna together are especially useful. Mixed with white in different proportions, they produce a wide range of warm and cool stone grays.
Get the Perspective Right First
Cobblestone texture amplifies perspective errors. If the street does not recede correctly, the stones make the mistake more obvious.
- Find the eye level. Draw a faint horizontal line at your eye height in the scene.
- Draw the street edges converging toward a vanishing point on that line. Curbs, gutters and building bases should all converge consistently.
- Space the rows of stones closer together as they recede. If you draw a few guiding lines across the street for rows, the gaps between them should shrink steadily toward the horizon.
- Make stones flatter with distance. Nearby stones look rounded and tall; distant ones look like thin horizontal dashes.
How to Paint Cobblestones in Oil Painting: Step-by-Step Guide
Step 1: Paint the street as one surface
Mix the overall color of the street as it appears in your scene. For a typical gray stone street in daylight, try white, burnt sienna and ultramarine. Paint the whole street in this color, lighter or darker in the areas where light or shadow falls. Include cast shadows from buildings, people or lamp posts as part of this base. Let the paint grade slightly lighter and cooler with distance.
Step 2: Indicate the rows
Using a thin, slightly darker mix on a small brush, lightly mark curved or straight lines across the street where rows of stones run. Follow your perspective guides. In the foreground, rows are widely spaced; in the distance, they are close together.
Step 3: Paint the gaps
Mix a darker color for the gaps between stones, for example burnt umber and ultramarine. With a small round or rigger, paint the gaps in the foreground as irregular lines that outline individual stones. Do not outline every stone completely; break the lines often. In the middle distance, paint only some gaps, and in the far distance, almost none.
Step 4: Light the stone tops
Mix a lighter, slightly warmer version of the street color, such as white with yellow ochre and a touch of the base color. Paint the top plane of selected foreground stones, leaving the darker gaps and shadow sides showing. Vary the shapes and sizes. A small palette knife can be used to apply this with a slightly textured, broken quality.
Step 5: Vary the stone colors
Real cobbles are rarely all the same color. Add a few stones that are slightly warmer, cooler, browner or more blue-gray than their neighbors. Keep these variations within a narrow value range so the street still reads as one surface.
Step 6: Add highlights
In sunlight, the most rounded or polished stones catch small highlights on their tops. Add a few small touches of a light, warm color on the foreground stones. On a wet street, these highlights become reflections of the sky and lights.
Step 7: Soften the distance
With a clean, dry brush, lightly drag across the distant part of the street to soften any gaps or stone edges that pull attention. The distant street should feel like texture, not a pattern.
Step 8: Integrate figures and objects
If people, carts or tables stand on the street, make sure their cast shadows fall across the stones and slightly blur the texture. Feet should sit on the stones, with a small contact shadow.
Color Mixes for Cobblestones
| Element | Suggested mix |
|---|---|
| Street base (gray stone) | White + burnt sienna + ultramarine |
| Warm sandstone cobbles | White + yellow ochre + burnt sienna + a touch of ultramarine |
| Gaps | Burnt umber + ultramarine |
| Sunlit stone tops | White + yellow ochre + a little base color |
| Stones in shadow | Base color + ultramarine + a touch of alizarin |
| Wet stone reflections | Sky color, slightly darker, with brighter touches for lights |
| Moss in gaps | Sap green or ultramarine + yellow ochre, low chroma |
Different Cobblestone Patterns
Not every cobbled street looks the same, and the pattern changes how you paint the gaps and rows.
- Rectangular setts in straight rows: common in many European and older American city streets. The rows run across the street and recede in clear perspective. Paint the cross-row gaps as broken horizontal lines and only some of the short vertical gaps between stones.
- Irregular rounded cobbles: river stones set in no fixed pattern. Paint them as varied, roughly oval shapes with no grid. Avoid repeating the same size and shape side by side.
- Fan or arc patterns: stones laid in overlapping arcs. Indicate a few arcs in the foreground, and let them flatten into horizontal curves as they recede.
- Brick pavers: thinner, more regular and often warmer in color. Treat them like setts but with a tighter, more even rhythm, and keep distant rows simplified.
Moss, weeds and weathering
Old streets often show moss in the gaps, worn and polished stones along wheel tracks or footpaths, and stains near gutters. These details add character when used sparingly. Paint moss as small, low-chroma green touches in a few foreground gaps, and suggest a worn path by making the stone tops slightly lighter and smoother along a band through the street. Keep weathering mostly in the foreground and near the focal area.
Painting Wet Cobblestones
Wet cobblestones are one of the most attractive variations, especially in evening or rainy scenes. Water makes each stone darker and glossy, so it reflects the sky, buildings and lights above.
- Paint the street base darker and more saturated than it would be when dry.
- Pull vertical reflections of lit windows, lamps and bright surfaces straight down into the street.
- Break the reflections with the stone texture: paint the gaps across them, and add small horizontal touches where light hits individual wet stones.
- Keep reflections slightly darker and softer than their light sources.
- Add small, bright highlights on the tops of wet stones near the light source.
Wet stones beside a shoreline or harbor share similar effects with wet sand. The sibling article on painting sand and beach in oil explains how reflective wet surfaces mirror the sky.
Cobblestones Under Different Light
- Midday sun: stone tops are bright and warm, gaps are dark, contrast is high. Simplify to avoid a busy pattern.
- Low sun: each stone casts a tiny shadow, emphasizing texture. Long shadows from buildings and figures stretch across the street.
- Overcast: low contrast; the street reads as a near-uniform gray with subtle texture.
- Night: the street is dark with warm pools of light under lamps, and reflections if wet.
- Fog: distant stones vanish quickly; detail exists only in the immediate foreground. The guide on painting fog in oil covers this low-contrast atmosphere.
Common Mistakes When Painting Cobblestones
- Painting every stone individually. It creates a busy pattern that overwhelms the painting.
- Outlining every stone. Continuous dark outlines look like a grid. Break the gaps.
- Stones the same size throughout. Ignoring perspective flattens the street.
- Skipping the base layer. Without an overall street value, the stones have nothing to sit on.
- Too much contrast in the distance. Distant stones should be soft and close in value.
- Uniform color. All stones identical in color look artificial.
Tips for Making Cobbled Streets Work in a Composition
- Use the street as a lead-in. Its converging lines draw the eye toward the focal point.
- Keep the most detailed stones in the foreground and close to the focal area, not across the whole street.
- Let shadows simplify the pattern. Large cast shadows across the street hide texture and give the eye a rest.
- Paint the buildings and focal elements first, then the street, so the street stays secondary.
- Step back often. Cobblestones that look good up close may look too busy from a distance.
A helpful test is to photograph the painting with your phone and view it small. If the street pattern is the first thing you notice at thumbnail size, simplify it further by glazing or scumbling a thin layer of the base color over the middle and far sections.
FAQs
How do you paint cobblestones without painting every stone?
Paint the street as one surface first, then add gaps and lit stone tops only in the foreground and near the focal point. In the distance, suggest texture with a few broken marks.
What colors are best for painting cobblestones in oil?
White, burnt sienna and ultramarine make a versatile range of stone grays. Add yellow ochre for warm sandstone, and use burnt umber with ultramarine for the dark gaps.
How do you paint wet cobblestones in oil?
Paint the street darker, pull vertical reflections of lights and bright surfaces down into it, break them up with stone texture, and add small highlights on stone tops.
How do you make cobblestones recede in a painting?
Make the stones smaller, flatter and closer together as they recede, reduce contrast and detail in the distance, and keep the street edges converging toward the eye level.
Can I use a palette knife for cobblestones?
Yes. A small palette knife is useful for applying broken, textured light on the tops of foreground stones. Use brushes for the base layer and gaps.
Should I paint the street before the buildings?
Usually block in everything together, but refine the buildings and focal point before detailing the street, so the cobblestones stay secondary.
Final Thoughts
Convincing cobblestones come from painting the street as a single surface in correct perspective, then adding gaps and lit stone tops selectively, with detail concentrated in the foreground and texture dissolving into the distance. Handled this way, the street supports the painting instead of taking it over. For more subjects, techniques and advice on oil styles and materials, explore our oil paintings guide with expert tips and styles.




